Rob's 7mm Scale Coach Workbench
Moderators: 52D, Tom F, Rlangham, Atlantic 3279, Blink Bonny, Saint Johnstoun, richard
- Robpulham
- LNER A4 4-6-2 'Streak'
- Posts: 1721
- Joined: Thu Mar 27, 2008 9:54 pm
- Location: Lower Wensleydale
- Contact:
Re: Kemilway GNR Coaches
Hi Vernon,
I sympathise entirely - my broadband speed is pretty slow too.
I sympathise entirely - my broadband speed is pretty slow too.
- Robpulham
- LNER A4 4-6-2 'Streak'
- Posts: 1721
- Joined: Thu Mar 27, 2008 9:54 pm
- Location: Lower Wensleydale
- Contact:
Re: Kemilway GNR Coaches
And now to test the theory...
This afternoon has seen me complete the detailing of the sides.
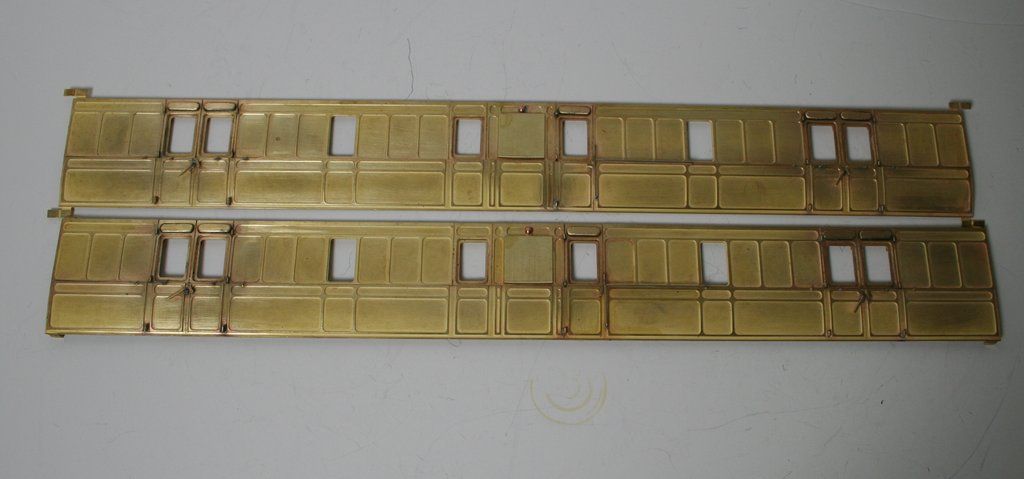
The bump stops are the etched ones from CPL they are tiny and you need a fair degree of patience to use them. The best way that I found to fit them was to drill the hole 0.6mm solder in a piece of nickel (what I had to hand brass would do equally as well) rod and leave a blob of solder at the back with a short stub at the front. Run a broach through the hole in the etc to open it out and cut off and tidy up one of the bump stops etches. slide this over the stub of rod and push home with either nails or tweezers. Apply a drop of flux and use the microflame to heat the blob of solder from behind. The flux draws enough of the solder through to hold it without trying to get the iron to do it. I did manage with the iron on a couple but found it much cleaner with the microflame.
I received an MMP LMS Roadstone Wagon for Christmas so I count this as practice for fitting the many small details that come with it.
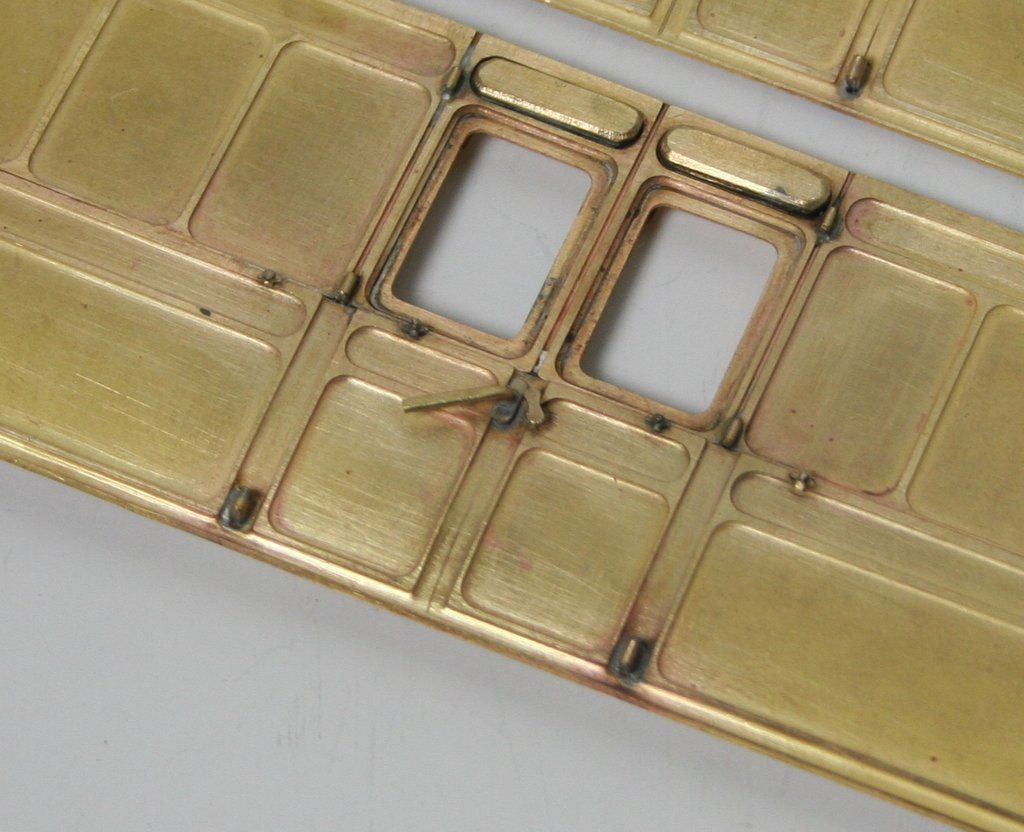
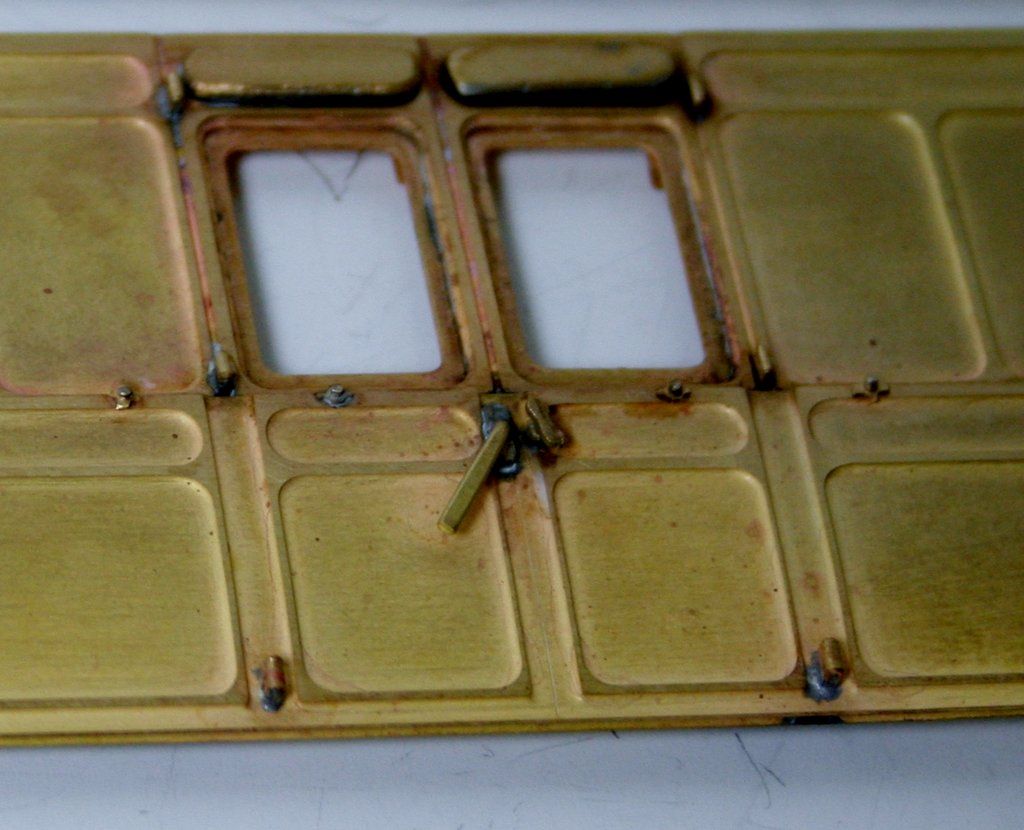
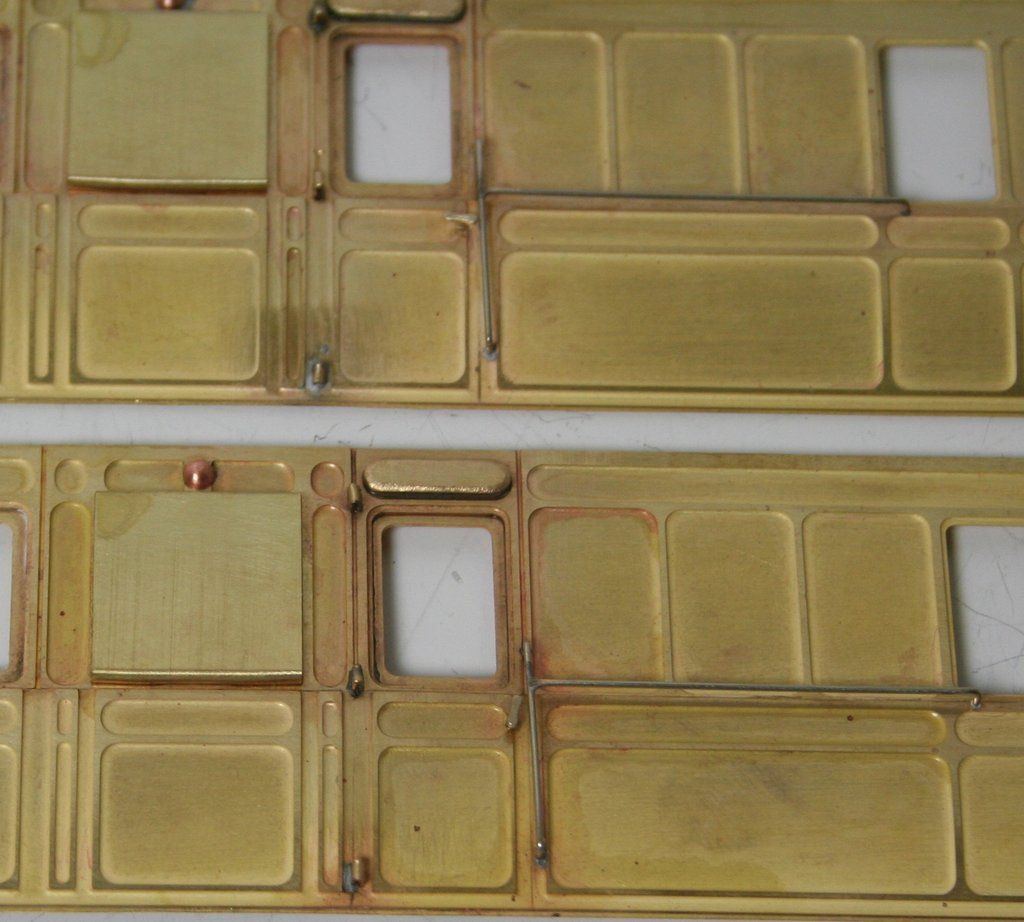
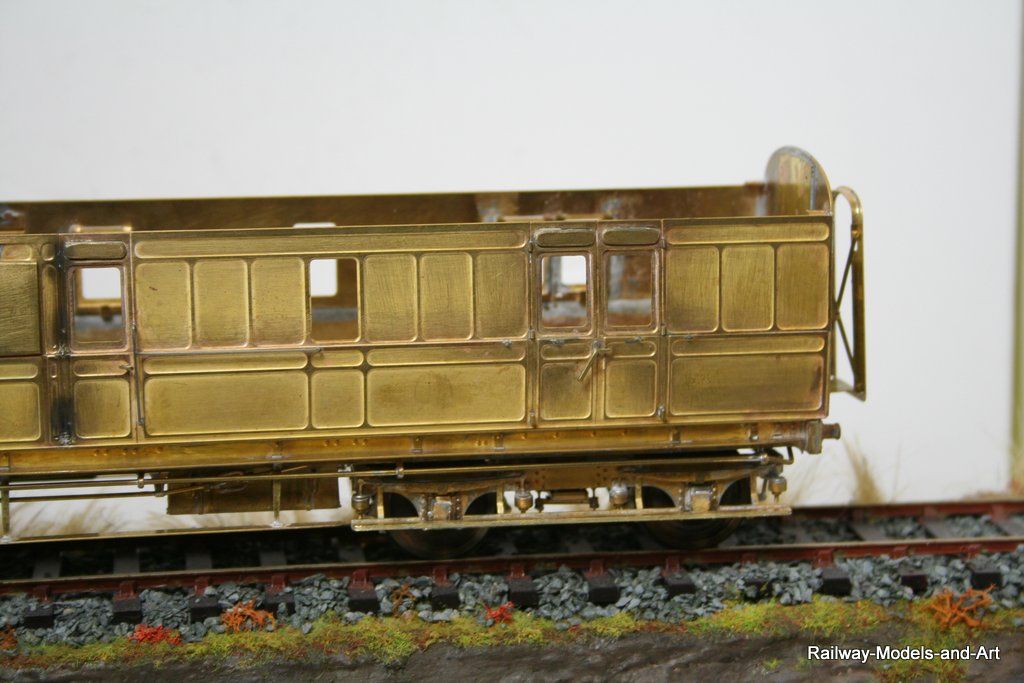
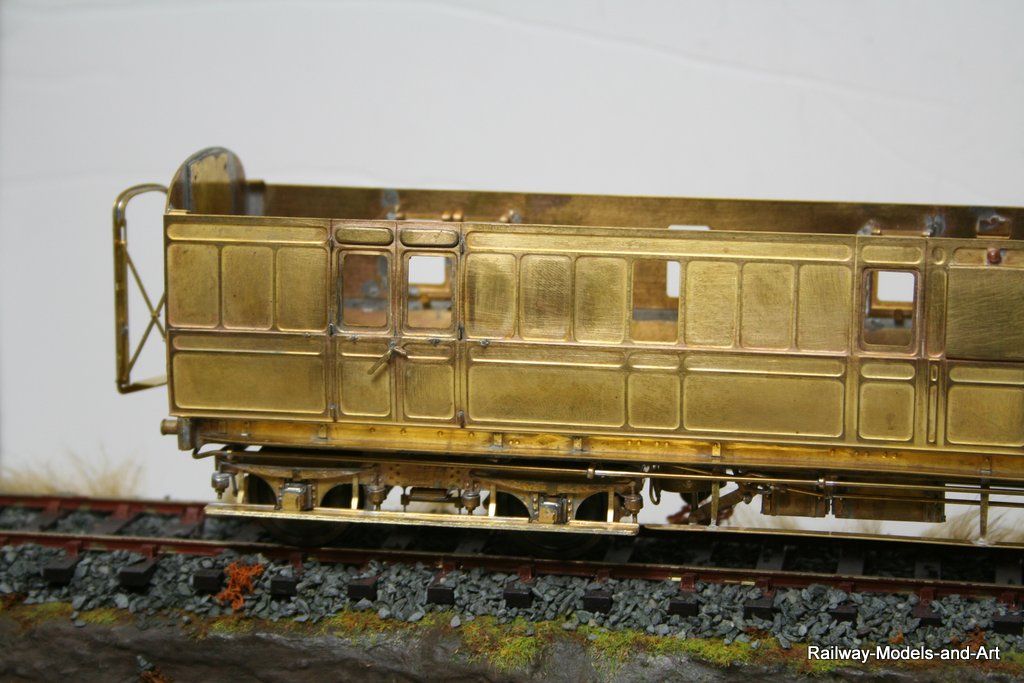
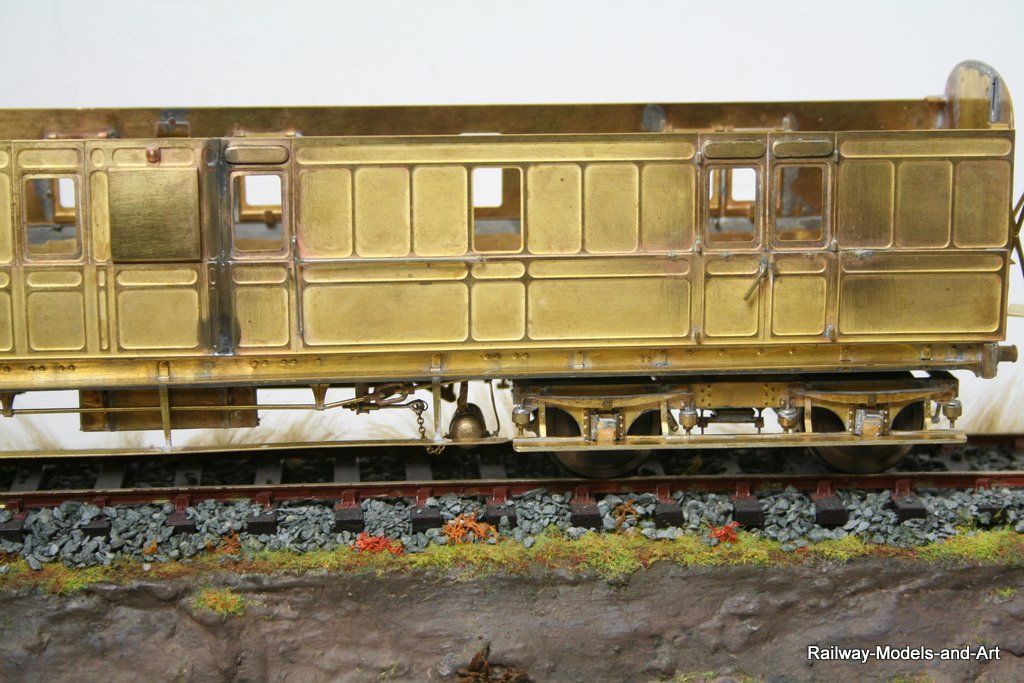
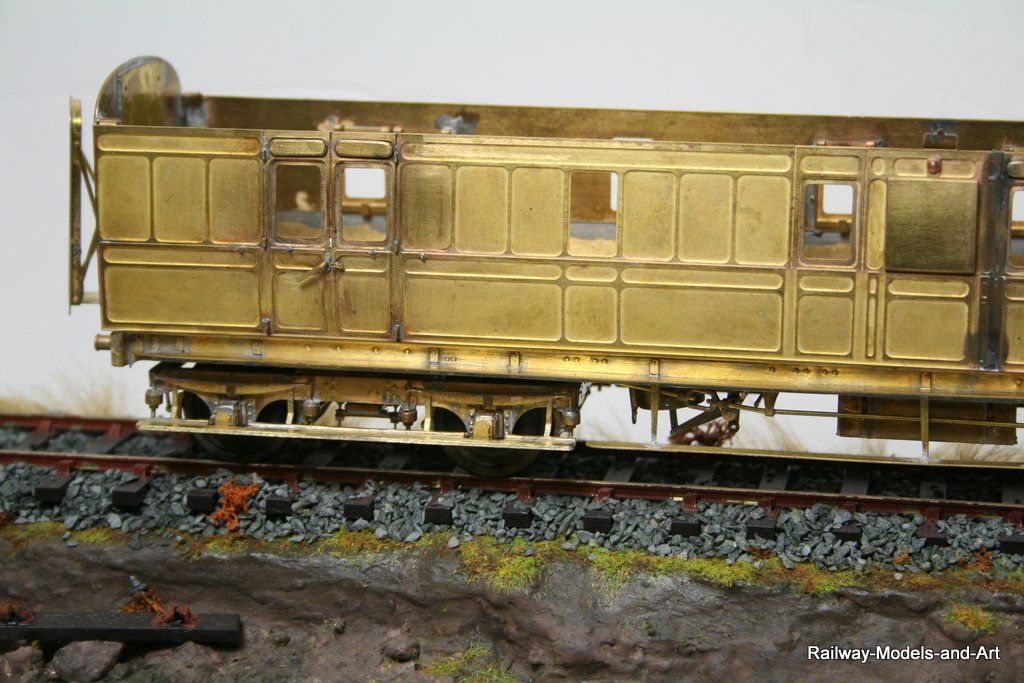
I managed to glean from photos the postion of the rather unusual handrail and the fact that the guards door had some visible hinges that I needed to add - these are not visible in many photos so they may be an LNER addition.
Next up the ends and hopefully I will be able to think about soldering it together.
This afternoon has seen me complete the detailing of the sides.

The bump stops are the etched ones from CPL they are tiny and you need a fair degree of patience to use them. The best way that I found to fit them was to drill the hole 0.6mm solder in a piece of nickel (what I had to hand brass would do equally as well) rod and leave a blob of solder at the back with a short stub at the front. Run a broach through the hole in the etc to open it out and cut off and tidy up one of the bump stops etches. slide this over the stub of rod and push home with either nails or tweezers. Apply a drop of flux and use the microflame to heat the blob of solder from behind. The flux draws enough of the solder through to hold it without trying to get the iron to do it. I did manage with the iron on a couple but found it much cleaner with the microflame.
I received an MMP LMS Roadstone Wagon for Christmas so I count this as practice for fitting the many small details that come with it.


I managed to glean from photos the postion of the rather unusual handrail and the fact that the guards door had some visible hinges that I needed to add - these are not visible in many photos so they may be an LNER addition.

Next up the ends and hopefully I will be able to think about soldering it together.
- Robpulham
- LNER A4 4-6-2 'Streak'
- Posts: 1721
- Joined: Thu Mar 27, 2008 9:54 pm
- Location: Lower Wensleydale
- Contact:
Re: Kemilway GNR Coaches
One thing that I forgot to mention in the last post was the door ventilator bonnets. I bought some very nice cast brass examples from CPL but they had ridges along them. When I have studied the few photos that I have of these coaches the ventilator bonnets are smooth in appearance. Rather than spoil the CPL castings by filing them smooth I added them to the spares box and soldered a couple of strips off the edge of the etch together giving me a reasonable thickness that was the right width. Then with the piercing saw I cut enough lengths to fit all the doors that needed them and patiently filed them to shape. I think that the result was worth the effort.
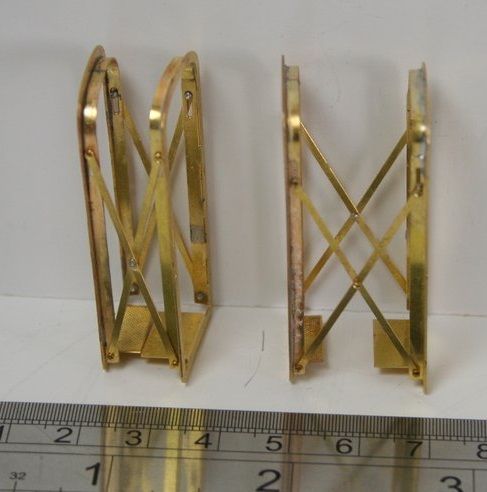
yesterdays efforts were centred on the gangways, these are a set from CPL that are designed to cover scissor or suspended and have lots of spare parts to allow LNER gangways to be produced too if you have a decent photo to work from. I built them as scissor gangways as per the drawings and photos that I am working from.
The gangways as designed have a fold up concertina of black paper that fits inside the working scissor section. I need to come up with a different solution because I have made doors on the coach end that I want to be visible.
The photo below shows them in the closed and extended positions next to a ruler to give an idea of how far they move.
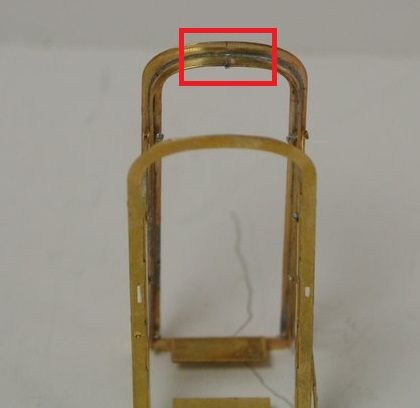
I have included this shot to illustrate where I had to cut the top of the fold around inner support strip. The strip has tabs to locate in slots in the sides but the bit in between which curves over the top of the gangway is too long . Once I had worked this out I cut the strip in half and and worked in towards the centre at the top which is marked. I repeated this for the other half and then soldered them in once happy with the fit. There are some other strips that you press rivets out on to represent the Pullman style gangway that would also need the same treatment if used. It's a simple fix once you realise what the problem is.
yesterdays efforts were centred on the gangways, these are a set from CPL that are designed to cover scissor or suspended and have lots of spare parts to allow LNER gangways to be produced too if you have a decent photo to work from. I built them as scissor gangways as per the drawings and photos that I am working from.
The gangways as designed have a fold up concertina of black paper that fits inside the working scissor section. I need to come up with a different solution because I have made doors on the coach end that I want to be visible.
The photo below shows them in the closed and extended positions next to a ruler to give an idea of how far they move.

I have included this shot to illustrate where I had to cut the top of the fold around inner support strip. The strip has tabs to locate in slots in the sides but the bit in between which curves over the top of the gangway is too long . Once I had worked this out I cut the strip in half and and worked in towards the centre at the top which is marked. I repeated this for the other half and then soldered them in once happy with the fit. There are some other strips that you press rivets out on to represent the Pullman style gangway that would also need the same treatment if used. It's a simple fix once you realise what the problem is.

- notascoobie
- GCR O4 2-8-0 'ROD'
- Posts: 554
- Joined: Sun Jul 20, 2008 9:43 pm
- Location: S Yorkshire
Re: Kemilway GNR Coaches
Hi Rob,
Geoff Kent covered "open" gangways in his recent coachbuilding article in MRJ226. Basically he makes seperate bellows for each side of the gangway, applying roof and floor later. The general idea can be seen in my photo below showing a pair of side attached to an Ian Kirk gangway end. The picture ain't brilliant but you can see the idea.
Regards,
Vernon
- Robpulham
- LNER A4 4-6-2 'Streak'
- Posts: 1721
- Joined: Thu Mar 27, 2008 9:54 pm
- Location: Lower Wensleydale
- Contact:
Re: Kemilway GNR Coaches
Thanks Vernon,
I was going to have a bash with some black ribbon but I can see merit in doing it Geoff's way. Mmmm...
I was going to have a bash with some black ribbon but I can see merit in doing it Geoff's way. Mmmm...
- Robpulham
- LNER A4 4-6-2 'Streak'
- Posts: 1721
- Joined: Thu Mar 27, 2008 9:54 pm
- Location: Lower Wensleydale
- Contact:
Re: Kemilway GNR Coaches
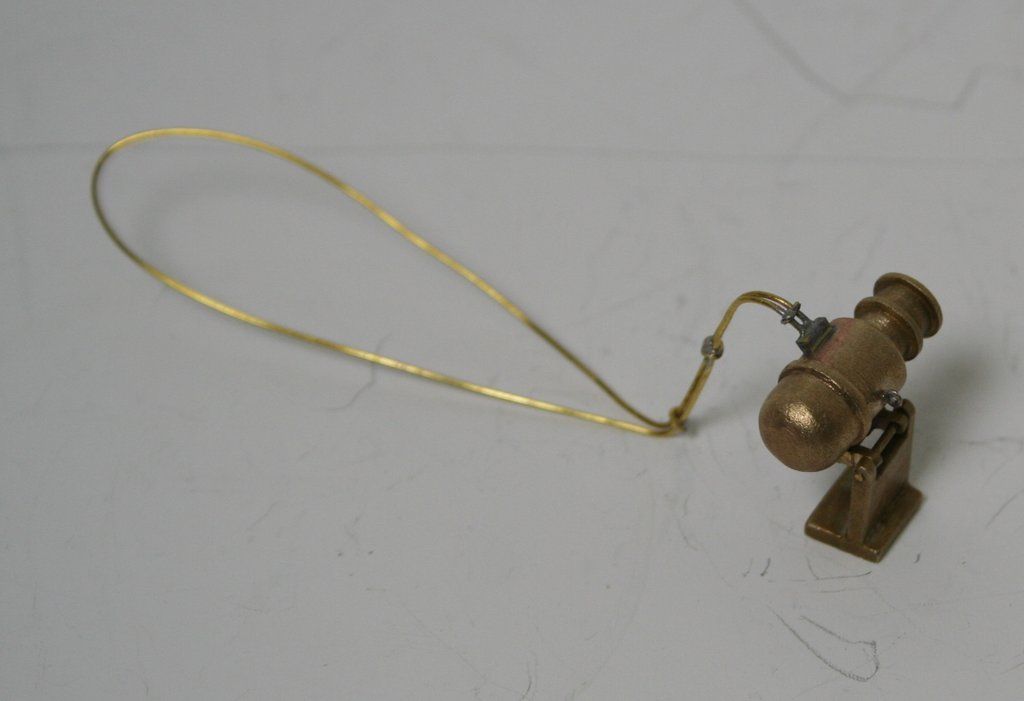
Today has been spent making underframe details - namely vacuum cylinders and Dynamos.
First up is a Gladiator Dynamo. These are a bit plain albeit very nice castings as they come, so I added a block (from square brass bar) for the wiring loom and an eye to connect a restraining chain. The "wiring" will be cut shorter and soldered to the underframe once I fit it.
Next is a bit of a comparison between the Gladiator dynamo and a Sidlelines example both are sold as LNER examples.
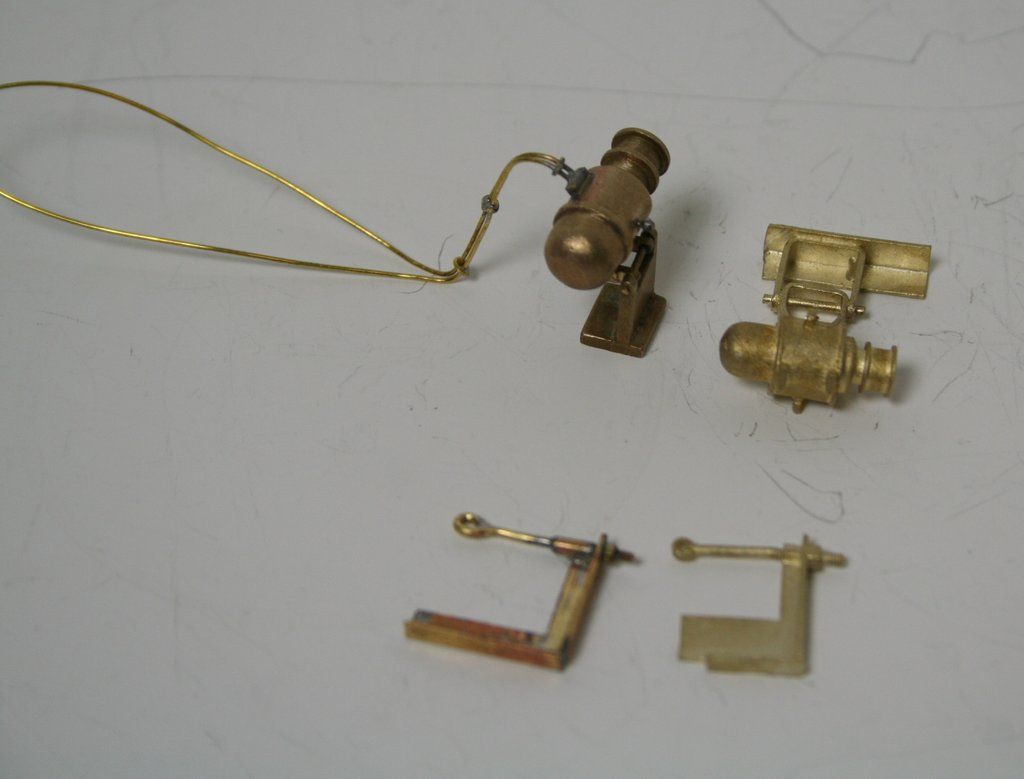
The Sidlelines example comes with a bracket/adjuster so I made one up from scrap etch a piece of rod that I threaded and a 14ba nut to go with the Gladiator dynamo.
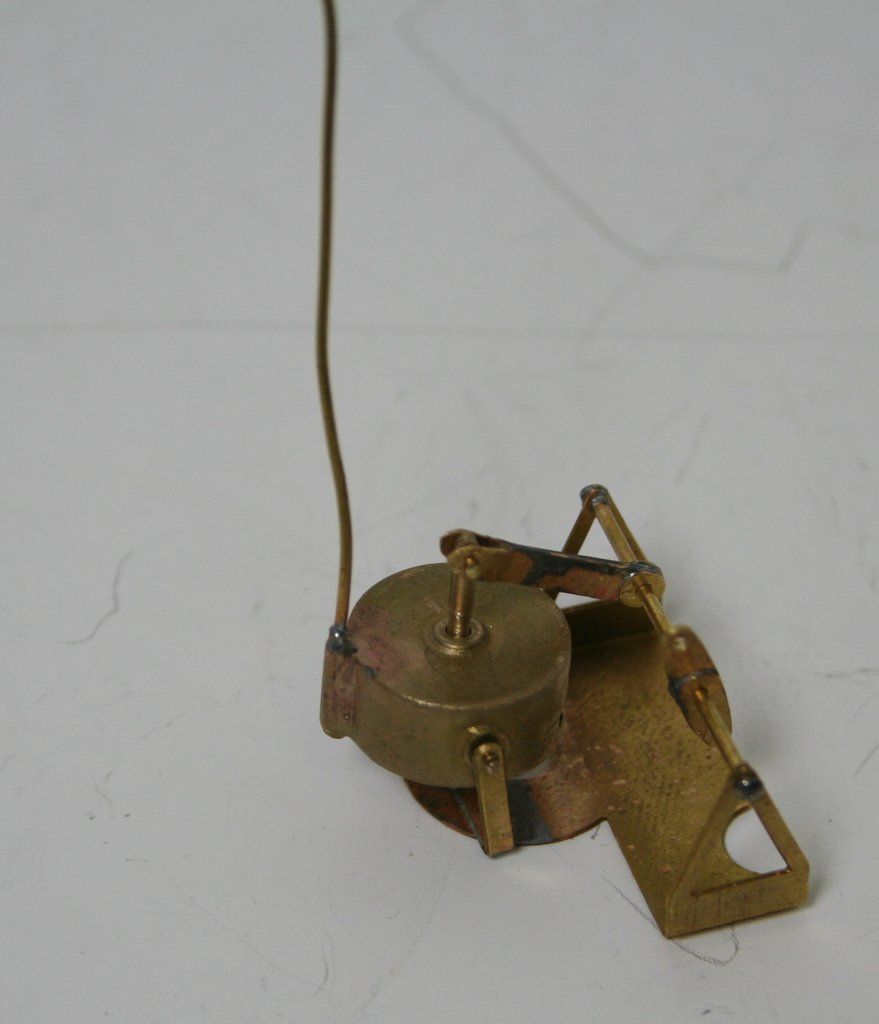
Last is one of a pair of Gladiator vacuum cylinders mounted on a set of Slaters V hangers from the spares box and some scratch built levers/pivots.
 .
.
The long soft brass wire will be bent round to meet up with the vacuum pipe that runs down below the solebar - when it's fitted.
First up is a Gladiator Dynamo. These are a bit plain albeit very nice castings as they come, so I added a block (from square brass bar) for the wiring loom and an eye to connect a restraining chain. The "wiring" will be cut shorter and soldered to the underframe once I fit it.

Next is a bit of a comparison between the Gladiator dynamo and a Sidlelines example both are sold as LNER examples.

The Sidlelines example comes with a bracket/adjuster so I made one up from scrap etch a piece of rod that I threaded and a 14ba nut to go with the Gladiator dynamo.
Last is one of a pair of Gladiator vacuum cylinders mounted on a set of Slaters V hangers from the spares box and some scratch built levers/pivots.
 .
.The long soft brass wire will be bent round to meet up with the vacuum pipe that runs down below the solebar - when it's fitted.
- Robpulham
- LNER A4 4-6-2 'Streak'
- Posts: 1721
- Joined: Thu Mar 27, 2008 9:54 pm
- Location: Lower Wensleydale
- Contact:
Re: Kemilway GNR Coaches
Yesterday was a good day at the bench seeing the underframe complete (I think!) and the sides/ends assembled along with the end doors and corridor connections fitted. I need to do a bit of a repair job on one of the scissor connections because when soldering it on I got the whole thing a bit hot and one of the joints soldered solid.
I will get some photos of the body work later but here are a few of the underframe to be going on with.
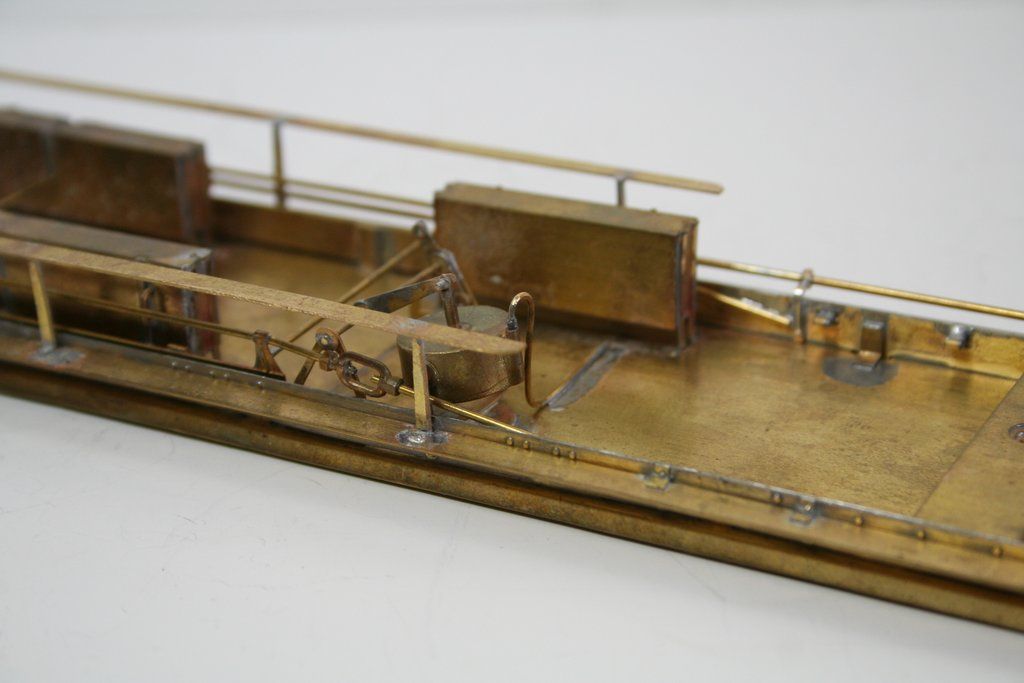
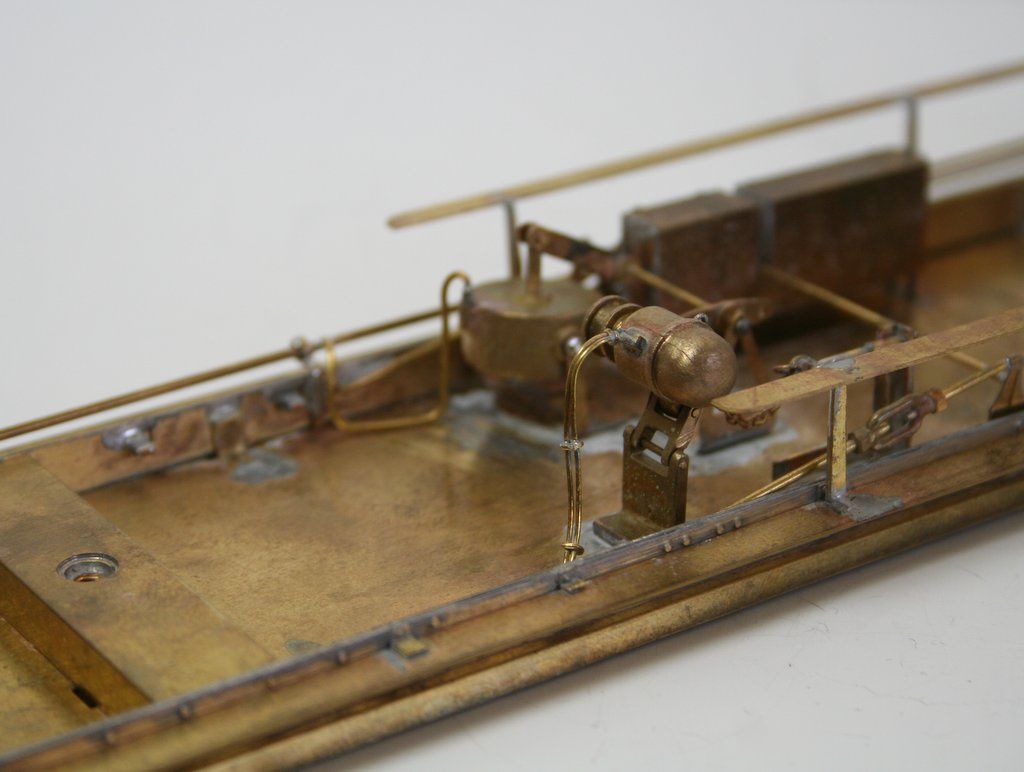
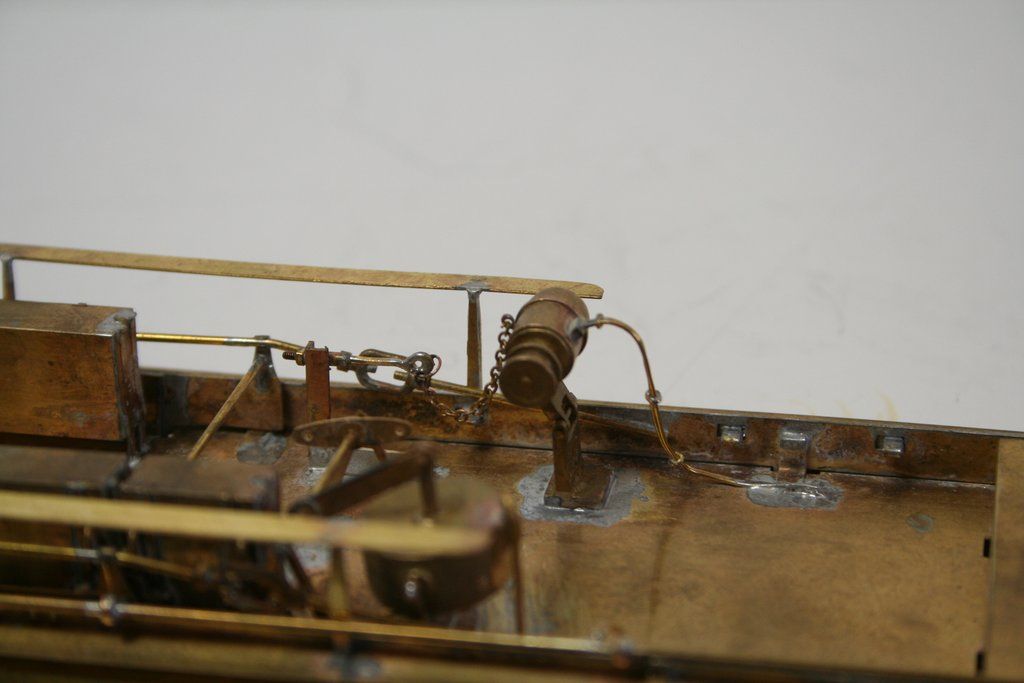
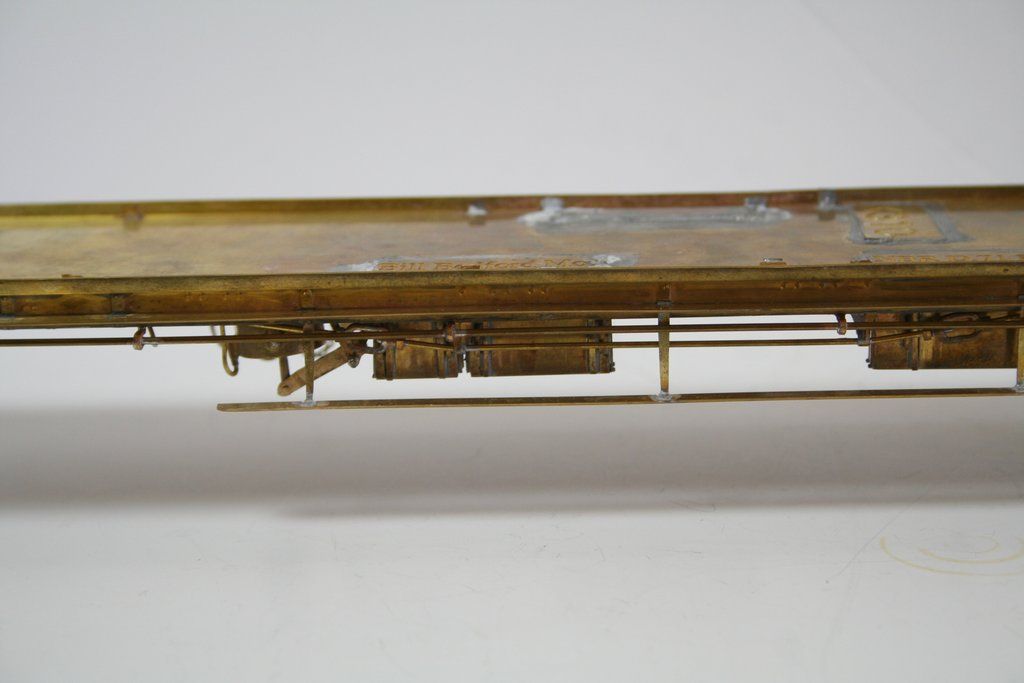
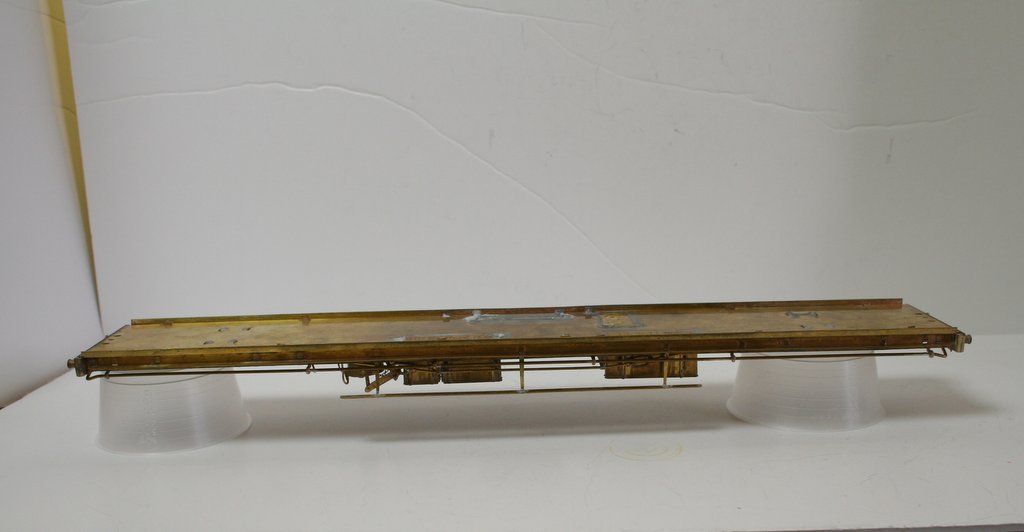
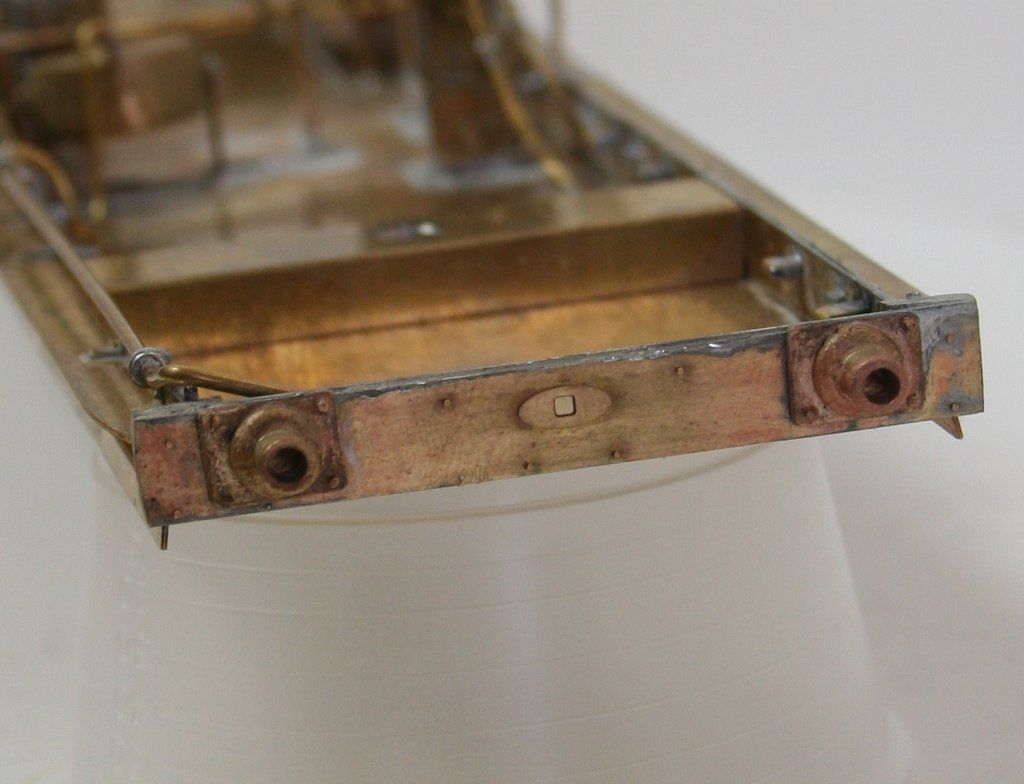
I will get some photos of the body work later but here are a few of the underframe to be going on with.


- Robpulham
- LNER A4 4-6-2 'Streak'
- Posts: 1721
- Joined: Thu Mar 27, 2008 9:54 pm
- Location: Lower Wensleydale
- Contact:
Re: Kemilway GNR Coaches
Once the bogie coal wagon was finished the mojo stayed in place and I made some good progress on the D71
First I found photographic evidence that Bill was right when he said that the gangway versions of these coahes had internal opening guards doors - so of they came.
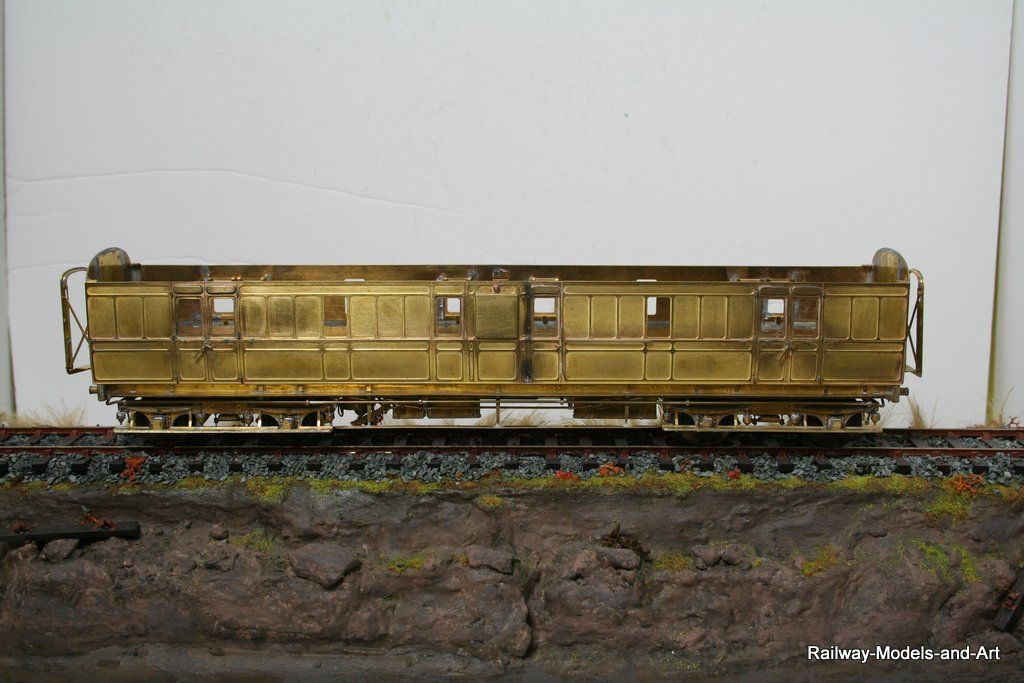
The bogies are the Newbould models Fox bogies and they only come with brake shoes/supports for the outer ends of each bogie. By good fortune a rummage in the spares box yielded enough spare Connoisseur brake shoes/and supports for the inner sets - they did need a bit of creative bending to get them fitted but fitted they are. The spares box also supplied enough yokes (Connoisseur again) for the outer axles which left the inner ones without. To get around this I first put a piece of rod through the brake shoes and then I measured the Connoisseur yokes. Next I got some scrap etch strip and filed a V 17mm from one end and then bent it around and soldered the joint. I then filed the open ends to and angle that would allow a second strip to be soldered across the open end to create the triangle all these joints were made with 227 degree solder.
These were clipped to the rode across between the brake shoes to make up the yoke. They still need a piece of rod to give the appearance of being able to be pulled on/off but they are better than nothing at all.
The rather nice full stepboards finish the bogies off and they were surplus from the Kemilway Fox bogies (they are designed to cover both GNR and NER variants).
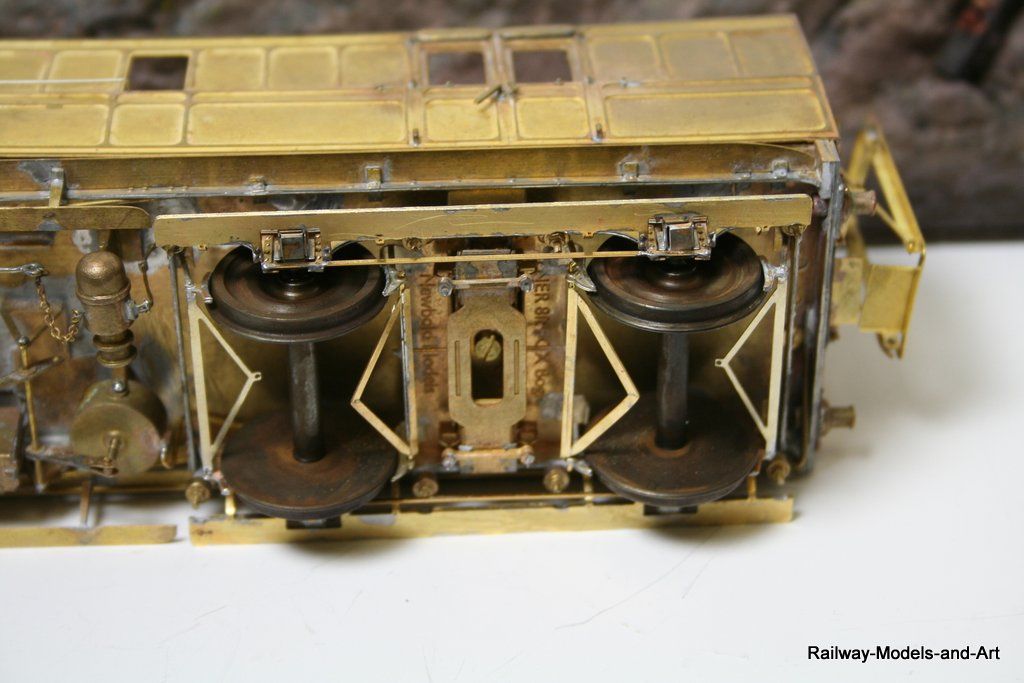
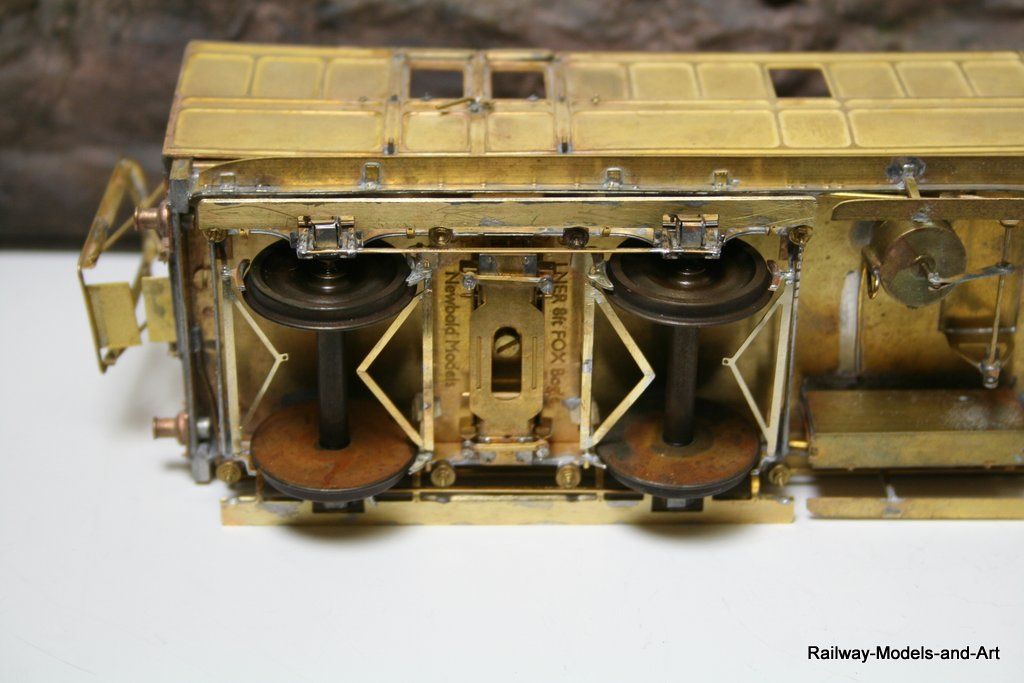
First I found photographic evidence that Bill was right when he said that the gangway versions of these coahes had internal opening guards doors - so of they came.


The bogies are the Newbould models Fox bogies and they only come with brake shoes/supports for the outer ends of each bogie. By good fortune a rummage in the spares box yielded enough spare Connoisseur brake shoes/and supports for the inner sets - they did need a bit of creative bending to get them fitted but fitted they are. The spares box also supplied enough yokes (Connoisseur again) for the outer axles which left the inner ones without. To get around this I first put a piece of rod through the brake shoes and then I measured the Connoisseur yokes. Next I got some scrap etch strip and filed a V 17mm from one end and then bent it around and soldered the joint. I then filed the open ends to and angle that would allow a second strip to be soldered across the open end to create the triangle all these joints were made with 227 degree solder.
These were clipped to the rode across between the brake shoes to make up the yoke. They still need a piece of rod to give the appearance of being able to be pulled on/off but they are better than nothing at all.
The rather nice full stepboards finish the bogies off and they were surplus from the Kemilway Fox bogies (they are designed to cover both GNR and NER variants).


- Robpulham
- LNER A4 4-6-2 'Streak'
- Posts: 1721
- Joined: Thu Mar 27, 2008 9:54 pm
- Location: Lower Wensleydale
- Contact:
Re: Kemilway GNR Coaches
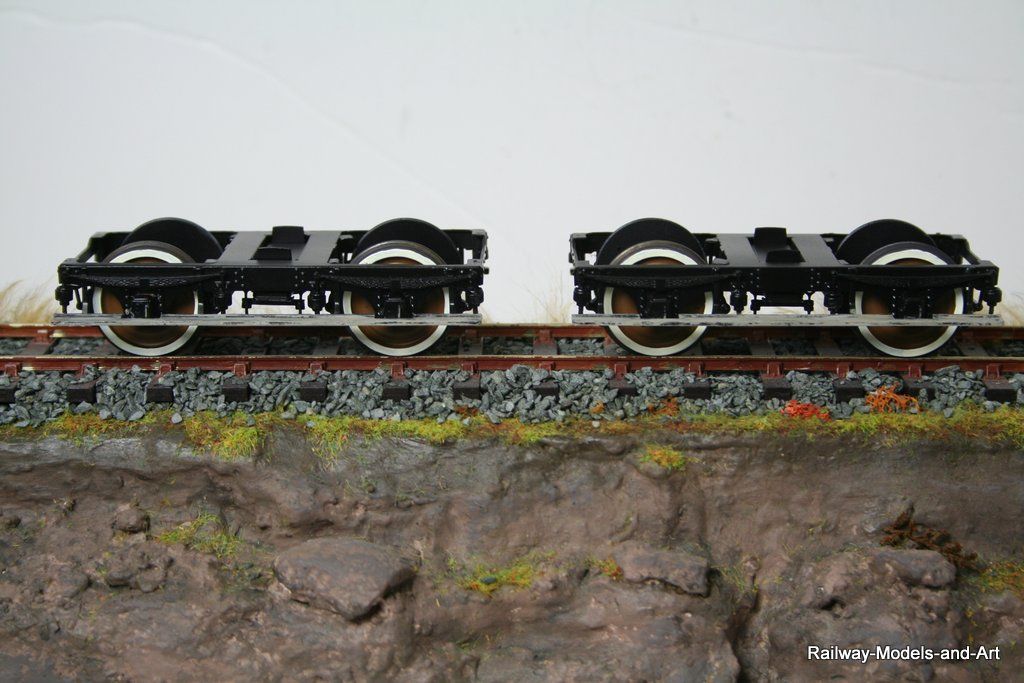
Continuing the painting theme I also managed to get the bogies painted for the NBR BG

- Robpulham
- LNER A4 4-6-2 'Streak'
- Posts: 1721
- Joined: Thu Mar 27, 2008 9:54 pm
- Location: Lower Wensleydale
- Contact:
Re: Rob's 7mm Scale Coach Workbench
The BG has been on hold for a while because I have been waiting for a friend to sort out a roof for it (who was in turn waiting for another friend etc.) I collected it at Telford earlier this month so I will progress that once the CCT leaves the bench.
In the meantime to wet appetites following on from the excellent coach modelling seen here recently I thought that I would share another Telford acquisition which came quite out of the blue from a chance query.
Earlier in the year I bought a set of etches for a Gresley Restaurant triplet set from CPL and I was in discussions with both Rupert Brown and Peter Dobson about etches for the underframes and roof parts etc. I can get some of Rupert's underframes from Wizard Models but Andrew needs to sort them out and Peter Dobson although having wound up newbould models as a business is still supplying bits and pieces and had done a test etch for the underframes but had never progressed them. I had arranged with Peter to bring some Gresley bogies to Telford for my CPL set and he said would I like to see his test etch underframes to which I said certainly.
It turned out that not only had he done a test etch for the underframes but also for the bodies as well but he had taken them so far an then popped them aside. Having had a look at them I asked since he hadn't touched them for quite some time, if he would sell them 'as is' and a deal was struck.
This is what I got for the money:
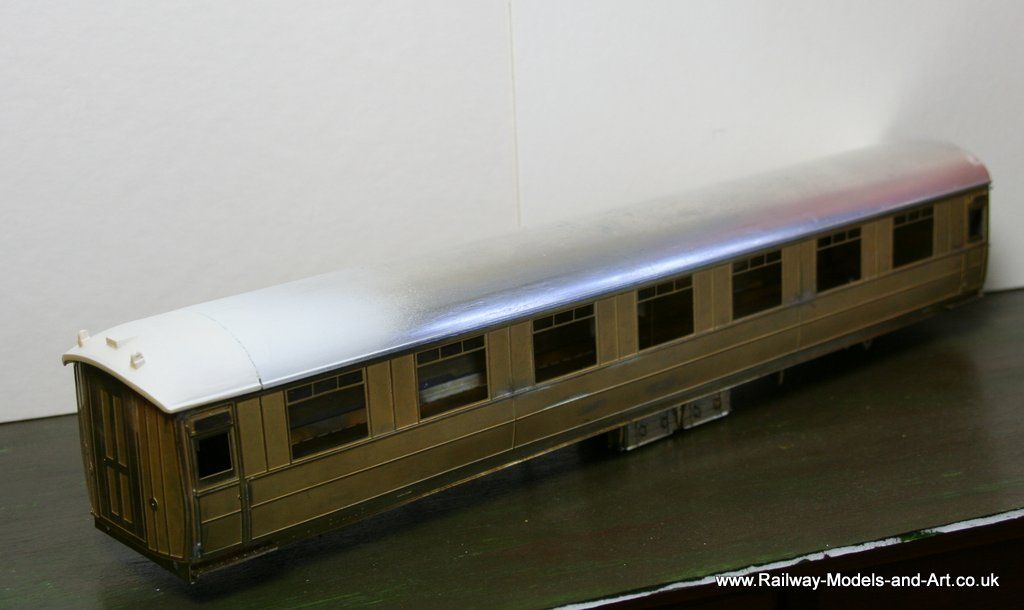
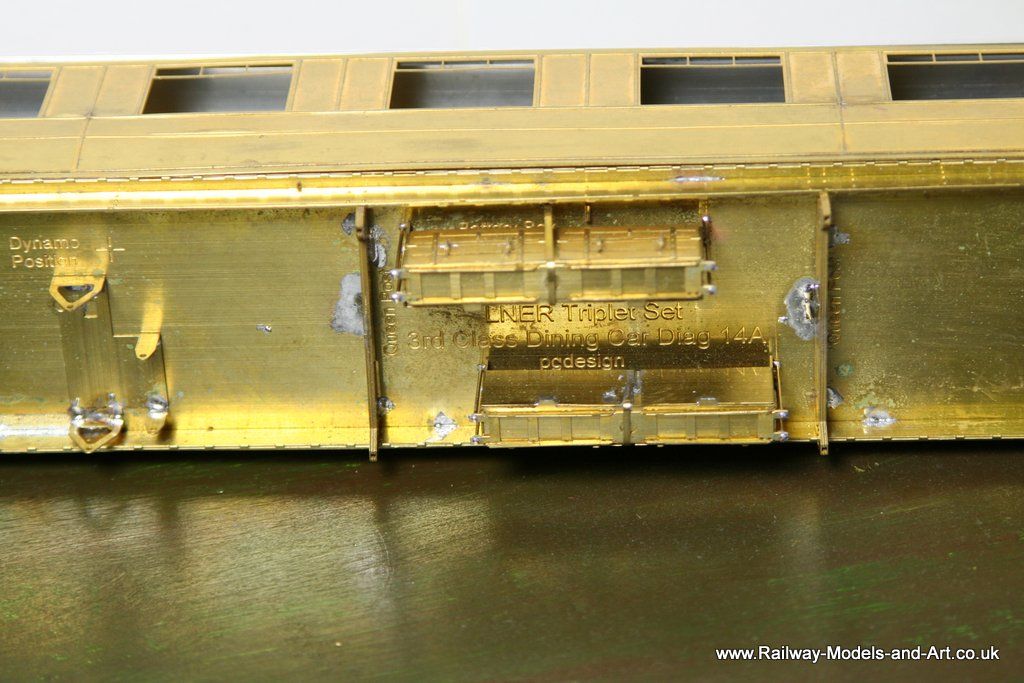
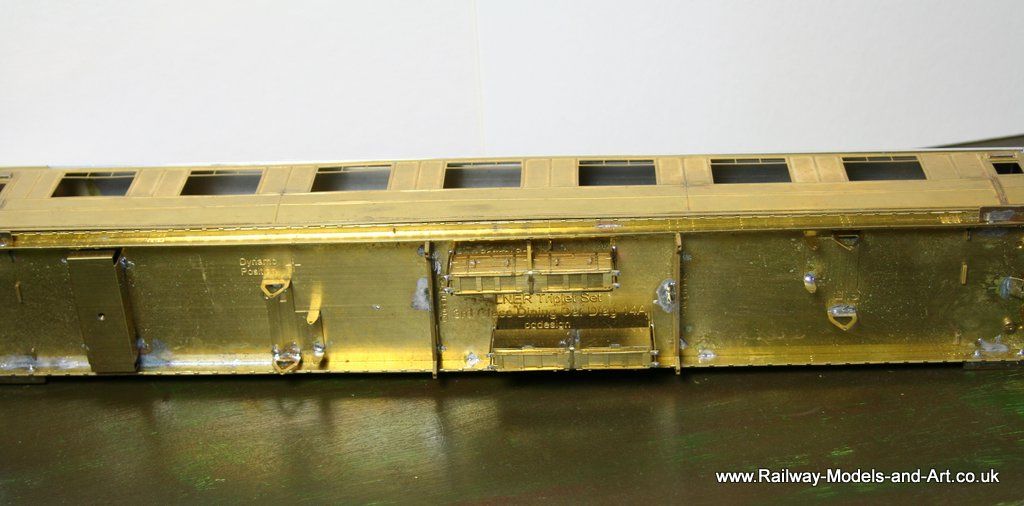
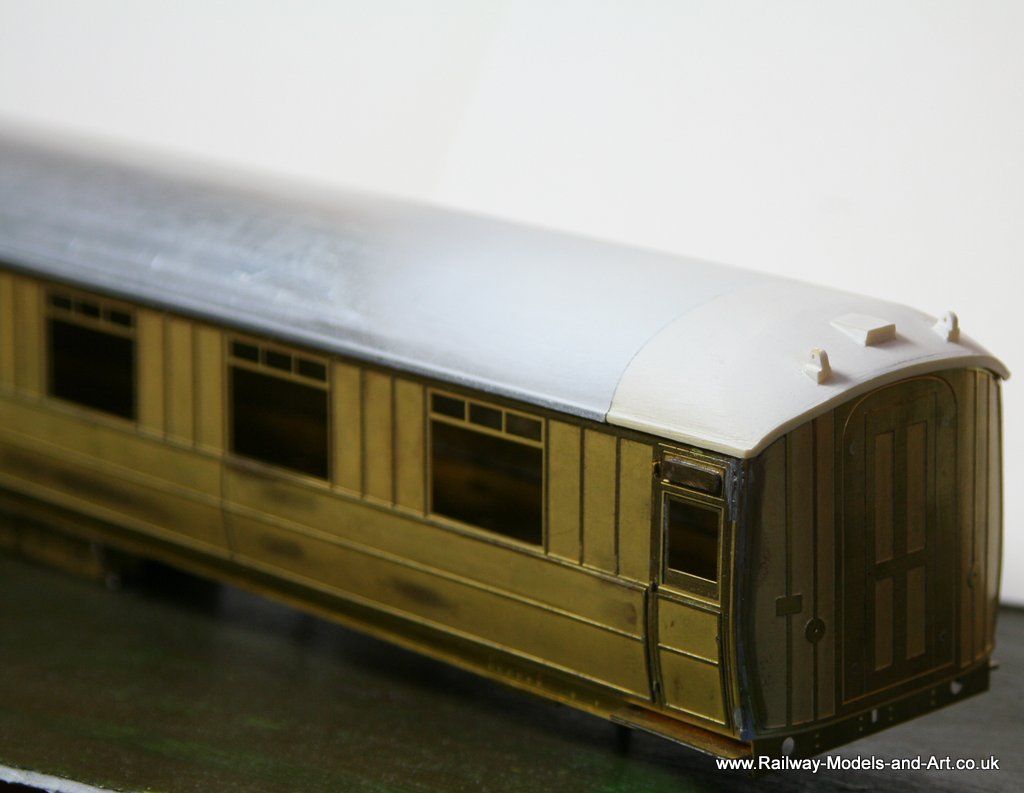
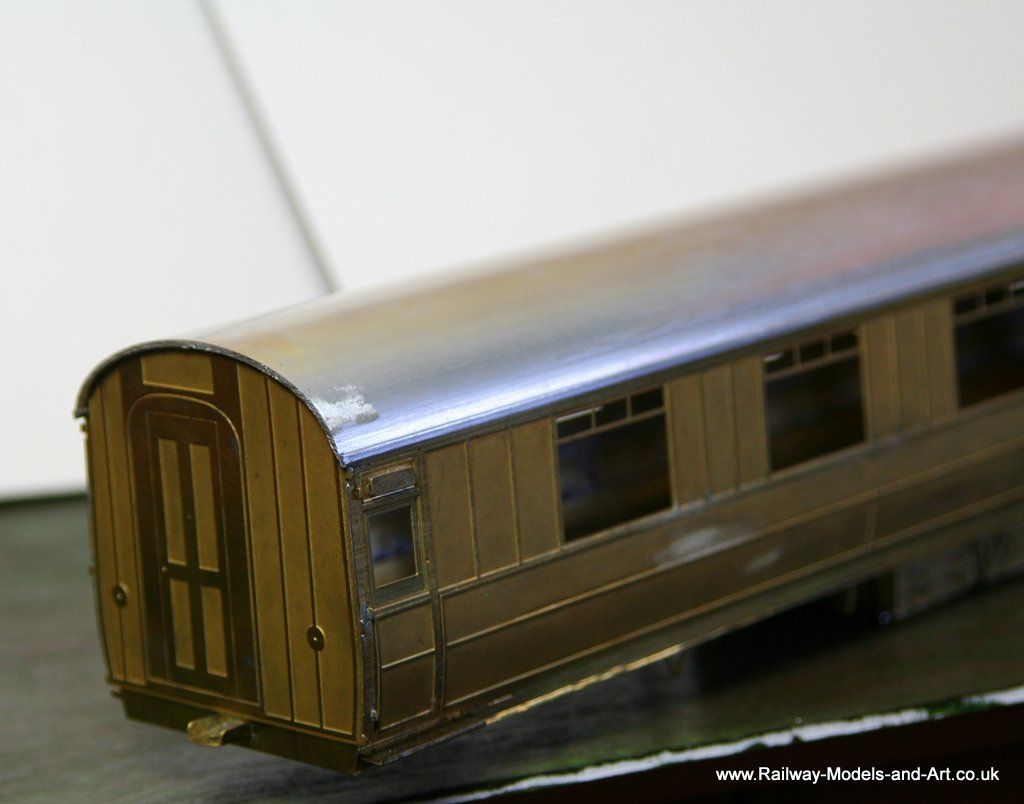
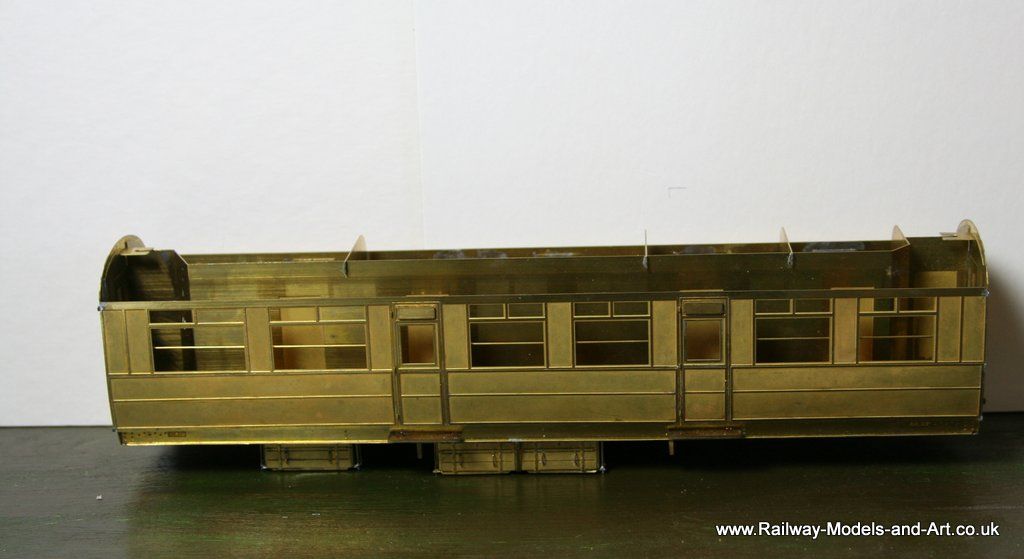
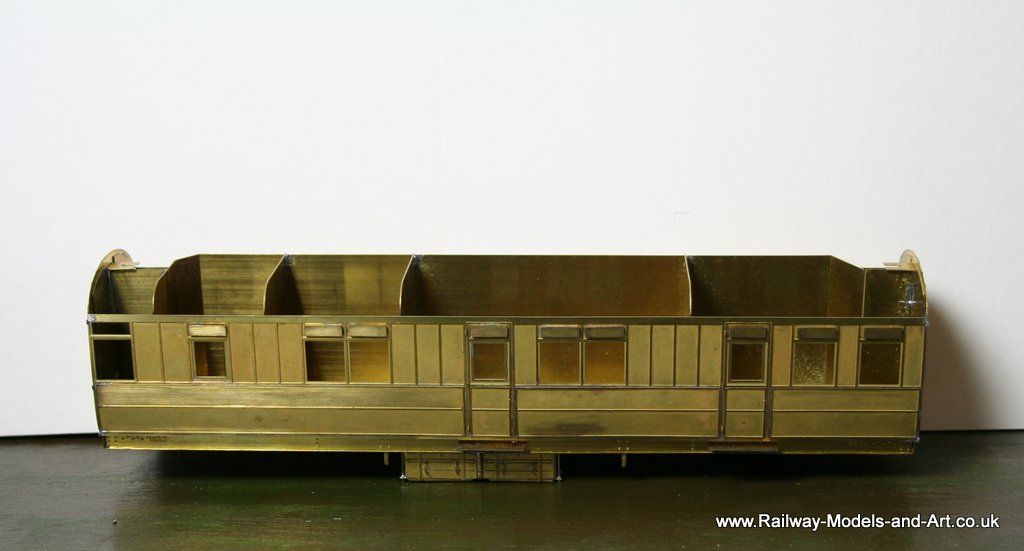
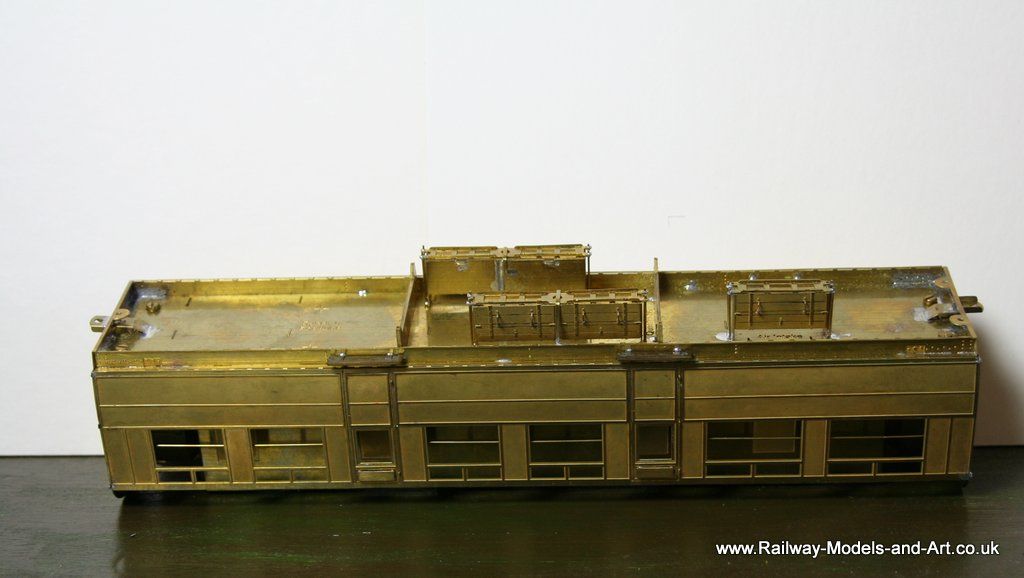
Also included were the remaining partitions for the restaurant cars and some etched tables. And hidden away under the tissue paper in one of the boxes was a very nicely finished Kemilway roof - so now I know what they should look like and can be made to look like.... note to self must try harder!
In the meantime to wet appetites following on from the excellent coach modelling seen here recently I thought that I would share another Telford acquisition which came quite out of the blue from a chance query.
Earlier in the year I bought a set of etches for a Gresley Restaurant triplet set from CPL and I was in discussions with both Rupert Brown and Peter Dobson about etches for the underframes and roof parts etc. I can get some of Rupert's underframes from Wizard Models but Andrew needs to sort them out and Peter Dobson although having wound up newbould models as a business is still supplying bits and pieces and had done a test etch for the underframes but had never progressed them. I had arranged with Peter to bring some Gresley bogies to Telford for my CPL set and he said would I like to see his test etch underframes to which I said certainly.
It turned out that not only had he done a test etch for the underframes but also for the bodies as well but he had taken them so far an then popped them aside. Having had a look at them I asked since he hadn't touched them for quite some time, if he would sell them 'as is' and a deal was struck.
This is what I got for the money:


Also included were the remaining partitions for the restaurant cars and some etched tables. And hidden away under the tissue paper in one of the boxes was a very nicely finished Kemilway roof - so now I know what they should look like and can be made to look like.... note to self must try harder!
- Robpulham
- LNER A4 4-6-2 'Streak'
- Posts: 1721
- Joined: Thu Mar 27, 2008 9:54 pm
- Location: Lower Wensleydale
- Contact:
Re: Rob's 7mm Scale Coach Workbench
Last year with the proceeds of a sale I bought a couple of Kirk LNER non corridor 51' parcels vans at Keighley show.
Last weekend, in between the rain/snow/hail.sunshine etc. I made a start on one of them. Now I haven't done a Kirk kit before so it was a bit of a learning curve especially cleaning up all the individual pieces. The sides went together okay and I can see how I might improve things slightly on the second one.
Although I plan to replace the bogies and turnbuckles (on the first one, the second I intend to do as a later angle truss variant) I decided to see what I could do to improve the underframe parts that came with it before discarding them out of hand.
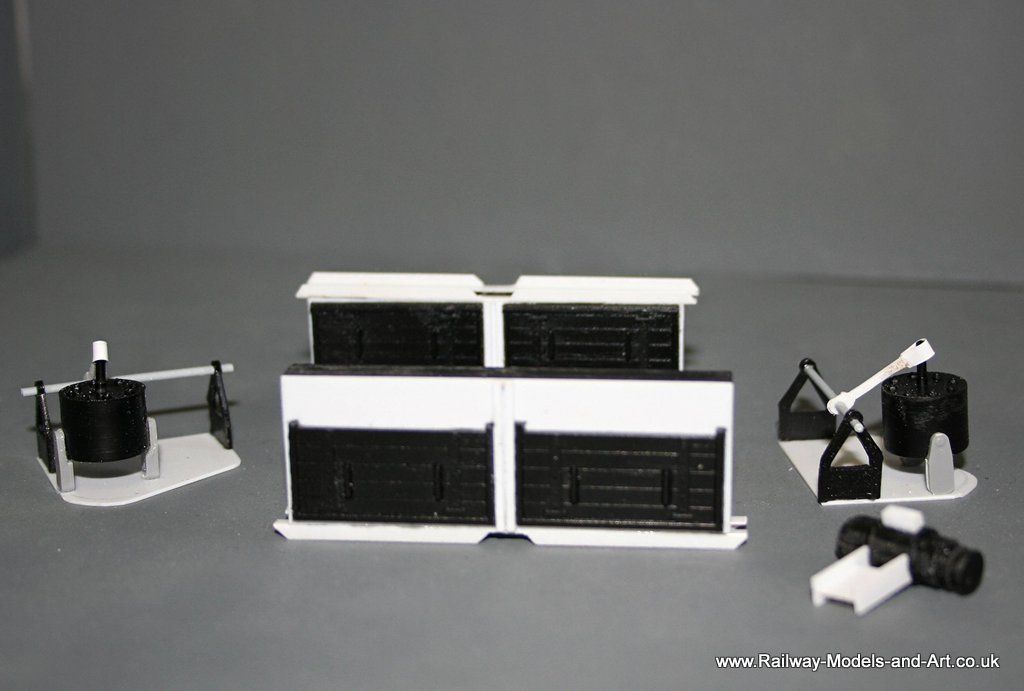
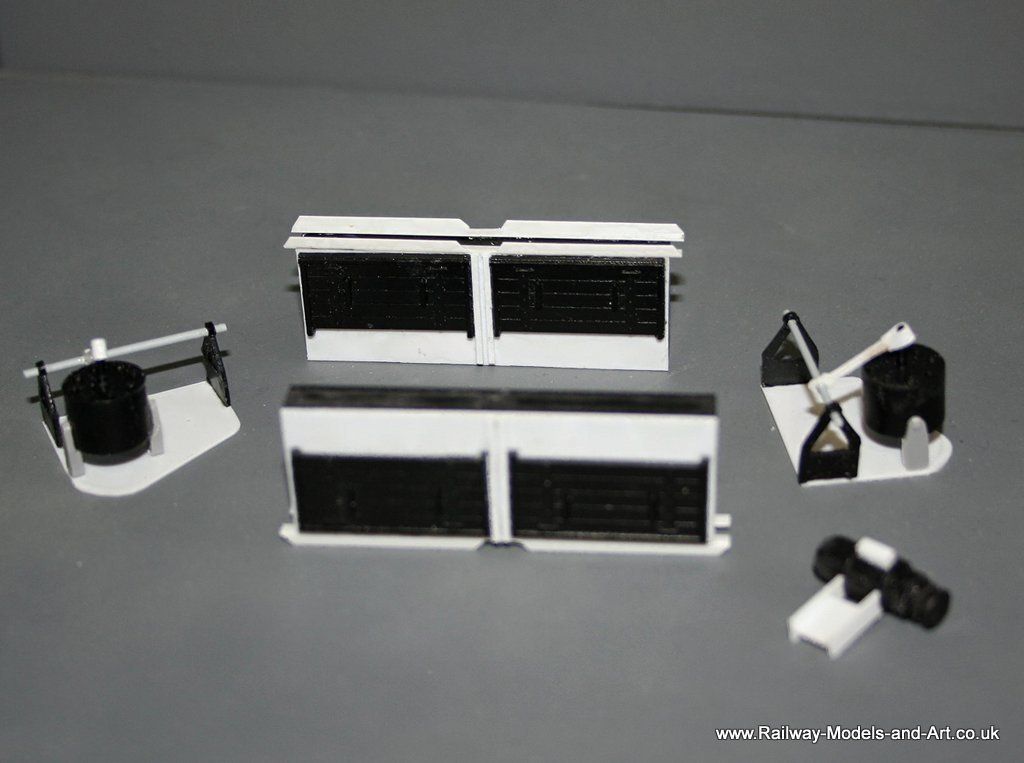
The battery boxes are supplied plain panelled fronted with optional plank doors if modelling pre 1930's LNER (according to Ian's instructional notes). For the first one I decided to add the planked doors to a plasticard backer and stick it to the rear to allow me to fill the box with some lead shot. The lead was added loose and the lid glued on with some small vent holes drilled in the base to allow any solvent fumes to escape. I added some pieces of angle to the bottoms to represent the cradle that the LNER Batteries sat in. I just need to finish them with the addition of the supporting straps and nuts that go down each end.
The vacuum cylinders I did consign to the bin - no matter what I did with them I couldn't improve them so I raided the Parkside spares box and came up with a couple that looked so much better. To these I added the V hangers supplied and stuck them all to a 20 thou plasticard base plate.
Lastly I assembled the supplied dynamo and made up a mounting bracket and a block for the electrical cables which I still have to add.
I am still struggling to get decent photos of anything with white plasticard in the picture.


- notascoobie
- GCR O4 2-8-0 'ROD'
- Posts: 554
- Joined: Sun Jul 20, 2008 9:43 pm
- Location: S Yorkshire
Re: Rob's 7mm Scale Coach Workbench
Hi Rob,
I've built a couple of 51ft carriages from Kirk bits and I offer these thoughts.
I only use sides, ends and roofs and Ian will supply just those bits. I use Peter Dobson's underframes which make up easily.
There was an article in the GOG mag a couple of years ago by a chap who'd made a jig to help assemble the sides. I made my own version using 1/4in aluminium angle and a length of melamine and it takes the uncertainty out of assembling the sides to be straight. The more pieces in the side the more you will lose through solvent use. Be ready to trim the sides to get a matching pair!
I didn't like the deep window reveals so used individually cut pieces of cobex for glazing.
Here's one I made earlier
Regards,
Vernon
- Robpulham
- LNER A4 4-6-2 'Streak'
- Posts: 1721
- Joined: Thu Mar 27, 2008 9:54 pm
- Location: Lower Wensleydale
- Contact:
Re: Rob's 7mm Scale Coach Workbench
Thanks Vernon,
I too made a jig but mine is aluminium strip glued to a sheet of plate glass.
If mine turns out anywhere like yours I will be pleased. I have had stuff from Peter Dobson in the past but having already bought the complete Kirk kits I decided that I would see what could be salvaged/modified to suit.
I too made a jig but mine is aluminium strip glued to a sheet of plate glass.
If mine turns out anywhere like yours I will be pleased. I have had stuff from Peter Dobson in the past but having already bought the complete Kirk kits I decided that I would see what could be salvaged/modified to suit.
- Robpulham
- LNER A4 4-6-2 'Streak'
- Posts: 1721
- Joined: Thu Mar 27, 2008 9:54 pm
- Location: Lower Wensleydale
- Contact:
Re: Rob's 7mm Scale Coach Workbench
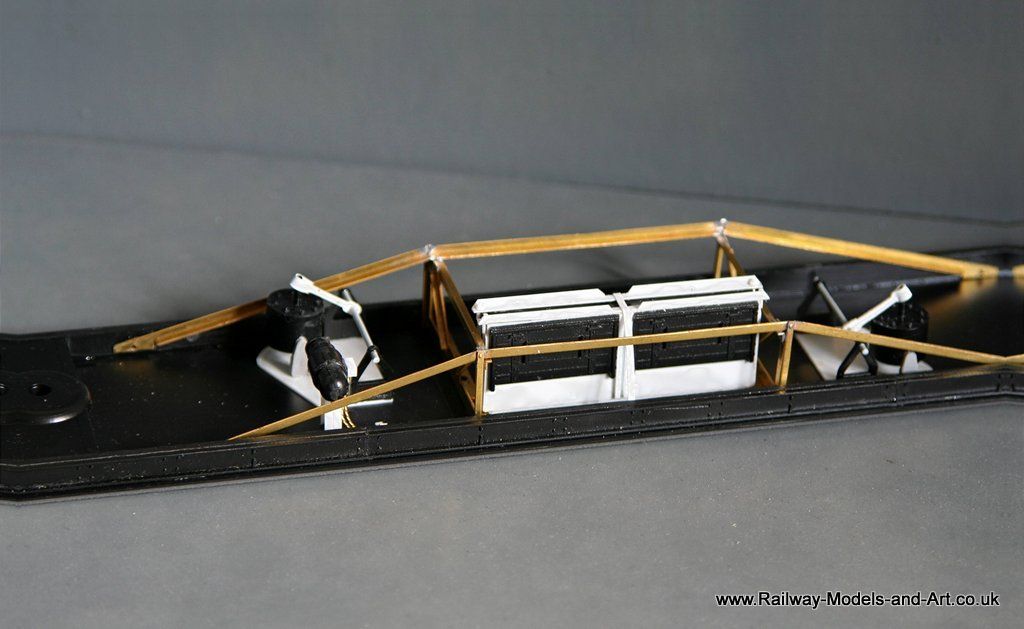
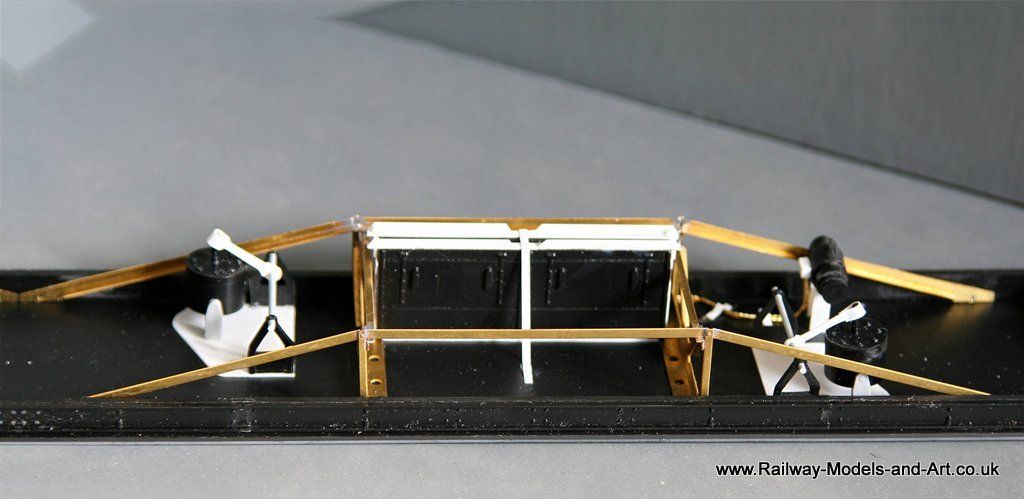
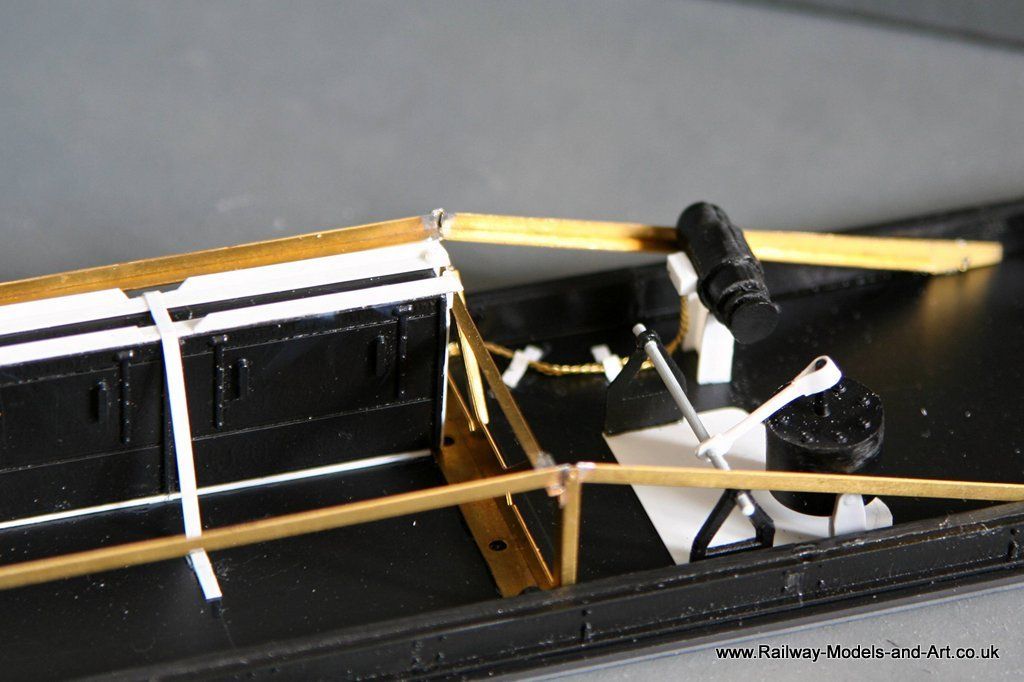
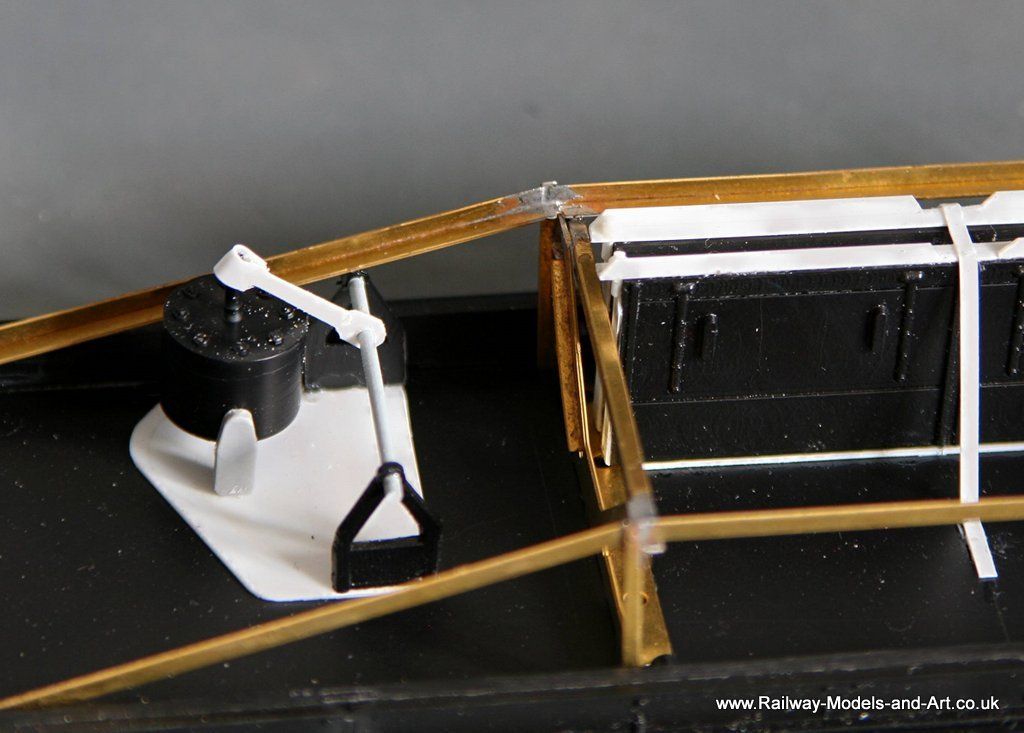
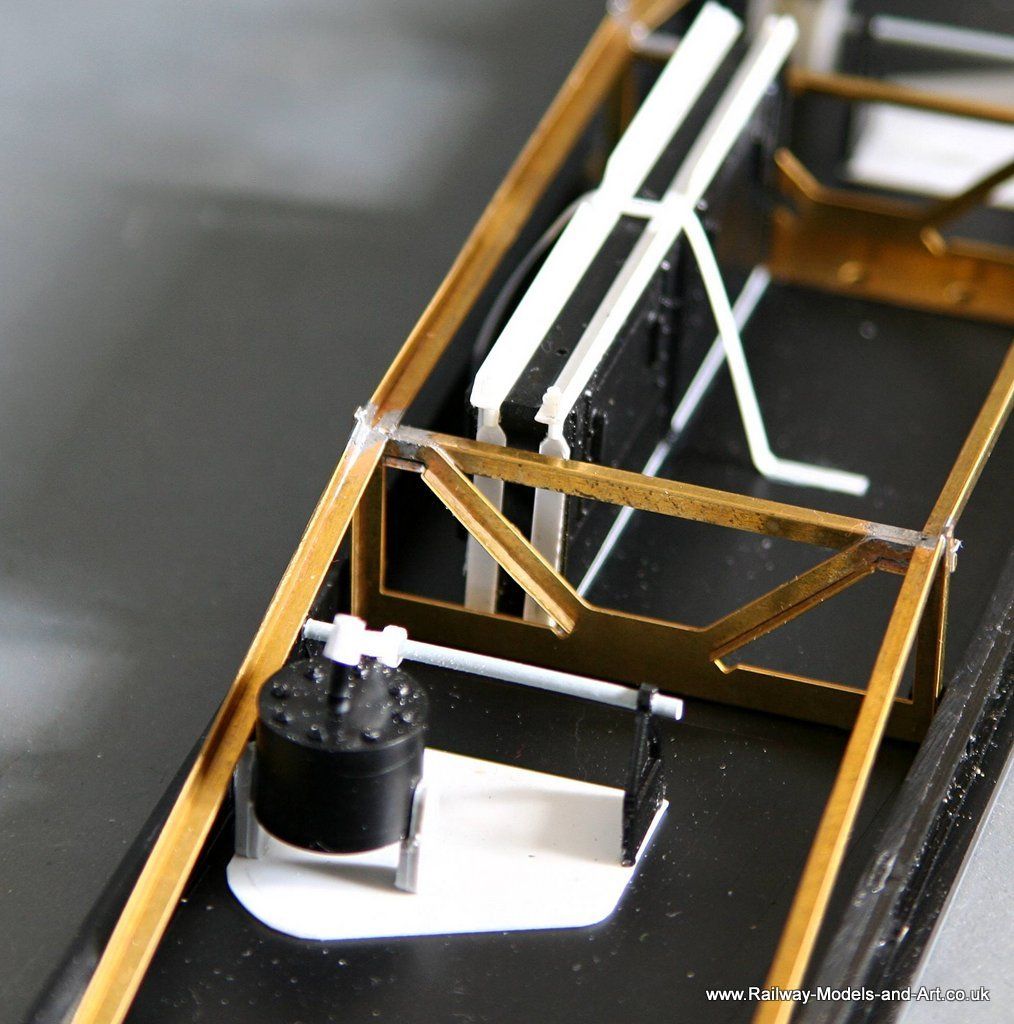
Although I didn't seem to spend much of last weekend modelling, the underframe for the Diagram 129 brake van came together nicely.
I used the Silhoutte to cut out the straps for the ends of the battery boxes adding the threaded part from 1mm half round with a slice of 1.5 and 1.0mm rod to represent the nut and end thread where it comes through the angle along the bottom of the battery boxes that I made earlier.
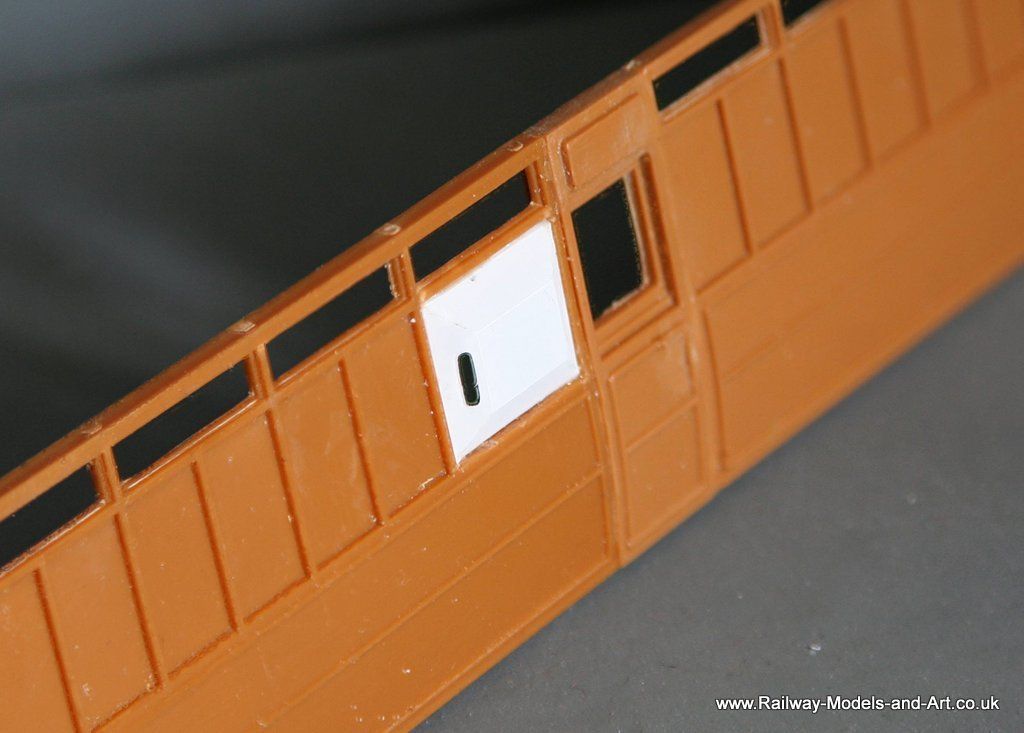
I had to modify the sides slightly to create the D129 because unlike the earlier Diagram 67 the D129 and D284 vans which are virtually identical had a ducket on one side. I adjusted my earlier drawing and cut out a ducket to fit with my Cameo.
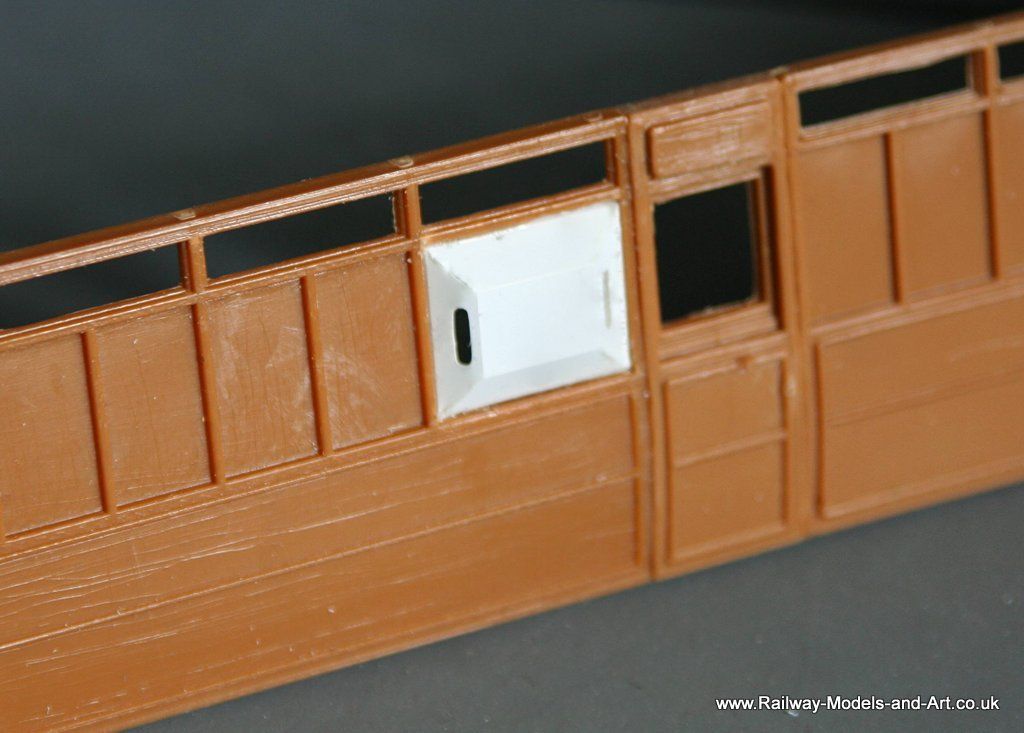
I also added hinge detail and scraped off the moulded T handles and made some representations of the lighting conduits on the ends.
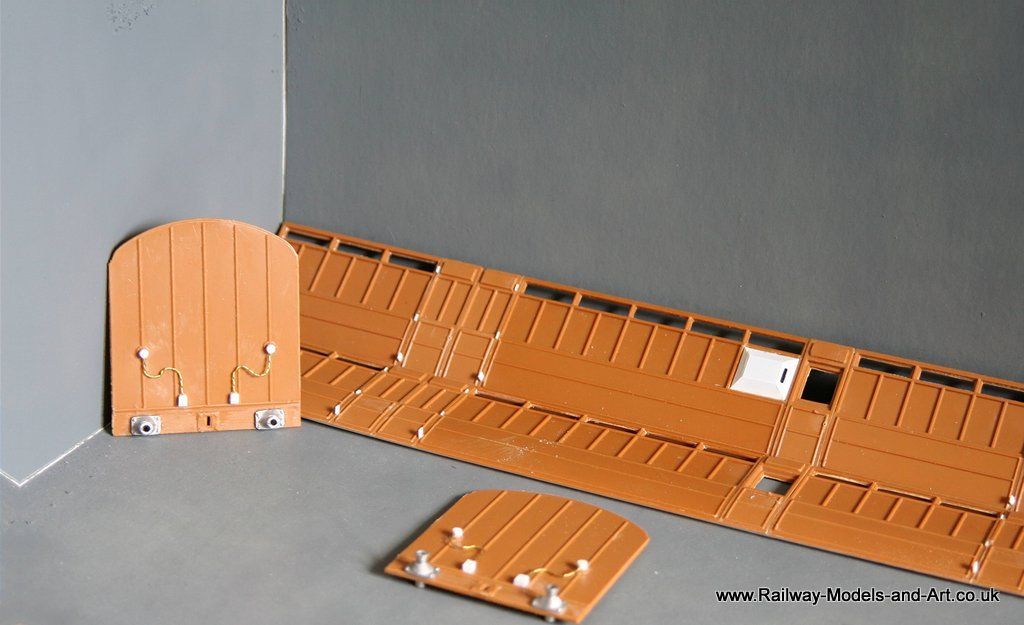
I used the Silhoutte to cut out the straps for the ends of the battery boxes adding the threaded part from 1mm half round with a slice of 1.5 and 1.0mm rod to represent the nut and end thread where it comes through the angle along the bottom of the battery boxes that I made earlier.


I had to modify the sides slightly to create the D129 because unlike the earlier Diagram 67 the D129 and D284 vans which are virtually identical had a ducket on one side. I adjusted my earlier drawing and cut out a ducket to fit with my Cameo.


I also added hinge detail and scraped off the moulded T handles and made some representations of the lighting conduits on the ends.

- notascoobie
- GCR O4 2-8-0 'ROD'
- Posts: 554
- Joined: Sun Jul 20, 2008 9:43 pm
- Location: S Yorkshire
Re: Rob's 7mm Scale Coach Workbench
Hi Rob,
You're making great progress with your build and I take your point about using all the bits from the kit.
I got a bit fixed about the vulnerability of exposed detail, so I tend to go overboard using anchored brass bits. Do you feel comfortable with things like door hinges and battery hanger straps being in plastic? I've probably gone a bit too far in my work but I'm interested in how others view this problem.
Regards,
Vernon