West End Workbench

This forum is for the discussion of railway modelling of the LNER and its constituent companies.

Moderators: 52D, Tom F, Rlangham, Atlantic 3279, Blink Bonny, Saint Johnstoun, richard

jwealleans
LNER A4 4-6-2 'Streak'
Posts: 4272
Joined: Wed Oct 25, 2006 8:46 am

Re: West End Workbench

Post by jwealleans »

Now as it happens I have a Hornby sleeper picked up cheap for that purpose, Mick, but not for this coach.

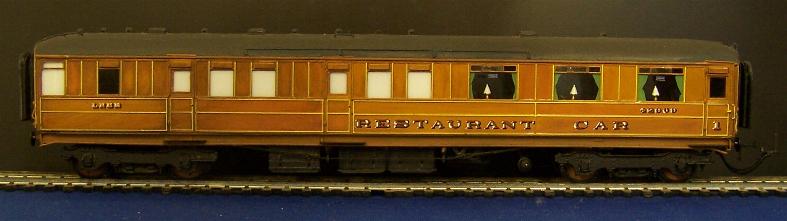
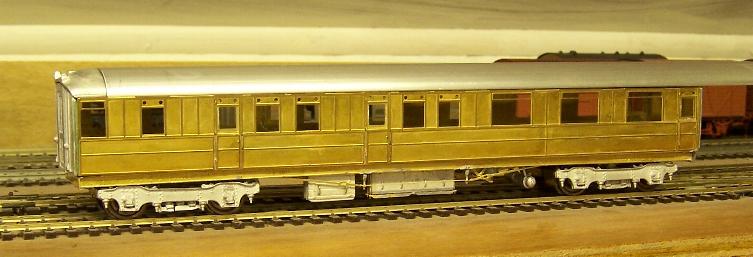
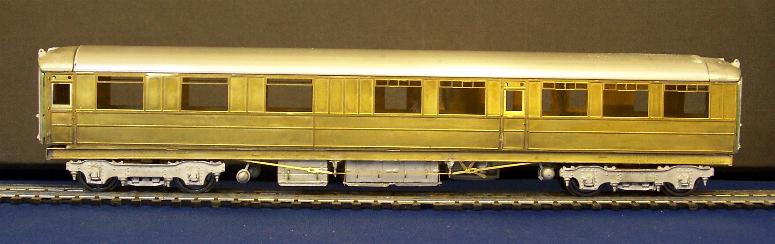
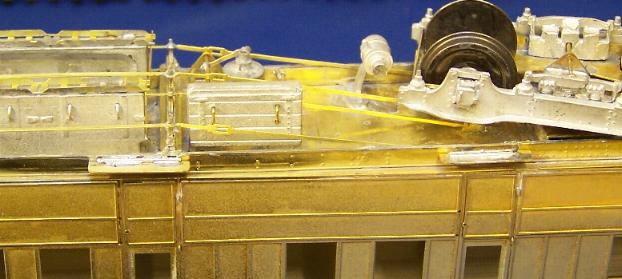
Mike, there's nothing revolutionary here, just something I'm sure others have done before. As regular readers will know, I like my coaches to come apart at the solebar. Mainly because it's easier to hide the join and I'm never going to be good enough to get the invisible roofline seam which Larry Goddard can knock out in half an hour. Mike's coaches, for those who haven't built one, are a single piece body and underframe and a roof which is stuck or clipped on. I built the D50 I made in that way and the roof join is still the thing I'm most unhappy with about it. So this one will return to my usual approach.

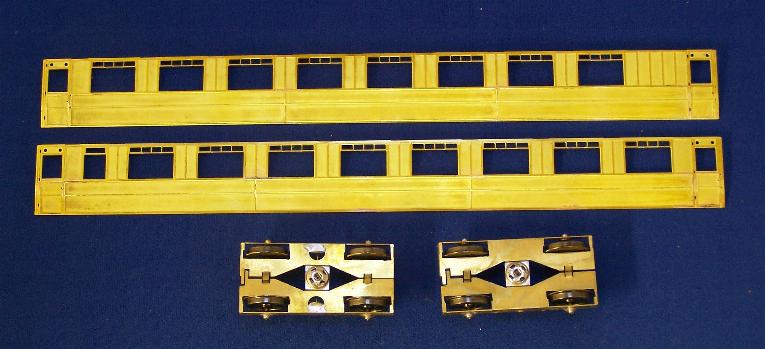
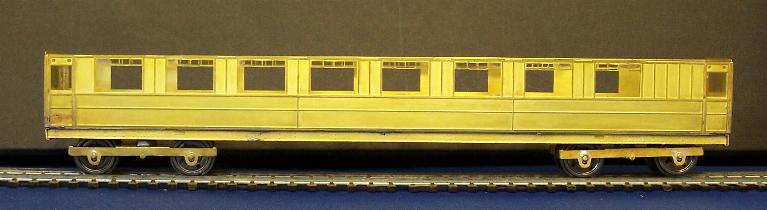
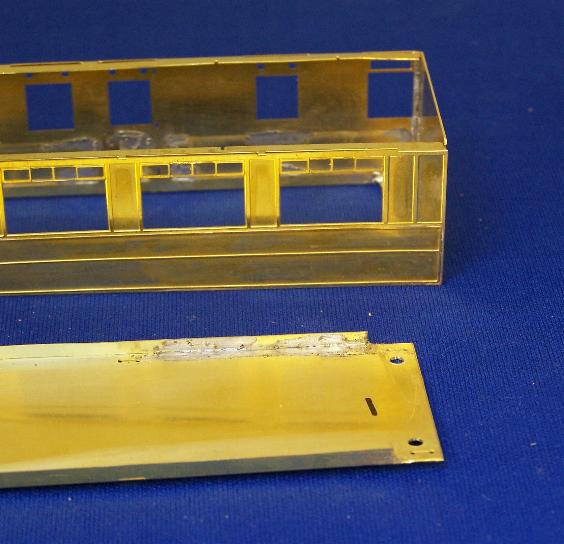
First of all I snapped the ends off the floorpan, tidied the break up and stuck them and the sides together to form the basic bodyshell. Then I stuck captive nuts to two pieces of brass strip and soldered them into the ends of the shell.

Image

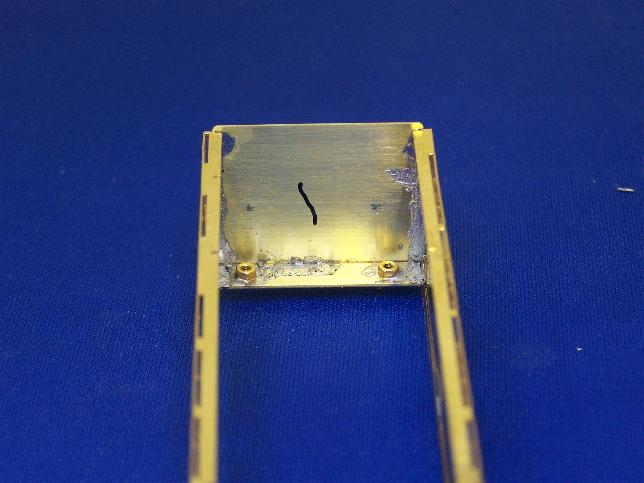
The floorpan sides fold up and these now need to be shortened by the width of the brass strip at each end.

Image

I've already made the holes above, but use the nuts to guide you then drill out the holes to allow a certain amount of clearance. Number sides and ends so you remember which is which although unless you're far more fastidious and accurate than me, they'll only fit one way round from here on in.

Once you've done this, you can fasten the two parts together. You did make sure to leave room for the solebars, didn't you?

Image

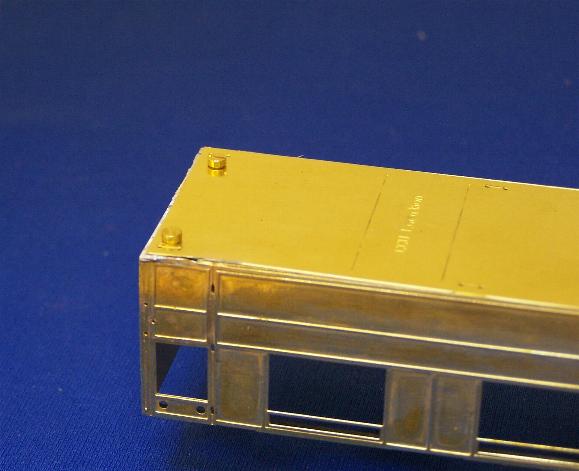
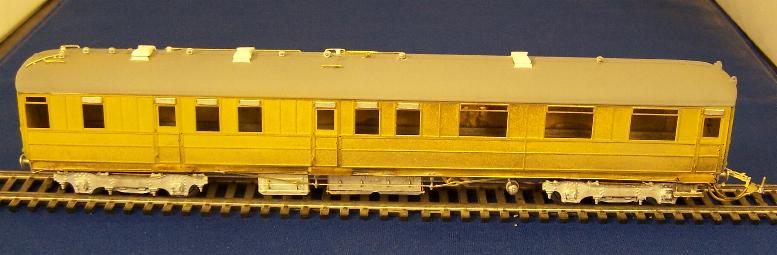
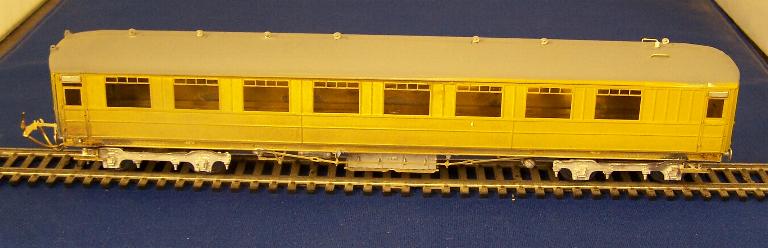
After a short delay while some fool worked out he'd put the presstuds on the wrong way round, we had a rolling body, just three evenings (and one of those cut very short) after starting. It's nice to feel you're getting somewhere.

[imghttps://s20.postimg.cc/htov9387h/rolling.jpg[/img]
Last edited by jwealleans on Tue Dec 18, 2018 5:17 pm, edited 3 times in total.
User avatar
Dave
LNER A4 4-6-2 'Streak'
Posts: 1731
Joined: Sat Nov 13, 2010 9:33 pm
Location: Centre of the known universe York

Re: West End Workbench

Post by Dave »

That is a great start, it's a great carriage to build...will be watching with interest. I have the 3rd to go with mine but I've not started it yet, I must find the time to finish the thing , but I have a feeling that you will beat me to it, I still need to get better at using a bow pen.

Oh and thank you for your very kind comments on my unfinished model as a proper job.
jwealleans
LNER A4 4-6-2 'Streak'
Posts: 4272
Joined: Wed Oct 25, 2006 8:46 am

Re: West End Workbench

Post by jwealleans »

Back to the script now, adding solebars and droplights. I couldn't resist posing it for the photo:

Image

The buffer beams are spot on the right height, but clearance between solebars and bogies is minimal to non-existent. I may have to file both back a bit to get smooth running. I've also added an extra hole and captive nut at this end to take my preferred Bill Bedford coach coupling.
Last edited by jwealleans on Tue Dec 18, 2018 5:17 pm, edited 2 times in total.
User avatar
Atlantic 3279
LNER A4 4-6-2 'Streak'
Posts: 6632
Joined: Fri Jun 26, 2009 9:51 am
Location: 2850, 245

Re: West End Workbench

Post by Atlantic 3279 »

Book me a table in there will you. The sight of a catering car makes me hungry.
Most subjects, models and techniques covered in this thread are now listed in various categories on page1

Dec. 2018: Almost all images that disappeared from my own thread following loss of free remote hosting are now restored.
jwealleans
LNER A4 4-6-2 'Streak'
Posts: 4272
Joined: Wed Oct 25, 2006 8:46 am

Re: West End Workbench

Post by jwealleans »

Saturday was spent putting most of the underframe parts on - and there are a lot - but I was out playing trains on Sunday so no photographs. I also found I'd run out of dynamos and had to scrabble around last night pinching them from other kits. Like Dave, I had gaps around the ends when they were stuck on so those have been filled and the next step will be to fettle and fit the roof ends. I also took the bogie mounts off and put a shim under each (scrap fret) to give just a little more clearance under the solebar edges for the bogies to pivot.

Image

I've started the accompanying TO last night - just a pair of rolling bogies up to now.

I should also have mentioned the excellent service from Cambridge Custom Transfers for the lettering for this:

Image

This is a new sheet he's done in anticipation of the Bachmann release sparking interest in grain wagons. This one also covers the Parkside LNER wagon in the BR era - among numerous others - and there's a separate sheet for the wagons covered by the new Bachmann model.
Last edited by jwealleans on Tue Dec 18, 2018 5:16 pm, edited 2 times in total.
LNER4479
GER D14 4-4-0 'Claud Hamilton'
Posts: 388
Joined: Wed Sep 18, 2013 9:12 am
Location: 51A

Re: West End Workbench

Post by LNER4479 »

Looking good, Houston :D
(recreating pre-war Grantham in model form http://www.lner.info/forums/viewtopic.php?f=3&t=9076.
Forthcoming exhibition appearances: Newcastle (Nov 2023); York (Easter 2024); Bristol (May 2024)
jwealleans
LNER A4 4-6-2 'Streak'
Posts: 4272
Joined: Wed Oct 25, 2006 8:46 am

Re: West End Workbench

Post by jwealleans »

Image
Last edited by jwealleans on Tue Dec 18, 2018 5:16 pm, edited 2 times in total.
jwealleans
LNER A4 4-6-2 'Streak'
Posts: 4272
Joined: Wed Oct 25, 2006 8:46 am

Re: West End Workbench

Post by jwealleans »

I don't often use these, but I think this calls for a :D

Image

Image

Same methodology on the RTO, just less time reading the instructions. Of course, it helps if it all fits, which it all does.
Last edited by jwealleans on Tue Dec 18, 2018 6:06 pm, edited 2 times in total.
LNER4479
GER D14 4-4-0 'Claud Hamilton'
Posts: 388
Joined: Wed Sep 18, 2013 9:12 am
Location: 51A

Re: West End Workbench

Post by LNER4479 »

I think you're fully entitled to use a :D :lol:
(recreating pre-war Grantham in model form http://www.lner.info/forums/viewtopic.php?f=3&t=9076.
Forthcoming exhibition appearances: Newcastle (Nov 2023); York (Easter 2024); Bristol (May 2024)
User avatar
Atlantic 3279
LNER A4 4-6-2 'Streak'
Posts: 6632
Joined: Fri Jun 26, 2009 9:51 am
Location: 2850, 245

Re: West End Workbench

Post by Atlantic 3279 »

Very posh.
Most subjects, models and techniques covered in this thread are now listed in various categories on page1

Dec. 2018: Almost all images that disappeared from my own thread following loss of free remote hosting are now restored.
User avatar
Dave
LNER A4 4-6-2 'Streak'
Posts: 1731
Joined: Sat Nov 13, 2010 9:33 pm
Location: Centre of the known universe York

Re: West End Workbench

Post by Dave »

Looking very good so far, boy you are a quick builder.
jwealleans
LNER A4 4-6-2 'Streak'
Posts: 4272
Joined: Wed Oct 25, 2006 8:46 am

Re: West End Workbench

Post by jwealleans »

Fact is, Dave, I have a very short attention span and I like to get things finished or well on the way - past the bits I need to think about - fairly smartly. That helps me keep the discipline of finishing things. I may take years to start, but I generally complete things once they're under way. If I do have to put them aside or get distracted - like those German ferry vans - they can take years to do.
User avatar
Dave
LNER A4 4-6-2 'Streak'
Posts: 1731
Joined: Sat Nov 13, 2010 9:33 pm
Location: Centre of the known universe York

Re: West End Workbench

Post by Dave »

Sounds a bit like me.

I've sent you the info you wanted.
jwealleans
LNER A4 4-6-2 'Streak'
Posts: 4272
Joined: Wed Oct 25, 2006 8:46 am

Re: West End Workbench

Post by jwealleans »

Before I start making all the bits Dave's been telling me about, I am still wafting the soldering iron dangerously close to all those gubbins already in place. The open 3rd is much simpler then the RF so it's catching up quite quickly. RF has had the roof fitted and making good the joint has begun.

Image

Image

Having said that about bits fitting, today I had a couple which didn't. I was running the D27 underframe backwards and forwards and the bogies were fouling on curves. I'd already added some fret under the mounts to keep the height consistent with the RF, so I was a bit puzzled. Then I realised that the sides were sitting high. On investigation, the holes are out of register with the bearings in the bogies - they were already too far apart, which I'd dealt with when I fitted them, but they were too low as well, making the top of the bogie frame catch the solebar. I drilled the holes out to 3mm and reglued the sides and that seems to have sorted it.

I also got onto steps tonight. The underframe etch supplies a full length step - I assume the idea is to cut it down to length if required. The instructions don't mention them. I found it impossible to solder the short steps I need to the solebars securely. Given that these will be exhibition models and may get rough handling, anything attached need to be as permanent as it can be. So this is what I resorted to:

Image

A length of .7mm wire soldered to the underside of the step, bent through 90 degrees and taken through a hole in the solebar. Soldered from the inside of the solebar with a short stub left in case it ever needs resoldering. That was fine except for the left hand door above, where the mass of underframe equipment made it too risky to try to insert a soldering iron. Here I just placed a length of wire along the bottom flange of the solebar and soldered the step from the underside. I'm fairly confident it won't be conspicuous when painted.
Last edited by jwealleans on Tue Dec 18, 2018 9:45 pm, edited 2 times in total.
45609
GCR D11 4-4-0 'Improved Director'
Posts: 426
Joined: Thu Sep 07, 2006 4:51 pm

Re: West End Workbench

Post by 45609 »

Hi JW,

I'm watching how you are building these coaches with interest. It's got my fingers itching to get out my part built rebuilt D.167. If that makes sense? Please may I see a bit more detail on how you are tackling the roof ends with respect to filling and making good? One of the things I noticed on my build was that all the MJT roof end castings I have are undersize. I think that is probably why I lost interest and put it to one side. My mind started wandering onto mastering a new end for casting in resin. That Mr. King is a bad man..... :wink:

Cheers....Morgan
Last edited by 45609 on Tue Nov 12, 2013 12:57 pm, edited 1 time in total.
Post Reply