Rob's 7mm Rolling Stock Workbench
Moderators: 52D, Tom F, Rlangham, Atlantic 3279, Blink Bonny, Saint Johnstoun, richard
- 52D
- LNER A4 4-6-2 'Streak'
- Posts: 3968
- Joined: Sun Jun 03, 2007 3:50 pm
- Location: Reallocated now between the Lickey and GWR
- Contact:
Re: 7mm Rolling Stock Builds -More painting and weathering..
Your good lady is a dab hand with the weathering.
Hi interested in the area served by 52D. also researching colliery wagonways from same area.
- Robpulham
- LNER A4 4-6-2 'Streak'
- Posts: 1721
- Joined: Thu Mar 27, 2008 9:54 pm
- Location: Lower Wensleydale
- Contact:
Re: 7mm Rolling Stock Builds -More painting and weathering..
Thanks 52D
She has done a bit more this week.
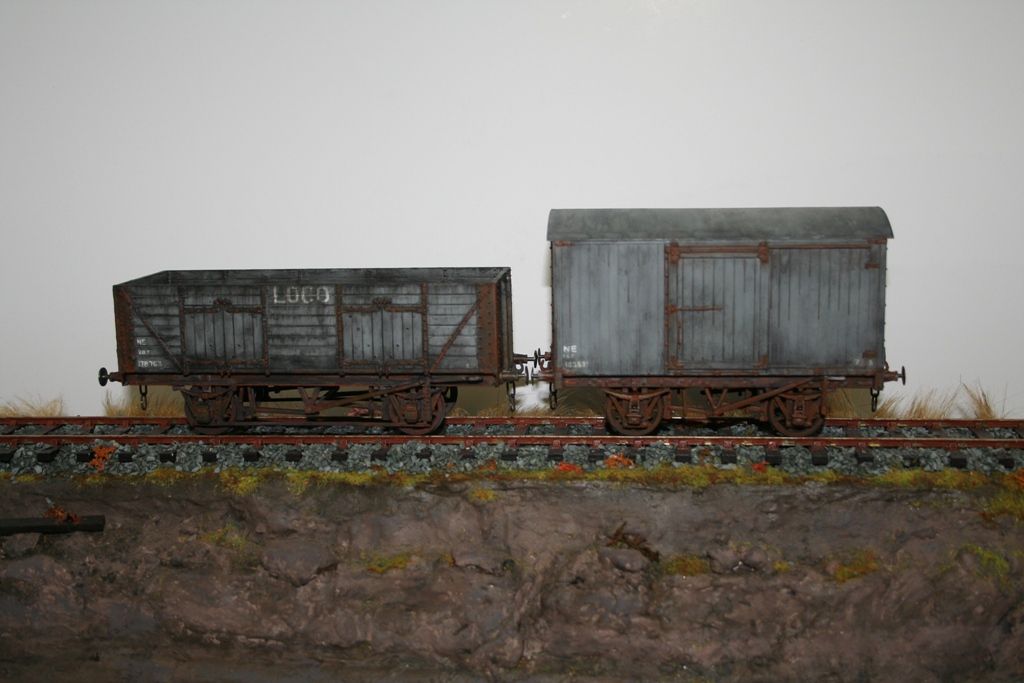
The flash seems to have highlighted the rust colour even more on these than it did on the coal wagon....
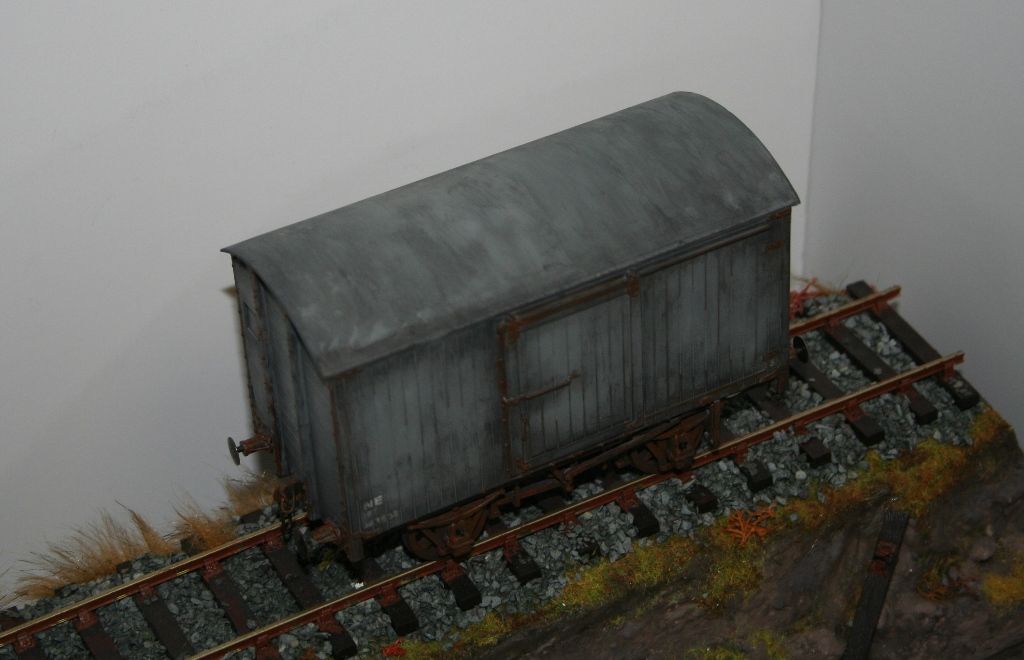
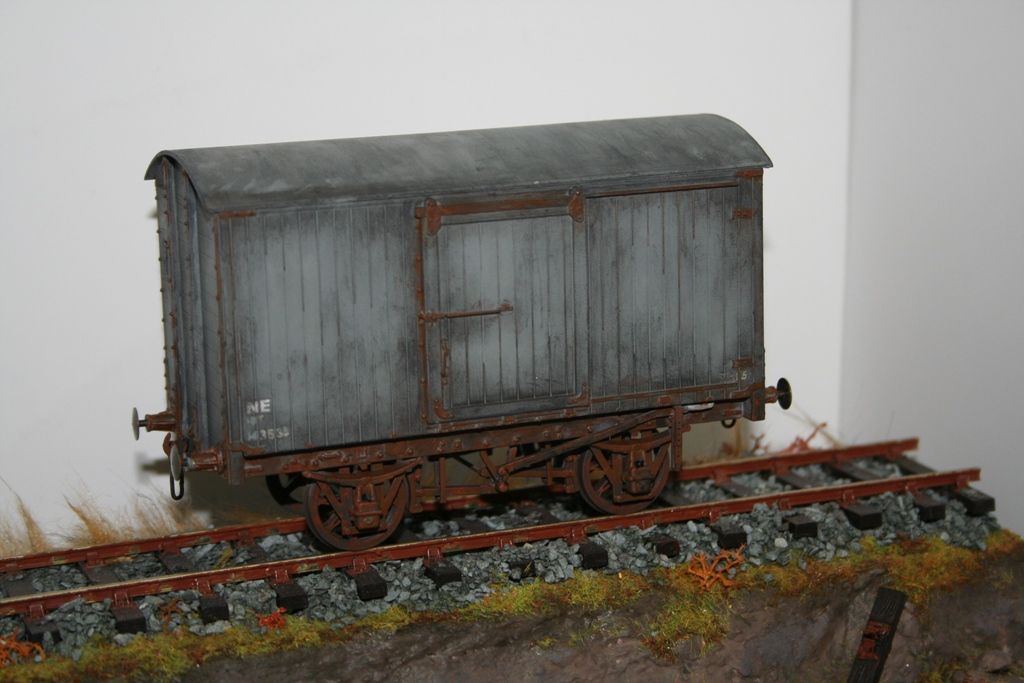
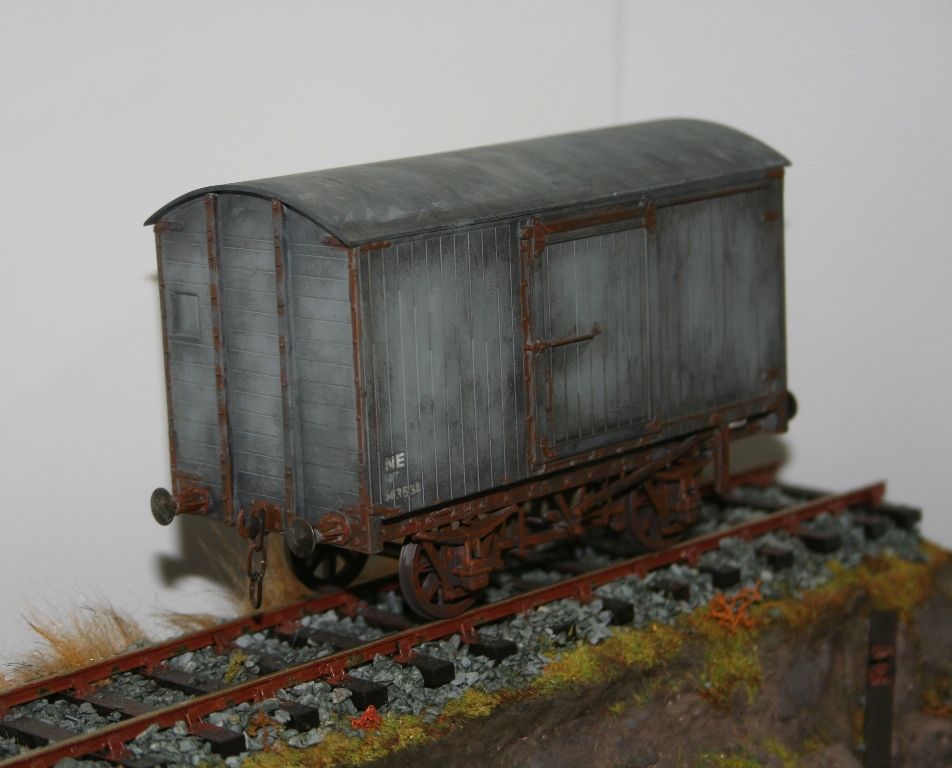
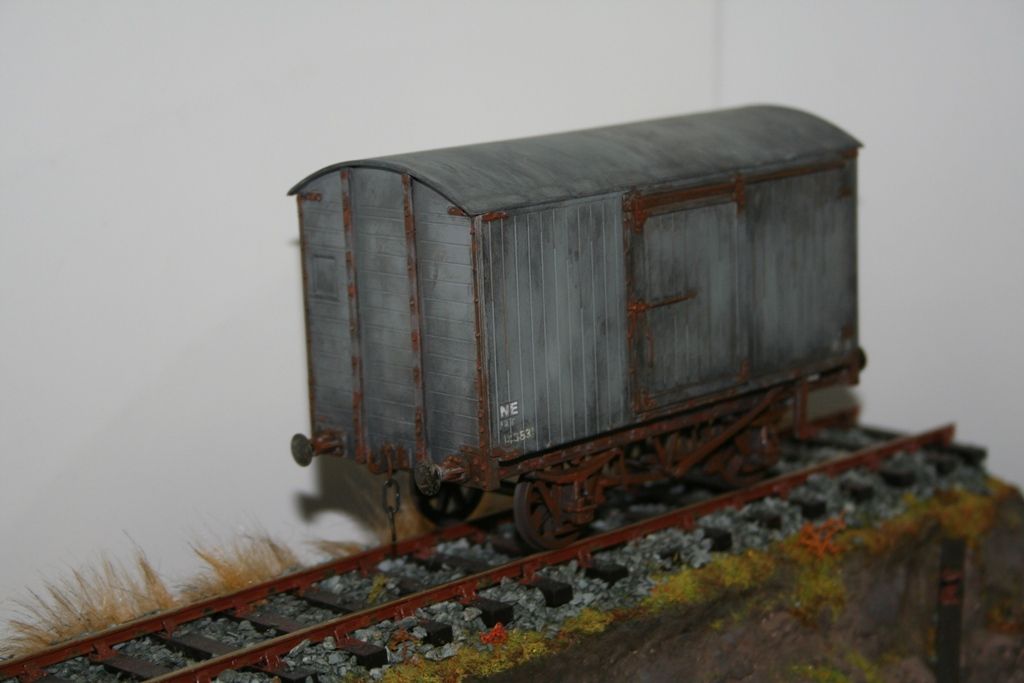
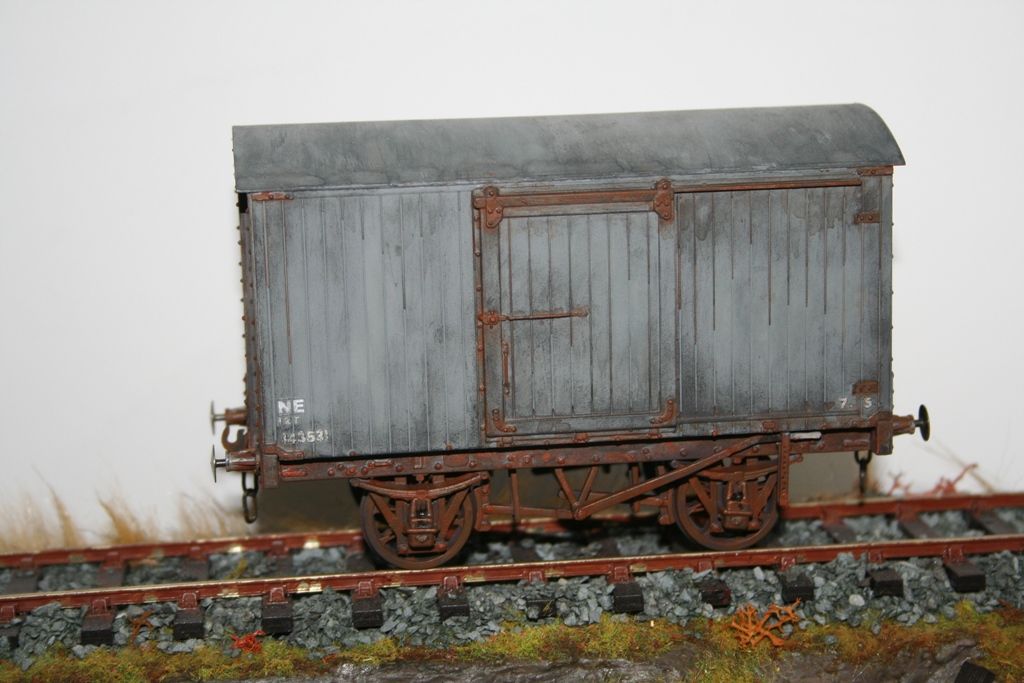
And then one of the two wagons together. I just need to clean the paint off the wheels treads and get them in the post.
She has done a bit more this week.
The flash seems to have highlighted the rust colour even more on these than it did on the coal wagon....


And then one of the two wagons together. I just need to clean the paint off the wheels treads and get them in the post.

- 52D
- LNER A4 4-6-2 'Streak'
- Posts: 3968
- Joined: Sun Jun 03, 2007 3:50 pm
- Location: Reallocated now between the Lickey and GWR
- Contact:
Re: 7mm Rolling Stock Builds -More painting and weathering..
I do like this latest batch the rust looks very realistic.
Hi interested in the area served by 52D. also researching colliery wagonways from same area.
- Robpulham
- LNER A4 4-6-2 'Streak'
- Posts: 1721
- Joined: Thu Mar 27, 2008 9:54 pm
- Location: Lower Wensleydale
- Contact:
Re: 7mm Rolling Stock Builds -More painting and weathering..
Thanks, it looks even better in the flesh - so much so that when I handle them I look to see if I have rust on my hands...52D wrote:I do like this latest batch the rust looks very realistic.
-
drmditch
Re: 7mm Rolling Stock Builds -More painting and weathering..
Your models look absolutely superb.
If you don't mind a query from a far less competent modeller, please could I ask about the interior colours of your cattle wagons, both LMS and LNER?
I'm just finishing two models, and before I 'put the lid on' it would be helpful to know the proper colours for the interiors (at least before the passengers started to modify them!).
- Robpulham
- LNER A4 4-6-2 'Streak'
- Posts: 1721
- Joined: Thu Mar 27, 2008 9:54 pm
- Location: Lower Wensleydale
- Contact:
Re: 7mm Rolling Stock Builds -More painting and weathering..
Thanks for the kind words.drmditch wrote:Your models look absolutely superb.
If you don't mind a query from a far less competent modeller, please could I ask about the interior colours of your cattle wagons, both LMS and LNER?
I'm just finishing two models, and before I 'put the lid on' it would be helpful to know the proper colours for the interiors (at least before the passengers started to modify them!).
Regarding the cattle wagon interiors I paint them white to represent the white/lime wash that they painted them in to reduce disease.
-
jwealleans
- LNER A4 4-6-2 'Streak'
- Posts: 4303
- Joined: Wed Oct 25, 2006 8:46 am
Re: 7mm Rolling Stock Builds -More painting and weathering..
Careful - lime washing was outlawed in around 1924 as it rotted the animals' feet.
- Robpulham
- LNER A4 4-6-2 'Streak'
- Posts: 1721
- Joined: Thu Mar 27, 2008 9:54 pm
- Location: Lower Wensleydale
- Contact:
Re: 7mm Rolling Stock Builds -More painting and weathering..
Cheers mate, I am still working on the theory that they painted em white because that's what we've always done 
There are a couple of my shelf queens that are especially dear to Chris's heart, since they were gifts from her. This is one of them finished at last - an MMP LMS Glass wagon.
This is one of those that I started a couple of years too early in the confidence and experience stakes. When I started on it I made mistakes but didn't have the confidence to unsolder it and start again. What seemed a struggle at the time was so much easier when I picked it up again. To be honest using some of the MMP bits on other build has helped me understand the way that they go together which has helped tremendously.
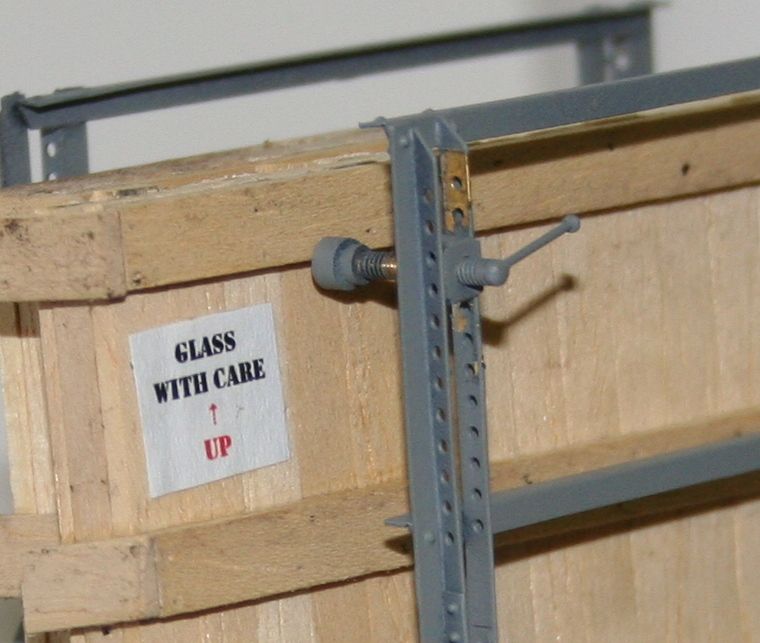
As a kit it is very highly detailed and the only bit's that I changed were the rope rings that I remade from brass wire (they were very nice whitemetal castings) and the screw clamps that hold the packing cases. Once again the ones supplied were castings but I wanted them to work. It turned out quite easy to do the make up of the slide that holds the clamp was easy to tap 10ba and the clamps themselves I made from a 10ba brass screw with two sections of tube soldered over them at the head end (I only had countersunk screws so I had to mount them in my mini drill and turn the heads down so that the large tube would fit. This was then filled with solder.
There were some etched handles supplied but I wanted something a bit more robust so cut a slot in the end of the screw and soldered in a brass pin.
A shot of the clamps - I need to patch in the paint where I moved them to clamp the crates.
I didn't take any photo's of the end of the journey on this one but here it is in it's grey livery just needing the black bits doing and then some transfers and weathering.
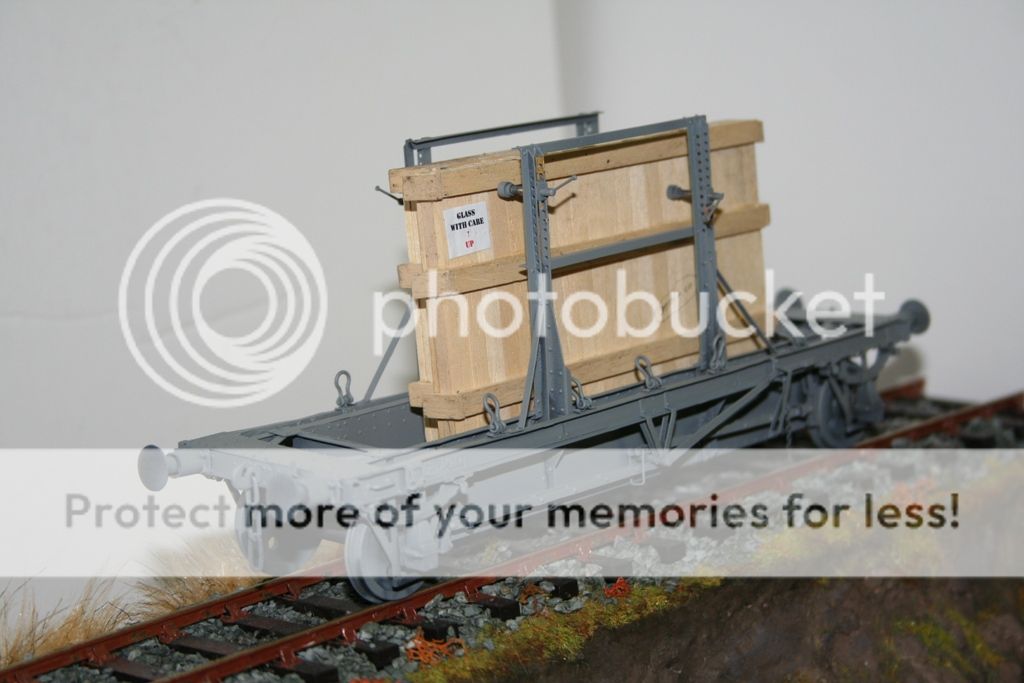
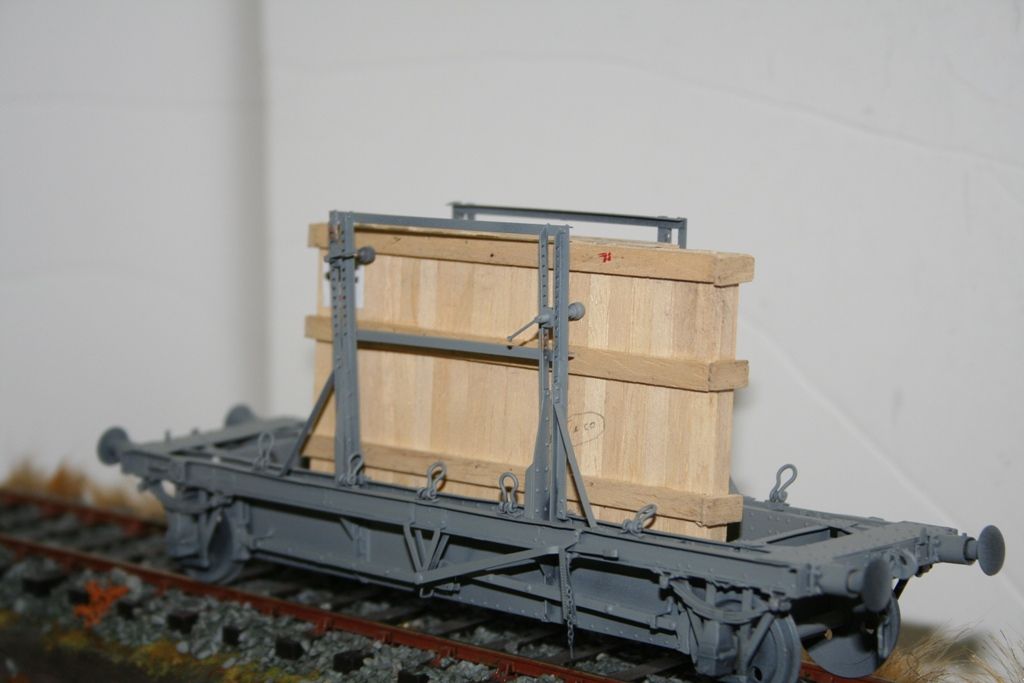
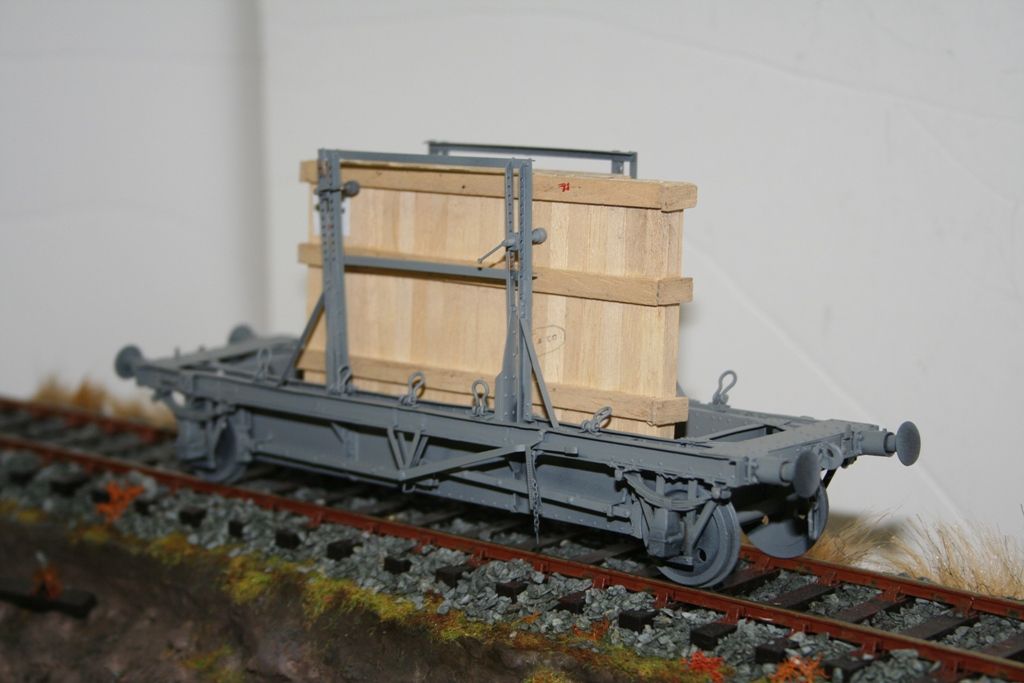
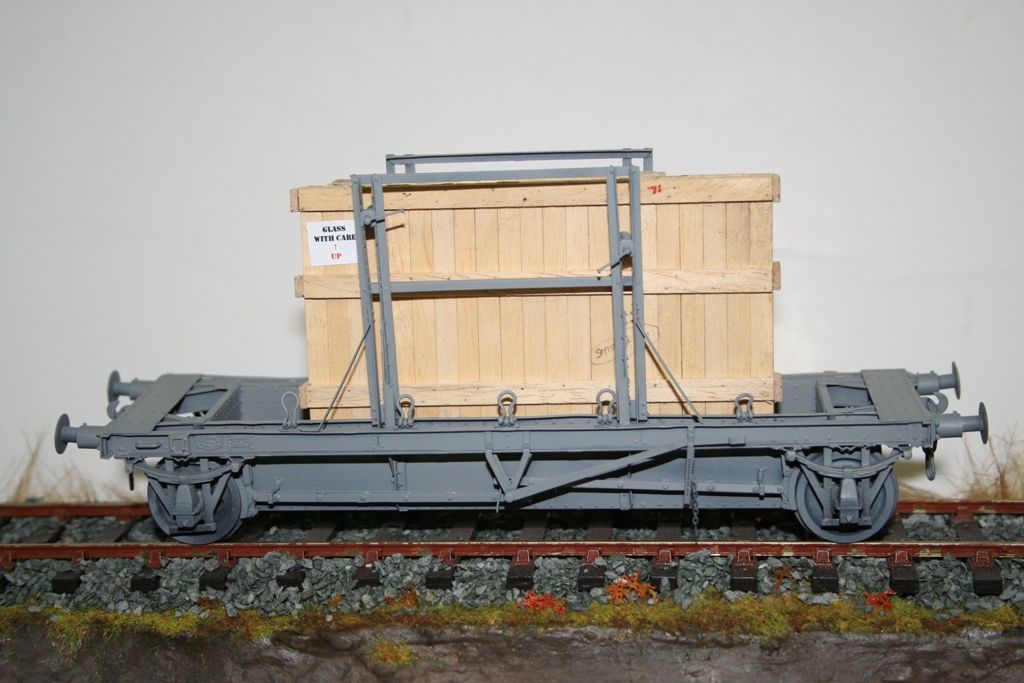
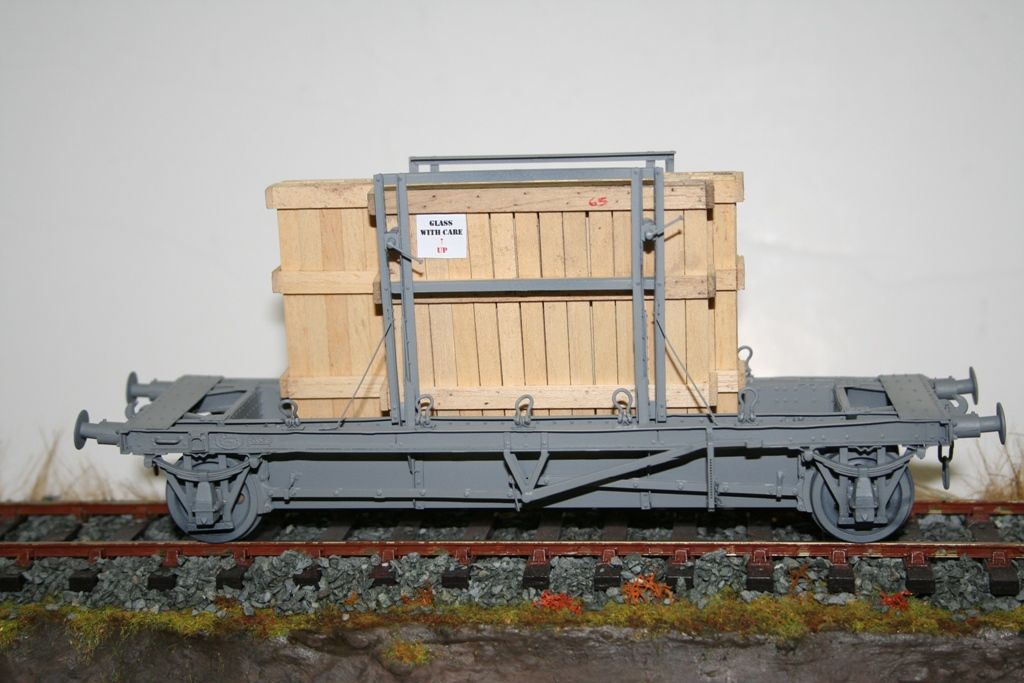
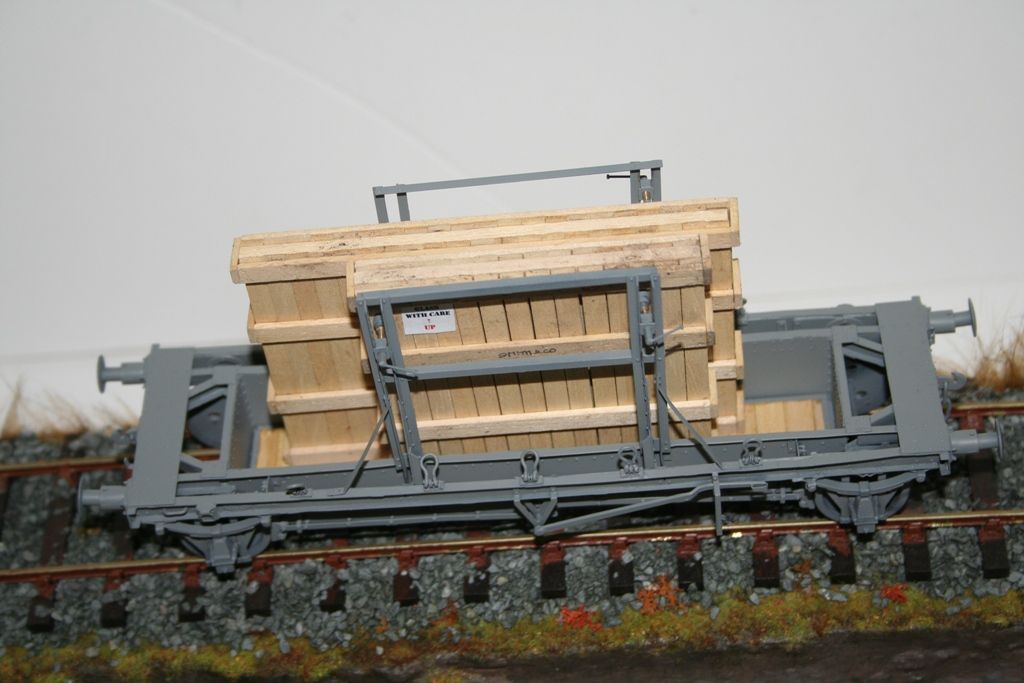
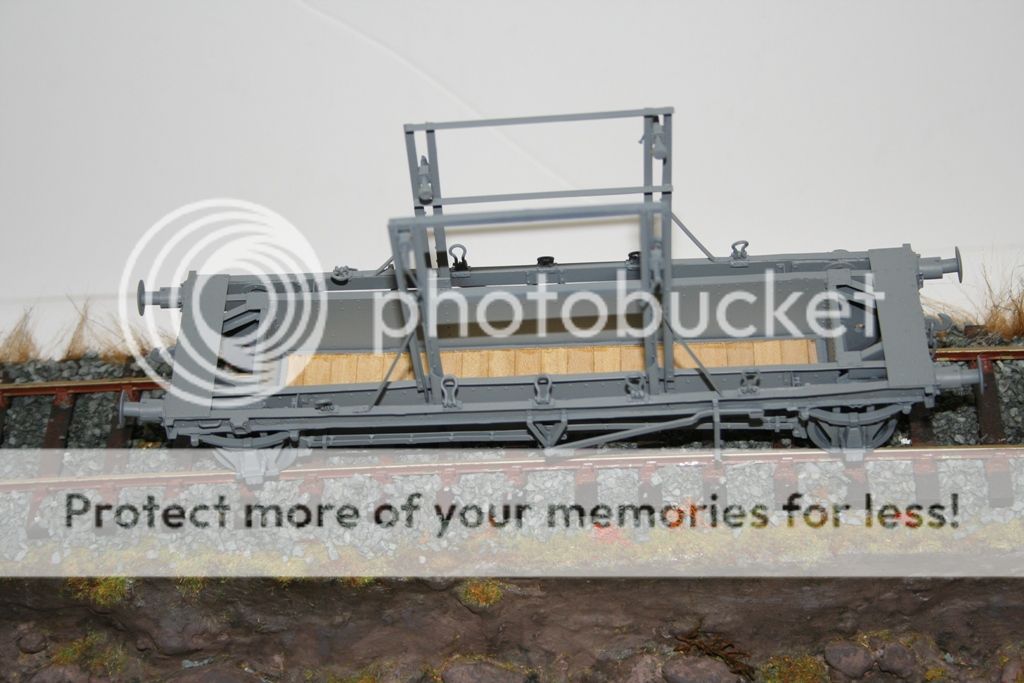
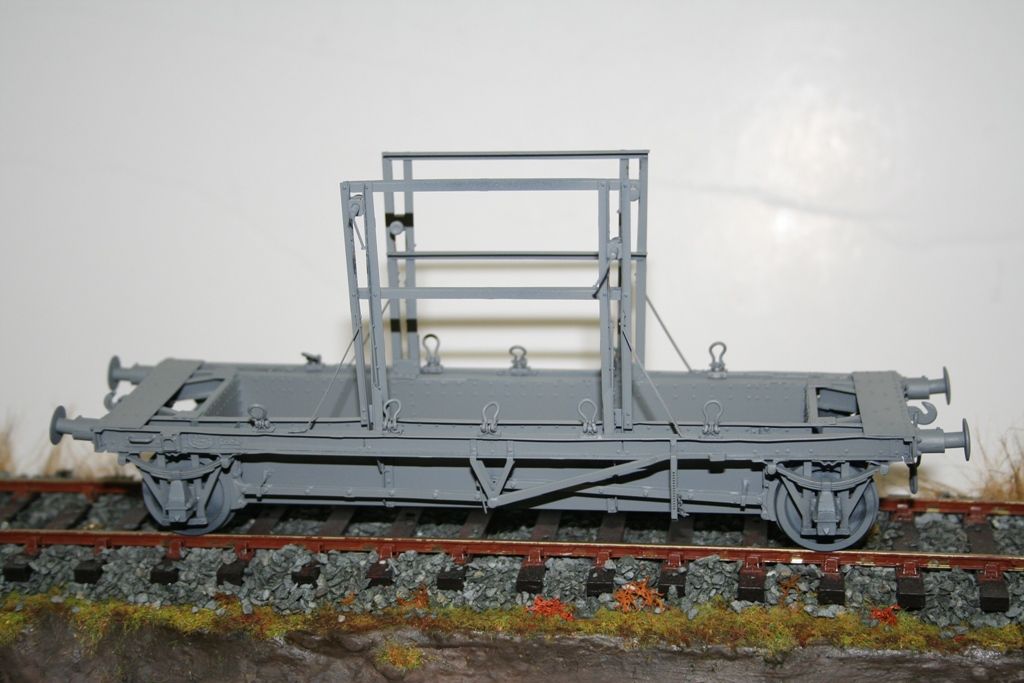
I also replaced the buffer heads with some brass ones that I had in the spares box this made it a bit easier to spring them.
The wood for the deck and packing cases was supplied with the kit along with cutting templates.
There are a couple of my shelf queens that are especially dear to Chris's heart, since they were gifts from her. This is one of them finished at last - an MMP LMS Glass wagon.
This is one of those that I started a couple of years too early in the confidence and experience stakes. When I started on it I made mistakes but didn't have the confidence to unsolder it and start again. What seemed a struggle at the time was so much easier when I picked it up again. To be honest using some of the MMP bits on other build has helped me understand the way that they go together which has helped tremendously.
As a kit it is very highly detailed and the only bit's that I changed were the rope rings that I remade from brass wire (they were very nice whitemetal castings) and the screw clamps that hold the packing cases. Once again the ones supplied were castings but I wanted them to work. It turned out quite easy to do the make up of the slide that holds the clamp was easy to tap 10ba and the clamps themselves I made from a 10ba brass screw with two sections of tube soldered over them at the head end (I only had countersunk screws so I had to mount them in my mini drill and turn the heads down so that the large tube would fit. This was then filled with solder.
There were some etched handles supplied but I wanted something a bit more robust so cut a slot in the end of the screw and soldered in a brass pin.
A shot of the clamps - I need to patch in the paint where I moved them to clamp the crates.

I didn't take any photo's of the end of the journey on this one but here it is in it's grey livery just needing the black bits doing and then some transfers and weathering.


I also replaced the buffer heads with some brass ones that I had in the spares box this made it a bit easier to spring them.
The wood for the deck and packing cases was supplied with the kit along with cutting templates.
- Robpulham
- LNER A4 4-6-2 'Streak'
- Posts: 1721
- Joined: Thu Mar 27, 2008 9:54 pm
- Location: Lower Wensleydale
- Contact:
Re: 7mm Rolling Stock Builds -MMP LMS Glass Wagon
Chris has weaved her magic on the S&D Horsebox so this is another one ready for service on the layout (layout, what layout I hear the cry, I must get on with it....)
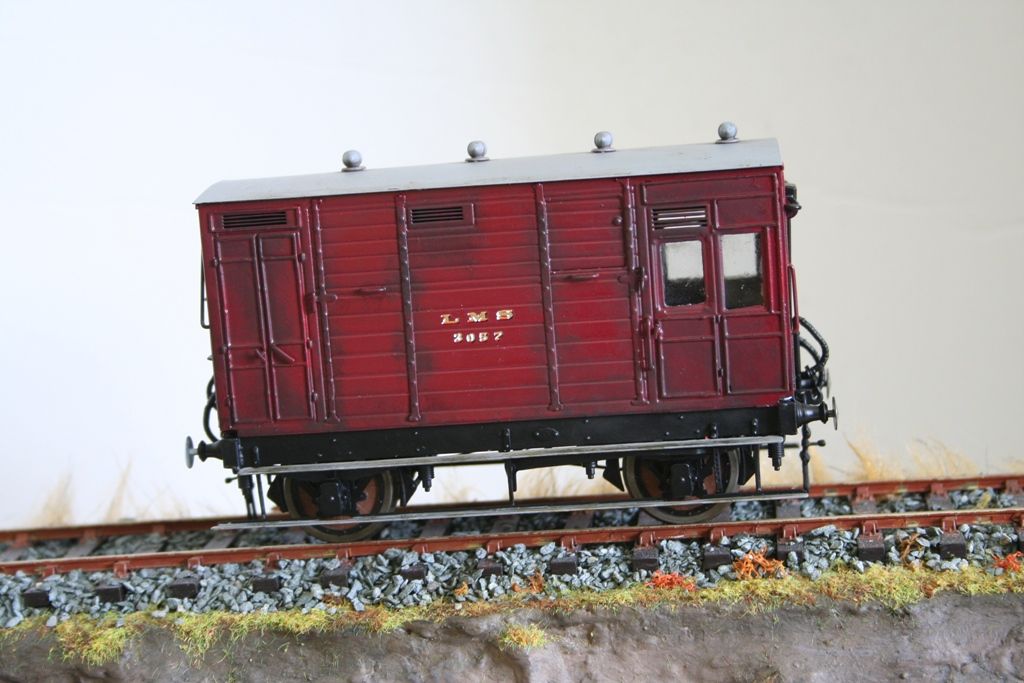
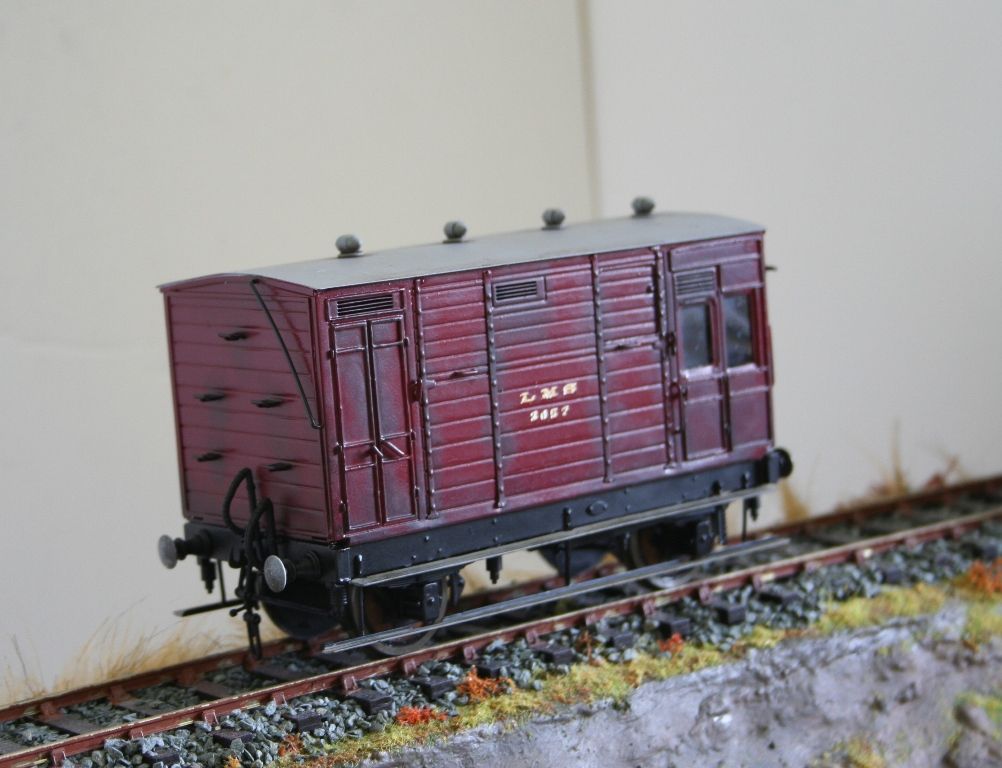
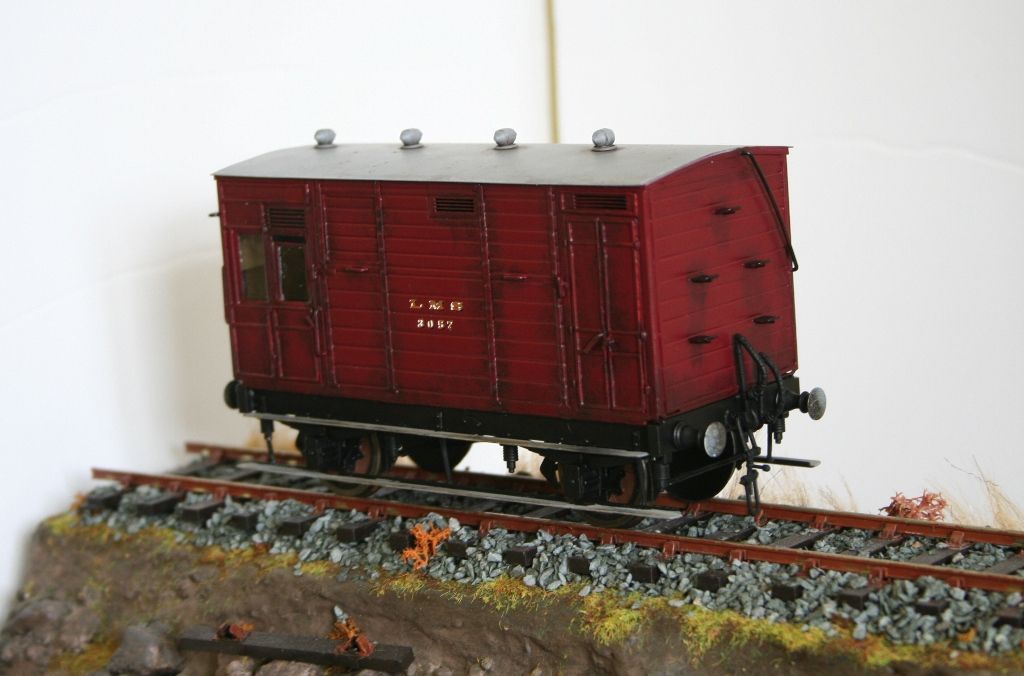
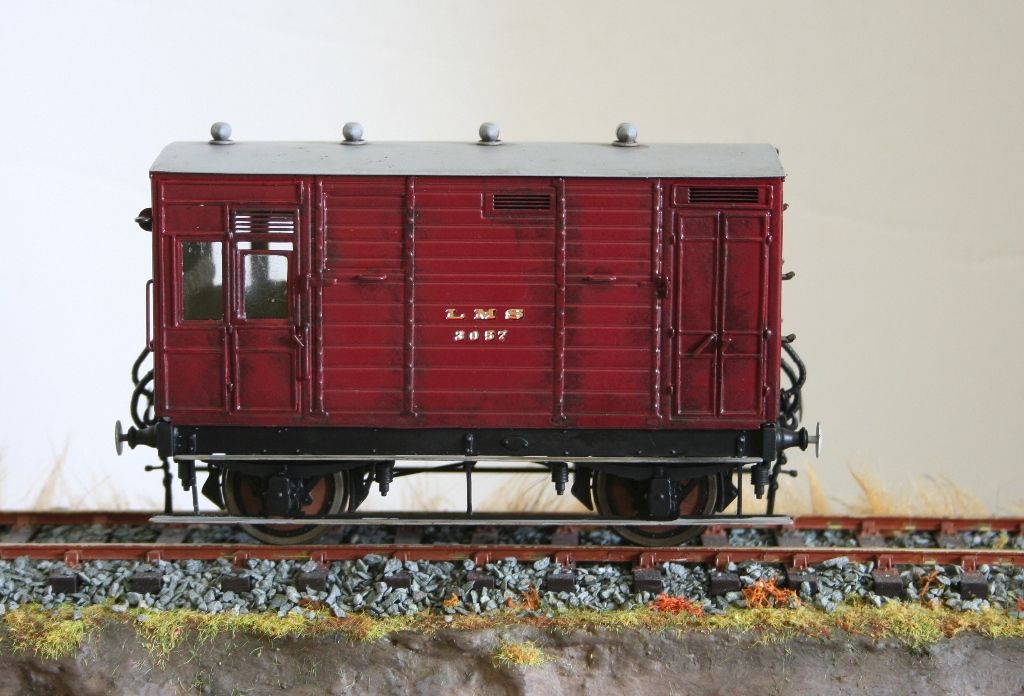
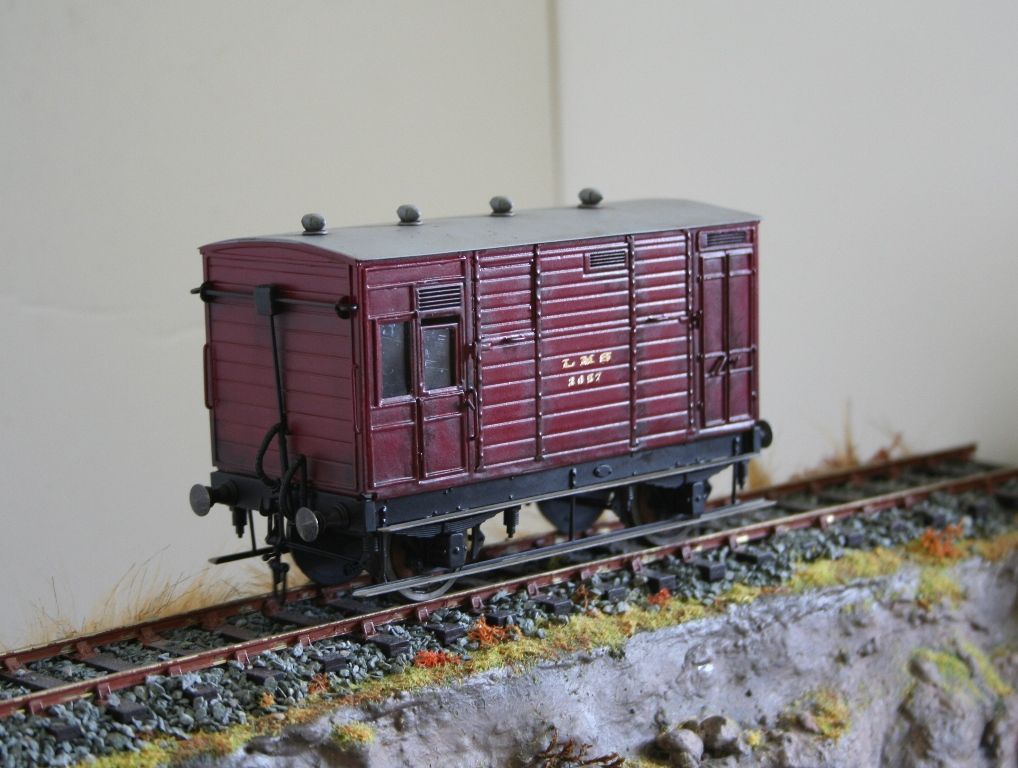
Because this one wouldn't have been in LMS livery for too long in my modelling period I wanted this one to be grubby as opposed to rusty and work worn.


Because this one wouldn't have been in LMS livery for too long in my modelling period I wanted this one to be grubby as opposed to rusty and work worn.
- Robpulham
- LNER A4 4-6-2 'Streak'
- Posts: 1721
- Joined: Thu Mar 27, 2008 9:54 pm
- Location: Lower Wensleydale
- Contact:
Re: 7mm Rolling Stock Builds -MMP LMS Glass Wagon
Another joint effort between me and my good lady is this Salt Wagon. It was built from one of the unlettered Slaters kits and it's another that has sat for quite some time unfinished - I am not sure why really....
I finished of the build and having looked at POW sides for transfers we liked the Mangers colour scheme I also fancied the idea of a very faded and worn look to the wagon. Working towards this I still hadn't ordered the transfers but I painted the wagon green using Railmatch Doncaster green.
Using the air brush and varying the amount that I sprayed on I got a head start on the colour variations that I was looking for.
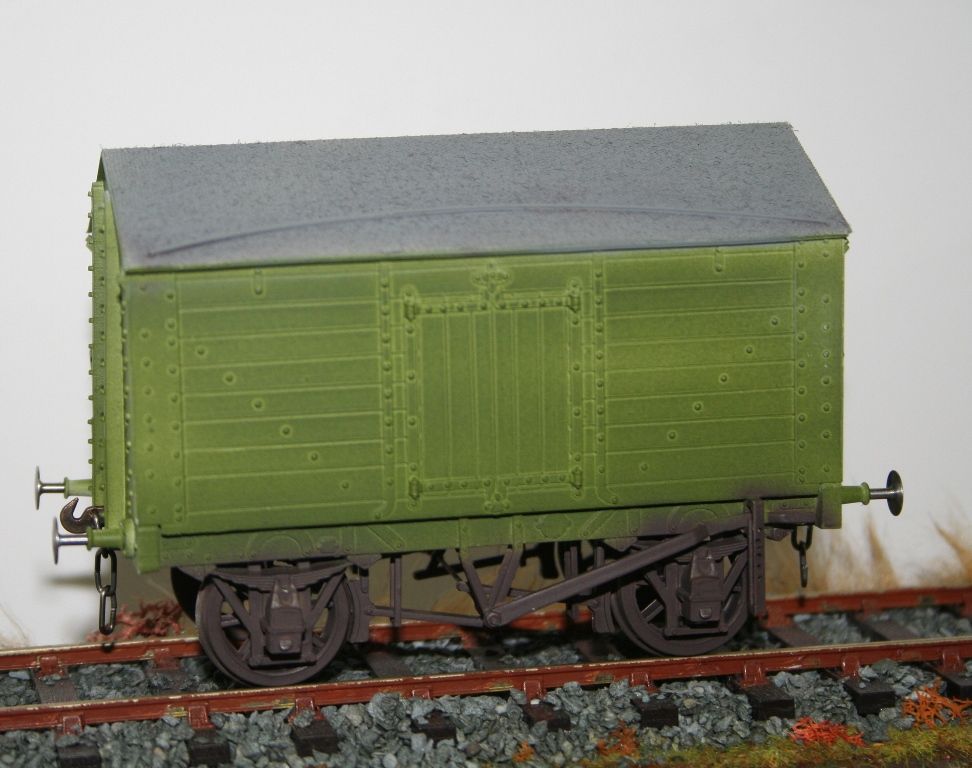
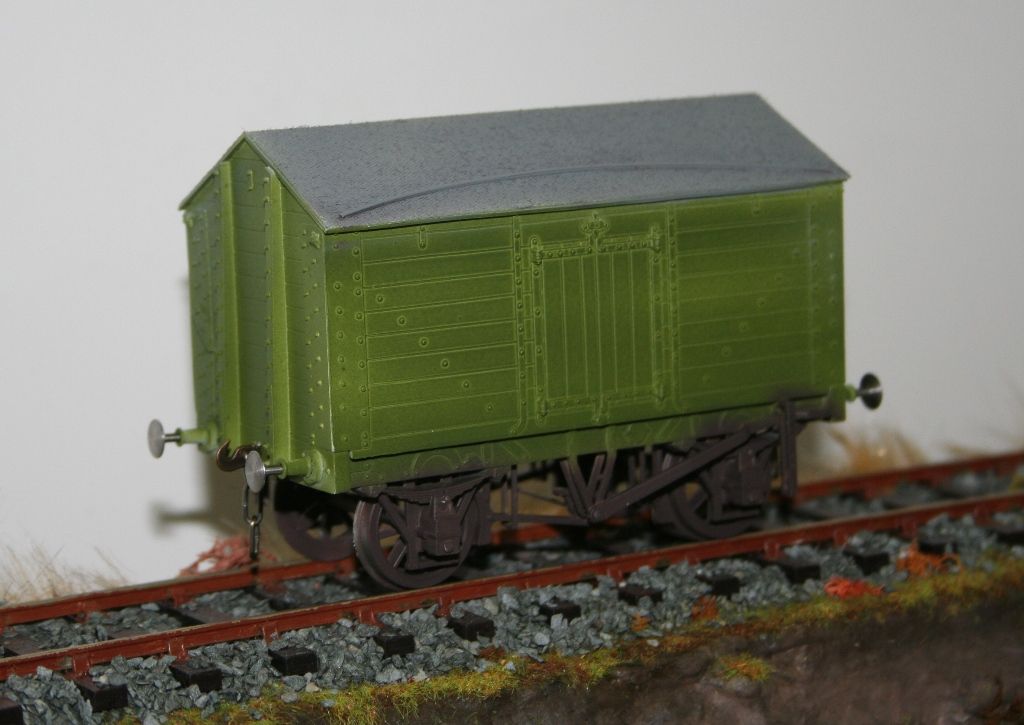
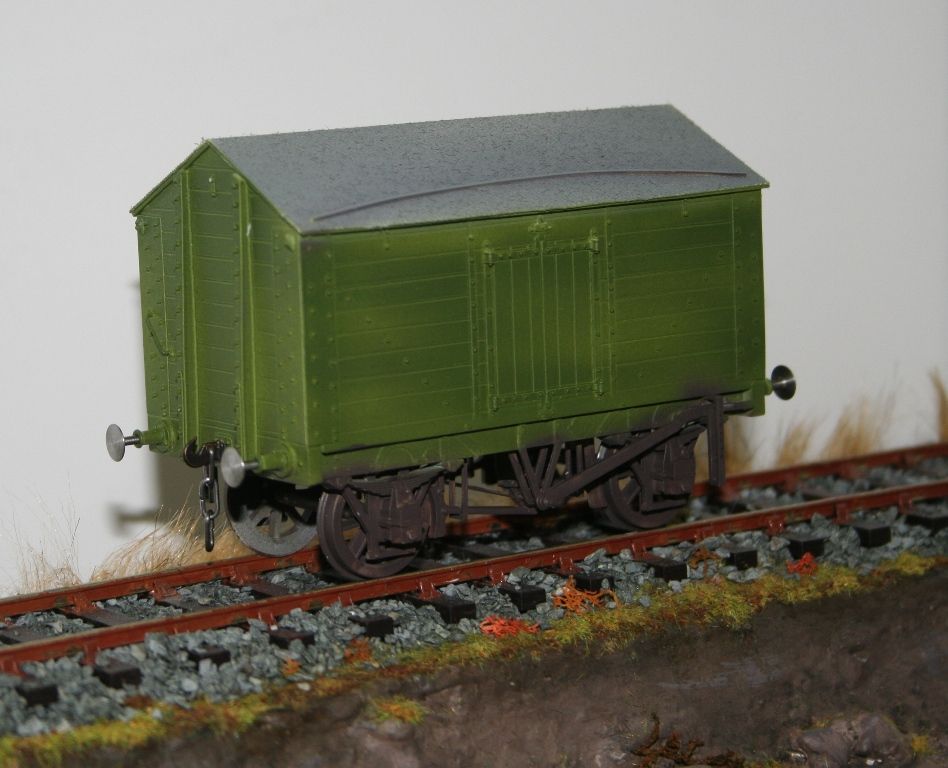
I had also ordered some transfer paper in transparent and white with a view to making my own transfers for boiler bands and the floor cloth wagon. To cut a long story short we decided to have a go at making our own Mangers transfers and after a bit of playing about in Microsoft word with various font Chris came up with these printed onto clear laser paper (I printed a full sheet in case I had problems).
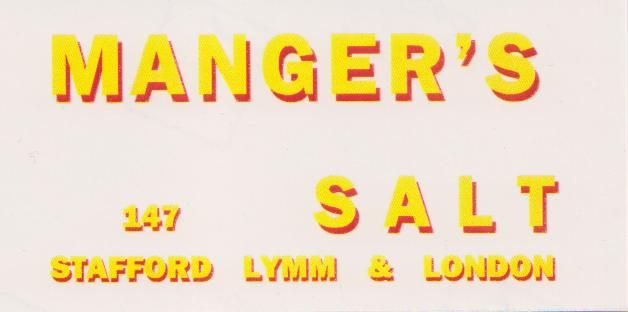
They were a bit of a challenge to get them to lay down over the hinges and straps (I will buy some Microsol for another set). By applying them over the varying shades on the wagon and with them being printed on clear decal film they further "faded" without too much effort. Chris then did some more weathering to the whole wagon ending up with this which is just what I hoped for but wasn't sure that it could be achieved.
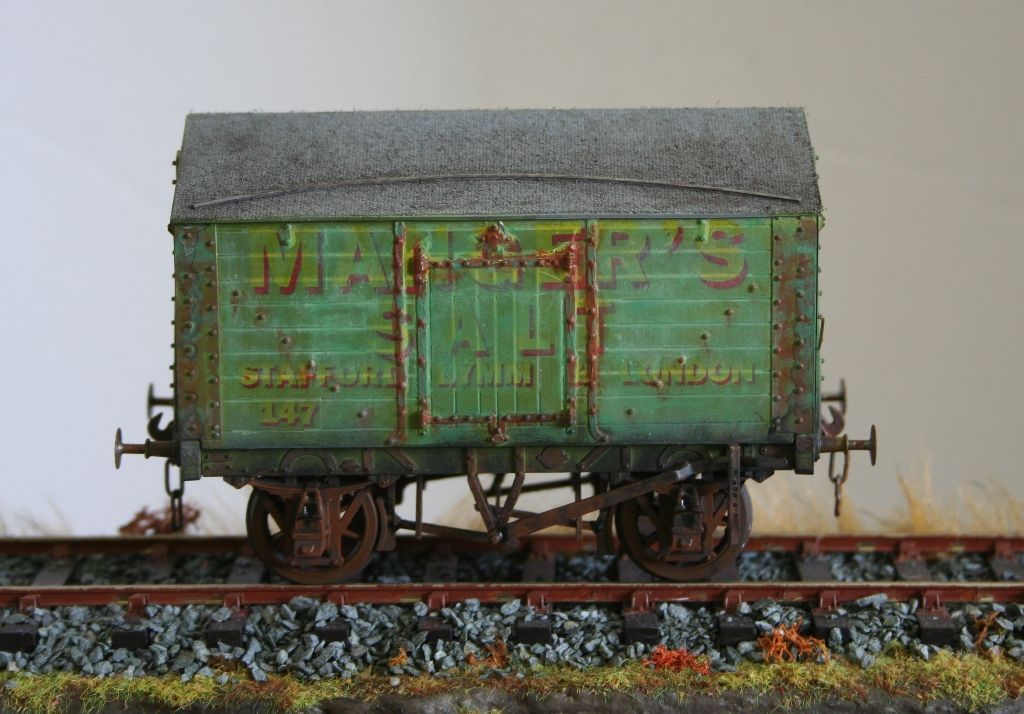
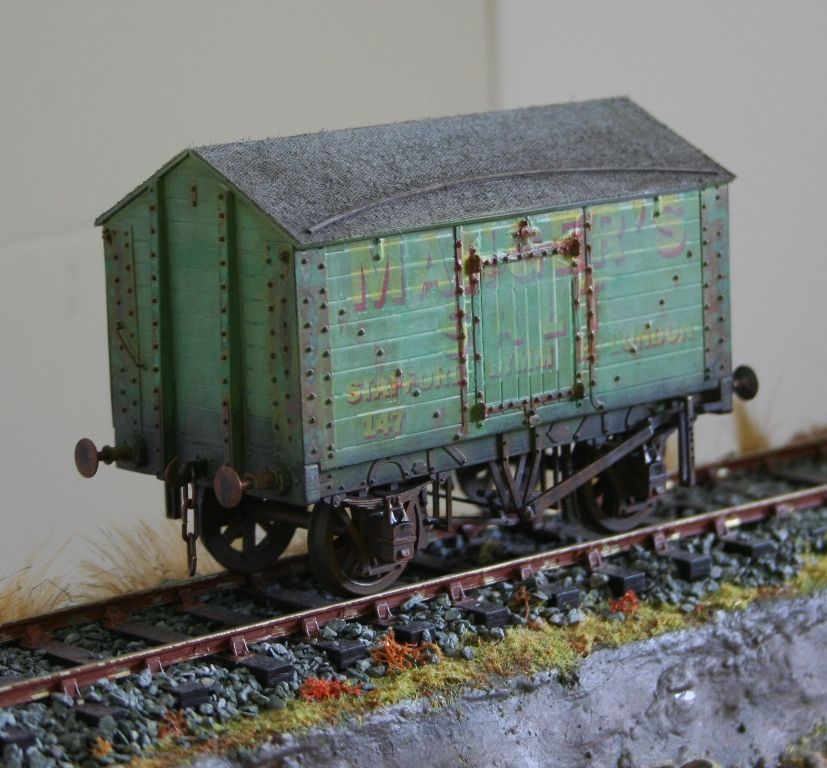
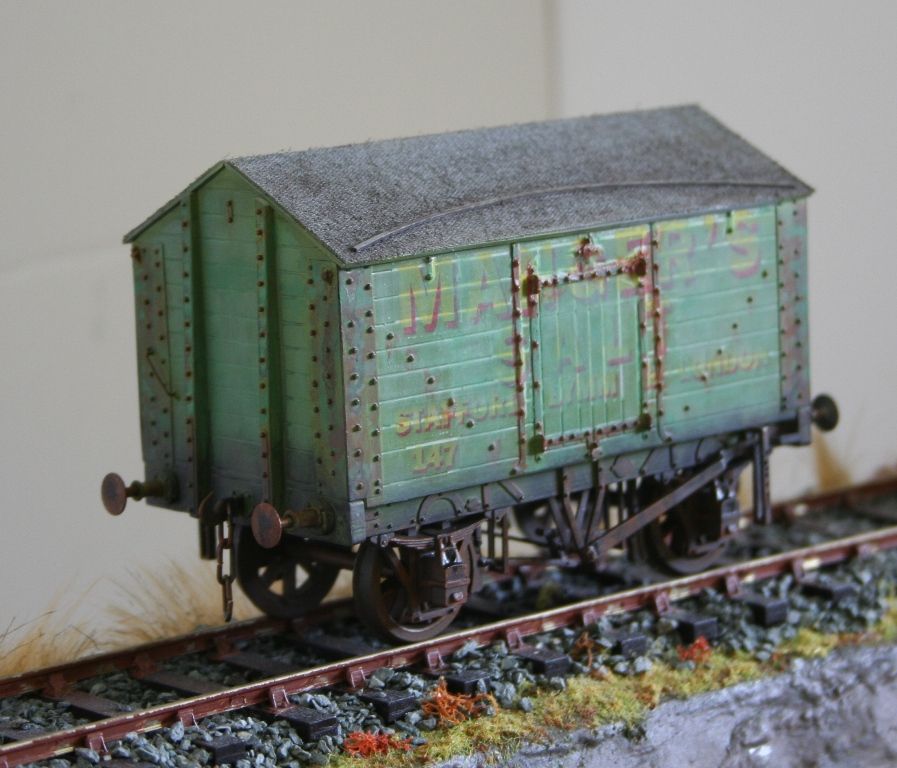
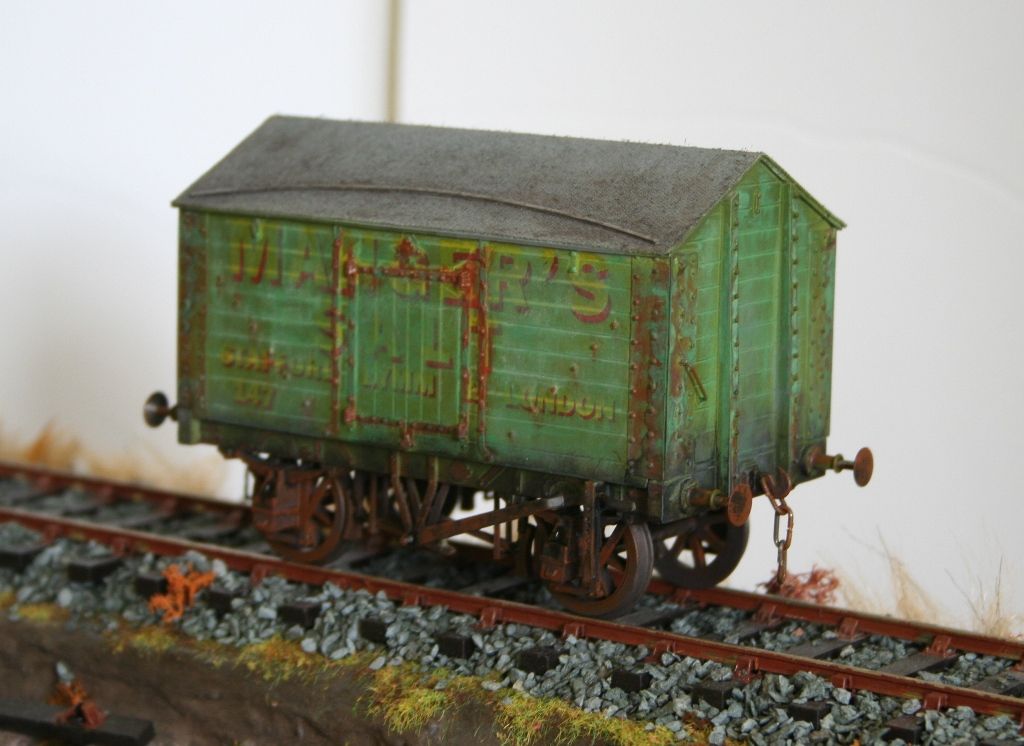
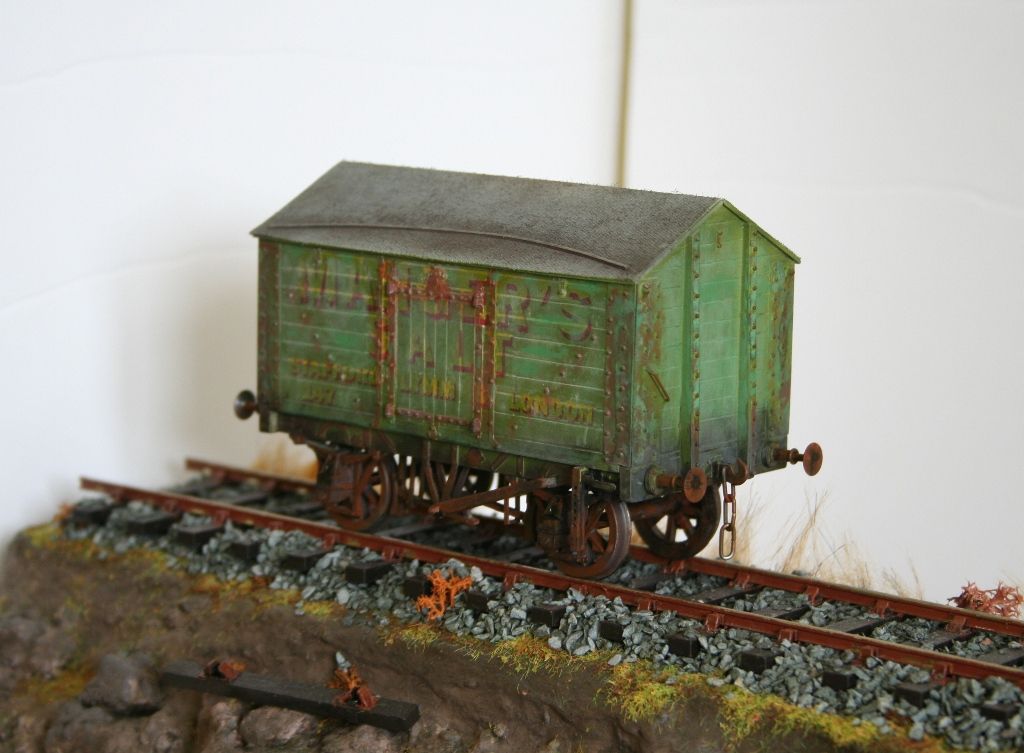
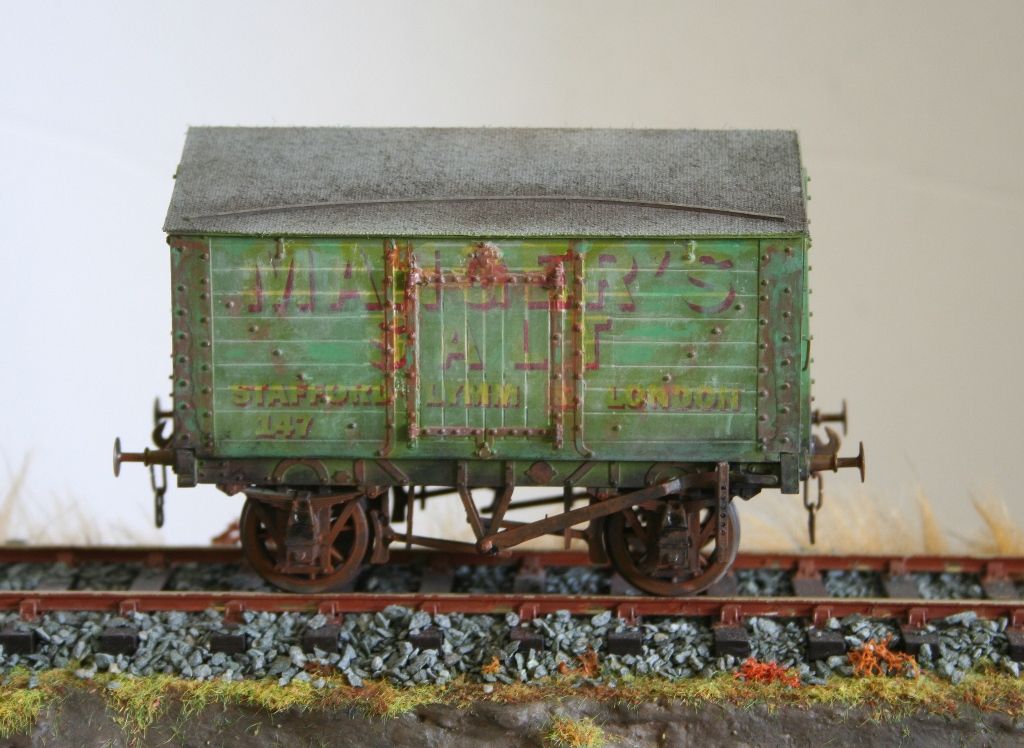
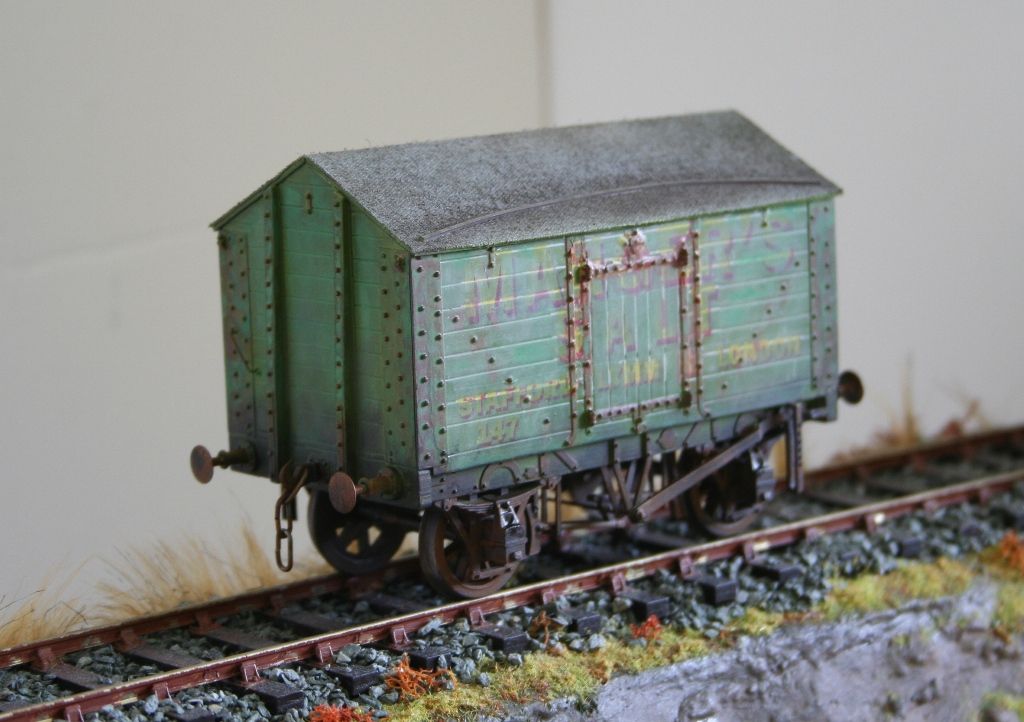
In the end up I only make a muck up of one set of transfers - being a bit heavy handed, so I have 3 spare sets should I happen across any more salt wagon kits.
The roof canvas was done with some blackout curtain liner which make a reasonable representation of canvas.
I finished of the build and having looked at POW sides for transfers we liked the Mangers colour scheme I also fancied the idea of a very faded and worn look to the wagon. Working towards this I still hadn't ordered the transfers but I painted the wagon green using Railmatch Doncaster green.
Using the air brush and varying the amount that I sprayed on I got a head start on the colour variations that I was looking for.


I had also ordered some transfer paper in transparent and white with a view to making my own transfers for boiler bands and the floor cloth wagon. To cut a long story short we decided to have a go at making our own Mangers transfers and after a bit of playing about in Microsoft word with various font Chris came up with these printed onto clear laser paper (I printed a full sheet in case I had problems).

They were a bit of a challenge to get them to lay down over the hinges and straps (I will buy some Microsol for another set). By applying them over the varying shades on the wagon and with them being printed on clear decal film they further "faded" without too much effort. Chris then did some more weathering to the whole wagon ending up with this which is just what I hoped for but wasn't sure that it could be achieved.


In the end up I only make a muck up of one set of transfers - being a bit heavy handed, so I have 3 spare sets should I happen across any more salt wagon kits.
The roof canvas was done with some blackout curtain liner which make a reasonable representation of canvas.
- Robpulham
- LNER A4 4-6-2 'Streak'
- Posts: 1721
- Joined: Thu Mar 27, 2008 9:54 pm
- Location: Lower Wensleydale
- Contact:
Re: 7mm Rolling Stock Builds - Private Owner Salt Wagon
Now for a tale of two Parksides.....
I haven't been well for the last couple of weeks which sadly caused me to miss out on York show but I have managed to do a little bit and finish another couple of lurkers on the bench.
Some may recall this being constructed some time ago it's one of Parkside's latest kits.
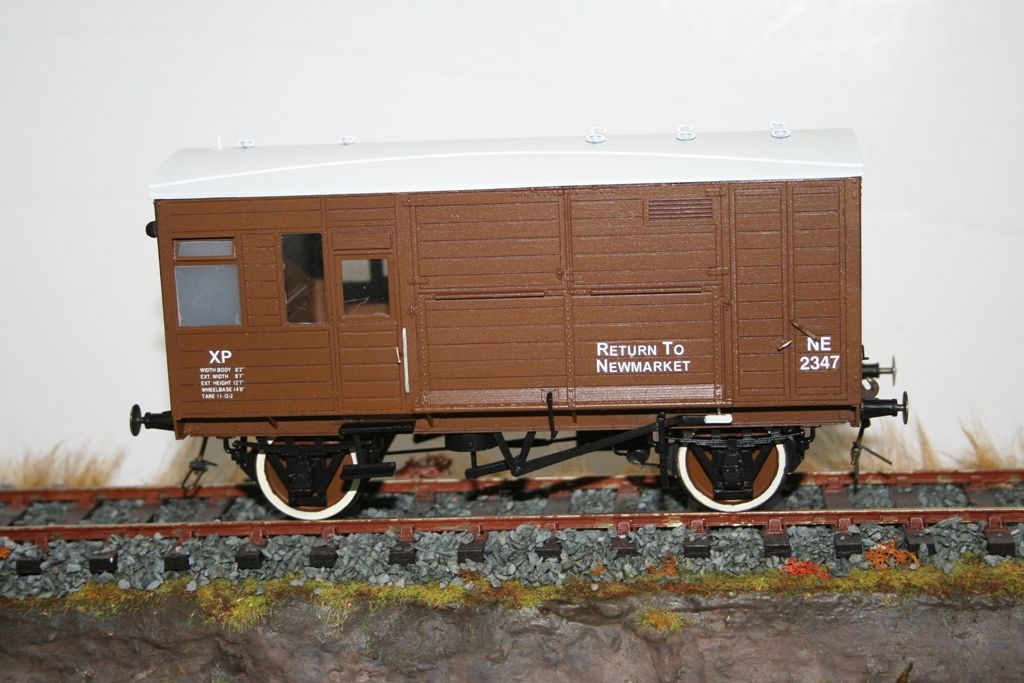
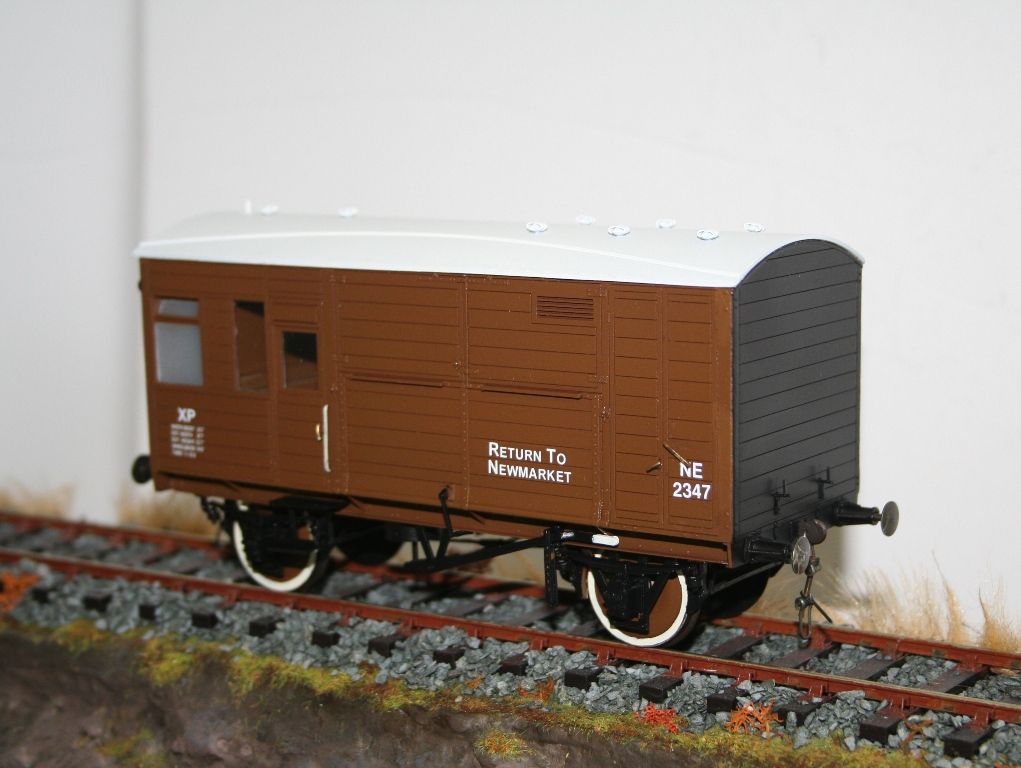
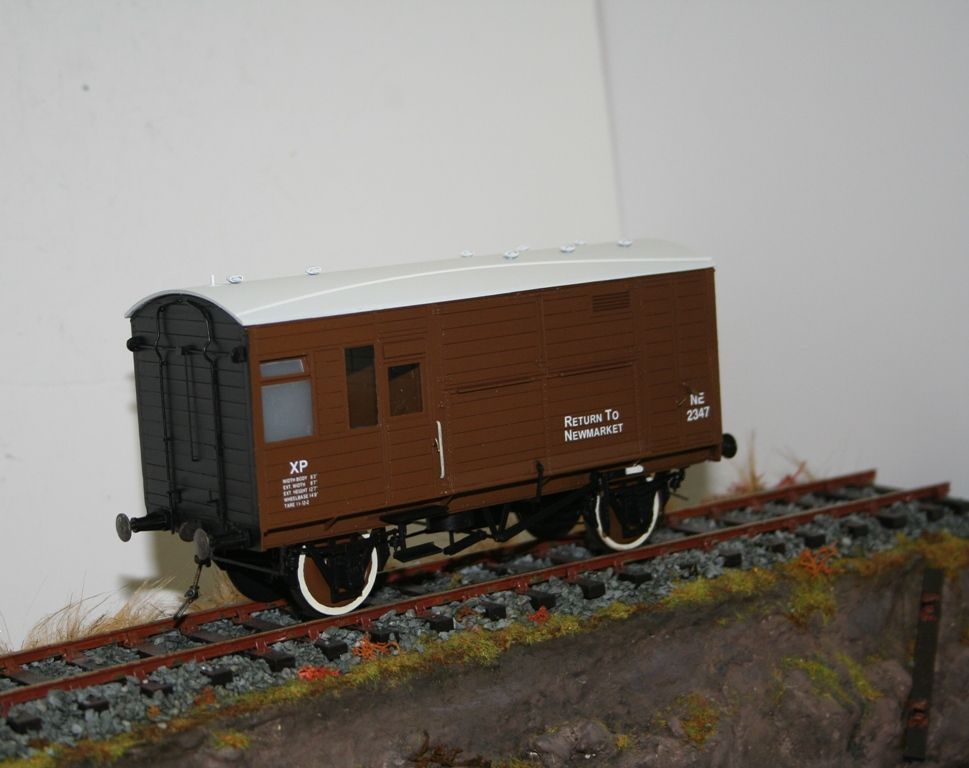
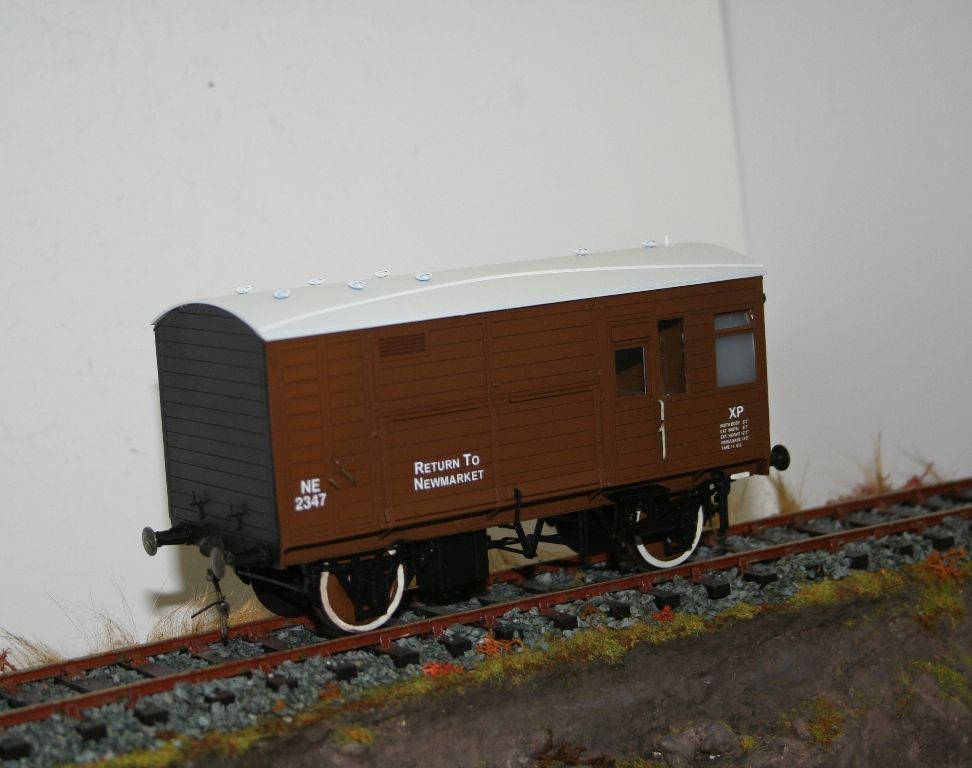
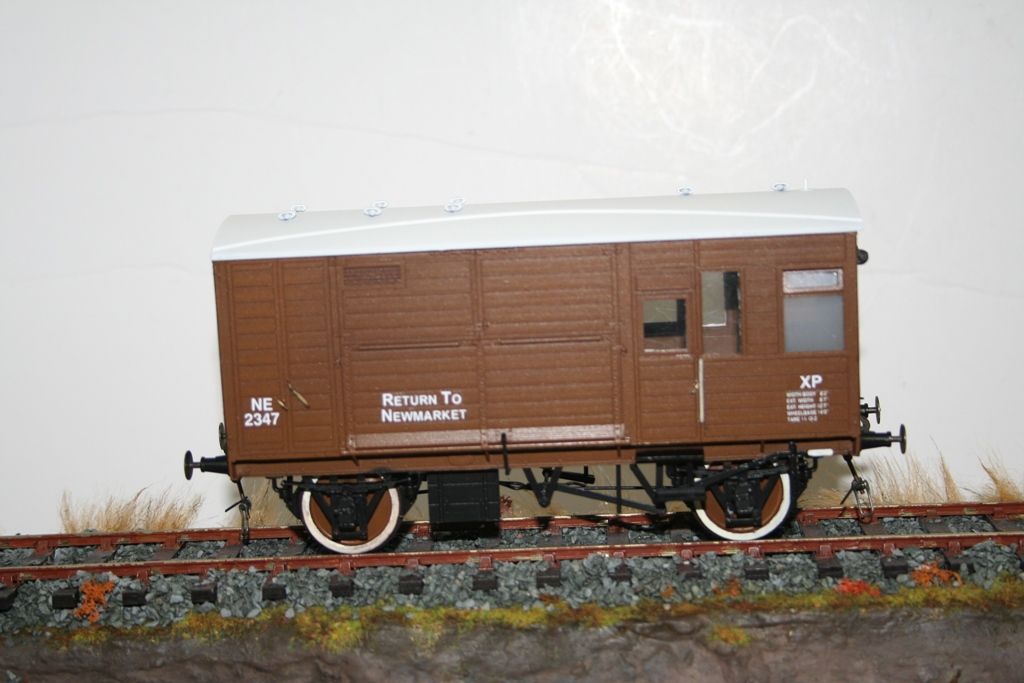
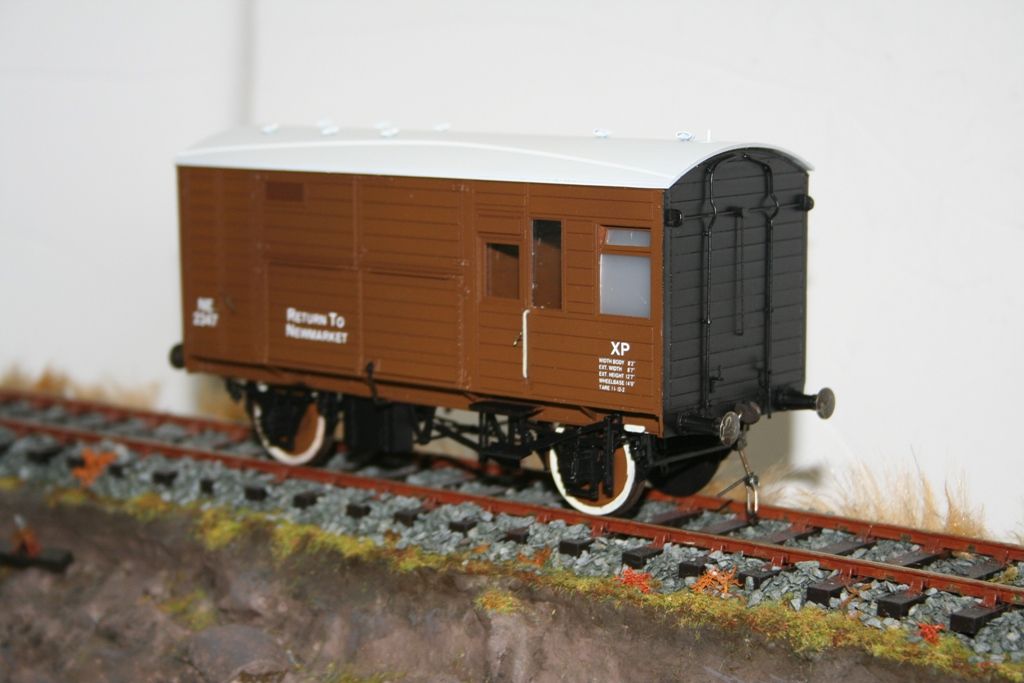
Those that recall it may remember that I modelled the vents in the toilet compartment in the open position which seemed like a great idea at the time. They were the absolute devil to glaze.....
The opaque windows are made from the plastic trays that chinese takeaways come in. I keep them for strage of parts during builds but realised that some of them are obscure enough for the window glazing job.
Thanks also have to go to a gent called Paul Gallon (who posts on RMWeb under the handle of Wordsell Forever) who pointed me in the direction of the Vallejo equivalent of LNER coach brown (Game Colour Flat Earth) as I fine the acrylics so much easier to get on with for spraying and cleaning up. I still need to make up some brass vacuum pies to replace the whitemetal ones supplied then it's off for a light weathering as it would be another newish one in my time frame
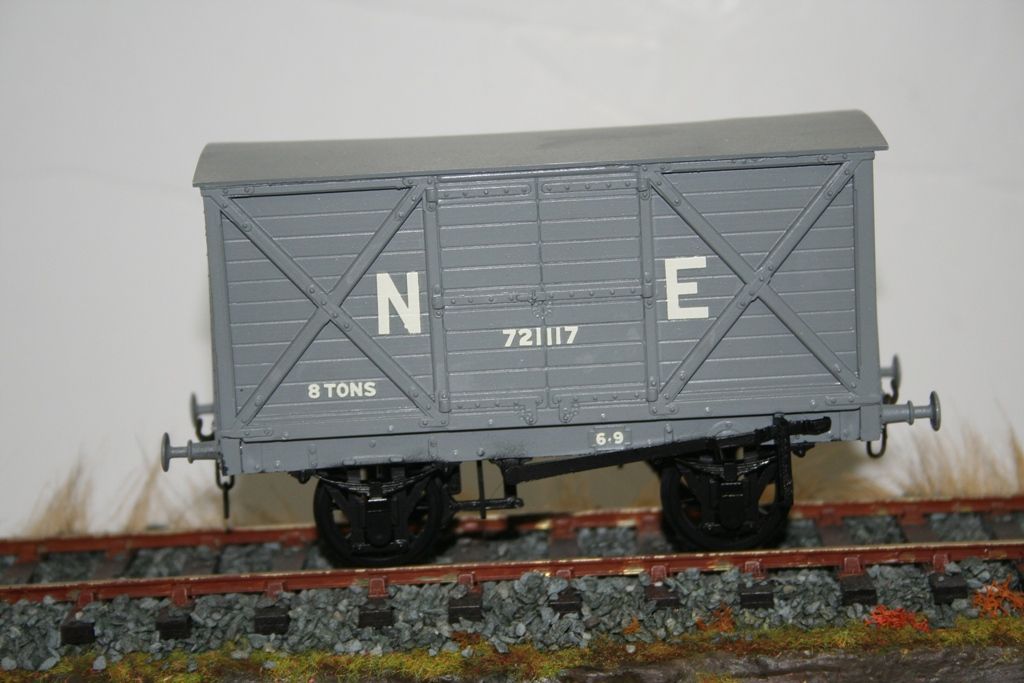
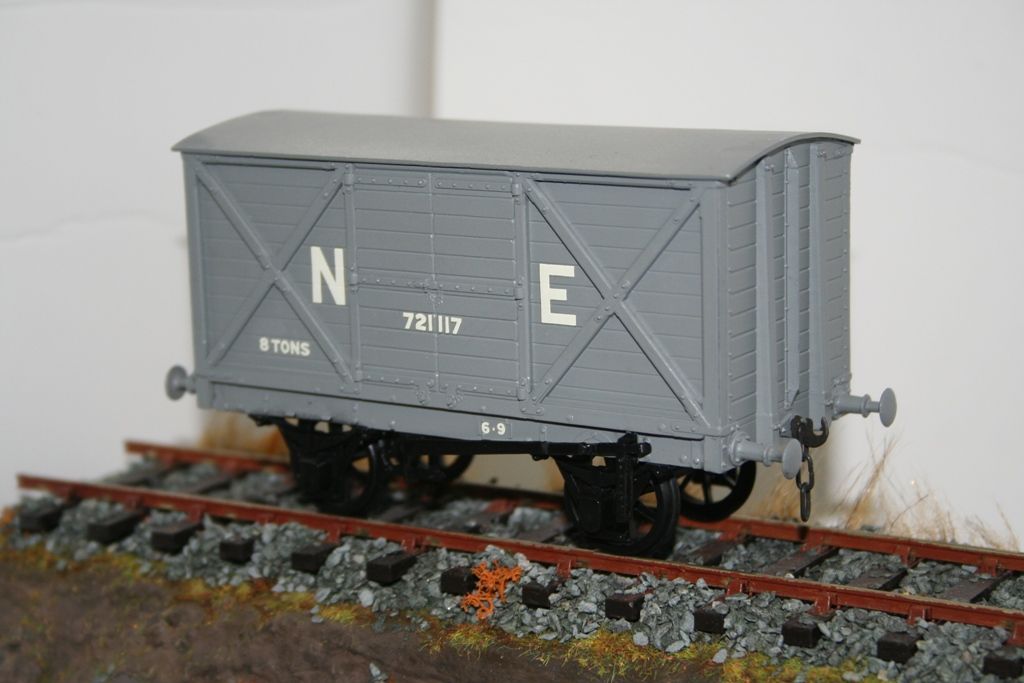
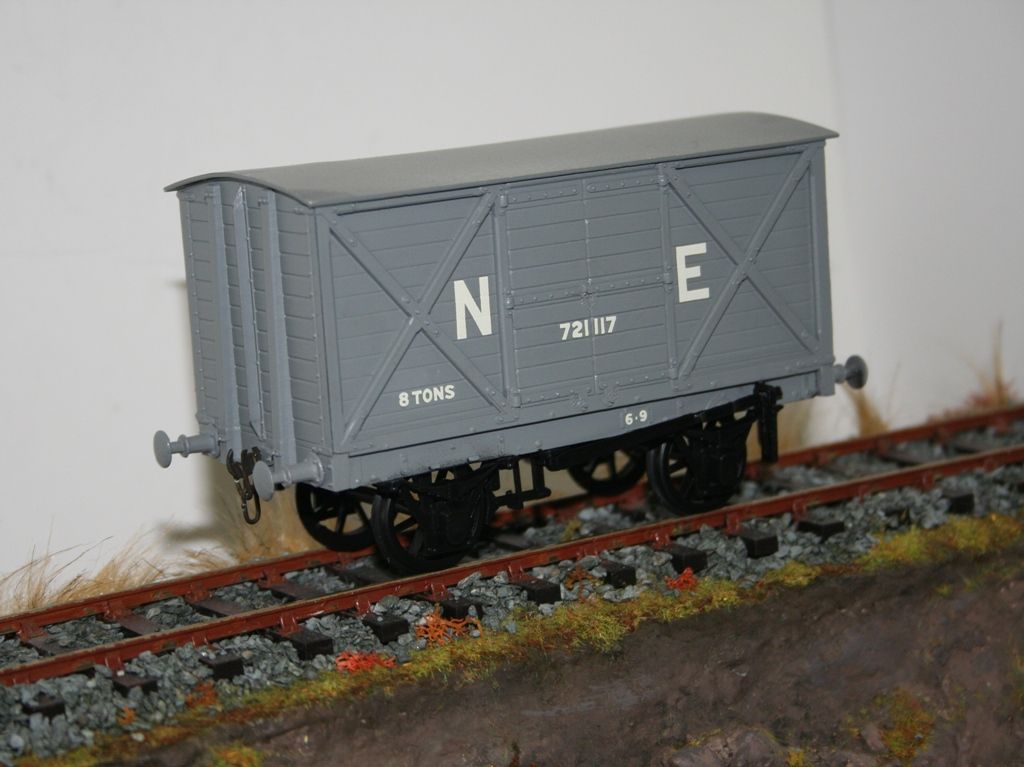
Followed by what could be one of their first kits an NBR 8 ton outside framed van.
I picked this up second hand. It still has solid unsprung buffers and a very plain underframe. Still a nice kit that makes up well enough.
I haven't been well for the last couple of weeks which sadly caused me to miss out on York show but I have managed to do a little bit and finish another couple of lurkers on the bench.
Some may recall this being constructed some time ago it's one of Parkside's latest kits.


Those that recall it may remember that I modelled the vents in the toilet compartment in the open position which seemed like a great idea at the time. They were the absolute devil to glaze.....
The opaque windows are made from the plastic trays that chinese takeaways come in. I keep them for strage of parts during builds but realised that some of them are obscure enough for the window glazing job.
Thanks also have to go to a gent called Paul Gallon (who posts on RMWeb under the handle of Wordsell Forever) who pointed me in the direction of the Vallejo equivalent of LNER coach brown (Game Colour Flat Earth) as I fine the acrylics so much easier to get on with for spraying and cleaning up. I still need to make up some brass vacuum pies to replace the whitemetal ones supplied then it's off for a light weathering as it would be another newish one in my time frame
Followed by what could be one of their first kits an NBR 8 ton outside framed van.
I picked this up second hand. It still has solid unsprung buffers and a very plain underframe. Still a nice kit that makes up well enough.


- Robpulham
- LNER A4 4-6-2 'Streak'
- Posts: 1721
- Joined: Thu Mar 27, 2008 9:54 pm
- Location: Lower Wensleydale
- Contact:
Re: 7mm Rolling Stock Builds - A Tale of Two Parkside's
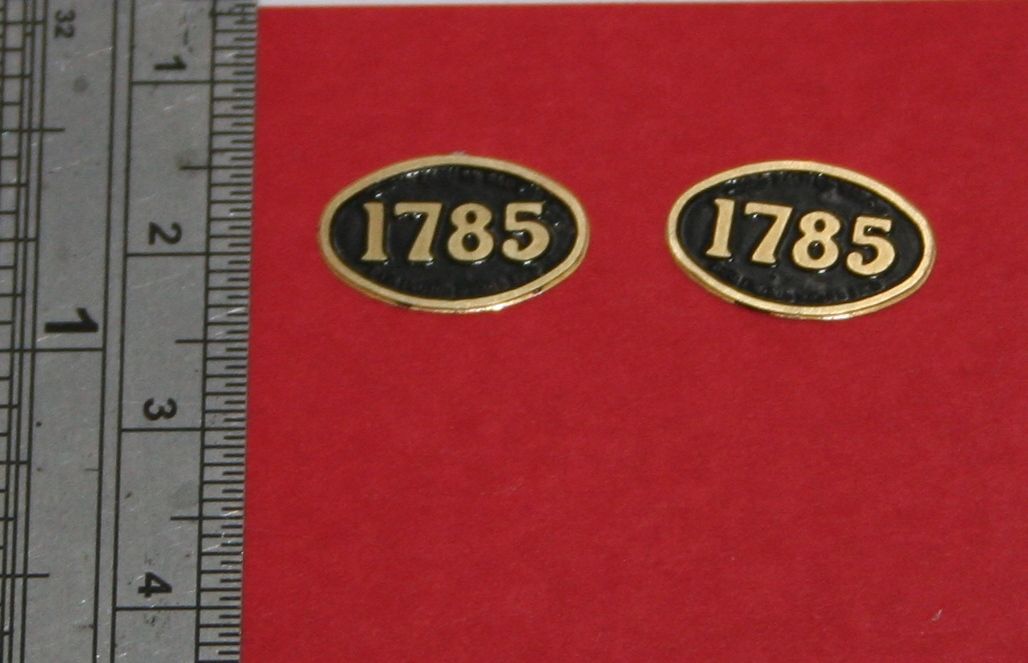
In between building track, painting coach sides, vans and things I have also been messing about painting some etched plates. I have the technique perfected for coloured backing/brass fronts but it's the ones that need black background/white lettering or the reverse where I have been struggling.
Here are a few that I have been playing with.
Then we get onto the more complex ones.....
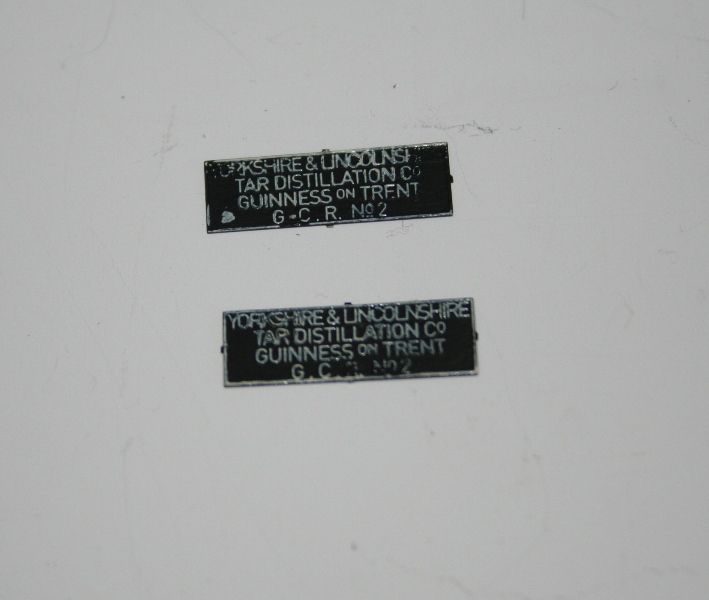
These don't look too bad not perfect but on the side of a weathered wagon they will do nicely. Spot the deliberate mistake here....
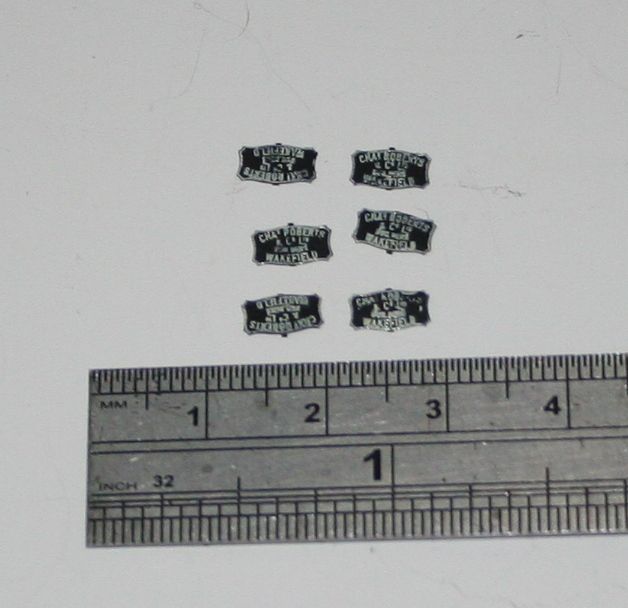
Then we get to really fiddly. Once again magnified to the size that they are they look a bit rough but I think that I am getting there.
In terms of getting them to this point, all the plates were chemically blackened using Carrs brass black - diluted. Then they were all painted with Games Workshop Chaos Black with a brush. After 10 mins drying the ones that were to be brass lettered were then rubbed with a piece of the mounting board type card that etched kits come attached to from the likes of Connoisseur etc. I find that this rubs off the paint from the letters while polishing the brass at the same time and it doesn't create grit that will stick to the still soft paint on the backing. They were then varnished with satin varnish after a couple of hours.
The ones that needed to have white lettering were treated in the same way up to this point with the exception that they were left on the fret initially. Next I got a small piece of plasticard and painted the shiny side with cream Humbrol enamel and left it for 15 minutes.
At this point I pressed the plates face down onto the painted plasticard and the paint was transferred to the face of the lettering. The smaller Charles Roberts plates were done in a similar fashion but I tried sticking blue tack to the backs of them in an effort to hold them better but it wasn't a success
In conclusion they are not perfect but they will do on a weathered wagon sole bar at normal viewing distances. I think that I am on the right lines I just need to perfect the technique.
Here are a few that I have been playing with.

Then we get onto the more complex ones.....
These don't look too bad not perfect but on the side of a weathered wagon they will do nicely. Spot the deliberate mistake here....

Then we get to really fiddly. Once again magnified to the size that they are they look a bit rough but I think that I am getting there.

In terms of getting them to this point, all the plates were chemically blackened using Carrs brass black - diluted. Then they were all painted with Games Workshop Chaos Black with a brush. After 10 mins drying the ones that were to be brass lettered were then rubbed with a piece of the mounting board type card that etched kits come attached to from the likes of Connoisseur etc. I find that this rubs off the paint from the letters while polishing the brass at the same time and it doesn't create grit that will stick to the still soft paint on the backing. They were then varnished with satin varnish after a couple of hours.
The ones that needed to have white lettering were treated in the same way up to this point with the exception that they were left on the fret initially. Next I got a small piece of plasticard and painted the shiny side with cream Humbrol enamel and left it for 15 minutes.
At this point I pressed the plates face down onto the painted plasticard and the paint was transferred to the face of the lettering. The smaller Charles Roberts plates were done in a similar fashion but I tried sticking blue tack to the backs of them in an effort to hold them better but it wasn't a success
In conclusion they are not perfect but they will do on a weathered wagon sole bar at normal viewing distances. I think that I am on the right lines I just need to perfect the technique.
- 52D
- LNER A4 4-6-2 'Streak'
- Posts: 3968
- Joined: Sun Jun 03, 2007 3:50 pm
- Location: Reallocated now between the Lickey and GWR
- Contact:
Re: 7mm Rolling Stock Builds - A Tale of Two Parkside's
You don't Drink Guiness at Gunness. lol. A bit of a coincidence I have worked at the Wharf and the old Roberts place at Horbury. Its also amazing the amount of glass companies I attend to none are rail connected all the glass comes in specially adapted lorries.
Hi interested in the area served by 52D. also researching colliery wagonways from same area.
- Robpulham
- LNER A4 4-6-2 'Streak'
- Posts: 1721
- Joined: Thu Mar 27, 2008 9:54 pm
- Location: Lower Wensleydale
- Contact:
Re: 7mm Rolling Stock Builds - A Tale of Two Parkside's
To be fair Steve at Narrow planet who supplied the plates has offered replacements FOC once it was pointed out that it was wrong - I supplied transfers to work from.
I live about 3 miles from Horbury and I used to deliver to Charles Roberts but at the time I think that they were only building road tankers. All the rail stuff was done by Bombardier who were next door. I haven't been down for a while but I believe that they are all gone now.
I live about 3 miles from Horbury and I used to deliver to Charles Roberts but at the time I think that they were only building road tankers. All the rail stuff was done by Bombardier who were next door. I haven't been down for a while but I believe that they are all gone now.
- Robpulham
- LNER A4 4-6-2 'Streak'
- Posts: 1721
- Joined: Thu Mar 27, 2008 9:54 pm
- Location: Lower Wensleydale
- Contact:
Re: 7mm Rolling Stock Builds - A Tale of Two Parkside's
I have been a bit quiet on the build posting front because I have been building a Dragon models L&Y 30 ton bogie van and I decided to do an article about it for the gazette so I thought that it wouldn't really be fair to post progress. i will put up some photos of it when it's finished.
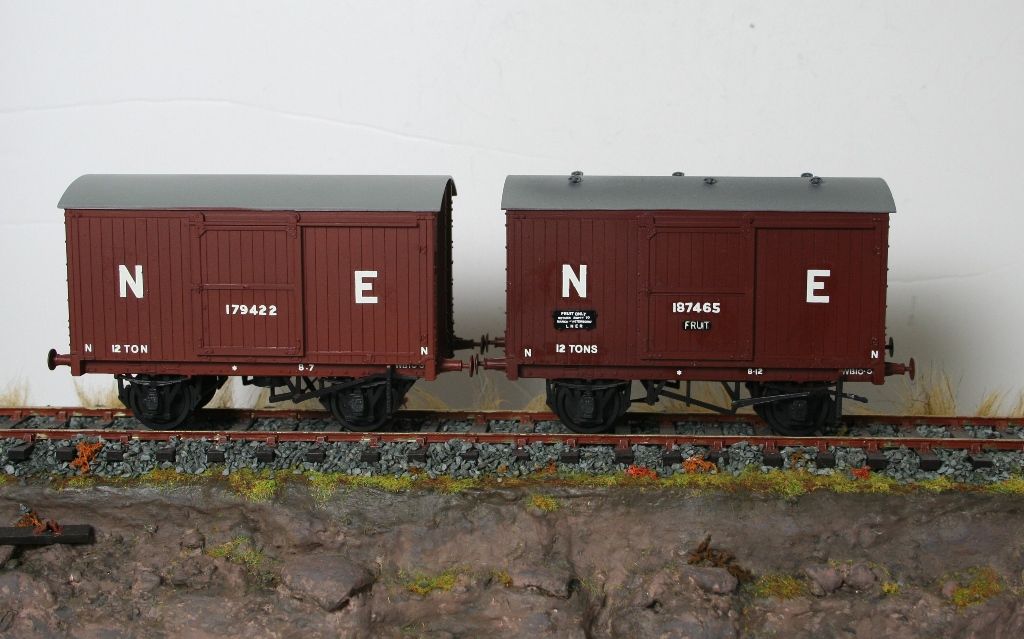
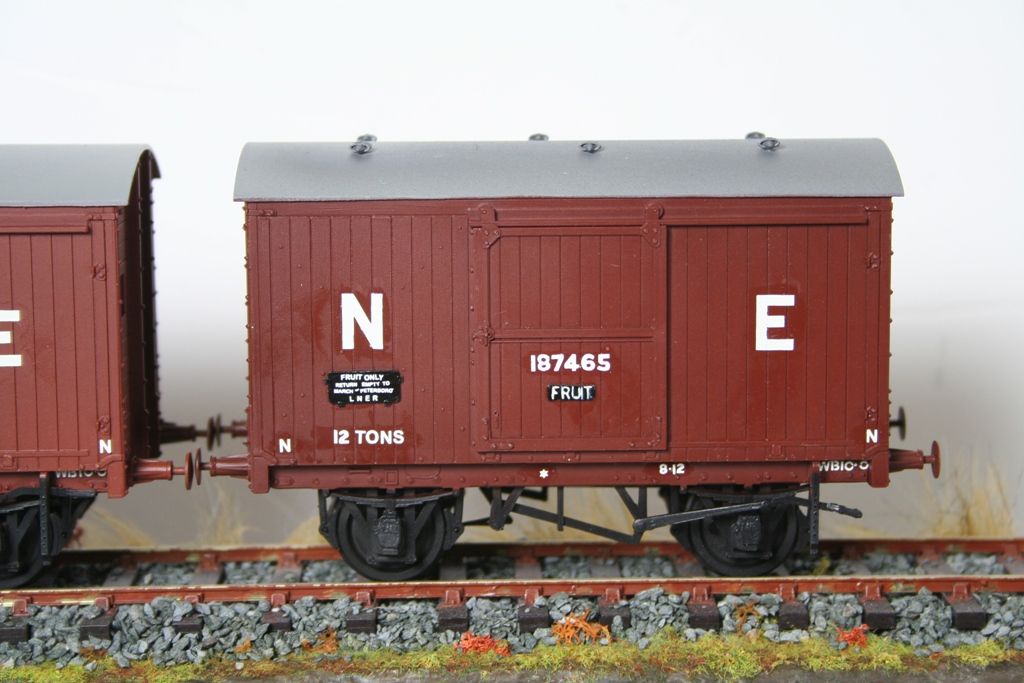
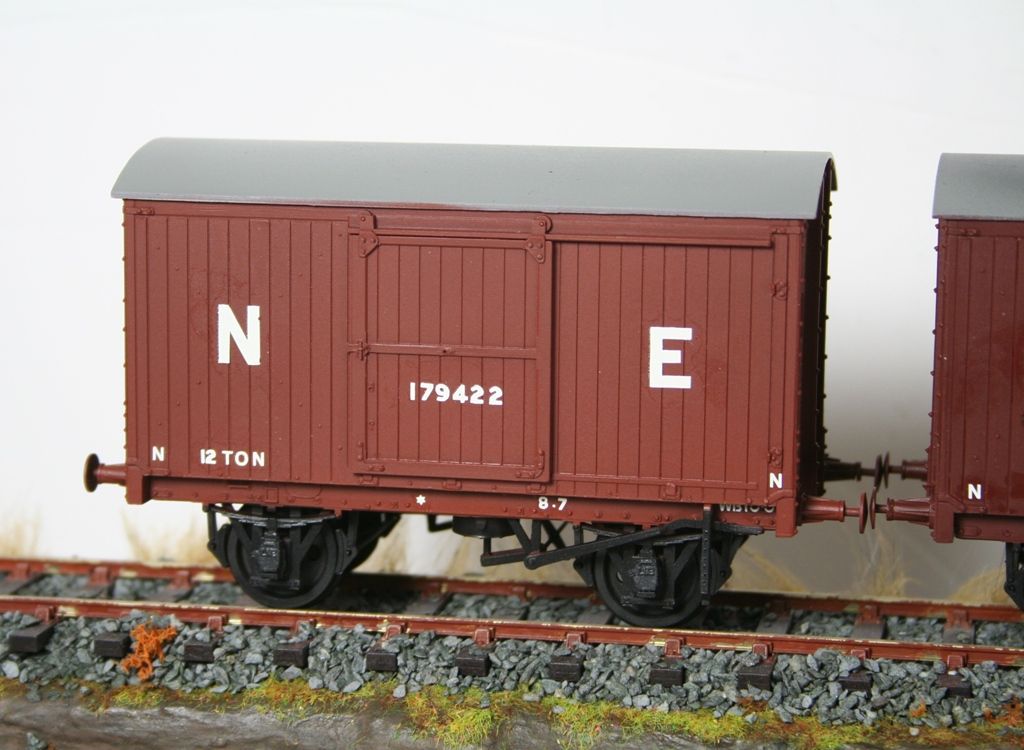
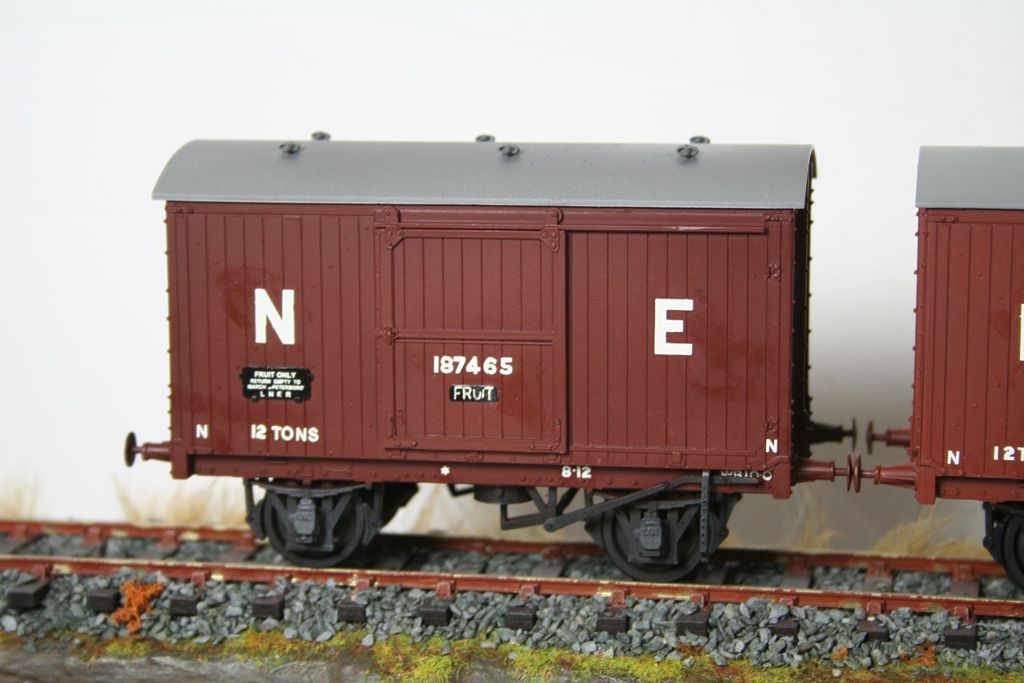
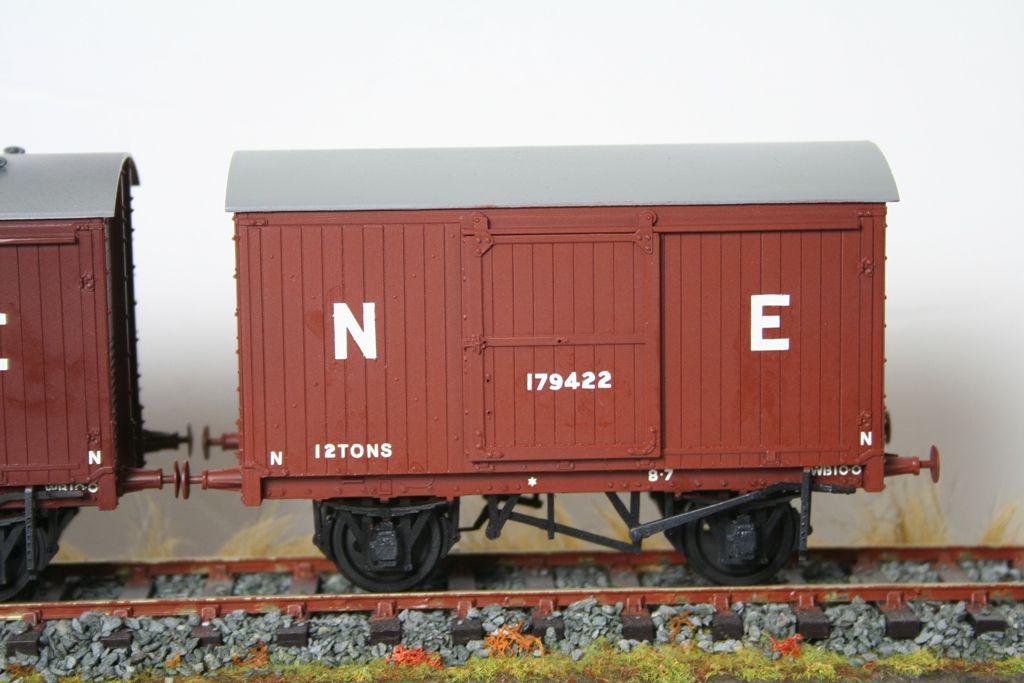
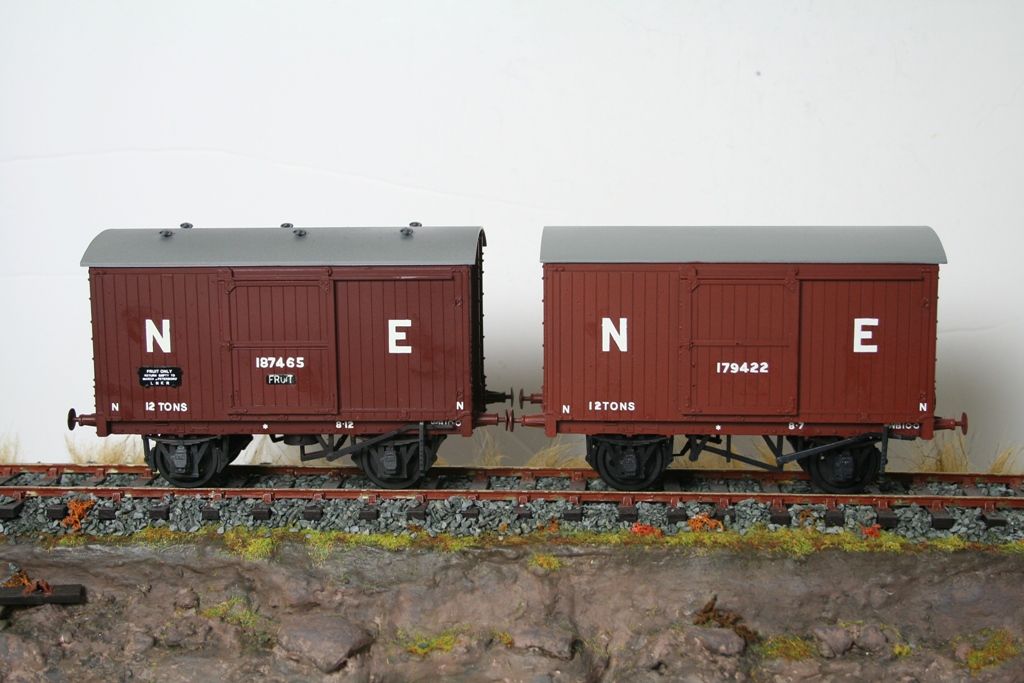
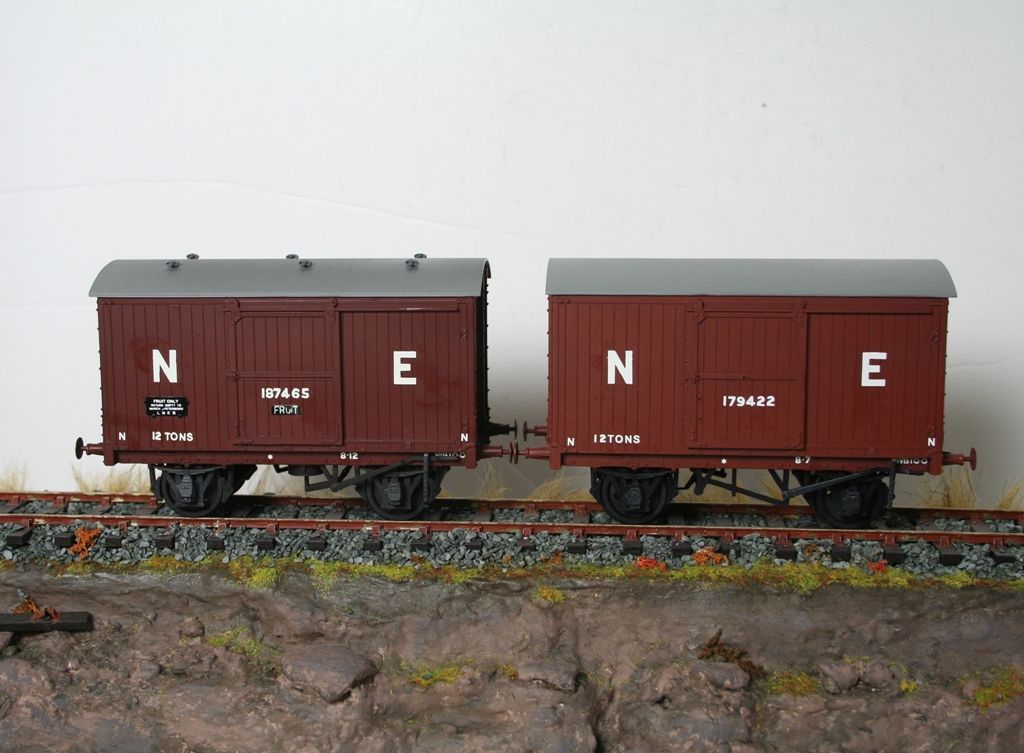
In between I have been doing a bit more on a pair of Parkside LNER 12 ton vans. I used these initially to experiment with springing before commencing the build of the scale 7 wagons for Love Lane. I have also used them to experiment with Bauxite colours. One of them has been done with Railmatch enamel over a dark red Vallejo primer and the other is Vallejo Dark Fleshtone as recommended as a substitute by a friend (I do find the acrylics so much easier to spray and clean up). What I have found recently is that although the Vallejo Game colours spray well when thinned with de-ionised water they spray even better when thinned with Tamiya Acrylic thinners. This one is thinned with de-ionised water. Both have come out very much on the red end of the spectrum due to the dark red primer. Further experimentation will take place using different coloured primers to see what I prefer.
Still to add are the couplings, hoses, door handles and weathering.


