not using it, an update will followblackout60800 wrote:I was thinking about this one BB: http://www.pdkmodels.co.uk/
Mercator II, the couplings in the packet look a bit fragile
My W1 build
Moderators: 52D, Tom F, Rlangham, Atlantic 3279, Blink Bonny, Saint Johnstoun, richard
-
Mercator II
- GCR O4 2-8-0 'ROD'
- Posts: 536
- Joined: Mon Nov 03, 2008 12:14 pm
- Location: Lincolnshire
Re: My W1 build
oOo
Brian
Garage Hobbit!!
Modelling in 00 on my heritage line, very GCR inspired
Brian
Garage Hobbit!!
Modelling in 00 on my heritage line, very GCR inspired
-
S.A.C. Martin
Re: My W1 build
That Jukebox, is stunning, may I say. However there is an alternative - flangeless cartazzi wheels ala Hornby. Yes, it's a pain and not accurate, but it will run. I personally think it's as good an alternative as any.
RE the W1 - I'm spoiled, most definitely, by having one of Graeme's conversions sitting on the corner of my layout, but having poured over the William Brown "Hush Hush" book, there's no way the SE Finecast kit is as good a depiction of the W1 as Graeme's technique. It's all in the height and proportions of the running plate, which Graeme's conversion of an A4 nails, and the SE Finecast kit doesn't.
Having said that, Mick of this parish built a W1 from that kit, and the results are absolutely stunning and very convincing.
-
Mercator II
- GCR O4 2-8-0 'ROD'
- Posts: 536
- Joined: Mon Nov 03, 2008 12:14 pm
- Location: Lincolnshire
Re: My W1 build
back on topic,
Been in the works today, and a short update
all the flashing has been removed
the holes for handrail knobs drilled along with those for the whistle & safety valves
on the chassis the rear trailing wheels and frame removed & the chassis cut as per instructions. the new rear pony fitted and the supplied wheels too, although these will be replaced with red ones when I have them
the rear frames have been cut off the resin cartarzi ready for fitting to the body, will just need to make a representation of the bottom of the fire box
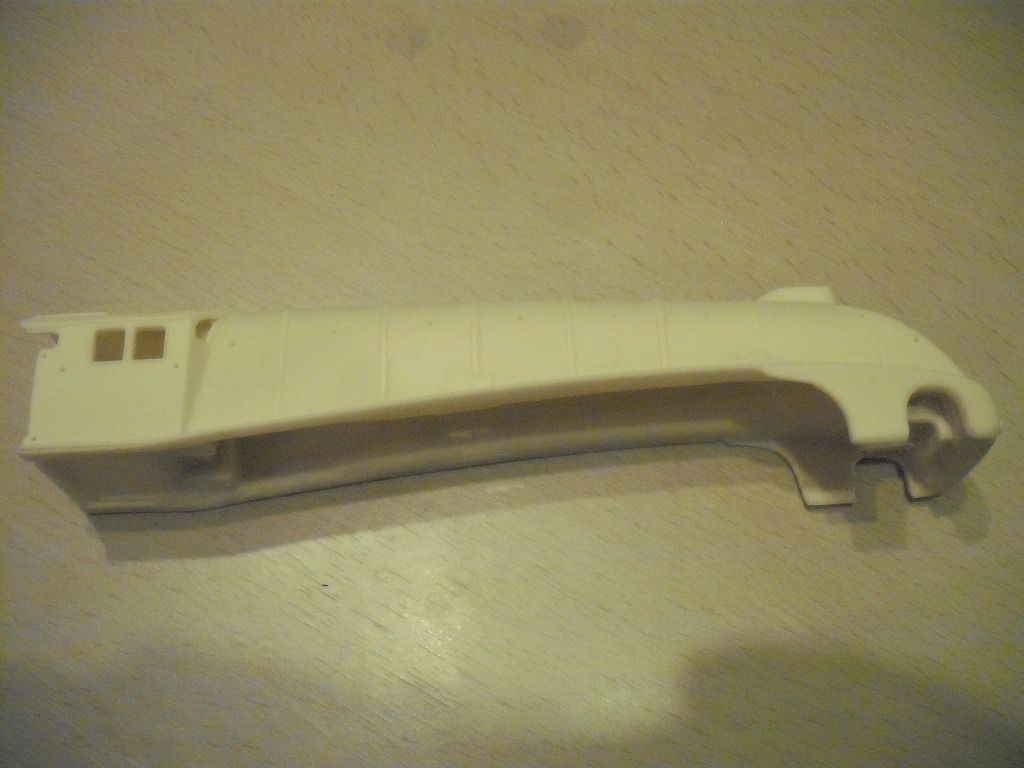
the valances were marked up and I spent 3 hours cutting & filing to shape
now to tidy up before swmbo comes home n sees the mess!!
a few pics
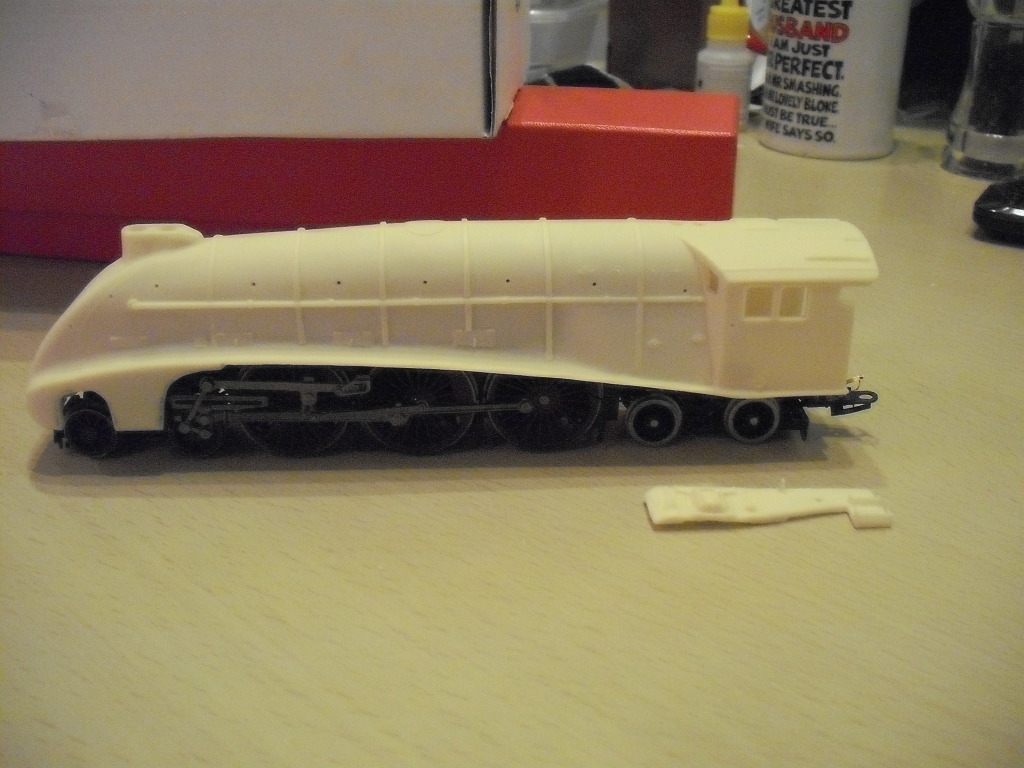

thanks for looking, back to it tomorrow
Brian
Been in the works today, and a short update
all the flashing has been removed
the holes for handrail knobs drilled along with those for the whistle & safety valves
on the chassis the rear trailing wheels and frame removed & the chassis cut as per instructions. the new rear pony fitted and the supplied wheels too, although these will be replaced with red ones when I have them
the rear frames have been cut off the resin cartarzi ready for fitting to the body, will just need to make a representation of the bottom of the fire box
the valances were marked up and I spent 3 hours cutting & filing to shape
now to tidy up before swmbo comes home n sees the mess!!
a few pics
thanks for looking, back to it tomorrow
Brian
oOo
Brian
Garage Hobbit!!
Modelling in 00 on my heritage line, very GCR inspired
Brian
Garage Hobbit!!
Modelling in 00 on my heritage line, very GCR inspired
Re: My W1 build
Can you post some pictures of how the rear truck is fitted to the chassis please. Coming on well.
-
2002EarlMarischal

- LNER A3 4-6-2
- Posts: 1402
- Joined: Thu Jul 09, 2009 11:18 pm
- Location: Burbage
Re: My W1 build
Very interesting - please keep the pics coming!
Re: My W1 build
Hi Brian,
I watch with great interest your quest to build the W1. It’s certainly looking good. I ‘m also interested in the various comments about your project and indeed the challenges it faces. Mostly because I have decided after a 25 year absence of building kits to build my own P2 in its original form.
My colleague from the BRMA has a P2 and it had considerable difficulties on many parts of our clubs layout (corners) but with our planned work this should cease to be an issue.
What tool did you use to cut away so well the valances? I understand the resin is quite thick in places. It’s a very neat job mate.
Keep up the good work, us dummies are watching intently.
Regards
Steve
-
Mercator II
- GCR O4 2-8-0 'ROD'
- Posts: 536
- Joined: Mon Nov 03, 2008 12:14 pm
- Location: Lincolnshire
Re: My W1 build
Steve05 wrote:Hi Brian,
I watch with great interest your quest to build the W1. It’s certainly looking good. I ‘m also interested in the various comments about your project and indeed the challenges it faces. Mostly because I have decided after a 25 year absence of building kits to build my own P2 in its original form.
My colleague from the BRMA has a P2 and it had considerable difficulties on many parts of our clubs layout (corners) but with our planned work this should cease to be an issue.
What tool did you use to cut away so well the valances? I understand the resin is quite thick in places. It’s a very neat job mate.
Keep up the good work, us dummies are watching intently.
Regards
Steve
Thanks Steve
I have a nice kit of various scalpels and blades my wife gave me, one has a fine saw tooth, cut roughly to shape then using my needle files to fettle, took a good few hours
oOo
Brian
Garage Hobbit!!
Modelling in 00 on my heritage line, very GCR inspired
Brian
Garage Hobbit!!
Modelling in 00 on my heritage line, very GCR inspired
-
S.A.C. Martin
Re: My W1 build
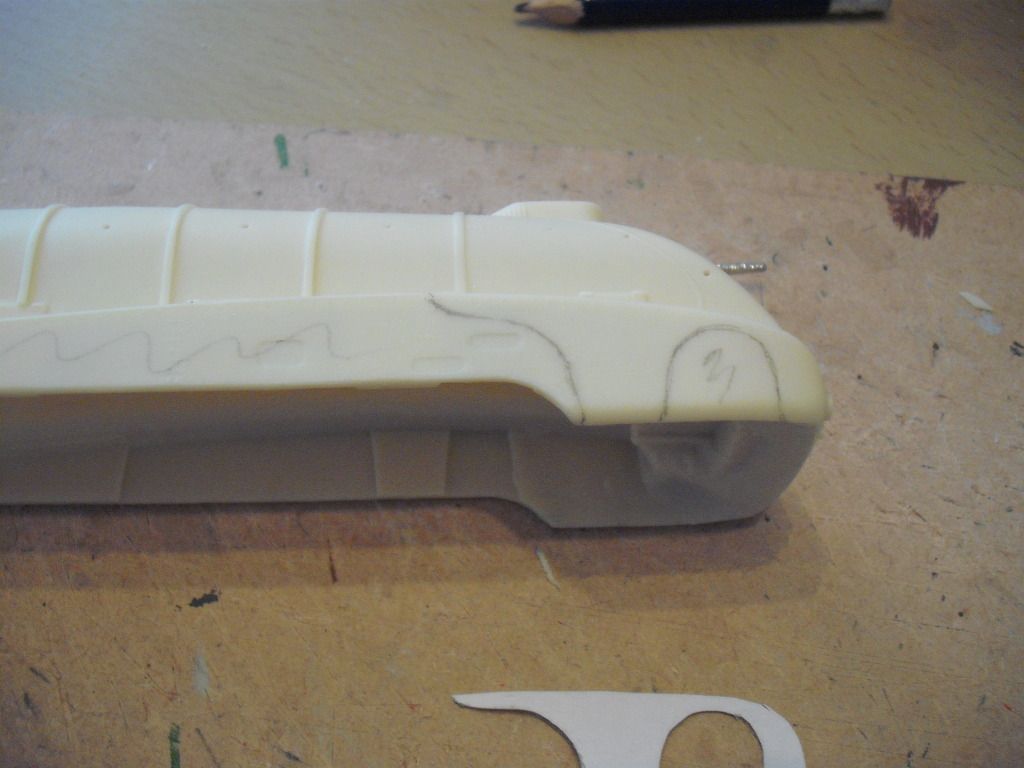
Mercator - a nice bit of slicing there. Looking through my photographs of the W1 I've collected over the years for modelling purposes, I'm a bit flummoxed by the shape of the running plate behind the cylinder you have done. I can't find a precedent for that "lip" there - is this a modification of a particular period you are modelling the W1?
-
Mercator II
- GCR O4 2-8-0 'ROD'
- Posts: 536
- Joined: Mon Nov 03, 2008 12:14 pm
- Location: Lincolnshire
Re: My W1 build
S.A.C. Martin wrote:Mercator - a nice bit of slicing there. Looking through my photographs of the W1 I've collected over the years for modelling purposes, I'm a bit flummoxed by the shape of the running plate behind the cylinder you have done. I can't find a precedent for that "lip" there - is this a modification of a particular period you are modelling the W1?
http://www.rmweb.co.uk/forum/viewtopic. ... 873#104873
used this as a reference, think its from a member here too
Brian
oOo
Brian
Garage Hobbit!!
Modelling in 00 on my heritage line, very GCR inspired
Brian
Garage Hobbit!!
Modelling in 00 on my heritage line, very GCR inspired
-
S.A.C. Martin
Re: My W1 build
Hi Brian,
I fear that's one of the pitfalls of the SE Finecast kit (despite Mick's obvious and excellent modelling) - the W1 never looked like that when the valances were removed.

Railbrit.co.uk
This shot from Railbrit shows what I mean. It also shows the difference in the running plate of the SE Finecast kit, which is too low and not deep enough in its curve. The W1 rebuild followed the A4 outline almost perfectly except in length of the running plate, which is why I remain convinced if you want a model of the rebuilt W1, Graeme's A4 conversion is the best way to get that complex set of curves at the front end accurately.
I fear that's one of the pitfalls of the SE Finecast kit (despite Mick's obvious and excellent modelling) - the W1 never looked like that when the valances were removed.
Railbrit.co.uk
This shot from Railbrit shows what I mean. It also shows the difference in the running plate of the SE Finecast kit, which is too low and not deep enough in its curve. The W1 rebuild followed the A4 outline almost perfectly except in length of the running plate, which is why I remain convinced if you want a model of the rebuilt W1, Graeme's A4 conversion is the best way to get that complex set of curves at the front end accurately.
-
Mercator II
- GCR O4 2-8-0 'ROD'
- Posts: 536
- Joined: Mon Nov 03, 2008 12:14 pm
- Location: Lincolnshire
Re: My W1 build
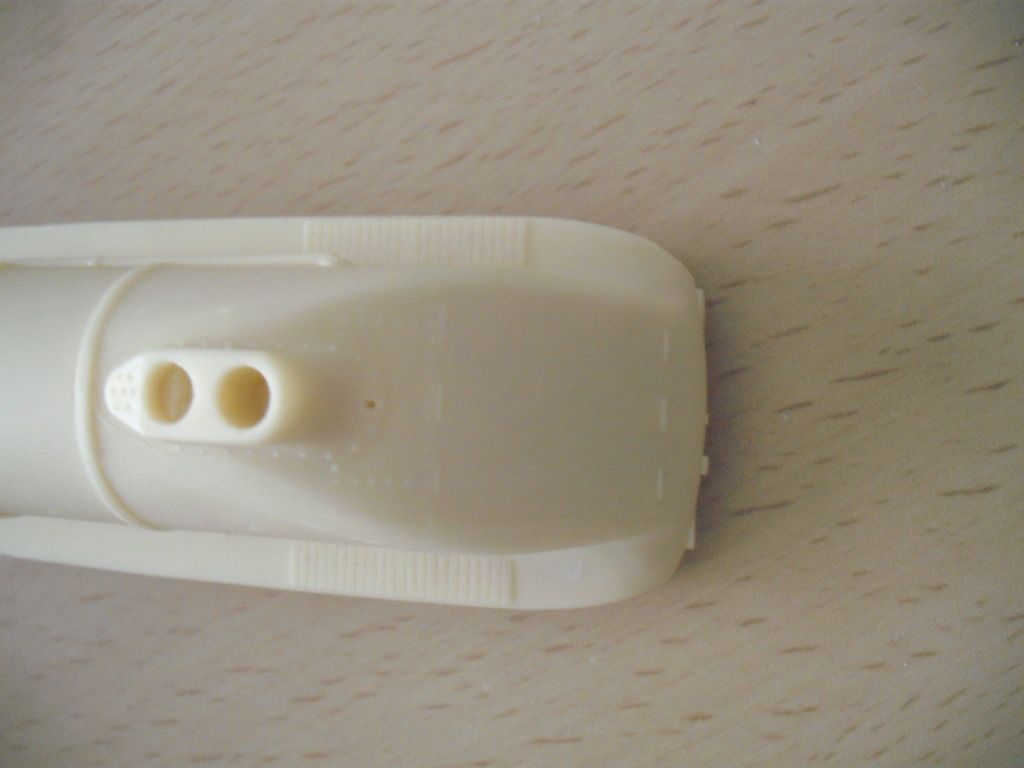
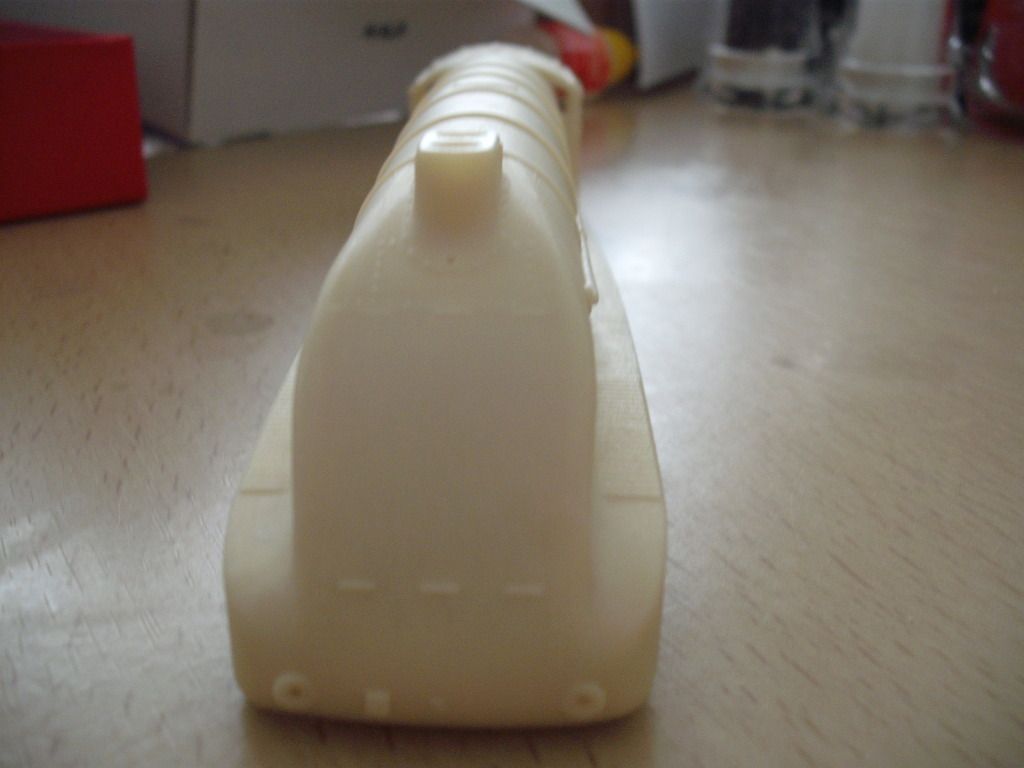
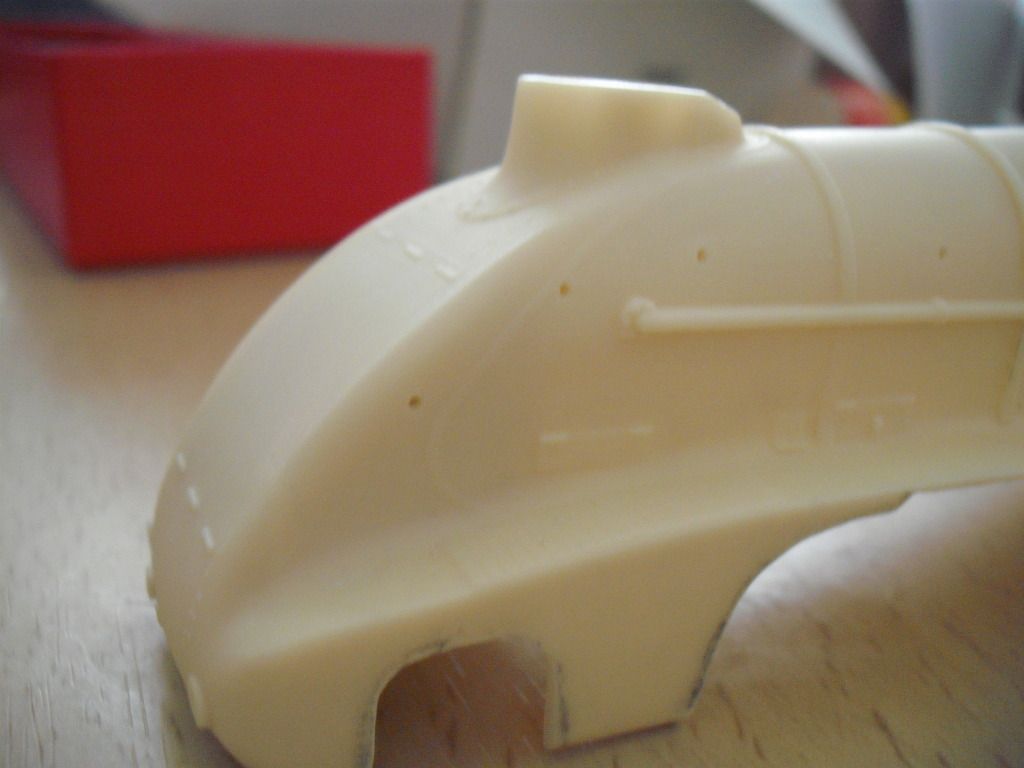
not sure what you wanted so I hope these will doblackout60800 wrote:Could you also show us some pics of the nose please?
left h/s, r/h/s, nose on & above

Brian
oOo
Brian
Garage Hobbit!!
Modelling in 00 on my heritage line, very GCR inspired
Brian
Garage Hobbit!!
Modelling in 00 on my heritage line, very GCR inspired
-
Mercator II
- GCR O4 2-8-0 'ROD'
- Posts: 536
- Joined: Mon Nov 03, 2008 12:14 pm
- Location: Lincolnshire
Re: My W1 build
mick b wrote:Can you post some pictures of how the rear truck is fitted to the chassis please. Coming on well.
glady
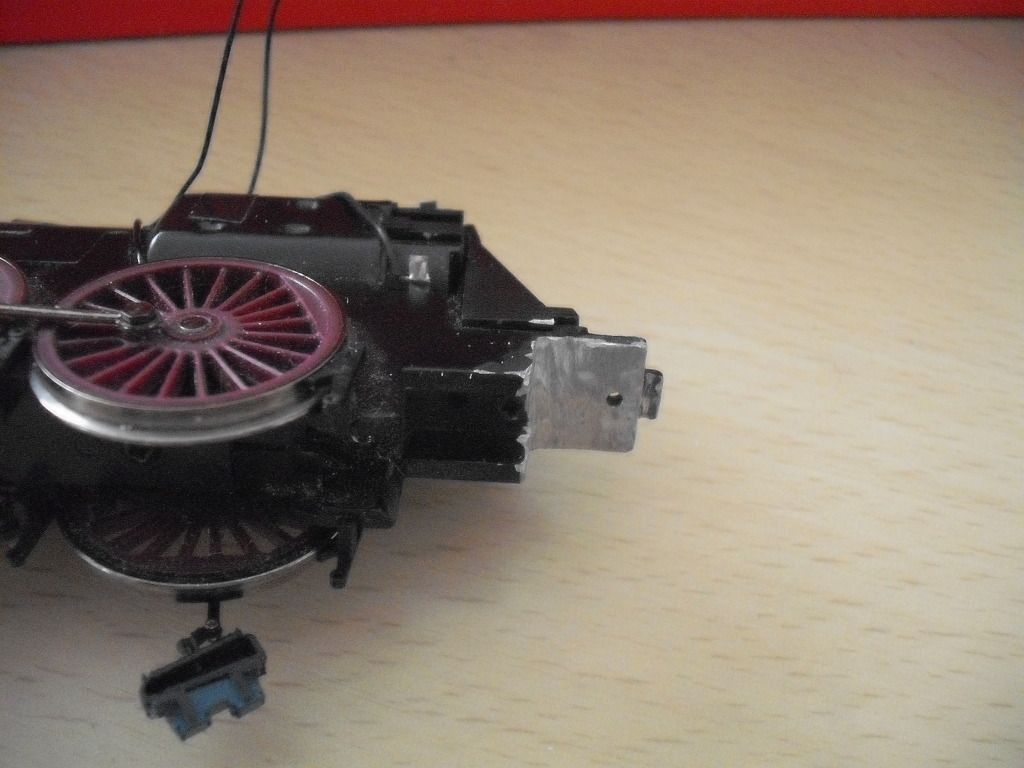
area removed
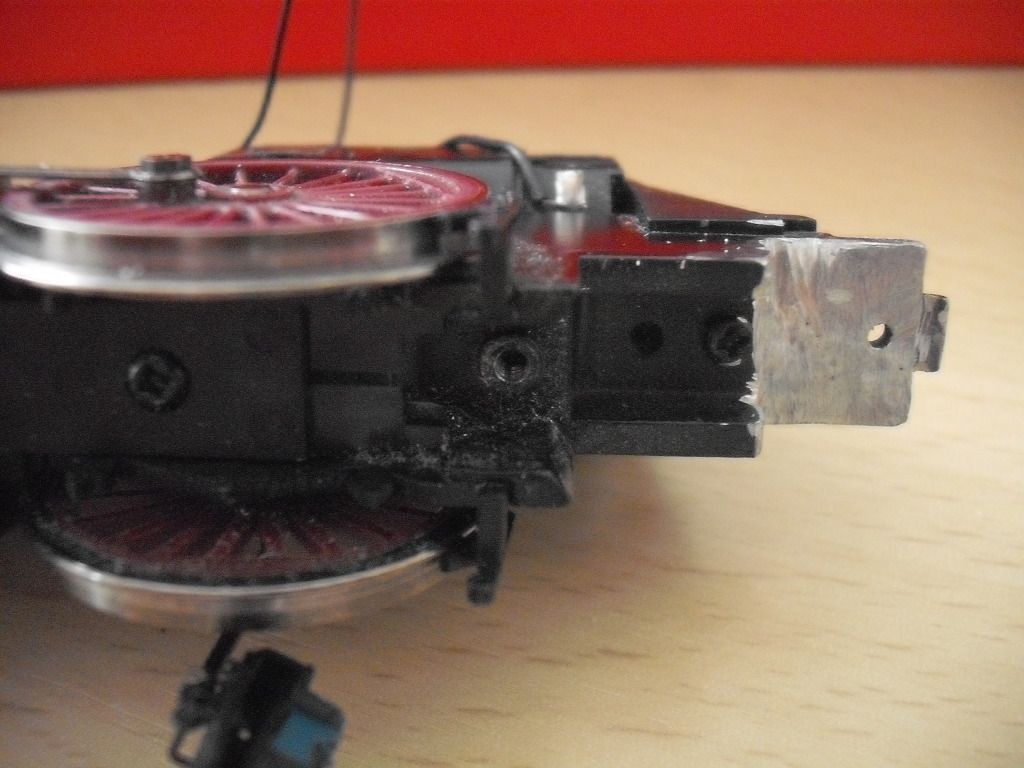
left hole was where the fixed frames where screwed, right hole was for the draw bar, middle one with screw holds the rear motor assembly in place
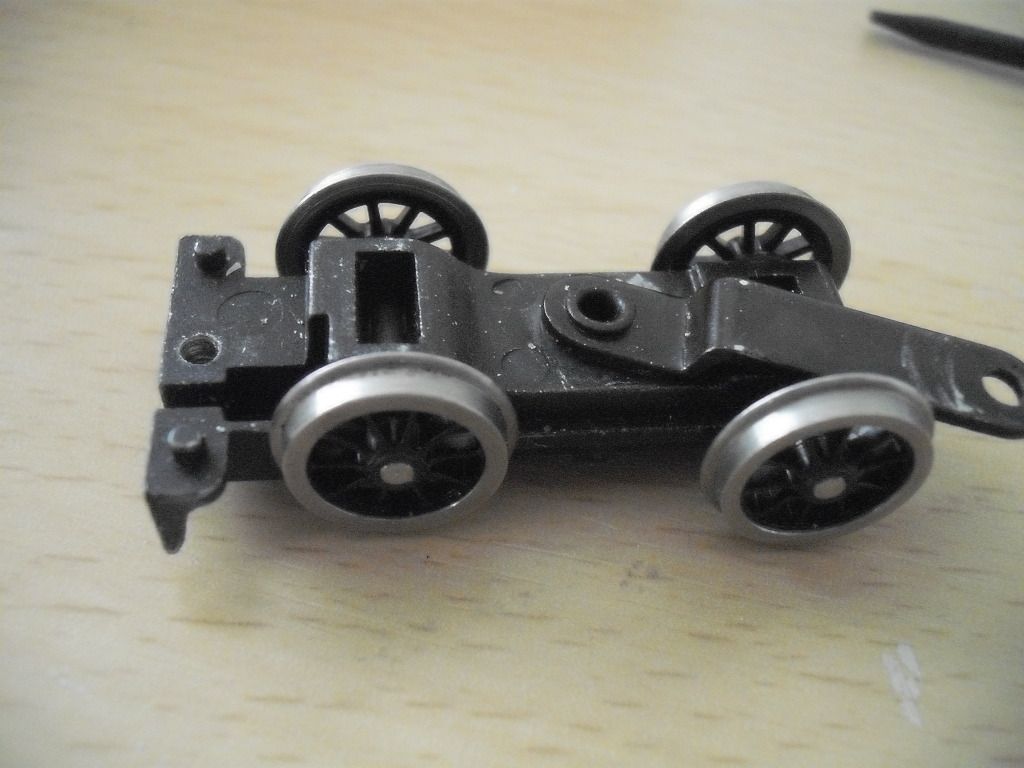
donor bogie with the wheels supplied with kit, it came from a Hornby china made B12, d-ring removed
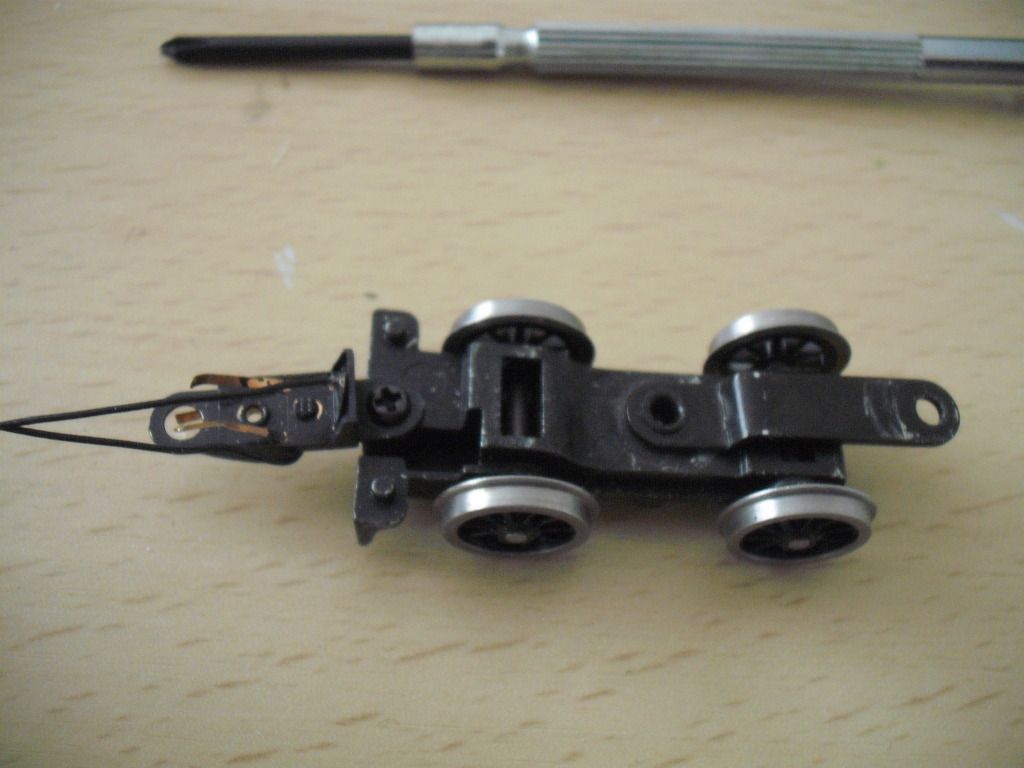
the draw bar attached to bogie using the hole from the d-ring, need to re-solder one wire as it came off. Doing this I can have pick ups on the tender
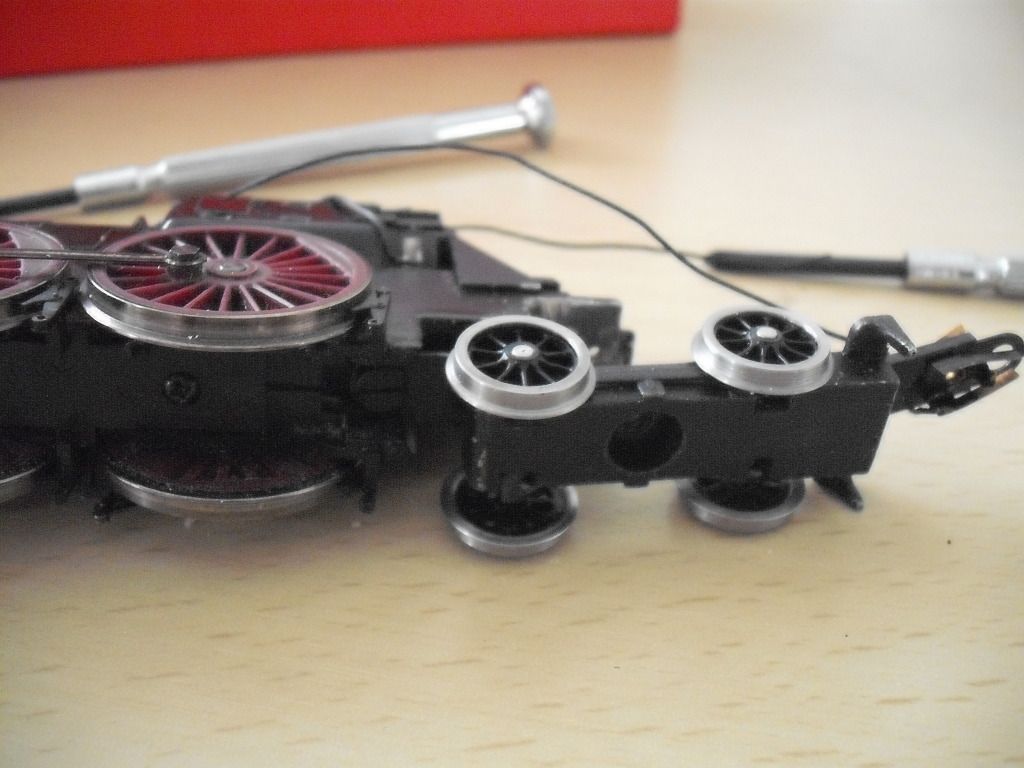
attached to chassis using the swing bar into the left hole
offered into the body
hope this helped
Brian
oOo
Brian
Garage Hobbit!!
Modelling in 00 on my heritage line, very GCR inspired
Brian
Garage Hobbit!!
Modelling in 00 on my heritage line, very GCR inspired
-
60800

- LNER A4 4-6-2 'Streak'
- Posts: 2316
- Joined: Sun Apr 17, 2011 5:41 pm
- Location: N-Lincolnshire
- Contact:
Re: My W1 build
Thanks for the pics of the nose
I would very strongly recommend re-sculpting the smokebox sides as the current mould portrays the old 90's hornby A4, which was way too wide at the front.
I would very strongly recommend re-sculpting the smokebox sides as the current mould portrays the old 90's hornby A4, which was way too wide at the front.
- Attachments
-
36C - Based out of 50H and 36F
-
S.A.C. Martin
Re: My W1 build
It's a fair comparison Blackout, but I don't think the resin can be manipulated in that way without causing some structual problems. If you can put up with the tender drive A4 shape, then it's as good a W1 kit as any. I prefer to think of it as a decent representation, which to be frank, all models are to some degree.
I think the build is coming on in leaps and bounds and have enjoyed seeing the excellent photographs thus far.
I think the build is coming on in leaps and bounds and have enjoyed seeing the excellent photographs thus far.