West End Workbench
Moderators: 52D, Tom F, Rlangham, Atlantic 3279, Blink Bonny, Saint Johnstoun, richard
Re: West End Workbench
Archer or Railtec Rivets would be a big improvement ? .
-
jwealleans
- LNER A4 4-6-2 'Streak'
- Posts: 4303
- Joined: Wed Oct 25, 2006 8:46 am
Re: West End Workbench
Thanks, Andrew. I did recall that you'd commissioned these, but not that you'd built one or I'd have gone back for another look. The ends look to have wooden rather than steel buffer beams, so a wooden solebar is probably a good shout.it did see me commissioning a 3D printed LNER refrigerator van from a lady in Tasmania
For the next one, whenever I build that, I'll shave the strapping off and probably use either of those on Evergreen 10 x 30 strip.Archer or Railtec Rivets would be a big improvement ? .
-
Woodcock29
- GNR C1 4-4-2
- Posts: 713
- Joined: Tue Nov 27, 2012 8:59 am
- Location: South Australia
Re: West End Workbench
Thanks for the offer Phil. I'll email you.
Andrew
Andrew
-
jwealleans
- LNER A4 4-6-2 'Streak'
- Posts: 4303
- Joined: Wed Oct 25, 2006 8:46 am
Re: West End Workbench
I was reading the relevant part of tatlow last night. Andrew, do you have a drawing or photograph of the roof arrangement for the wooden solebar version? I gather it had two roof doors instead of the one on the later diagram?
-
Woodcock29
- GNR C1 4-4-2
- Posts: 713
- Joined: Tue Nov 27, 2012 8:59 am
- Location: South Australia
Re: West End Workbench
No I don't so it will have to be an educated guess unfortunately. It means I'll probably end up making a plastic sheet roof rather than using Amanda's roof with its cut out for the single icebox hatch at each end.
I've got a spare 3H underframe and am intending to use the timber solebars and axleboxes from that.
Andrew
I've got a spare 3H underframe and am intending to use the timber solebars and axleboxes from that.
Andrew
-
jwealleans
- LNER A4 4-6-2 'Streak'
- Posts: 4303
- Joined: Wed Oct 25, 2006 8:46 am
Re: West End Workbench
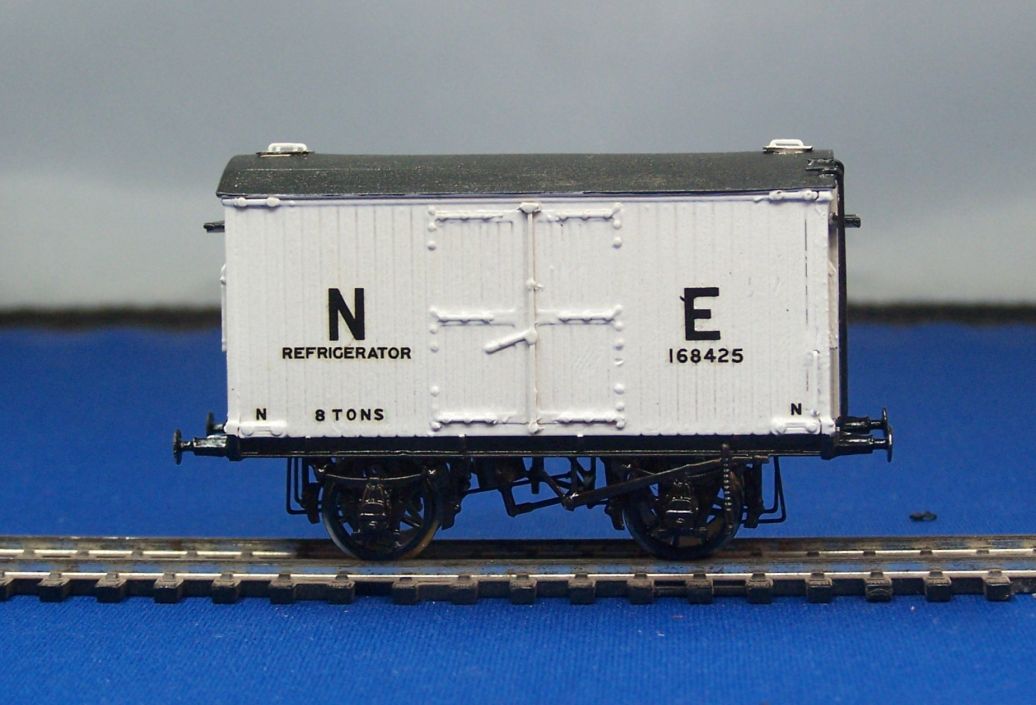
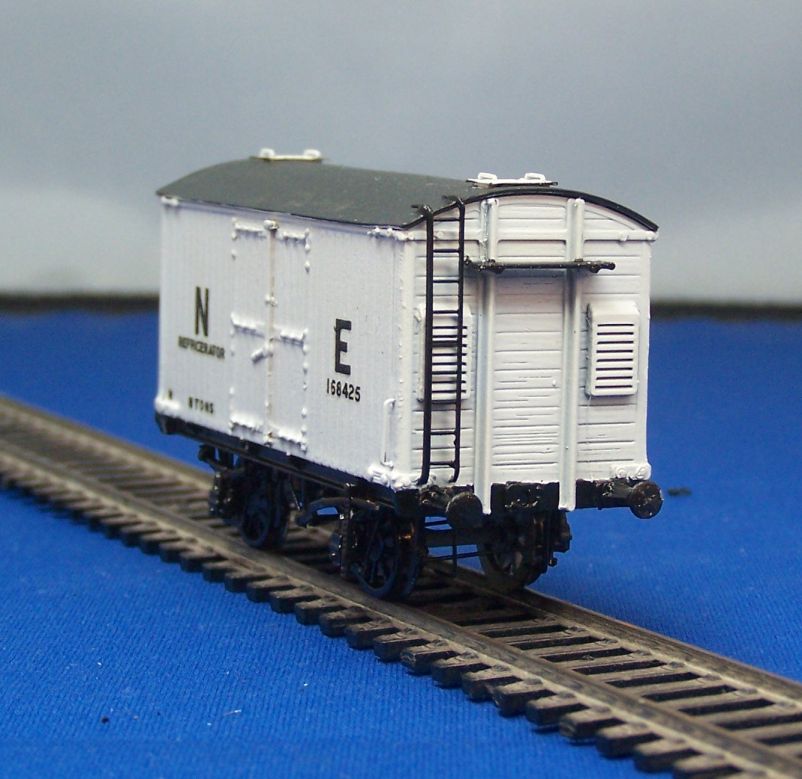
I'll have a look through drawing lists in case there is anything available. In the meantime, the first wagon has been lettered and I think it's come up quite tidy:
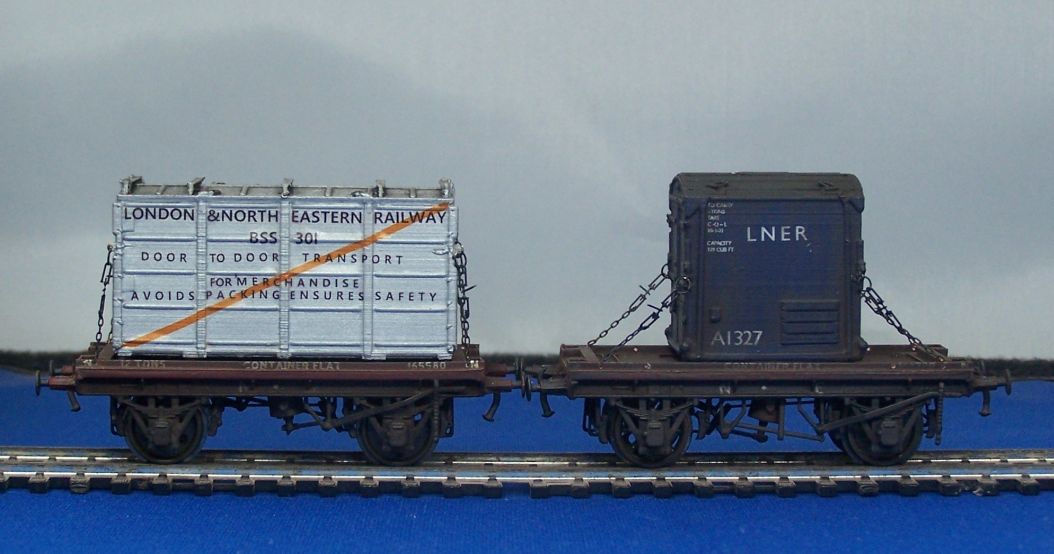
I had some lettering made up for the conflats as well. They will look the part once the chains are fitted.
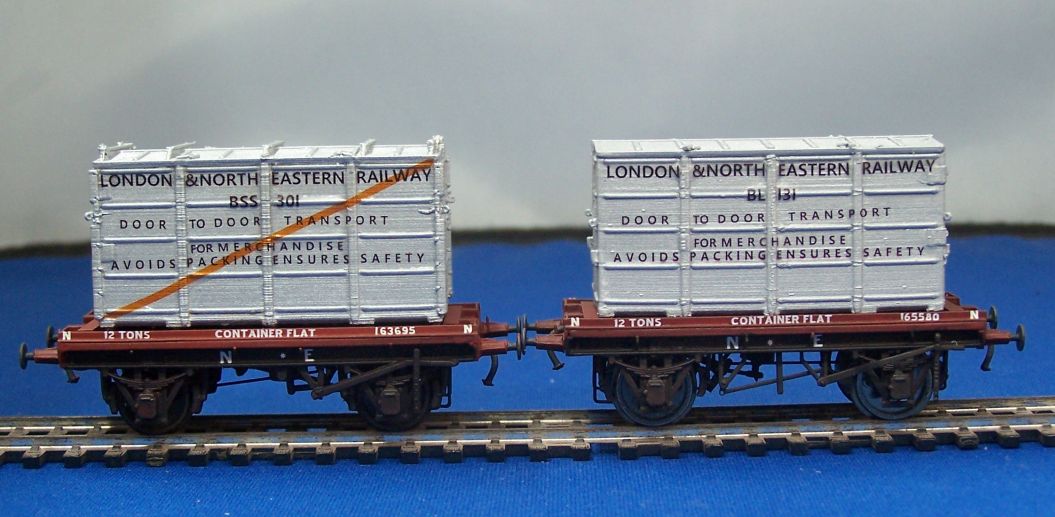
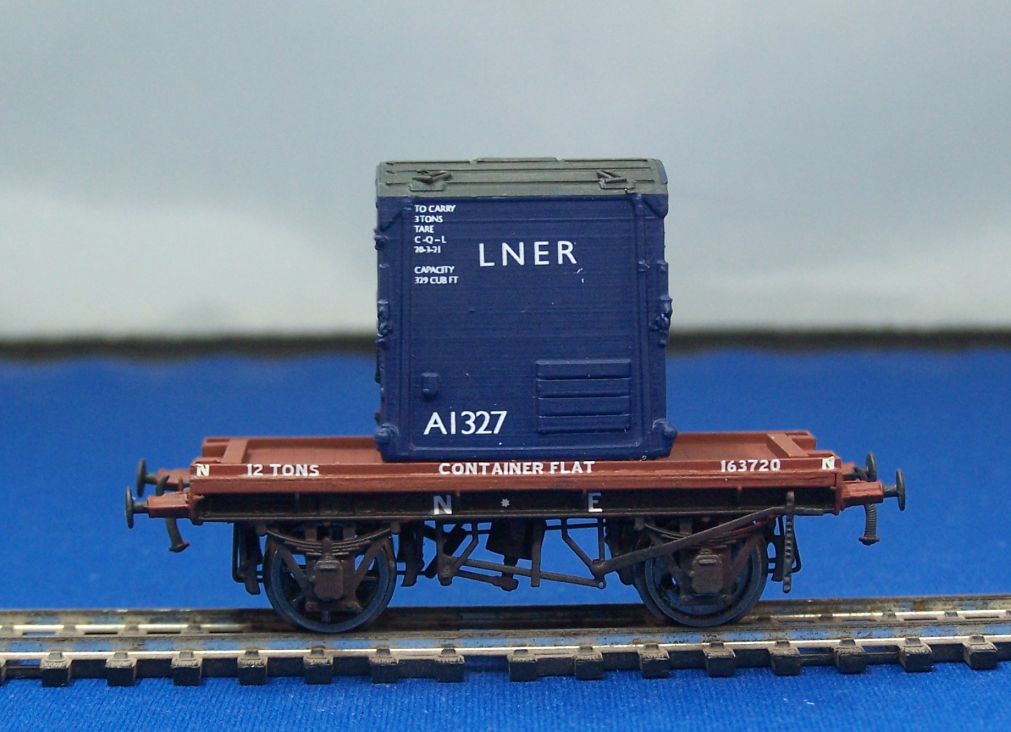
Ths sheet was printed by John Peck, if anyone wants to order one; enough wagon lettering for 6 conflats (assuming you have the HMRS or another sheet for the star and Non-common user marking) and also for 4 or 6 of the Type A container.


I had some lettering made up for the conflats as well. They will look the part once the chains are fitted.


Ths sheet was printed by John Peck, if anyone wants to order one; enough wagon lettering for 6 conflats (assuming you have the HMRS or another sheet for the star and Non-common user marking) and also for 4 or 6 of the Type A container.
Re: West End Workbench
JW.
Is there any reference to quote to John Peck for ordering please?.
Is there any reference to quote to John Peck for ordering please?.
-
jwealleans
- LNER A4 4-6-2 'Streak'
- Posts: 4303
- Joined: Wed Oct 25, 2006 8:46 am
Re: West End Workbench
Morning Mick,
It is the last sheet he printed for me. I've attached it here.
It is the last sheet he printed for me. I've attached it here.
- Attachments
-
- d76_Lettering.pdf
- (79.11 KiB) Downloaded 149 times
Re: West End Workbench
Excellent , many thanks.
-
jwealleans
- LNER A4 4-6-2 'Streak'
- Posts: 4303
- Joined: Wed Oct 25, 2006 8:46 am
Re: West End Workbench
I'm surrounded by boxes of Grantham stock at the moment, going back over my notes from Harrogate and the running weekend and investigating faults. Just a couple of jobs from the bench last night:
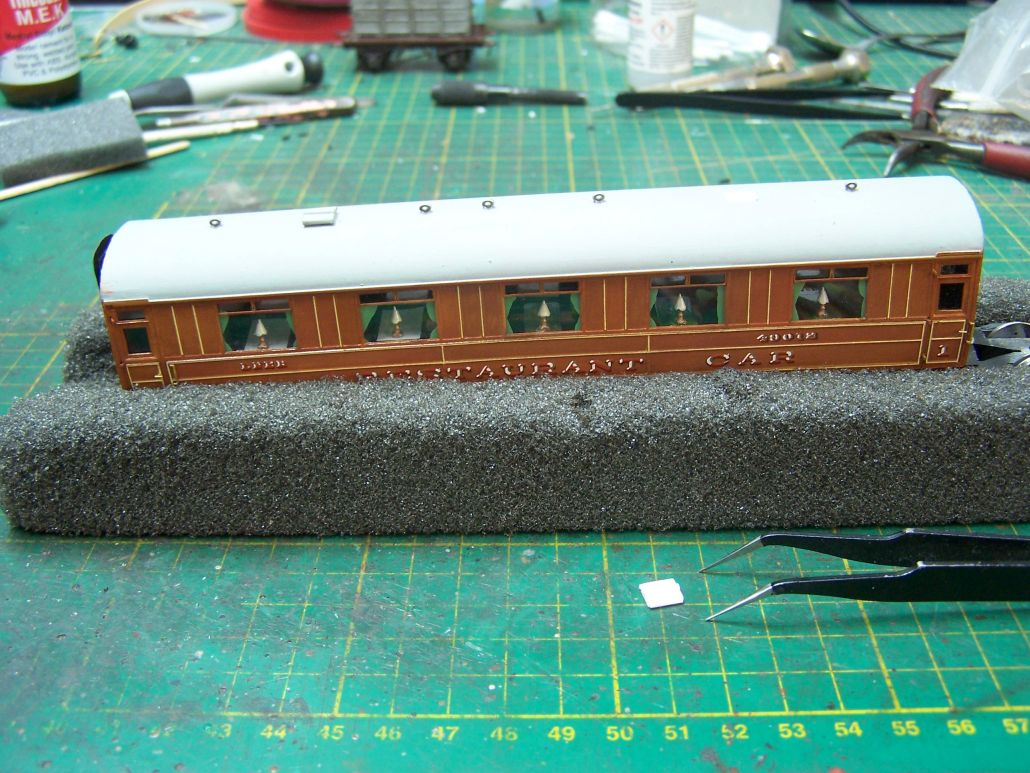
The RF in the Leeds Quint had lost a roof vent. I had scratchbuilt these, so I wasn't looking forward to trying to replace it, but in the end it was a fairly straightforward job. The roofs on these have never been finished as I didn't ever get hold of the artwork for the roof boards, but there is a chance that something may finally develop.

I put the chains on the first steel container last night as well. I'm not happy with how well the tensioning is working, so 'll probably have another go. Slack chains can almost look worse than none at all.

The RF in the Leeds Quint had lost a roof vent. I had scratchbuilt these, so I wasn't looking forward to trying to replace it, but in the end it was a fairly straightforward job. The roofs on these have never been finished as I didn't ever get hold of the artwork for the roof boards, but there is a chance that something may finally develop.

I put the chains on the first steel container last night as well. I'm not happy with how well the tensioning is working, so 'll probably have another go. Slack chains can almost look worse than none at all.
-
jwealleans
- LNER A4 4-6-2 'Streak'
- Posts: 4303
- Joined: Wed Oct 25, 2006 8:46 am
Re: West End Workbench
Final jobs for Newcastle completed (until I remember something else). These need couplings, but are otherwise ready to go.
While I had the weathering gear out I finished off a couple of other wagons:
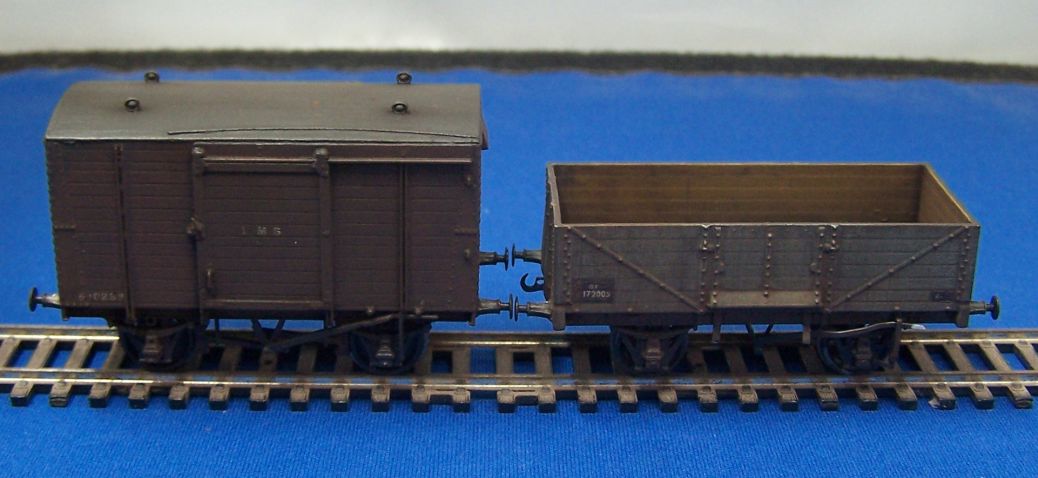
Oxford open I picked up at Shildon for eight quid. You can find these very cheaply now they've been out a while and other than correcting the brakes they take very little work. I have also replaced the buffers on this one with the better LMS casting.
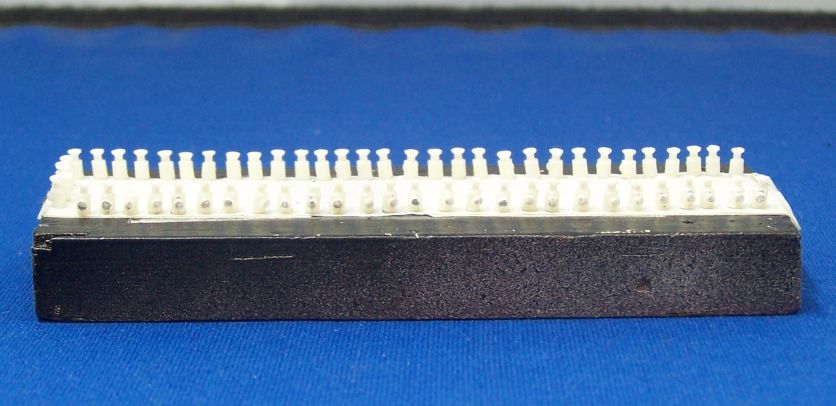
Finally, although he won't be joining us at Newcastle, a nod to Mr King for another heroic contribution: sixty (count them) loco lamps. Even at the rate we lose them, this should see the layout out. A splash of silver paint, a .75mm hole and a spot of Tacky Wax and they're ready for use.

While I had the weathering gear out I finished off a couple of other wagons:

Oxford open I picked up at Shildon for eight quid. You can find these very cheaply now they've been out a while and other than correcting the brakes they take very little work. I have also replaced the buffers on this one with the better LMS casting.

Finally, although he won't be joining us at Newcastle, a nod to Mr King for another heroic contribution: sixty (count them) loco lamps. Even at the rate we lose them, this should see the layout out. A splash of silver paint, a .75mm hole and a spot of Tacky Wax and they're ready for use.
- Atlantic 3279
- LNER A4 4-6-2 'Streak'
- Posts: 6658
- Joined: Fri Jun 26, 2009 9:51 am
- Location: 2850, 245
Re: West End Workbench
My pleasure. Drilling and painting them is a far bigger chore than casting them in resin  .
.
Most subjects, models and techniques covered in this thread are now listed in various categories on page1
Dec. 2018: Almost all images that disappeared from my own thread following loss of free remote hosting are now restored.
Dec. 2018: Almost all images that disappeared from my own thread following loss of free remote hosting are now restored.
-
jwealleans
- LNER A4 4-6-2 'Streak'
- Posts: 4303
- Joined: Wed Oct 25, 2006 8:46 am
Re: West End Workbench
I'm sure the news will be spreading fast, but in case anyone hasn't seen it, Newcastle Show has been cancelled due to the storm damage suffered by the school a week ago.
-
jwealleans
- LNER A4 4-6-2 'Streak'
- Posts: 4303
- Joined: Wed Oct 25, 2006 8:46 am
Re: West End Workbench
With an unexpected couple of days off in the absence of Newcastle Show, I seem to have gone off at a bit of a tangent. It started with a request to show how I make my own transfers. Fine, I can do that... but do I have any I need to make? Not on Friday morning, no, but then after a bit of thought I had an idea.
On the side of the bench, for no real reason, an Acro quad has been sitting for several weeks.
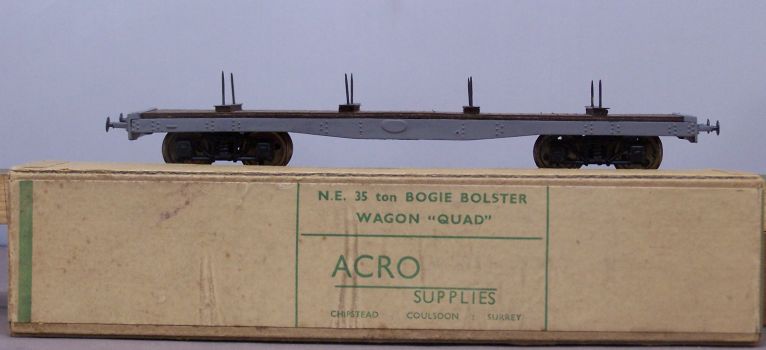
For those who don't know, Acro made wagon kits in the 1950s and early 1960s. I'm not old enough to remember them and this kit may well be older than me. I was given a couple of Quads (the same vehicle Parkside now make) and a Crocodile a few years ago. I made all 3 up, but this Quad had never really been finished. It's a whitemetal body frame with a wooden deck and bolsters. I had to replace the missing bogies with Parkside ones (the originals were compensated and run beautifully) and I added a thin plastic overlay to the bolsters, painted to look like steel, then made and added pins from 0.7mm wire. There it had stopped.
Separately, I'd happened across Cornwall Custom Designs on Ebay and bought one or two items including a 'Bob' or beam for a pumping engine. I'd idly thought it might make an interesting wagon load and here was an idea wagon for it. I reckon the beam weighs about 30 tons and the quad is able to carry 45, so easily the wagon for the job.
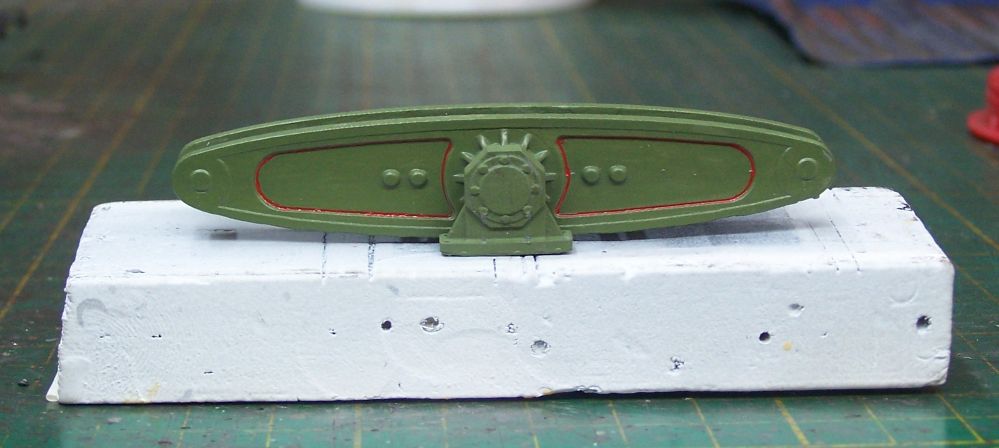
I painted it what I hope looks a suitably industrial shade and added just a little decoration. Then it was ready to be sent back to whencever it had come. I did a little reading and found that at one time Armstrongs made beam engines, so here's one which has been back for repair.
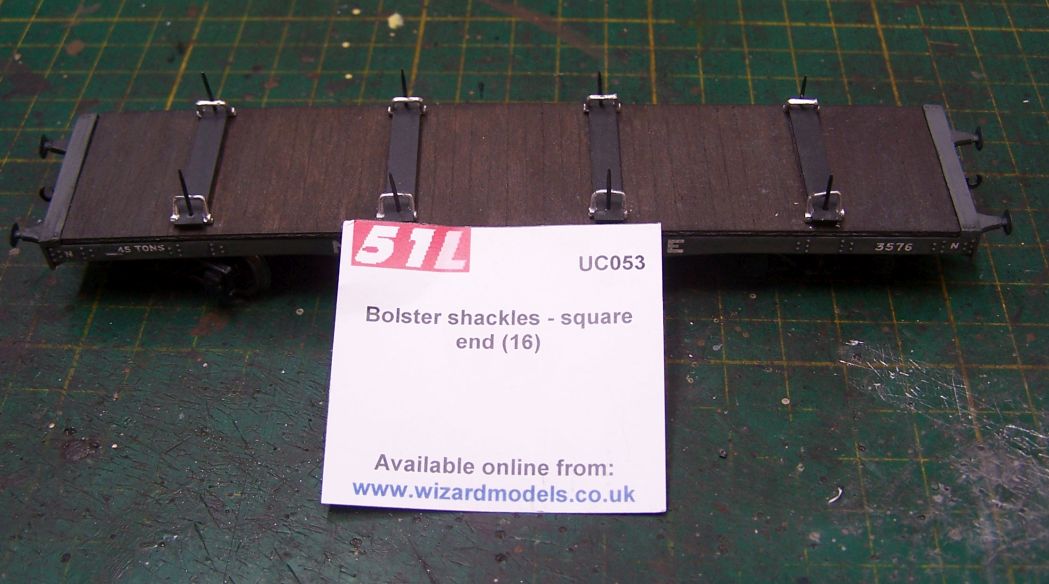
Firstly, the Quad had to be titvated a little. I had these bolster shackles from 51L in the drawer - they're a bit chunky but at least they're a consistent shape, which is more than I can manage with bits of wire.
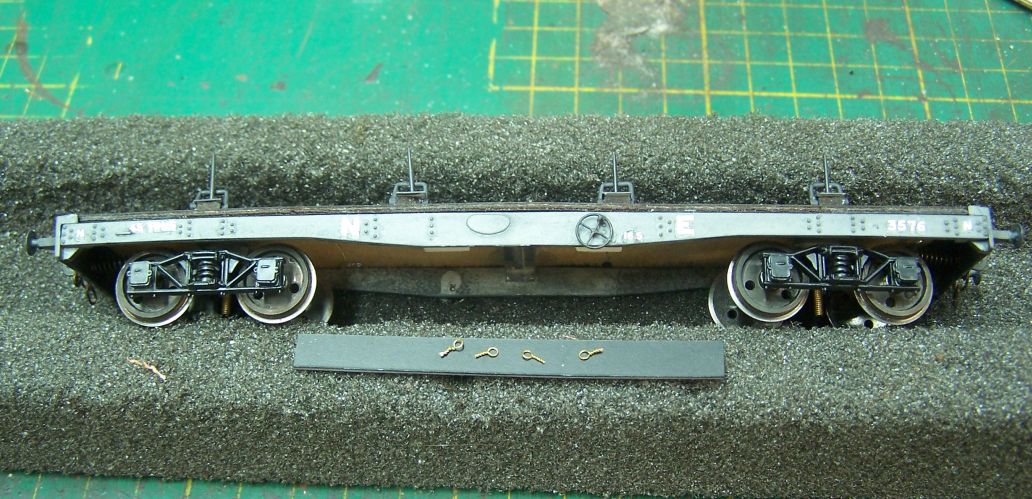
Some of these wagons also had lashing rings added, even whem they were still bogie bolsters. Others had the bolsters removed and they had extra rings fitted. These are made from thin brass wire (from picture hanging wire) wound round a very small screwdriver. They're then just stuck into holes in the side. You'll see that I've also added handbrake wheels.
The loading gave me pause for thought - you'd expect it to be sheeted over which rather wastes the nice looking print. Then I thought that maybe they'd want to make a feature of it - beam engines must have been becoming uncommon even in the 1930s - and get a bit of advertising in. This is where the transfers (remember them?) came into it. So this is how it's been loaded, with the bearing surfaces protected and sacking wrapped round to prevent the chains damaging the paint. I've put gun blue onto the chains and lashings - they'll be painted metalcote black when that has dried. The black will also help disguise the fact that I've wrapped the copper wire w hich holds it all together round the bolster pins as well as the shackles. that has allowed me to tighten the wire all the more and keep the chains fairly taut.
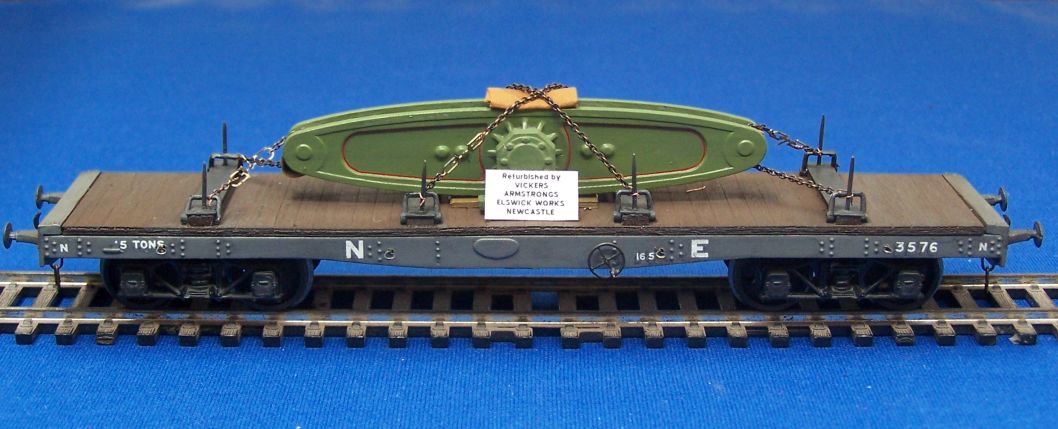
The sign is a mockup on paper. I will make up some waterslide versions and stick them to plastikard panels this week.
On the side of the bench, for no real reason, an Acro quad has been sitting for several weeks.

For those who don't know, Acro made wagon kits in the 1950s and early 1960s. I'm not old enough to remember them and this kit may well be older than me. I was given a couple of Quads (the same vehicle Parkside now make) and a Crocodile a few years ago. I made all 3 up, but this Quad had never really been finished. It's a whitemetal body frame with a wooden deck and bolsters. I had to replace the missing bogies with Parkside ones (the originals were compensated and run beautifully) and I added a thin plastic overlay to the bolsters, painted to look like steel, then made and added pins from 0.7mm wire. There it had stopped.
Separately, I'd happened across Cornwall Custom Designs on Ebay and bought one or two items including a 'Bob' or beam for a pumping engine. I'd idly thought it might make an interesting wagon load and here was an idea wagon for it. I reckon the beam weighs about 30 tons and the quad is able to carry 45, so easily the wagon for the job.

I painted it what I hope looks a suitably industrial shade and added just a little decoration. Then it was ready to be sent back to whencever it had come. I did a little reading and found that at one time Armstrongs made beam engines, so here's one which has been back for repair.
Firstly, the Quad had to be titvated a little. I had these bolster shackles from 51L in the drawer - they're a bit chunky but at least they're a consistent shape, which is more than I can manage with bits of wire.

Some of these wagons also had lashing rings added, even whem they were still bogie bolsters. Others had the bolsters removed and they had extra rings fitted. These are made from thin brass wire (from picture hanging wire) wound round a very small screwdriver. They're then just stuck into holes in the side. You'll see that I've also added handbrake wheels.

The loading gave me pause for thought - you'd expect it to be sheeted over which rather wastes the nice looking print. Then I thought that maybe they'd want to make a feature of it - beam engines must have been becoming uncommon even in the 1930s - and get a bit of advertising in. This is where the transfers (remember them?) came into it. So this is how it's been loaded, with the bearing surfaces protected and sacking wrapped round to prevent the chains damaging the paint. I've put gun blue onto the chains and lashings - they'll be painted metalcote black when that has dried. The black will also help disguise the fact that I've wrapped the copper wire w hich holds it all together round the bolster pins as well as the shackles. that has allowed me to tighten the wire all the more and keep the chains fairly taut.

The sign is a mockup on paper. I will make up some waterslide versions and stick them to plastikard panels this week.
- Dave
- LNER A4 4-6-2 'Streak'
- Posts: 1733
- Joined: Sat Nov 13, 2010 9:33 pm
- Location: Centre of the known universe York
Re: West End Workbench
Very nice jonathan, you can't have too many Quads, they are the basis for a number of conversions as well.