West End Workbench
Moderators: 52D, Tom F, Rlangham, Atlantic 3279, Blink Bonny, Saint Johnstoun, richard
-
- LNER A4 4-6-2 'Streak'
- Posts: 4303
- Joined: Wed Oct 25, 2006 8:46 am
Re: West End Workbench
Couple of days break while I attended to a faulty strip light in the workshop. I find it very hard to work under what amounted to a strobe light. i now have a twin daylight batten LED above my head and very bright it is too.
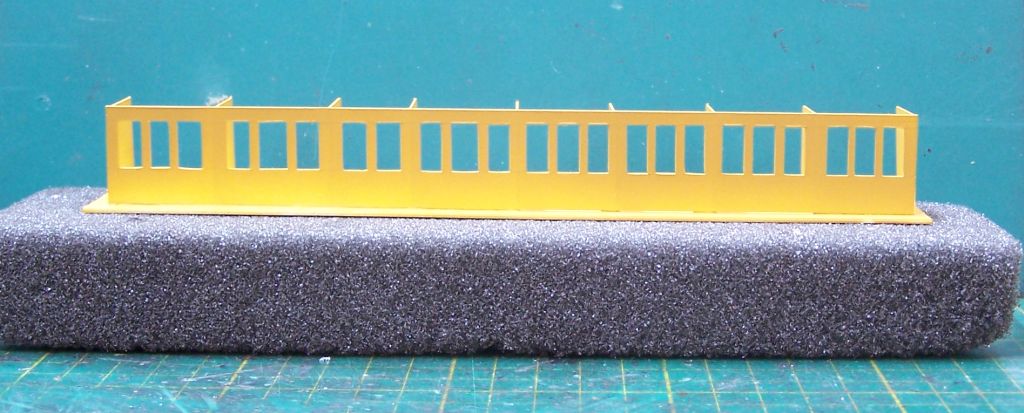
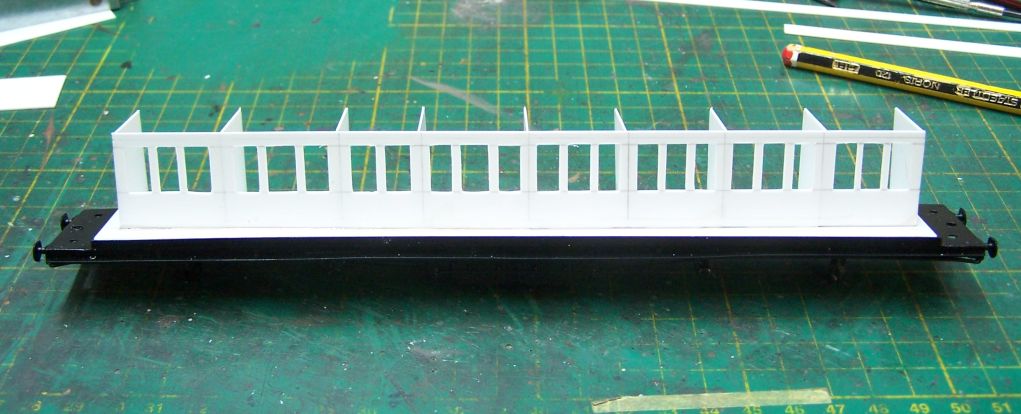
While painting is very necessary for completing the model it doesn't make for desperately interesting pictures. What can be done while the body is drying, though, is the interior. I make these from 15 or 20 thou plastikard on a 40 thou base. The methodology is fairly obvious and while it can all be a bit flimsy while you're cutting it out, it's surprisingly strong once stuck together. The holes around the two bogie screws serve to locate it and once complete a spot of Tacky Wax at each end will hold it in place.The plastikard is very light - MJT vehicles are already quite heavy so you don't need to add any extra ballast. If you're making multiples of the same carriage you can find someone with a Silhouette cutter and have them made - Paul Bolton did me around a dozen of these for D134/175 BCKs when I was batch producing them for Grantham. For one or two carriages it's just as easy to do them by hand. Once you're in the swing of it it only takes a few minutes per compartment.
I confess to having missed a trick here, probably because I haven't built a carriage for a little while. I usually put a brass piece at an angle in the end of the body to serve as the lav/vestibule partition. I'll have to glue a piece of plastic in now the roof is on. As long as it blocks the light from side to side you can get away with almost anything in the ends as they're not really visible. I don't bother putting seats in any more as they're not really visible either - the internal windows and partitions are about all you can make out at normal viewing distance.
Body has been painted brown inside and the roof now has its undercoat.
Re: West End Workbench
I seem to recall Mr D Jenkinson suggesting interiors were not worth modelling, or at least he only did the minimum.
Have I got that wrong?
John
Have I got that wrong?
John
-
- LNER A4 4-6-2 'Streak'
- Posts: 4303
- Joined: Wed Oct 25, 2006 8:46 am
Re: West End Workbench
You have not, John. He simply painted his interiors black as far as I recall.
That's a bit extreme - even in 4mm you can see light wood tones in corridor partitions. Much more than that is a bit oa a watse of effort, though.
-
- LNER A4 4-6-2 'Streak'
- Posts: 1729
- Joined: Fri Dec 23, 2011 3:34 pm
Re: West End Workbench
He was rather more subtle than that I would suggest, and he would qualify his opinion as being due to his bias toward the whole point of railway modelling being to operate the trains on a layout; while fully accepting that there was a range of priorities within the hobby. But in short, yes, 'only model what can be seen'. More recent efficient methods of interior lighting by LED strips might have altered his thinking...
-
- LNER A4 4-6-2 'Streak'
- Posts: 4303
- Joined: Wed Oct 25, 2006 8:46 am
Re: West End Workbench
... not that any of my carriages have such fripperies.
We've jumped an evening here as i forgot to bring the card from the camera down the other night. The bodyshell had had the first topcoat, the cream colour.
The previous vehicles in the set had been done with Ford Sahara Beige, which looked a bit pale. For this carriage I foudn some Vauxhall Gazelle Beige on Ebay which has a touch more yellow to it. This had been painted and left 48 hours to harden as we are, of course, going to mask over it. masking beaded carriages is a PITA. I used to use Euro tape, but that seems to have disappeared so it's back to Tamiya and pressing it into the corners with a cocktail stick. You inevitably get some bleed but you can do your best to minimise it. Edit - for those who haven't done this before, don't put gloss onto gloss, put a coat of red primer onto the cream before you start with the red, or it'll pool in the crevices and give a very uneven and in places transparent finish.
The red went on tonight. This is Ford Rosso red. You can see that there are some areas where it's seeped under the masking. I'll touch these in with a brush in due course, but you have to let it thoroughly harden off before you do that. I've painted the ends a lightly faded black as a first coat as well.
The interior has had a coat of Halford filler primer - the yellow makes a good base for the wood effect on the interior. That has been done but I forgot to take a picture. Next time.
Last edited by jwealleans on Thu Jul 20, 2023 11:08 am, edited 1 time in total.
-
- LNER A4 4-6-2 'Streak'
- Posts: 4303
- Joined: Wed Oct 25, 2006 8:46 am
Re: West End Workbench
Day out today - took some of the trains to a testing/running session at Graham Nicholas' Hills of the North layout. For those who haven't seen the thread on RMWeb, it's a large permanent layout fairly early in its construction which will represent Carlisle and some of the surrounding lines.
To give you an idea of the scale and scope:
Tom and Barry at the operating seat for Garsdale station. The boards behind them are the main scenic section of Graham's Shap exhibition layout.
Graham and Mike Edge going over the operation of Bog Junction. Currently all trains pass through this point, so it's quite critical.
Steve Pearce (31A) getting to grips with Central station, which is where all trains originate or terminate at the moment. Also fairly important.
I brought one or two items along to give them a run out. Below a view over Central MPD and to the goods yard behind the passenger terminus...
... where the track gang had just brought in their Wickham. I still haven't found the wheelbarrow to lash onto the trailer.
As you'd expect given that it's the main thing I'm currently working on, I took the Easterling set and a couple of the locos which might end up pulling it.
61655 Middlesbrough in what will be Dentonholme yard, currently one of the terminating points. The current train (7 vehicles) is just about on the limit of what this loco can pull, so I shall have to investigate adding weight. Even on the flat it was only just managing and on the numerous inclines it needed help. It is an unmodified Hornby, though, so hopefully there's scope to pack some lead in.
Here's the part built D7 in its place in the set. You can see the effect of the painted interior.
The dining pair and the end of the main (Yarmouth) portion. I've yet to start the two Lowestoft carriages. Running the set around a different layout was very beneficial and gave me a few faults and tweaks to work on.
61655 in among the foreign locos after taking the set round the layout.
I took 61059 along as well. Here it is backing out of Central after bringing in a fitted van train.
The wandering tractors in Dentonholme yard having been round the layout and back again.
Finally, it has to be done...
At the rear of central goods yard,
and at Bog Junction. It's a shame I couldn't get a full view of the signal, it's an impressive beast.
-
- H&BR Q10 0-8-0
- Posts: 178
- Joined: Thu Apr 01, 2021 8:47 pm
Re: West End Workbench
Those are some very nice photos, it looks like the rake is coming together nicely.
I am curious about the purpose of the 'essential packing block'
Jim de Griz
I am curious about the purpose of the 'essential packing block'
Jim de Griz
- manna
- LNER A4 4-6-2 'Streak'
- Posts: 3862
- Joined: Sun May 24, 2009 12:56 am
- Location: All over Australia
Re: West End Workbench
G'day Gents
Some very nice work there Jonathon, love watching you coaches come together, (Jealous really, you make it look easy.)
manna
Some very nice work there Jonathon, love watching you coaches come together, (Jealous really, you make it look easy.)
manna
EDGWARE GN, Steam in the Suburbs.
-
- LNER A4 4-6-2 'Streak'
- Posts: 4303
- Joined: Wed Oct 25, 2006 8:46 am
Re: West End Workbench
The 'essential packing block' fits under one of the irregularly shaped Grantham boards to keep it upright in the van. It's labelled so it doesn't get discarded or reused elsewhere. That pile of boards and boxes is part of Grantham - the rest is in storage with me.
-
- LNER A4 4-6-2 'Streak'
- Posts: 1729
- Joined: Fri Dec 23, 2011 3:34 pm
Re: West End Workbench
First simple mod - also applies to the B1 - is to remove the tender wiper pick ups and much reduce the tender weight. Whatever the exact materials combination may be, the wipers are excessively draggy, and while possibly useful on set track simply not required on live crossing pointwork on modeller's layouts. (If your six coupled tank engine has no trouble...) That's been enough traction for my operation. as 4-6-0s are secondary power, we have the wide firebox traction for heavy loads. (Or a B12/3 which has a largely mazak body, and all the advantage in appearance.)jwealleans wrote: ↑Sun Jul 16, 2023 8:04 pm ...61655 Middlesbrough in what will be Dentonholme yard, currently one of the terminating points. The current train (7 vehicles) is just about on the limit of what this loco can pull, so I shall have to investigate adding weight. Even on the flat it was only just managing and on the numerous inclines it needed help. It is an unmodified Hornby, though, so hopefully there's scope to pack some lead in....
Adding weight to these plastic body 4-6-0s is made difficult by the construction. Some lead sheet on the cab floor and under the roof is simple enough, but there is a lump of mazak in the front of the boiler and no obvious way to remove it to substitute lead without breaking the body apart. Not having the need I have refrained from having a go on what are overall decent bodies. If you find a way, do please share.
-
- H&BR Q10 0-8-0
- Posts: 178
- Joined: Thu Apr 01, 2021 8:47 pm
Re: West End Workbench
I did wonder if it would be something like that. I can well imagine that if it wasn’t labelled it would long ago have been reused for something elsejwealleans wrote: ↑Mon Jul 17, 2023 6:54 am The 'essential packing block' fits under one of the irregularly shaped Grantham boards to keep it upright in the van. It's labelled so it doesn't get discarded or reused elsewhere. That pile of boards and boxes is part of Grantham - the rest is in storage with me.
Jim de Griz
-
- LNER A4 4-6-2 'Streak'
- Posts: 4303
- Joined: Wed Oct 25, 2006 8:46 am
Re: West End Workbench
I have been working on weighting the loco but as you say there are limited options. I'll show what I've achieved in due course.
The coach body was deemed sufficiently dried off to be touched in this week. This is done with afine brush and a small quantity of the aerosol paint sprayed into a jam jar lid. You have to be quick but you can use it before it goes off. Small amounts and repeated often are the key, especially with transparent colours.
There's some unevenness in the masking, but you can cover a small degree of that with the width of the lining transfer. Once that is applied, assuming you get it straight, there remains the option of further touching in the paint using the lining as a guide.
I added jumper cables and the dimension plate to the end. I'm not really sure why they aren't cast in. Maybe Mike can comment?
The interior has had a coat of Klear which brings out the colour and graining nicely. The lowered section in the middle is where I fitted the piece of etch to hold the sides in.
Roof and end painted. I forgot to adjust that jumper cable before painting, so it may need touching in once I've moved it.
-
- LNER A4 4-6-2 'Streak'
- Posts: 4303
- Joined: Wed Oct 25, 2006 8:46 am
Re: West End Workbench
Been a few days - bit of a mare at work meant I got no free time at the weekend. Anyway, even small steps get you towards where you need to go and there have been a few this week.
The 1/4" brass hex rod arrived from Macc Models (no connection, but very satisfied) and so i've cut, drilled and tapped a replacement bolster. You can also see the plastic block i built up around the coupling screw hole. This helps prevent them from drooping and also, when used as the female end, makes it very obvious when you've got it in the hole so you don't have carriages riding round the layout on top of the adjacent coupling pin. That also makes them droop and often derails the elevated vehicle.
The roof has had a couple of coats of a dark grey/black mix, the body has been lettered (HMRS) and lined (Fox) and had three coats of lacquer to seal them in.
Interior has had another coat of Klear and the whole lot is now in the airing cupboard just to help everything harden off.
To finish with a plug - I shall be demonstrating weathering at Thirsk show this weekend. It's always a good show and for a very worthy cause (Yorkshire Air Ambulance). In addition to myself, Rob Pulham of this parish and his very talented wife are usually to be seen as well as Martin Smith and Peter Simmerson whose layouts I operate and which can be seen on this page. Dave has also threatened to attend.
http://www.expo-thirsk.co.uk/blog/
-
- LNER A4 4-6-2 'Streak'
- Posts: 4303
- Joined: Wed Oct 25, 2006 8:46 am
Re: West End Workbench
After that slight break for Thirsk, back to the bench tonight. I know Larry Goddard used to moan like hell if he had to use more than one strip of glazing material each side, but it only took an hour or so to do the carriage and all the compartment side is individual pieces. The corridor side is easier but it's still eight or nine sections of varying sizes. I use PVA to secure the material. The interior is also glazed - it does help the overall effect slightly, but it's mainly to hold the No Smoking and First signs, which are surprisingly visible from the outside.
There's usually a particular step which feels like the point where you start to see the finish of a model approaching. With locos it's when they move unaided, or the valve gear is all erected and free. With me and LNER carriages, it's when I can put the first coat of white on the lav windows. It's largely downhill from here.
- manna
- LNER A4 4-6-2 'Streak'
- Posts: 3862
- Joined: Sun May 24, 2009 12:56 am
- Location: All over Australia
Re: West End Workbench
G'Day Gents
Another beautiful build Jonathan, I always use a bit of white plastic card for the Loo window.
manna
Another beautiful build Jonathan, I always use a bit of white plastic card for the Loo window.
manna
EDGWARE GN, Steam in the Suburbs.