Great Central Railway Class 5A - LNER J63
Moderators: 52D, Tom F, Rlangham, Atlantic 3279, Blink Bonny, Saint Johnstoun, richard
- Robpulham
- LNER A4 4-6-2 'Streak'
- Posts: 1721
- Joined: Thu Mar 27, 2008 9:54 pm
- Location: Lower Wensleydale
- Contact:
Re: Great Central Railway Class 5A - LNER J63
Progress has been slow this weekend, but a mystery has been unravelled.
You may recall that when I started the footplate, I couldn’t find two out of four part 60’s? Well today I found them…
I started yesterday’s session by rolling the boiler and it mentions using part 52 to ensure that it’s round.
This is the drawing of part 52
I found it amongst the remaining bits of etch and tried it in the boiler all was well.
Then I started to assemble the inner support frame for the boiler using the diagram below and photos of my previous build.
In my previous build I hadn’t used part 52… so I started questioning why not.
Although I obviously hadn’t worked it out before due to lack of experience it quickly became apparent that there was something wrong with part 52.
The photo above shows both sides of part 52 as etched. Although it’s one piece when you check against the drawing snip above it should in fact be three parts, 52 and 2 x part 60 (the missing parts). It looks like when he drew the artwork Garth Patrick got these bits on the wrong layers and the bit’s that should have been etched though have been half etched on one side and the outer ring which should have been full thickness has been half etched on the back making the part completely useless. I contemplated cutting the ring out with the piercing saw but I obviously managed without it on my build so could on this. As it happens in my spare etch box I found a semi circle the correct diameter which I will attach with a couple of bits of scrap to support the firebox end of the boiler tube.
Photos to follow once I have done it.
You may recall that when I started the footplate, I couldn’t find two out of four part 60’s? Well today I found them…
I started yesterday’s session by rolling the boiler and it mentions using part 52 to ensure that it’s round.
This is the drawing of part 52
I found it amongst the remaining bits of etch and tried it in the boiler all was well.
Then I started to assemble the inner support frame for the boiler using the diagram below and photos of my previous build.
In my previous build I hadn’t used part 52… so I started questioning why not.
Although I obviously hadn’t worked it out before due to lack of experience it quickly became apparent that there was something wrong with part 52.
The photo above shows both sides of part 52 as etched. Although it’s one piece when you check against the drawing snip above it should in fact be three parts, 52 and 2 x part 60 (the missing parts). It looks like when he drew the artwork Garth Patrick got these bits on the wrong layers and the bit’s that should have been etched though have been half etched on one side and the outer ring which should have been full thickness has been half etched on the back making the part completely useless. I contemplated cutting the ring out with the piercing saw but I obviously managed without it on my build so could on this. As it happens in my spare etch box I found a semi circle the correct diameter which I will attach with a couple of bits of scrap to support the firebox end of the boiler tube.
Photos to follow once I have done it.
- Atlantic 3279
- LNER A4 4-6-2 'Streak'
- Posts: 6659
- Joined: Fri Jun 26, 2009 9:51 am
- Location: 2850, 245
Re: Great Central Railway Class 5A - LNER J63
Was he still "in good shape" when he drew the etches? I don't think age was kind to him.
I suppose those ghost parts at least provide you with a template, should you wish to cut a set for yourself.
Most subjects, models and techniques covered in this thread are now listed in various categories on page1
Dec. 2018: Almost all images that disappeared from my own thread following loss of free remote hosting are now restored.
- Robpulham
- LNER A4 4-6-2 'Streak'
- Posts: 1721
- Joined: Thu Mar 27, 2008 9:54 pm
- Location: Lower Wensleydale
- Contact:
Re: Great Central Railway Class 5A - LNER J63
Hi Graham,
As I understand it this was one of Garth's earlier kits and to my mind the test build should have brought it to light. Given that it was drawn in AutoCAD it would have been the work of moments to fix but it would have needed a new photo tool.
It's not the end of the world but when you know that it was so easy to fix it's a shame that it was left to detract from what is otherwise and excellent kit.
- Robpulham
- LNER A4 4-6-2 'Streak'
- Posts: 1721
- Joined: Thu Mar 27, 2008 9:54 pm
- Location: Lower Wensleydale
- Contact:
Re: Great Central Railway Class 5A - LNER J63
This morning I added the semicircle of spare etch attached with a couple of small bridging pieces made from scrap etch.
I had already rolled the boiler but hadn’t soldered the seam so that was done next and then I realised that the two slits which allow for the curve out of the smokebox base the fit the smokebox saddle hadn’t quite etched right through. A simple task to cut down it with the piercing saw once the seam was soldered. But equally had I noticed it before rolling the boiler I could have done it in the flat with a blade.
There are some tabs on the ends of the inner frame at the firebox end but I can’t see any corresponding slots in the cab front, so I think I will have to cut those off to get it to sit in place correctly. But that will be a task for next year when I resume.
- Robpulham
- LNER A4 4-6-2 'Streak'
- Posts: 1721
- Joined: Thu Mar 27, 2008 9:54 pm
- Location: Lower Wensleydale
- Contact:
Re: Great Central Railway Class 5A - LNER J63
I am not sure where last weekend went as I had hoped to achieve a bit more on this build but sometimes that’s the way it goes.
First off I cut out the Diane Carney number plates with a no 6 blade in my piercing saw and filed them to final size. Not knowing for certain whether the actual plates had a rim around the beading or whether the beading was in fact the edge of the plate I left two of them with a rim and asked Brian which he preferred.
Then I soldered the boiler to the formers and fitted it to the body. The bottom edge of the boiler section that fits between the tanks has three tabs either side which fit into corresponding slots on a fold out on the inner tank sides. What a fiddle it was to get all six in the slots together. I hadn’t slept well on Saturday night and in the end, I had a snooze before my brain was clear enough to get them all in place.
- Robpulham
- LNER A4 4-6-2 'Streak'
- Posts: 1721
- Joined: Thu Mar 27, 2008 9:54 pm
- Location: Lower Wensleydale
- Contact:
Re: Great Central Railway Class 5A - LNER J63
Modelling time has been a little sparse just lately, we were fortunate to be gifted a fair quantity of topsoil from a neighbour’s garden which is to be used to level off or reduce the slope on our front lawn and initially I was wheelbarrowing it in.
I would never have moved it all manually in a timely manner, so the gent doing the groundworks offered to use his digger and dumper to bring it round to our house. Now it all needs to moved away from the dwarf wall so that the wall can be built up higher and then finally levelled off.
I have managed to do bits in between and I have got the plunger pickups ready for installation and also prepared all the brake parts ready for fitting. I felt that the brake spreaders were a bit on the flimsy side so I used some of the scrap etch to double the thickness before fitting the clevis’s.
Although I never thought to take a photo of them, the layers that make up the brake shoes and hangers come tagged together in small outer frames which can be placed over each other and gripped as one, to allow the parts to be soldered together before cutting out the individual brake hangers complete with shoe as in the photo above.
- Robpulham
- LNER A4 4-6-2 'Streak'
- Posts: 1721
- Joined: Thu Mar 27, 2008 9:54 pm
- Location: Lower Wensleydale
- Contact:
Re: Great Central Railway Class 5A - LNER J63
With mojo fully restored in between going for my Covid jab I cracked on and got the brakes assembled and soldered in place. I left the crankshaft from the brake cylinder loose for the moment just in case I do find a way to fit the brake cylinder.
I made up a couple of adjusters from some telescopic tube, filing the larger pieces into hexagons to represent nuts at each end.
Next up is fit the sand pipes then to work out how best the motor will fit with the body on. The latter should tell me whether I will be able to fit the brake cylinder after all.
Re: Great Central Railway Class 5A - LNER J63
That really is a beautiful build Rob.
- Robpulham
- LNER A4 4-6-2 'Streak'
- Posts: 1721
- Joined: Thu Mar 27, 2008 9:54 pm
- Location: Lower Wensleydale
- Contact:
Re: Great Central Railway Class 5A - LNER J63
Thanks Simon,
It's good to be back at it.
- Robpulham
- LNER A4 4-6-2 'Streak'
- Posts: 1721
- Joined: Thu Mar 27, 2008 9:54 pm
- Location: Lower Wensleydale
- Contact:
Re: Great Central Railway Class 5A - LNER J63
I managed to get the sand pipes fitted and then moved on to fitting the motor to the chassis and testing within the body.
On this there is good news in that I should be able to squeeze in the brake cylinder albeit that to avoid the plunger pickup I will have to fit it to the rear of the frame spacer instead of the front but at least it will be there.
Then there is bad news. Brian has provided a really nice ABC motor/gearbox unit. Sadly, the kit is designed for a can motor with simple gears mounted to a frame spacer. The motor gear box will fit into the boiler area no problem but where it does cause an issue is that it interferes with the rear brake cross beam which I think I am going to have to cut
- Robpulham
- LNER A4 4-6-2 'Streak'
- Posts: 1721
- Joined: Thu Mar 27, 2008 9:54 pm
- Location: Lower Wensleydale
- Contact:
Re: Great Central Railway Class 5A - LNER J63
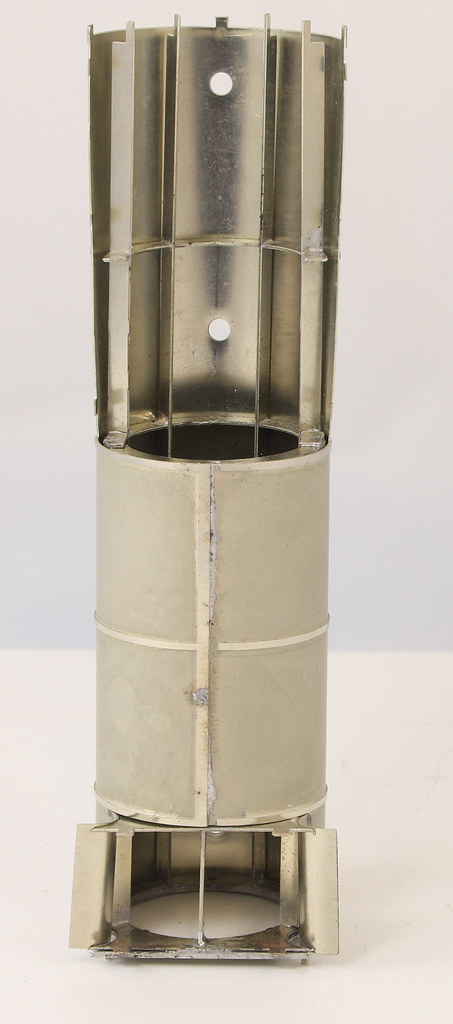
Things have been quietly progressing with the Class 5A and the number of etched parts is diminishing.
The other thing I have been considering is the motor position and I have been trialling fitting it to the middle axle which would remove the need to chop some out of the brake cross beam.
By nibbling some of the boiler/firebox former away it has allowed the motor to slip inside and run without any apparent issues. What I am not sure of yet, because I still have to test it, is whether it affects the movement of the compensation beams.
There isn’t a great deal of room for movement in there so I need to test it before making a final decision.
Re: Great Central Railway Class 5A - LNER J63
I feel strongly that this isn't modelling. It's engineering, in miniature. Lovely stuff Rob.
-
- LNER A4 4-6-2 'Streak'
- Posts: 1729
- Joined: Fri Dec 23, 2011 3:34 pm
Re: Great Central Railway Class 5A - LNER J63
The fundamental question then is how much compensation does the track of the layout(s) it is to operate on require?
The simpler prospect of placing the drive on the rear axle; would it be acceptable to cut out much of the centre section of the cross beam to clear the gear, leavinga tab inside the pull rods each side, and then solder onto those tabs a slightly lower down crossbeam? In 'the gloom beneath' a cross beam positioned a few scale inches lower will not be obvious.
- Robpulham
- LNER A4 4-6-2 'Streak'
- Posts: 1721
- Joined: Thu Mar 27, 2008 9:54 pm
- Location: Lower Wensleydale
- Contact:
Re: Great Central Railway Class 5A - LNER J63
That is indeed a good question, not knowing the layout, the honest answer is I don't know but I want to allow it at least a little movement. Or more importantly I need to ensure that in fitting the motor in the boiler it doesn't push the middle axle up or down leaving either the front or middle axle floating in the air.Hatfield Shed wrote: ↑Tue Mar 09, 2021 3:10 pmThe fundamental question then is how much compensation does the track of the layout(s) it is to operate on require?
The simpler prospect of placing the drive on the rear axle; would it be acceptable to cut out much of the centre section of the cross beam to clear the gear, leavinga tab inside the pull rods each side, and then solder onto those tabs a slightly lower down crossbeam? In 'the gloom beneath' a cross beam positioned a few scale inches lower will not be obvious.
While I understand what you are saying about being able to fudge the cross beam, my concern is that with the wheels being quite small and the gearbox quite substantial that much of the gearbox will be visible when viewed from the side if fitted to the rear axle.
When fitted to the rear axle the gear box/motor is sat like an 'L' if fitted to the middle axle it's sat like this ¬ so the gearbox is less visible when viewed from the side.
- Robpulham
- LNER A4 4-6-2 'Streak'
- Posts: 1721
- Joined: Thu Mar 27, 2008 9:54 pm
- Location: Lower Wensleydale
- Contact:
Re: Great Central Railway Class 5A - LNER J63
Thanks SimonS.A.C. Martin wrote: ↑Tue Mar 09, 2021 11:09 am I feel strongly that this isn't modelling. It's engineering, in miniature. Lovely stuff Rob.