Lambton, Hetton and Joicey Colliery (Kitson) No.29 build
Moderators: 52D, Tom F, Rlangham, Atlantic 3279, Blink Bonny, Saint Johnstoun, richard
- richard
- LNER A4 4-6-2 'Streak'
- Posts: 3390
- Joined: Thu Sep 01, 2005 5:11 pm
- Location: Wichita Falls, Texas
- Contact:
Re: Lambton, Hetton and Joicey Colliery (Kitson) No.29 build
The colour seems to be getting better.
I recall No. 29 being lighter but everyone's colour memory is notoriously bad.
I have seen that darker 'mossy' colour on a model before - I had a Union Mills B12 that was that sort of colour. Too dark imho.
Might be a sucking-eggs comment, but also use daylight lamps when comparing colours and painting. (thankfully with CFLs and LEDs, daylight lamps with standard fittings are easy to find, or they are here in the US)
(if it helps, for my 7mm Y7 I used the Phoenix Darlington Green with a dab of yellow to lighten it)
Richard Marsden
LNER Encyclopedia
LNER Encyclopedia
-
Paul_sterling
- GER D14 4-4-0 'Claud Hamilton'
- Posts: 332
- Joined: Fri May 10, 2013 12:50 pm
- Location: Durham
Re: Lambton, Hetton and Joicey Colliery (Kitson) No.29 build
Thanks Richard,richard wrote: ↑Tue Dec 17, 2019 6:07 pm The colour seems to be getting better.
I recall No. 29 being lighter but everyone's colour memory is notoriously bad.
I have seen that darker 'mossy' colour on a model before - I had a Union Mills B12 that was that sort of colour. Too dark imho.
Might be a sucking-eggs comment, but also use daylight lamps when comparing colours and painting. (thankfully with CFLs and LEDs, daylight lamps with standard fittings are easy to find, or they are here in the US)
(if it helps, for my 7mm Y7 I used the Phoenix Darlington Green with a dab of yellow to lighten it)
I've never heard of Daylight lamps before, I shall look into it, as I can see the reason, the light No.29 sits under has a HUGE difference on the appeared colour. I'm inclined to agree from the feedback that Phoenix paints are the ones to use, once I'm set up for spraying, that's the way i'm going to go with this, as I can adjust the paint slightly if need be.
As a slight aside, I've been commissioned (sort of) to make a fit in cab for the Hornby Austerity, to recreate LH&JC No.60. As the Hornby Mouldings are quite chunky on this model, printing shouldn't be too challenging.
Cheers. Paul.
- Atlantic 3279
- LNER A4 4-6-2 'Streak'
- Posts: 6659
- Joined: Fri Jun 26, 2009 9:51 am
- Location: 2850, 245
Re: Lambton, Hetton and Joicey Colliery (Kitson) No.29 build
Of course, even if you succeed in obtaining a "daylight" lamp that genuinely conforms rigorously to a version of daylight, the colour rendering in that illumination won't guarantee that apparently matched colours will still match in other lights, and you face the problem that daylight itself isn't of fixed composition. If you really want to start delving into the complications you could begin with this:
https://www.sciencedirect.com/topics/en ... illuminant
Alternatively, just try to relax about the question of "correct colour".
https://www.sciencedirect.com/topics/en ... illuminant
Alternatively, just try to relax about the question of "correct colour".
Most subjects, models and techniques covered in this thread are now listed in various categories on page1
Dec. 2018: Almost all images that disappeared from my own thread following loss of free remote hosting are now restored.
Dec. 2018: Almost all images that disappeared from my own thread following loss of free remote hosting are now restored.
- richard
- LNER A4 4-6-2 'Streak'
- Posts: 3390
- Joined: Thu Sep 01, 2005 5:11 pm
- Location: Wichita Falls, Texas
- Contact:
Re: Lambton, Hetton and Joicey Colliery (Kitson) No.29 build
Well yes, there's a potential rabbit hole there, but 'regular' daylight lamps are probably sufficient - definitely better than the yellowish lamps that most household lamps are (ie. to look like classic incandescents), and you should probably be using daylight lamps for the layout to match...
I notice a lot of people photograph their models outside - and I've been known to do this; and when I was in the Tex-N club (N-scale NTRAK) it was amazing how much better the layout looked with natural sunlight in the atrium of the George (HW) Bush Presidential Library, compared to the usual artificially lit dingy exhibition halls.
I notice a lot of people photograph their models outside - and I've been known to do this; and when I was in the Tex-N club (N-scale NTRAK) it was amazing how much better the layout looked with natural sunlight in the atrium of the George (HW) Bush Presidential Library, compared to the usual artificially lit dingy exhibition halls.
Richard Marsden
LNER Encyclopedia
LNER Encyclopedia
-
john coffin
- LNER V2 2-6-2 'Green Arrow'
- Posts: 1101
- Joined: Mon Sep 19, 2011 12:24 am
Re: Lambton, Hetton and Joicey Colliery (Kitson) No.29 build
When I did a lot of spraying I used "daylight" bulbs, and nowadays, I use a daylight bulb when drawing on the computer.
I have bought as modern one from Lidl which was a benchtop LED type at less than 30 QUid, works very well, and
makes continued computer use in winter a much more pleasant experience.
Interestingly, the only "old fashioned" type of bulbs that you can easily buy are daylight bulbs for old flexible type office
lamps, they are a reddish colour.
Whilst I understand the viewpoint of Graeme, if you use one standard type of light, then you will have a "standard" personal
view.
As has been said,colour is subjective, but at least if you have a basic line from which you can paint.
Paul
-
Paul_sterling
- GER D14 4-4-0 'Claud Hamilton'
- Posts: 332
- Joined: Fri May 10, 2013 12:50 pm
- Location: Durham
Re: Lambton, Hetton and Joicey Colliery (Kitson) No.29 build
Thanks for all of the useful feedback gents, I'll will put it to good use.
In the meantime, I've done some extra parts, which are not to fit on No.29, but when time permits, and I print another frame, will be to recreate a one of the lost LH&JC Kitsons.
 IMG_20191220_103456[1] by Paul Sterling, on Flickr
This is No.31. Of the Three Kitsons built for Lambton 1904-1907, they are basically the same, but not, so to speak. No.29 and No.30 was almost identical barring one having a twin handle smokebox door, No.30 having a handle and wheel, they also have different tube sizes. There may have been other changes, but difficult to identify from the small pics available. No.31 has the same basic dimensions, and has the tube sizes from No.30, but visually, it has a tapered-top, full-width bunker, and its cab was significantly different, looking more like it had been borrowed from a Sentinel DH or similar. The weight distribution was different, but I was kind of expecting the bigger bunker to bring the weight rearward, but the opposite is the case.
Paul.
In the meantime, I've done some extra parts, which are not to fit on No.29, but when time permits, and I print another frame, will be to recreate a one of the lost LH&JC Kitsons.
 IMG_20191220_103456[1] by Paul Sterling, on Flickr
This is No.31. Of the Three Kitsons built for Lambton 1904-1907, they are basically the same, but not, so to speak. No.29 and No.30 was almost identical barring one having a twin handle smokebox door, No.30 having a handle and wheel, they also have different tube sizes. There may have been other changes, but difficult to identify from the small pics available. No.31 has the same basic dimensions, and has the tube sizes from No.30, but visually, it has a tapered-top, full-width bunker, and its cab was significantly different, looking more like it had been borrowed from a Sentinel DH or similar. The weight distribution was different, but I was kind of expecting the bigger bunker to bring the weight rearward, but the opposite is the case.
Paul.
-
Paul_sterling
- GER D14 4-4-0 'Claud Hamilton'
- Posts: 332
- Joined: Fri May 10, 2013 12:50 pm
- Location: Durham
Re: Lambton, Hetton and Joicey Colliery (Kitson) No.29 build
I've got a little closer to dealing with the signwriting on No.29. LNER typeface is similar (but not the same) as Gill Sans. The Gill sans shadowed typeface available as a downloadable add on for Microsoft Word gets you close to it, but the aspect ratio needs to be altered, even so, one or two letters would still need to be individually modified to get a visual representation of the LH&JC.
I did also receive, a very generous set of pictures from one of the Lambton Locomotives trust volunteers, who was involved with the painting of No.29, some head-on pics of the text, from which I was able to generate a set of edited letters, that would probably pass for No.29, the numericals, would just be standard early LNER for Green loco ones. as Per Fox transfers "FRH4309 - LNER Earlier Lettering/Numbering for green Locos". With this strip, I'm only short of HJC and a full stop anyway.
Thanks, Paul.
-
Paul_sterling
- GER D14 4-4-0 'Claud Hamilton'
- Posts: 332
- Joined: Fri May 10, 2013 12:50 pm
- Location: Durham
-
Paul_sterling
- GER D14 4-4-0 'Claud Hamilton'
- Posts: 332
- Joined: Fri May 10, 2013 12:50 pm
- Location: Durham
Re: Lambton, Hetton and Joicey Colliery (Kitson) No.29 build
Hi Folks,
I recently got asked to produce another Lambton Colliery product, the cabs fitted to (some) Hunslet Austerity tanks based there.
 IMG_20200106_192538[1] by Paul Sterling, on Flickr
 IMG_20200106_192546[1] by Paul Sterling, on Flickr
The prints weren't brilliant, so the purchaser now had the CAD, and will source a print elsewhere. My printer is having technical problems at the moment, which I am in the process of investigating, but if nothing else, these particular prints are a direct replacement for the Hornby Cab on the Austerity, to give a reasonable impression of the Lambton Cab. Obviously no dimensions for this one (though No.60 still exists), so it was done largely using the profile from No.29, as well as "scaled" pictures of the numerous engines modified with this cab.
Paul.
I recently got asked to produce another Lambton Colliery product, the cabs fitted to (some) Hunslet Austerity tanks based there.
 IMG_20200106_192538[1] by Paul Sterling, on Flickr
 IMG_20200106_192546[1] by Paul Sterling, on Flickr
The prints weren't brilliant, so the purchaser now had the CAD, and will source a print elsewhere. My printer is having technical problems at the moment, which I am in the process of investigating, but if nothing else, these particular prints are a direct replacement for the Hornby Cab on the Austerity, to give a reasonable impression of the Lambton Cab. Obviously no dimensions for this one (though No.60 still exists), so it was done largely using the profile from No.29, as well as "scaled" pictures of the numerous engines modified with this cab.
Paul.
-
Paul_sterling
- GER D14 4-4-0 'Claud Hamilton'
- Posts: 332
- Joined: Fri May 10, 2013 12:50 pm
- Location: Durham
Re: Lambton, Hetton and Joicey Colliery (Kitson) No.29 build
A visit to the NYMR last week (see my new thread on this page) provided me with an opportunity too good to miss.
look closely at the left hand wheel splasher........
 C4EFA429-798D-4319-88CD-1AA931581078 by Paul Sterling, on Flickr
 0172FF7F-20A7-4B9F-AE1C-FA55942CD446 by Paul Sterling, on Flickr
 59D4FF46-50E1-4A53-9D58-20A5047DECAF by Paul Sterling, on Flickr
The model isn't finished yet, but once the S1 is out of the way, this will be my main focus. The lightness of the paint colour in this shot, compared to real No.29, makes me think the fix to my colour problems is to make the room brighter, a better spread of "white" LED's rather than the warm white I currently have. pictures always seem to look quite "nostalgic" shall we say in that room.
Paul.
look closely at the left hand wheel splasher........
 C4EFA429-798D-4319-88CD-1AA931581078 by Paul Sterling, on Flickr
 0172FF7F-20A7-4B9F-AE1C-FA55942CD446 by Paul Sterling, on Flickr
 59D4FF46-50E1-4A53-9D58-20A5047DECAF by Paul Sterling, on Flickr
The model isn't finished yet, but once the S1 is out of the way, this will be my main focus. The lightness of the paint colour in this shot, compared to real No.29, makes me think the fix to my colour problems is to make the room brighter, a better spread of "white" LED's rather than the warm white I currently have. pictures always seem to look quite "nostalgic" shall we say in that room.
Paul.
-
Paul_sterling
- GER D14 4-4-0 'Claud Hamilton'
- Posts: 332
- Joined: Fri May 10, 2013 12:50 pm
- Location: Durham
Re: Lambton, Hetton and Joicey Colliery (Kitson) No.29 build
A recent request for some additional No.29's meant I have been printing again, but now I own a DLP "Resin" printer, this afforded an opportunity to see if DLP does offer a better print for features such as the Boiler/Smokebox, and detail.
I'll add the pictures presently, but my observations this far is as follows.
- DLP provides a smoother surface finish,
- Details such as the smokebox hinges, rivets etc, can easily be printed, though they need to be made slightly oversize in some instances
Surfaces like the cab front need considerably less finishing work after printing than FDM printed ones do.
- I'm still a firm supporter of using an FDM printer for features such as the running plate, and flat surfaces, as they are more stable, and flatter than DLP can offer.
- warpage has to be understood and factored in for during print orientation, and support setup.
- the parts grow due to light spillage at each end by nominally 0.1mm, so in the case of a 10mm x 1mm thick RSJ for example, the outside measurement is 10.2, and the inside measurement is 7.8mm. where precision is required, this has to be factored in at Design stage to joggle the CAD size to compensate.
Overall its an experiment I'm pleased i've tried, and the investment in the new printer has been justified, it'll mean all future prints I do are hybrid prints, using FDM made running plates, and a combination of DLP and FDM upper parts. Rivets wil now be modelled on tanks, smokeboxes, etc. but I will still add a significant proportion of the detail components separately by the usual suppliers, Alan Gibson, Markits, Comet, etc.
Thanks, Paul.
-
Paul_sterling
- GER D14 4-4-0 'Claud Hamilton'
- Posts: 332
- Joined: Fri May 10, 2013 12:50 pm
- Location: Durham
Re: Lambton, Hetton and Joicey Colliery (Kitson) No.29 build
Hi Everyone,
Ironically, despite being stuck at home on furlough, I've had very little time online, mostly spending my time on daddy day care duties, which I am chuffed about, as not long back i'd expressed concerns that work and 'home work' was meaning I was not able to spend much time with my Son, so happily now, we've had loads of time together. I have also managed to do a bit of work on the model railway too.
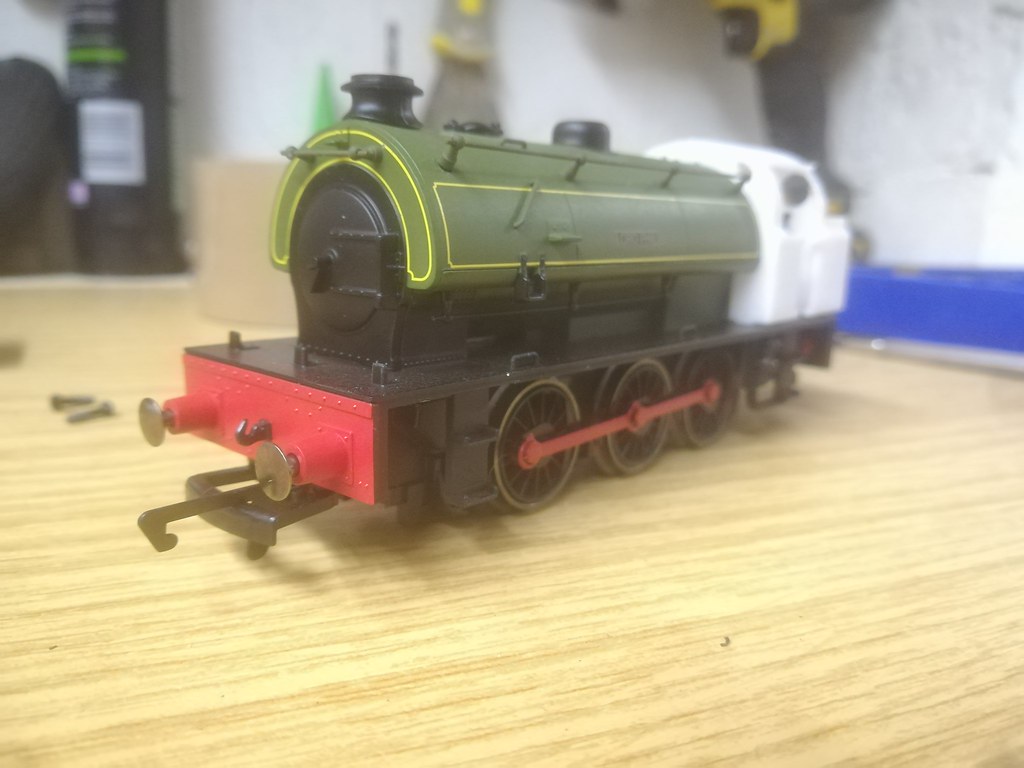
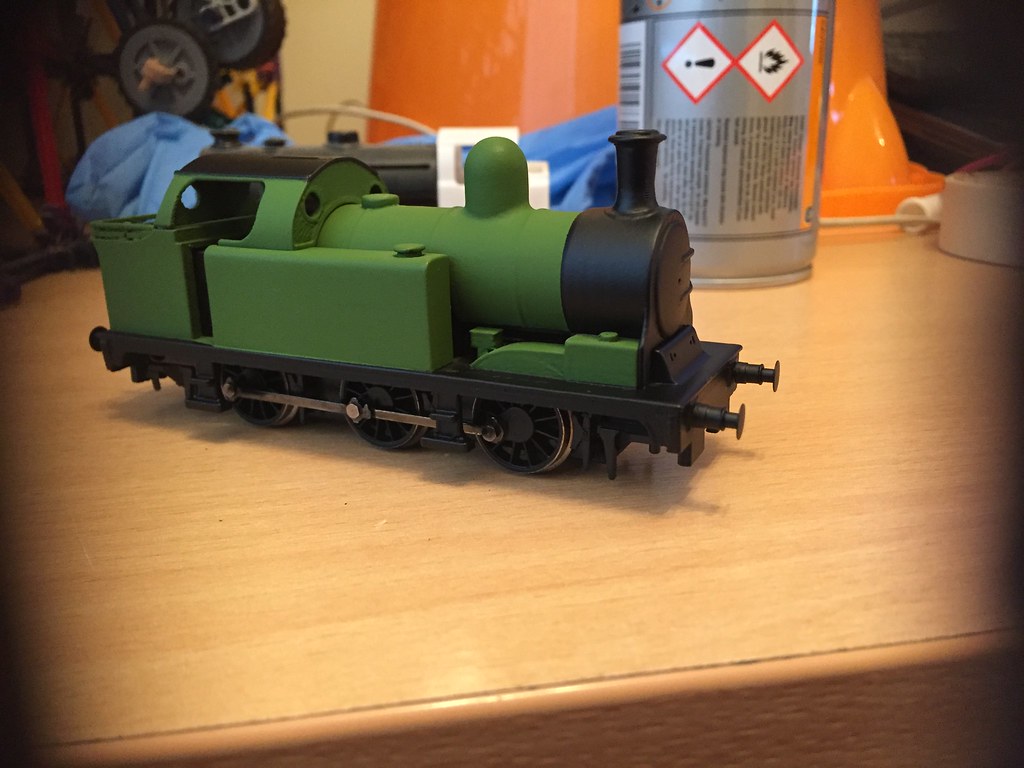
The 0-6-0 (LH&JC No.61) is now finished (well i'm happy with it, it was always a mule for work on No.29, so I learned on it, particularly colour, which we'll come back to later). Happily a friend took on the other 0-6-0 shell, and has built that as LH&JC/NCB No.62, I'll get his permission before I post any pics. No.62 has a different cab to 61, partly because my friend wanted a non-Lambton cab, but also so that they were unique in their own right. Mine has stayed as I planned, a bob-tailed version of No.29.
The S1 is also now finished with one exception, the cab! I'll cover that subject in its thread.
viewtopic.php?f=3&t=13445&start=45
 IMG_1397 by Paul Sterling, on Flickr
 IMG_1457 by Paul Sterling, on Flickr
 IMG_1472 by Paul Sterling, on Flickr
 IMG_1490 by Paul Sterling, on Flickr
Onto 29,
As soon as I got No.61 finished, I made an effort to crack on with No.29, starting with the detail parts, such as the vacuum ejector, and blower controls, and drilling the holes for various different grab rails around the engine.
 IMG_1513 by Paul Sterling, on Flickr
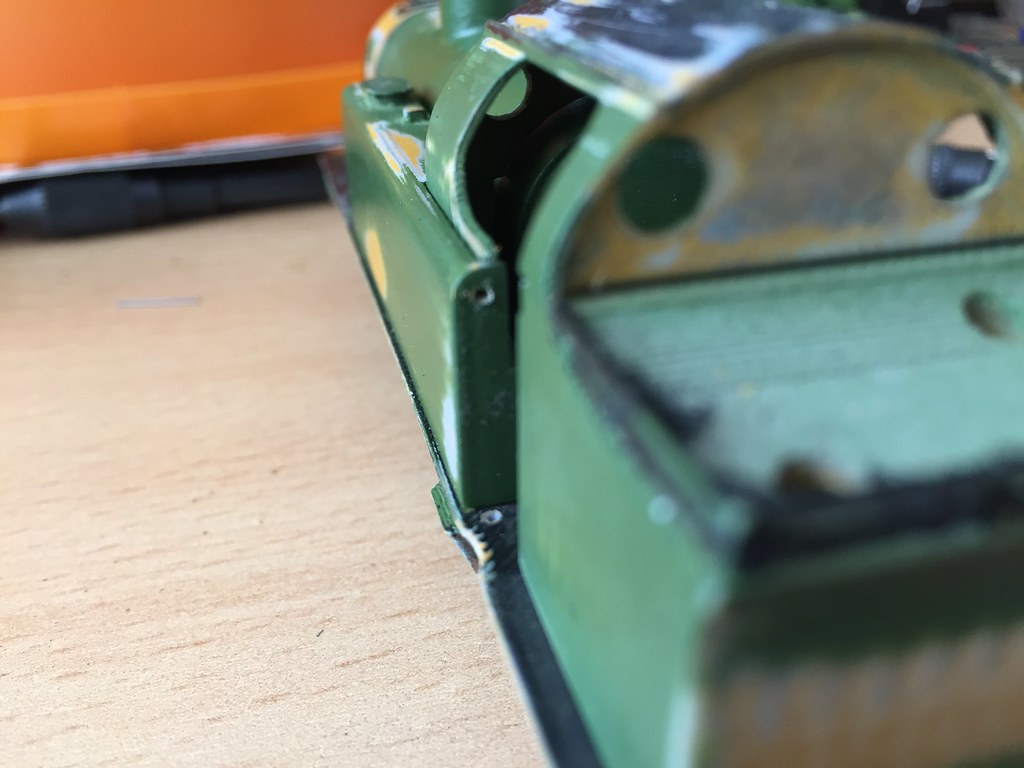 IMG_1514 by Paul Sterling, on Flickr
That famous, distinctive hooter
 IMG_1522 by Paul Sterling, on Flickr
Underscale in this instance!
 IMG_1524 by Paul Sterling, on Flickr
The blower control valve, this was slimmed down a lot once the glue had dried.
As well as its bracket, and the smokebox grab rail
 IMG_1525 by Paul Sterling, on Flickr
Next was rivets, this was an experience! The S1 has a couple of strips, No.29 used nearly the entire pack!
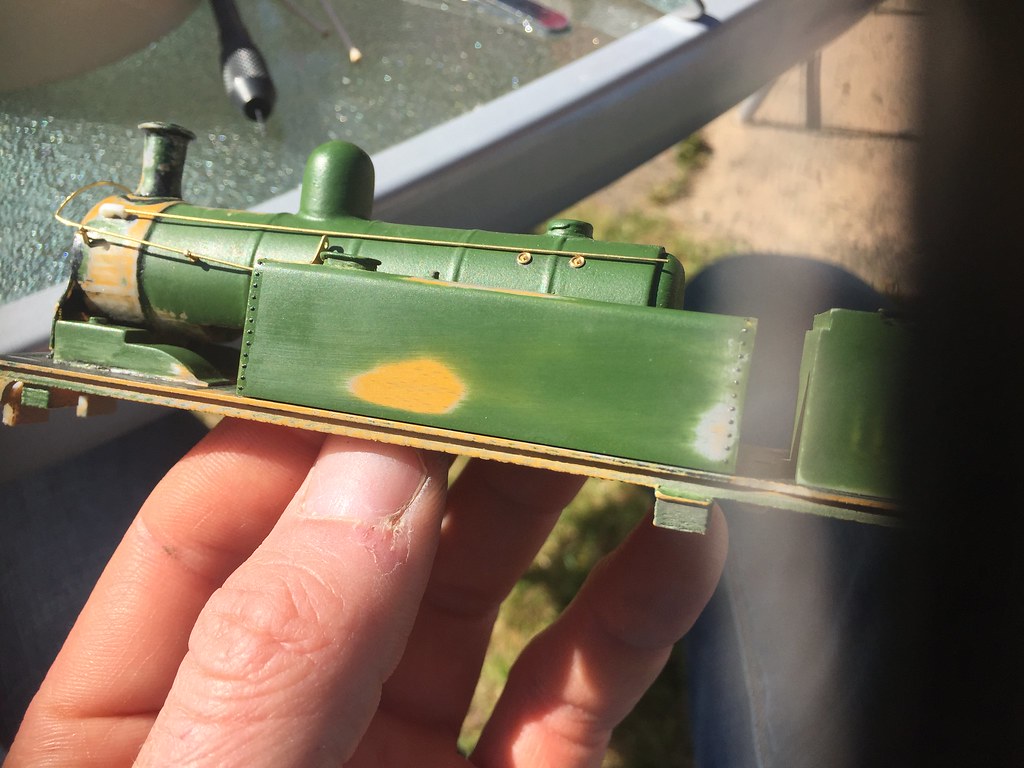 IMG_1542 by Paul Sterling, on Flickr
 IMG_1546 by Paul Sterling, on Flickr
Vac ejector pipe
 IMG_1549 by Paul Sterling, on Flickr
Ironically, despite being stuck at home on furlough, I've had very little time online, mostly spending my time on daddy day care duties, which I am chuffed about, as not long back i'd expressed concerns that work and 'home work' was meaning I was not able to spend much time with my Son, so happily now, we've had loads of time together. I have also managed to do a bit of work on the model railway too.
The 0-6-0 (LH&JC No.61) is now finished (well i'm happy with it, it was always a mule for work on No.29, so I learned on it, particularly colour, which we'll come back to later). Happily a friend took on the other 0-6-0 shell, and has built that as LH&JC/NCB No.62, I'll get his permission before I post any pics. No.62 has a different cab to 61, partly because my friend wanted a non-Lambton cab, but also so that they were unique in their own right. Mine has stayed as I planned, a bob-tailed version of No.29.
The S1 is also now finished with one exception, the cab! I'll cover that subject in its thread.
viewtopic.php?f=3&t=13445&start=45
 IMG_1397 by Paul Sterling, on Flickr
 IMG_1457 by Paul Sterling, on Flickr
 IMG_1472 by Paul Sterling, on Flickr
 IMG_1490 by Paul Sterling, on Flickr
Onto 29,
As soon as I got No.61 finished, I made an effort to crack on with No.29, starting with the detail parts, such as the vacuum ejector, and blower controls, and drilling the holes for various different grab rails around the engine.
 IMG_1513 by Paul Sterling, on Flickr
 IMG_1514 by Paul Sterling, on Flickr
That famous, distinctive hooter
 IMG_1522 by Paul Sterling, on Flickr
Underscale in this instance!
 IMG_1524 by Paul Sterling, on Flickr
The blower control valve, this was slimmed down a lot once the glue had dried.
As well as its bracket, and the smokebox grab rail
 IMG_1525 by Paul Sterling, on Flickr
Next was rivets, this was an experience! The S1 has a couple of strips, No.29 used nearly the entire pack!
 IMG_1542 by Paul Sterling, on Flickr
 IMG_1546 by Paul Sterling, on Flickr
Vac ejector pipe
 IMG_1549 by Paul Sterling, on Flickr
-
Paul_sterling
- GER D14 4-4-0 'Claud Hamilton'
- Posts: 332
- Joined: Fri May 10, 2013 12:50 pm
- Location: Durham
Re: Lambton, Hetton and Joicey Colliery (Kitson) No.29 build
Next was the lubricator plumbing.
 IMG_1553 by Paul Sterling, on Flickr
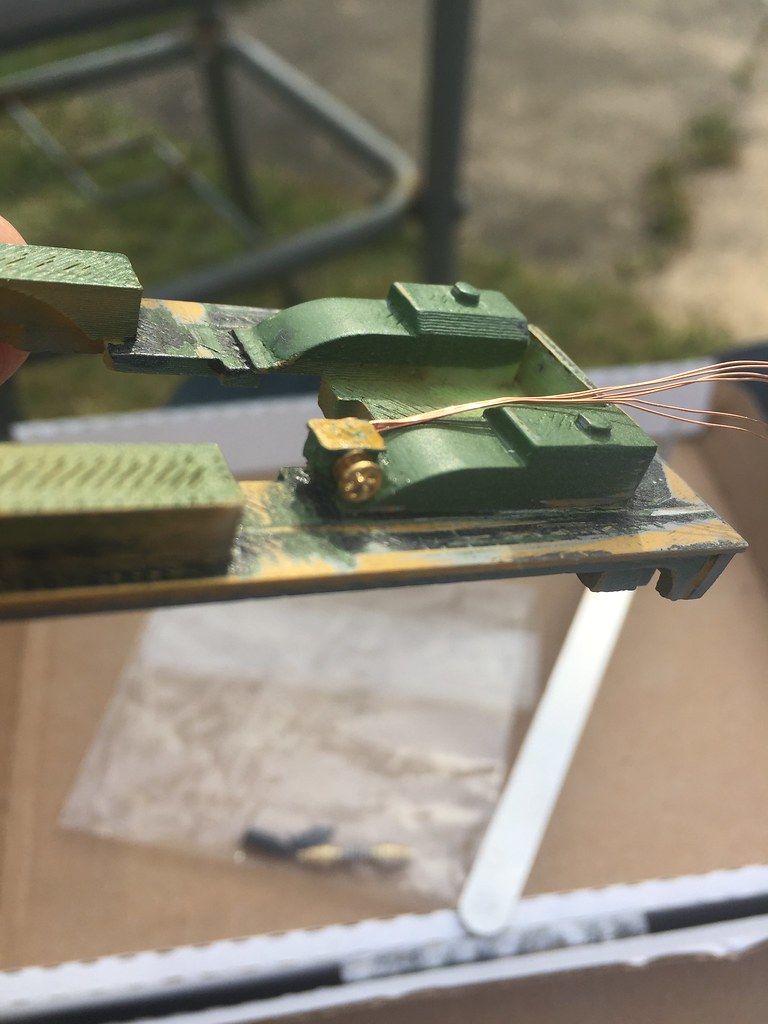
I've used six 'pipes', but in reality, 29 has a lot of dividers in between the frames, as well as extra lubrication points that are just served by oil wells.
 IMG_1554 by Paul Sterling, on Flickr
Same method as the S1, I do have a brass wakefield lubricator, but as I printed the casing on 29, I just took a GCR style smokebox door handle/wheel, and fitted that to the box for the primer wheel.
 IMG_1574 by Paul Sterling, on Flickr
Onto paint. The Railmatch Doncaster Green goes crazy dark with more than one layer, so I decided to do what I'd harboured for some time, and used that as the background shade.
 IMG_1692 by Paul Sterling, on Flickr
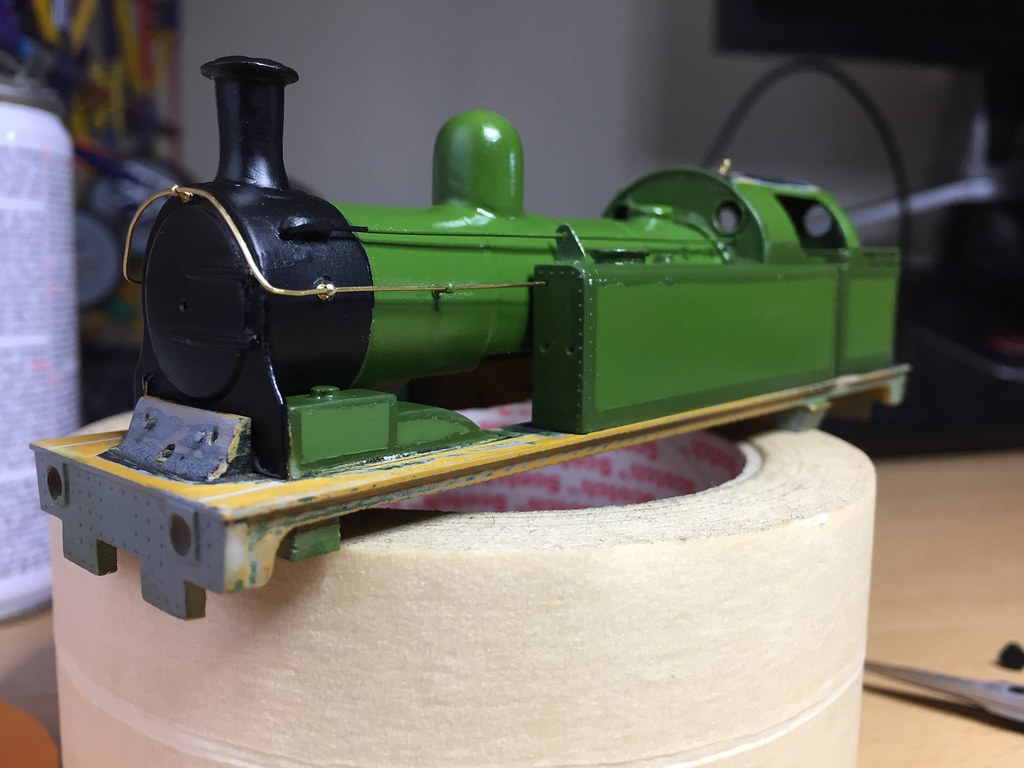
I've broke the rules somewhat, the Railmatch is an enamel, and the top light colour is in fact Humbrol Acryllic, Grass Green, which is what was used on No.61, but with a gloss varnish on, matches right. I left the paint a week or so between enamel and acrylic coats, and I'd have preferred not to mix them really in a perfect world.
 IMG_1693 by Paul Sterling, on Flickr
 IMG_1697 by Paul Sterling, on Flickr
But I think its come out okay.
I'm now on with the lining of the loco, not something I've never done before.
 IMG_1706 by Paul Sterling, on Flickr
There are many more pics in the album, so please by all means have a look.
Thanks, Paul.
 IMG_1553 by Paul Sterling, on Flickr
I've used six 'pipes', but in reality, 29 has a lot of dividers in between the frames, as well as extra lubrication points that are just served by oil wells.
 IMG_1554 by Paul Sterling, on Flickr
Same method as the S1, I do have a brass wakefield lubricator, but as I printed the casing on 29, I just took a GCR style smokebox door handle/wheel, and fitted that to the box for the primer wheel.
 IMG_1574 by Paul Sterling, on Flickr
Onto paint. The Railmatch Doncaster Green goes crazy dark with more than one layer, so I decided to do what I'd harboured for some time, and used that as the background shade.
 IMG_1692 by Paul Sterling, on Flickr
I've broke the rules somewhat, the Railmatch is an enamel, and the top light colour is in fact Humbrol Acryllic, Grass Green, which is what was used on No.61, but with a gloss varnish on, matches right. I left the paint a week or so between enamel and acrylic coats, and I'd have preferred not to mix them really in a perfect world.
 IMG_1693 by Paul Sterling, on Flickr
 IMG_1697 by Paul Sterling, on Flickr
But I think its come out okay.
I'm now on with the lining of the loco, not something I've never done before.
 IMG_1706 by Paul Sterling, on Flickr
There are many more pics in the album, so please by all means have a look.
Thanks, Paul.
-
Paul_sterling
- GER D14 4-4-0 'Claud Hamilton'
- Posts: 332
- Joined: Fri May 10, 2013 12:50 pm
- Location: Durham
Re: Lambton, Hetton and Joicey Colliery (Kitson) No.29 build
I've completed some more work on 29, the lining is a task I am not made for! I had to redo the bunker lining due to a masking incident, but that is now happily corrected, and I am just on with the half lining around the cab, fiddly to say the least, and to some degree, I can see why a lot would prefer to present No.29 in her NCB days!
Buffer beam detail is all done, and I have redesigned the rear truck to feature an NEM pocket, which also means 1mm of the rear buffer beam bottom is to come off, but a worthwhile sacrifice for improving how the rolling stock follow, as well as a bit more flexibility for tighter radii, as some of those sold are destined for colliery layouts rather than the generous curves on my own NYMR line.
I have finally managed to arrange the LH&JC transfers, happily James Hilton is producing them to a custom order, and look to be excellent thus far. that is really the missing piece of this project, and with those, I'll be able to finish this and move on to No.5.
Thanks, Paul.
-
thecactusman
- NER Y7 0-4-0T
- Posts: 1
- Joined: Tue Sep 28, 2021 8:19 pm
Re: Lambton, Hetton and Joicey Colliery (Kitson) No.29 build
Hi Paul
I am trying to find out as much as I can about Models of LH&JC No 29
Can you help please ?
Check out the NYMR Model Railway Group on facebook
Cheers
John
I am trying to find out as much as I can about Models of LH&JC No 29
Can you help please ?
Check out the NYMR Model Railway Group on facebook
Cheers
John
