West End Workbench
Moderators: 52D, Tom F, Rlangham, Atlantic 3279, Blink Bonny, Saint Johnstoun, richard
Re: West End Workbench
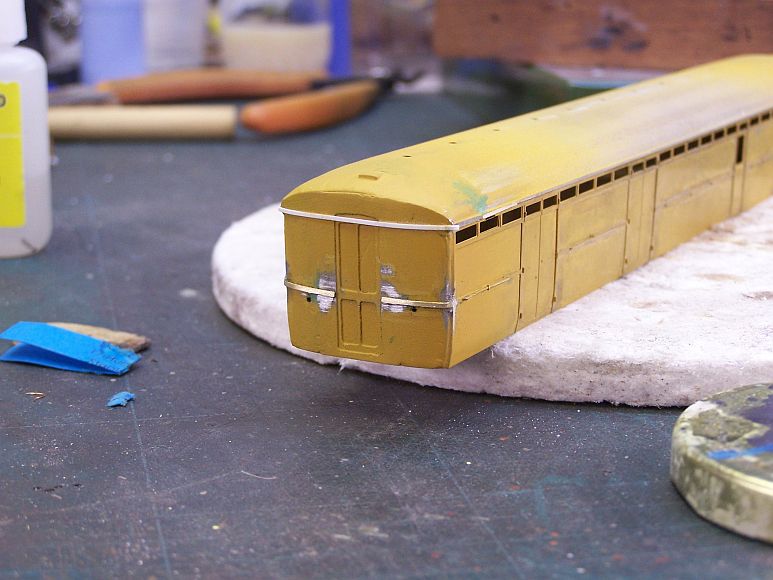
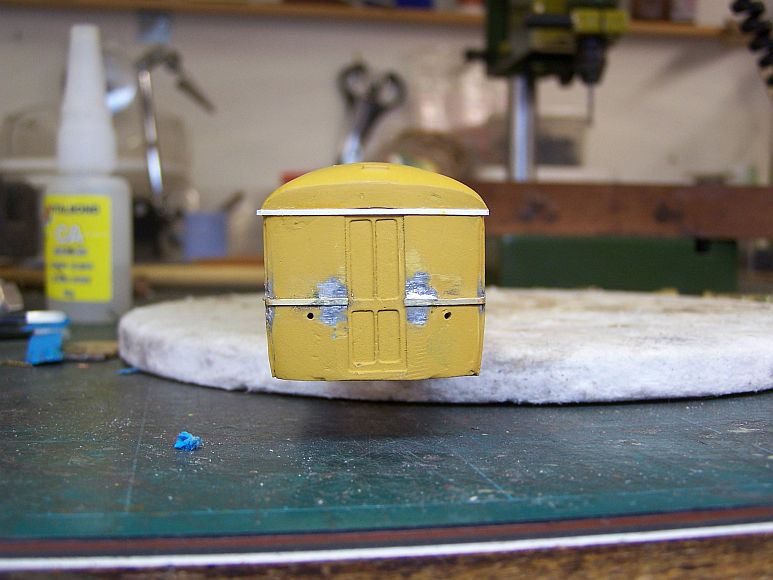
Nice; in fact, this whole project is tasty.jwealleans wrote: ↑Fri Aug 30, 2019 9:50 pm Back to the BG tonight after a few days away from it. I've added the other side handrails and also experimented with the end beading. There will be provision for this in the next iteration, but I had to make my own. For the lower I used some MJT fret, full thickness but filed down after attaching. I haven't quite got both sides in line, but that won't be apparent with a gangway in place. Normal solder to attach to the existing beading, low melt onto the end casting.
For the top beading I hesitated about to try solder as the roof dome is whitemetal and there's a great deal of filler over the upper end. I tried 10 x 30 thou Evergreen strip, superglued in one piece and then to cut down and dress once the glue has fully set.
Although my natural inclination is to solder, I think the plastic looks as good.
Having already dealt with Ian, I can only say his kits are top draw.
Perfection is impossible, however I may choose to serve perfection - Robert Fripp
-
jwealleans
- LNER A4 4-6-2 'Streak'
- Posts: 4303
- Joined: Wed Oct 25, 2006 8:46 am
Re: West End Workbench
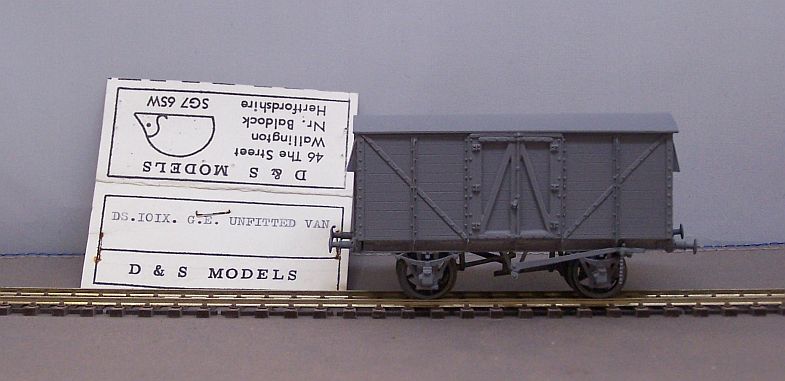
Saw Baz Oliver at Shipley and having crossed his palm i came away with this. Quite an old D & S kit, I think, but not lacking in quality for that. It took me an hour and a quarter to put it together the other evening.
I had another Parkside grain hopper for attention, this one of the ones I built for Thurston about 10 years ago. Some of the river trapping had come off the roof end, so that was repaired and the roof refinished. I removed some unsightly marks in the weathering as well.

This has been the main focus of activity this week, though: NuCast J6 picked up at Doncaster Show about three years ago for the princely sum of £65. It was a finished runner in BR black, but when tested had no sideplay at all and wouldn't go round any sort of curve. I picked up a replacement chassis at S4N this year and with that put together it went into the Nitromors. That was when I found out that it had been glued together. The body has now been reassembled as far as it will be until a new drive unit is fitted.
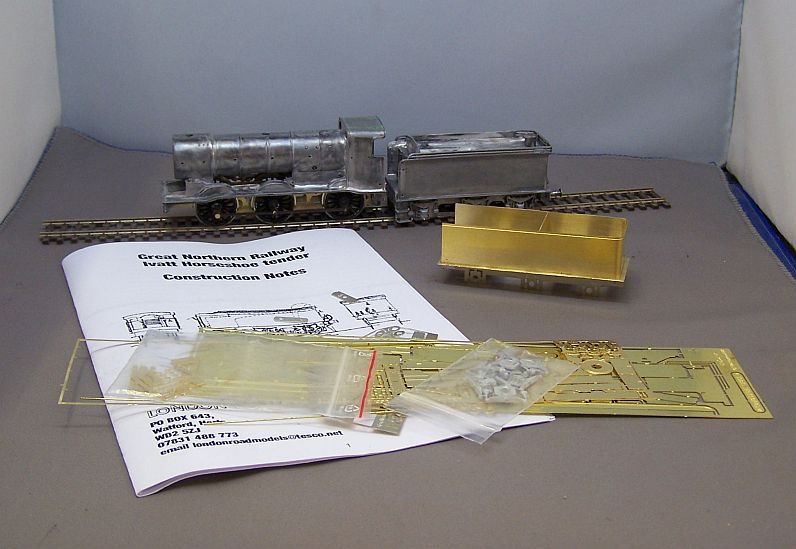
I followed Tony Wright's article in BRM (Dec 2018) for assembly as i have no instructions. That also means, of course, that I have no idea what parts may be missing. The cunning plan is to build an LRM one and use that as a guide. I didn't do a great deal of fettling to the body - it had already been together and although not circular the boiler and smokebox were generally straight and central and the cab, with a bit of filler, didn't come out too badly.
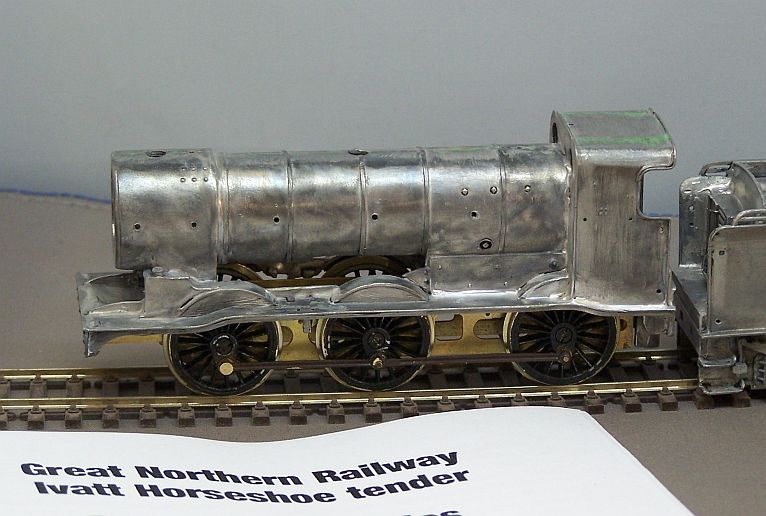
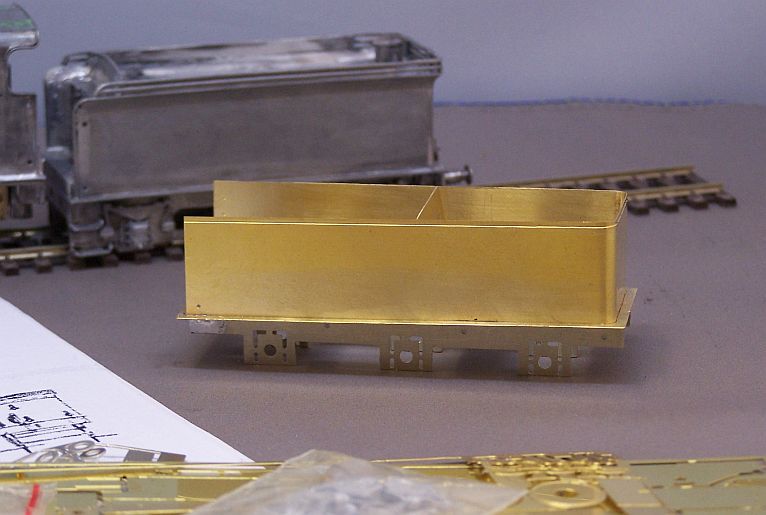
I'm sure everyone knows that the tender supplied in the kit is wrong for all but one engine; the LRM replacement was started last night. The instructions are silent on how you're supposed to attach body to frames, but I think I've worked it out.

I had another Parkside grain hopper for attention, this one of the ones I built for Thurston about 10 years ago. Some of the river trapping had come off the roof end, so that was repaired and the roof refinished. I removed some unsightly marks in the weathering as well.

This has been the main focus of activity this week, though: NuCast J6 picked up at Doncaster Show about three years ago for the princely sum of £65. It was a finished runner in BR black, but when tested had no sideplay at all and wouldn't go round any sort of curve. I picked up a replacement chassis at S4N this year and with that put together it went into the Nitromors. That was when I found out that it had been glued together. The body has now been reassembled as far as it will be until a new drive unit is fitted.

I followed Tony Wright's article in BRM (Dec 2018) for assembly as i have no instructions. That also means, of course, that I have no idea what parts may be missing. The cunning plan is to build an LRM one and use that as a guide. I didn't do a great deal of fettling to the body - it had already been together and although not circular the boiler and smokebox were generally straight and central and the cab, with a bit of filler, didn't come out too badly.

I'm sure everyone knows that the tender supplied in the kit is wrong for all but one engine; the LRM replacement was started last night. The instructions are silent on how you're supposed to attach body to frames, but I think I've worked it out.

-
john coffin
- LNER V2 2-6-2 'Green Arrow'
- Posts: 1101
- Joined: Mon Sep 19, 2011 12:24 am
Re: West End Workbench
Jonathan, I thought i had covered that in the LRM instructions, but it is many years ago that I wrote them.
I had first to figure out the process from the original George Norton instructions, which were decidedly
sparse in George's normal form.
There are holes in the floor and in the spacers for the frames, and nut above, screw up from bottom is
what I am sure I suggested. Only just got in, so have not checked whether the file is still on my computer.
Mind you as I say, the instructions are old, and we have sold a bunch of tenders since John took them over,
lots of people have questioned the instructions, but only one, Rob of this parish has attempted to help update
them.
Let me know if you need any more help
Paul
-
jwealleans
- LNER A4 4-6-2 'Streak'
- Posts: 4303
- Joined: Wed Oct 25, 2006 8:46 am
Re: West End Workbench
Morning Paul,
I went through the instructions several times but I didn't see anything. The rear fixing is easy enough to work out - as you say, the matching pairs of holes are easy enough to spot. it was the front fixing which had me mulling, but I think a bolt attached to the underside of the floor and a nut up through the front frame spacer will do it.
Have the instructions changed recently? As you say, I imagine John has sold a bunch of these tender kits (four to me) and this is the oldest of them having been bought for a K3 originally quite a few years ago. I picked the last one up at York at Easter so maybe I should have started with those instructions.
Up to now the rest seems clear enough, but I'll let you know if there's anything else which comes up. I expect to be back to it later today.
Last edited by jwealleans on Sun Sep 22, 2019 10:40 am, edited 1 time in total.
-
john coffin
- LNER V2 2-6-2 'Green Arrow'
- Posts: 1101
- Joined: Mon Sep 19, 2011 12:24 am
Re: West End Workbench
No we have not actually revised them. Lots of people have made comments, but no one seems to have
had the courage of Rob and actually written anything.
I agree they should be re done, but.
I cannot remember whether the front spacer is low enough to allow a nut under the soleplate
whereas there is I seem to remember a shovelling floor under which the nut could go.
Paul
had the courage of Rob and actually written anything.
I agree they should be re done, but.
I cannot remember whether the front spacer is low enough to allow a nut under the soleplate
whereas there is I seem to remember a shovelling floor under which the nut could go.
Paul
-
jwealleans
- LNER A4 4-6-2 'Streak'
- Posts: 4303
- Joined: Wed Oct 25, 2006 8:46 am
Re: West End Workbench
Right, I've got further with the tender (as far as the bit where you have to form the flare, which is where I've stopped for a deep breath).
There are notes about putting in captive nuts, but I think they're in the wrong sequence.
I'm also rather lost for the arrangement around the coal plate, so I've retreated to look at books and mull it over.
Paul, do you want to discuss instructions by PM rather than on open forum?
There are notes about putting in captive nuts, but I think they're in the wrong sequence.
I'm also rather lost for the arrangement around the coal plate, so I've retreated to look at books and mull it over.
Paul, do you want to discuss instructions by PM rather than on open forum?
-
john coffin
- LNER V2 2-6-2 'Green Arrow'
- Posts: 1101
- Joined: Mon Sep 19, 2011 12:24 am
Re: West End Workbench
Jonathan,
very happy to talk off or on piste.
you have I think my pm so please do not hesitate.
Let me know about the horseshoe, should be able to resolve that for you
quite quickly.
We all have different ideas about whether or not to flatten the soleplate
by installing the outside frames first which was Malcolm's preferred method,
and some use as you have done, the tank sides
but, you have a somewhat wavy soleplate according to what I see of your photos.
That will show in the finished model.
The real problem is know where and how to install the toolboxes at the front.
I seem to remember that the frame spacers were not marked front and rear,
but there were two holes in one, which should go at the rear,with the single
holed spacer at the front.
I hope to be at Scaleforum on the sunday, on the LRM stand, from around 12.30
assuming I can find a way round the bypass traffic problems!!
Paul
-
jwealleans
- LNER A4 4-6-2 'Streak'
- Posts: 4303
- Joined: Wed Oct 25, 2006 8:46 am
Re: West End Workbench
Well, here's the state of play. The loco and tender are on a pleasingly adjacent level and although the camera has bent the image slightly, the tender does indeed sit fractionally tail high = there's some solder on the underside which needs cleaning off.

These are the two captive nuts which are mentioned in the instructions:
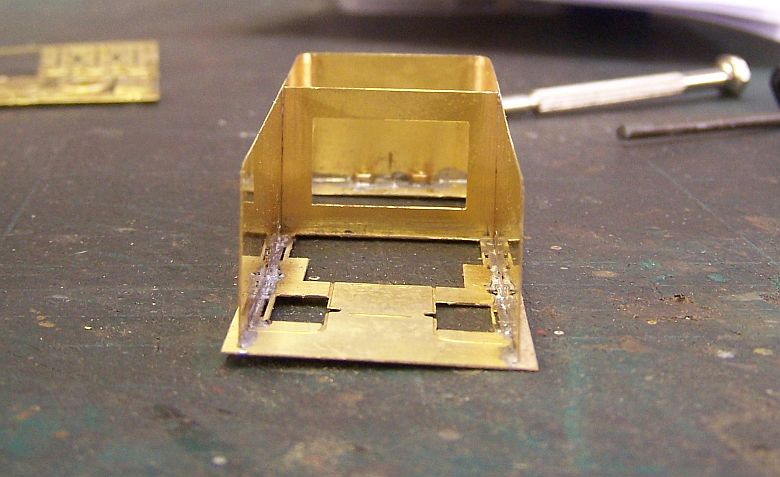
You're advised to fit them after the sides and centre bracing. I have to say that I misread the instructions and understood that part 64 was the tank top, so once you fitted that you'd closed up the main part of the body. I stopped reading at that point , thinking 'you can't get the captive nuts in now'? In fact it's the next step after where I stopped reading, but for me you'd be better off fitting them in the first paragraph, after you've seamed up the sides but before you attach the bulkhead.
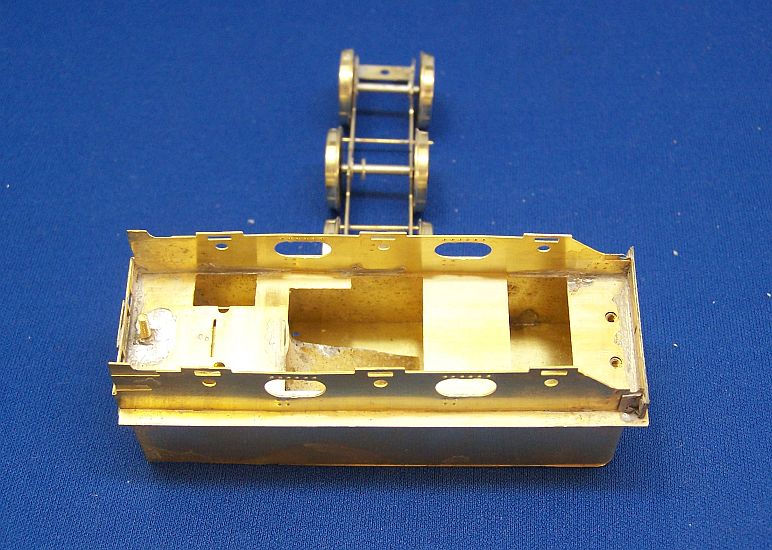
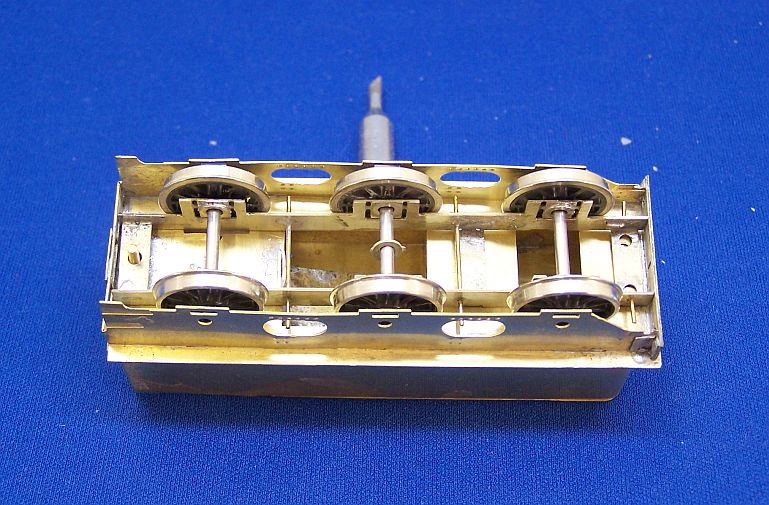
This is how I've elected to attach body to chassis. I prefer a bolt downwards at the front rather than a truncated bolt screwed upwards into a blind nut. The arrangement is going to be awkward at the back when I come to attach a fixing for a Kadee box. For the next one I may well make a different fixing just behind the centre axle brake rigging so I'm not so hampered at the rear.
Now, the next step. These are are parts I'm looking at:

The two brackets (part 66) fold up into a right angle and go either side of the narrow coal space, 2mm in from the front (the instructions say '2mm in front of the tank', which threw me slightly. The large plate (part 65) goes between them - level with the tank tops at each side. Part 67 (with the little handle) then goes 'behind' this? Is that on the coal side of the plate? Sticking up above it, I assume, or it'll be invisible. I'd have thought it should be in front, which is to say on the footplate side. There's also no mention of the etched grille pieces, but the drawing on the front seems to show one on the front of the coal plate.
While I think on, if you do revise these, you're told to put piece 32 on twice.
I've been all over looking for photos - apart from Rob Pulham's preserved shots, are there none published?

These are the two captive nuts which are mentioned in the instructions:

You're advised to fit them after the sides and centre bracing. I have to say that I misread the instructions and understood that part 64 was the tank top, so once you fitted that you'd closed up the main part of the body. I stopped reading at that point , thinking 'you can't get the captive nuts in now'? In fact it's the next step after where I stopped reading, but for me you'd be better off fitting them in the first paragraph, after you've seamed up the sides but before you attach the bulkhead.


This is how I've elected to attach body to chassis. I prefer a bolt downwards at the front rather than a truncated bolt screwed upwards into a blind nut. The arrangement is going to be awkward at the back when I come to attach a fixing for a Kadee box. For the next one I may well make a different fixing just behind the centre axle brake rigging so I'm not so hampered at the rear.
Now, the next step. These are are parts I'm looking at:

The two brackets (part 66) fold up into a right angle and go either side of the narrow coal space, 2mm in from the front (the instructions say '2mm in front of the tank', which threw me slightly. The large plate (part 65) goes between them - level with the tank tops at each side. Part 67 (with the little handle) then goes 'behind' this? Is that on the coal side of the plate? Sticking up above it, I assume, or it'll be invisible. I'd have thought it should be in front, which is to say on the footplate side. There's also no mention of the etched grille pieces, but the drawing on the front seems to show one on the front of the coal plate.
While I think on, if you do revise these, you're told to put piece 32 on twice.
I've been all over looking for photos - apart from Rob Pulham's preserved shots, are there none published?
-
john coffin
- LNER V2 2-6-2 'Green Arrow'
- Posts: 1101
- Joined: Mon Sep 19, 2011 12:24 am
Re: West End Workbench
Just walked in Jonathan, so it might well take me a few moments to get my head around it again.
What is I hope sort of important to remember is that I first wrote these instructions about 20 years ago
when LRM took on the range from George, who as you may remember was a little off hand about the
need for instructions.
Up to this moment, we have no photos of the horseshoe, that show the detail you need, since any
original building was done before the internet made the dissemination of this data so easy, and frankly
we have been concentrating on getting more GNR locos out and got diverted. Maybe after Scaleforum
at Stoke Mandeville, I might be able to see about improving things.
Hope to get back to you later tonight.
Paul
having trouble finding the notes I originally typed for the instructions, so will seek out what I have
in terms of parts to see if I can identify it properly.
Cannot remember if you have a copy of the tender book, the drawing in there might help,
please let me know.
By the by I don't mind airing the dirty linen in public to improve things.
Paul I also love the curved track!!!!!!!!
-
jwealleans
- LNER A4 4-6-2 'Streak'
- Posts: 4303
- Joined: Wed Oct 25, 2006 8:46 am
Re: West End Workbench
It's not all down to you, Paul - I know at least one other member on here has built one of these. I do have the tender book, but it only has a plan view. I'm working to drawing R22 in the main.
Rob Pulham's album (is this the tender with 251?) suggests the arrangement I thought and also puts one of the grille parts on the front of the coal gate (or is it the coal gate?). I can't see where the sliding plate goes on there, though, if it's even present. Of course, it may be incomplete.
Rob Pulham's album (is this the tender with 251?) suggests the arrangement I thought and also puts one of the grille parts on the front of the coal gate (or is it the coal gate?). I can't see where the sliding plate goes on there, though, if it's even present. Of course, it may be incomplete.
-
john coffin
- LNER V2 2-6-2 'Green Arrow'
- Posts: 1101
- Joined: Mon Sep 19, 2011 12:24 am
Re: West End Workbench
Two things Jonathan,
my copy, since I drew them, of R23 has both a plan and a side view beneath it as well as the "front view".
As for the instructions, one of the problems for all kit designers and manufacturers is the certain
knowledge that many modellers only read them after they have made mistakes, (not just model railways I know)
It certainly happens to IKEA furniture!!!!!
But I am of the opinion, with any of these things, if you present the maker with a reasonable argument,
then many of us learn and can evolve and develop better and easier kits.
Mind you, we still can't teach who don't want to learn, how to solder, and try to make etched kits.
Paul
-
jwealleans
- LNER A4 4-6-2 'Streak'
- Posts: 4303
- Joined: Wed Oct 25, 2006 8:46 am
Re: West End Workbench
Whichever drawing I use the end product will be a hybrid as the filler supplied (and the one I'd have used anyway) is round as in R23, but the brakes are behind the wheels as in R22.
Both show a grille as the coal gate - but it's hard to tell whether it's a grille on a solid plate or just has a gap beneath it. I also can't see a part on the etch which looks like the little shelf which sticks out of the front.
Both show a grille as the coal gate - but it's hard to tell whether it's a grille on a solid plate or just has a gap beneath it. I also can't see a part on the etch which looks like the little shelf which sticks out of the front.
-
john coffin
- LNER V2 2-6-2 'Green Arrow'
- Posts: 1101
- Joined: Mon Sep 19, 2011 12:24 am
Re: West End Workbench
Having searched around Jonathan, I do not actually have a horseshoe tender in my collection,
so cannot attest to the parts.
I have checked the GA that I took the drawing from, it is indeed a "front ender" in terms of the brakes,
however not all Horseshoe tenders had brake shoes at the front of the wheels. I will have to see
if I can find my notes which give a build number.
This is one of the reasons that there were no photos in the tender book. Malcolm was very clear that in
fact determining the accuracy of a tender type from available photos was almost impossible, due to the
way in which most old photos were taken. SO we have all the problems about toolbox placement etc.
Let alone brake positioning.
Malcolm was very clear that the brake positioning of the tender behind No 251 in preservation was wrong,
since they did not carry them in revenue service. Still that gets us back to all the GNR tenders in preservation.
Paul
Re: West End Workbench
Jon,
In 2011 I bought (and built) a Nucast J6 - cost me £62.50 - still on the box, so your price about correct! About the same time I bought the Crownline J19 and J20 we did a deal on.
I still have the full Autocom J6 instructions, but don't have your address any longer. If you want I can Photostat tomorrow and mail or email.
Best Regards
Ray Sadler
