LNER Q1/2 Build.
Moderators: 52D, Tom F, Rlangham, Atlantic 3279, Blink Bonny, Saint Johnstoun, richard
-
- GER D14 4-4-0 'Claud Hamilton'
- Posts: 332
- Joined: Fri May 10, 2013 12:50 pm
- Location: Durham
LNER Q1/2 Build.
Hi Folks,
First build for me. A couple of years ago I made a few 009 3D printed Loco's, they came out alright, but as is usually the case, plenty of post process was/is required.
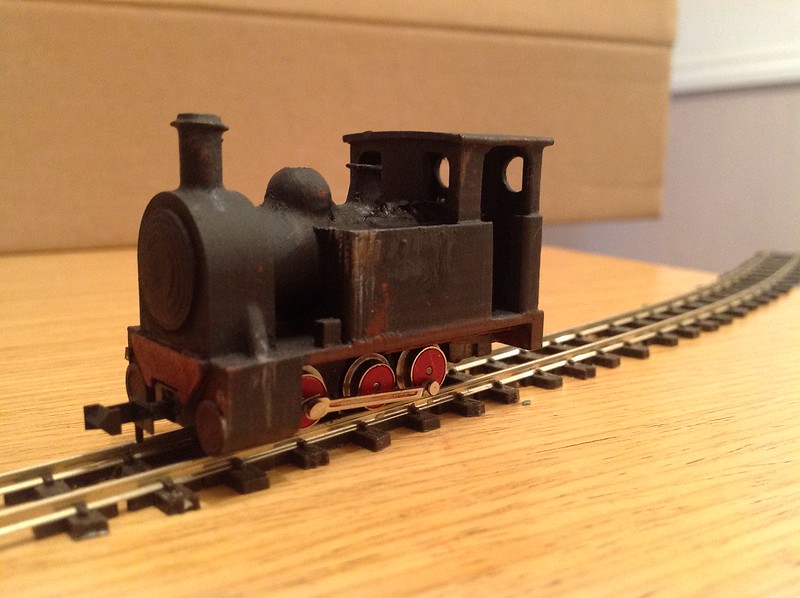
Photo 28-08-2017, 19 46 45 by Paul Sterling, on Flickr
Photo 28-08-2017, 19 42 38 by Paul Sterling, on Flickr
As you can see, they still needed filling and finishing. The FDM process by its very nature, builds parts in layers, and curved surfaces, if not carefully orientated, have a finish not unlike woodgrain.
I've long since admired the LNER Thompson Q1, Denis Griffiths book, Heavy Freight Locomotives of Britain inspired me to have a go at making one, as it seems none of the manufacturers would ever do so, but I don't have the abilities with plasticard to do the engine justice, so a 3D printed one would almost certainly be the way. A heavily price reduced Bachmann ROD 2-8-0 sealed the deal.
Thanks to very kind and patient help from Richard (Mossie) and Graeme (Atlantic 3279) I put the design together on CAD, based off their info, and the line diagrams in Robinson Locomotives (Brian Haresnape & Peter Rowledge), the aforementioned Griffiths book, and Yeadons' LNER Locomotives Volume 20. I've since bought the RCTS book which covers the class. I've modelled the Q1/2 with the extended rear bunker, as the extra 2mm scale makes it long enough to use the Bachmann chassis unmodified.
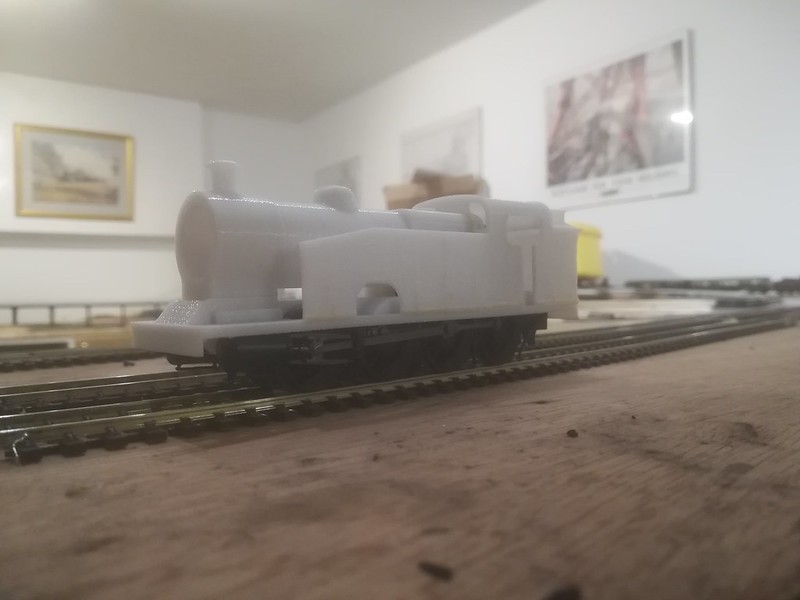
This is the earliest mule print, to make sure everything goes together. The print was done in three parts, so that 1, I could change dimensions without having to reprint the whole thing, and 2, so that each respective part, smokebox/boiler, frames and tank/cab/bunker could all be orientated in a direction to limit the wood-grain effect and maximise structural integrity, and 3 so I could add detail parts to it and the filling with it in bits. Despite the size, this doesn't use a vast amount of filament, but showed room for improvement.
IMG_20190218_221828 by Paul Sterling, on Flickr
This was held together with Gorilla Glue, but no nonsense superglue does the job even better. The underside mimics the cast metal frame of the ROD/O4, and no modifications are required to the chassis, it can fasten straight in, aside from bridging the tender plug, which is a simple task, as kindly advised by Graeme King.
Q1 3rd build by Paul Sterling, on Flickr
The Mk2 was a better print, and I used more alignment features to make sure the three parts almost clipped together, irrespective of glue. the frame didn't sit quite level, so I needed to create some additional pockets and some minor revisions. as it was, changing one face by something daft like 0.15mm made 1mm of difference end to end!
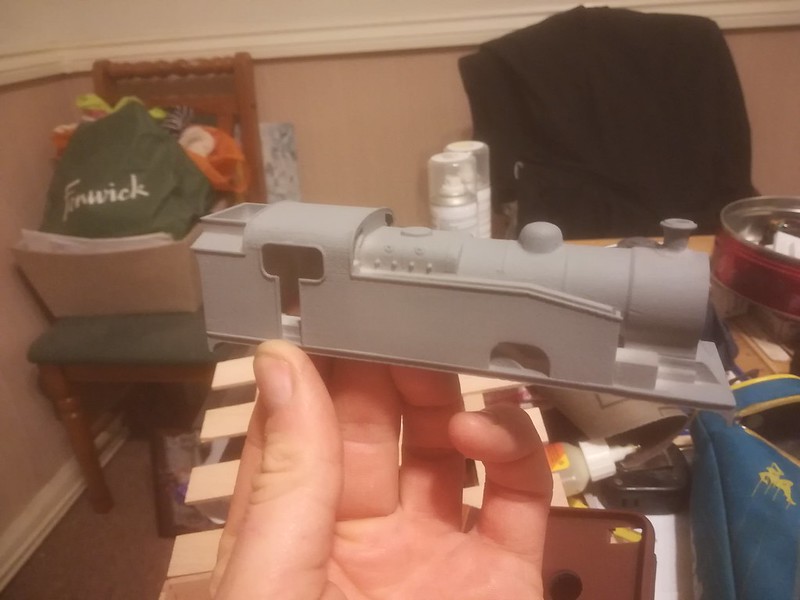
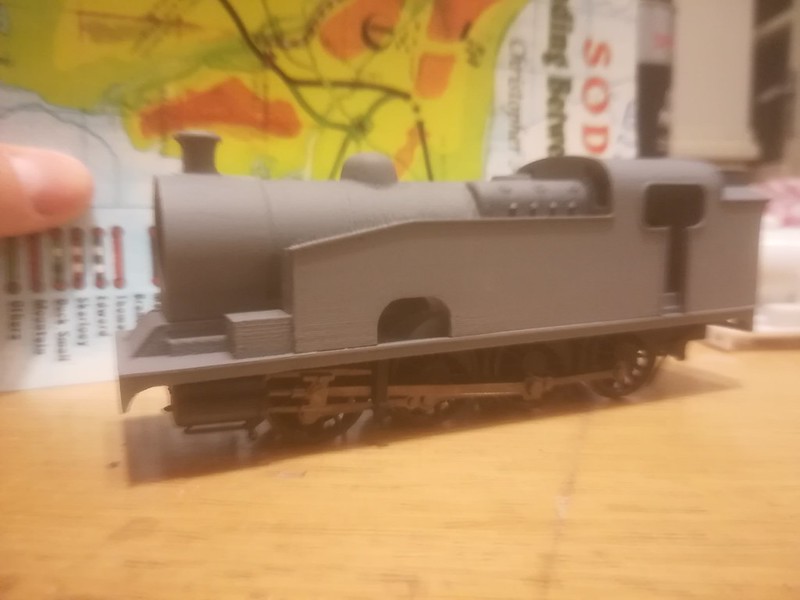
The next pics are the mk3, which is hopefully the final one. Even with the prints correctly orientated, there is still a bit of woodgrain, so I've filled and sanded the body where needed. you can see after the first cut of filler and primer that some graining stillshows through.
IMG_20190305_200639 by Paul Sterling, on Flickr
IMG_20190305_200720 by Paul Sterling, on Flickr
IMG_20190305_200657 by Paul Sterling, on Flickr
So after another light fill and sand, things start to look better.
IMG_20190307_064225 by Paul Sterling, on Flickr
There is a little distortion on the pictures, but its mostly my appalling camera skills.
What I have done deliberately is left the tops of the tanks open, this is to fill them with lead ballast, probably the boiler barrel and bunker as well.
The next challenge is the smokebox door, its a shape with makes it difficult to get around wood grain effect on print, and to be honest, would probably be best as a whitemetal part.
More to follow
Thanks, Paul.
Last edited by Paul_sterling on Wed Apr 17, 2019 3:59 pm, edited 4 times in total.
- Atlantic 3279
- LNER A4 4-6-2 'Streak'
- Posts: 6659
- Joined: Fri Jun 26, 2009 9:51 am
- Location: 2850, 245
Re: LNER Q1/2 Build
Looking good. Very kind of you to acknowledge assistance given.
Most subjects, models and techniques covered in this thread are now listed in various categories on page1
Dec. 2018: Almost all images that disappeared from my own thread following loss of free remote hosting are now restored.
-
- GER D14 4-4-0 'Claud Hamilton'
- Posts: 332
- Joined: Fri May 10, 2013 12:50 pm
- Location: Durham
Re: LNER Q1/2 Build
It was kind of you to help Graeme thank you.Atlantic 3279 wrote: ↑Thu Mar 07, 2019 7:40 pm Looking good. Very kind of you to acknowledge assistance given.
Paul.
Re: LNER Q1/2 Build
Very nice, looks a lot better than the god awful Millholme version I sold on .
Re: LNER Q1/2 Build
I second what Graeme wrote.
A pleasure to help a fellow scratch builder, even thou I have not built anything in a long time. Will have to try and finish the Q4.
-
- GER D14 4-4-0 'Claud Hamilton'
- Posts: 332
- Joined: Fri May 10, 2013 12:50 pm
- Location: Durham
Re: LNER Q1/2 Build
Hi Richard,
Again thank you for your help.
Here is some inspiration for finishing the Q4.
https://youtu.be/pxFpubt_rrc
Q1 was doing a canny job of giving a good shove.
Paul.
Again thank you for your help.
Here is some inspiration for finishing the Q4.
https://youtu.be/pxFpubt_rrc
Q1 was doing a canny job of giving a good shove.
Paul.
Last edited by Paul_sterling on Thu Mar 07, 2019 10:08 pm, edited 10 times in total.
-
- GER D14 4-4-0 'Claud Hamilton'
- Posts: 332
- Joined: Fri May 10, 2013 12:50 pm
- Location: Durham
Re: LNER Q1/2 Build
Thanks Mick.
If I'd made this from a kit I reckon it would have been awful, despite being an engineer and used to handling fine details for work, by the time I'm home I don't want to work on fiddly stuff and I just can't concentrate. That's the best excuse I can make ha.
Paul
-
- GER D14 4-4-0 'Claud Hamilton'
- Posts: 332
- Joined: Fri May 10, 2013 12:50 pm
- Location: Durham
Re: LNER Q1/2 Build
IMG_20190307_185306 by Paul Sterling, on Flickr
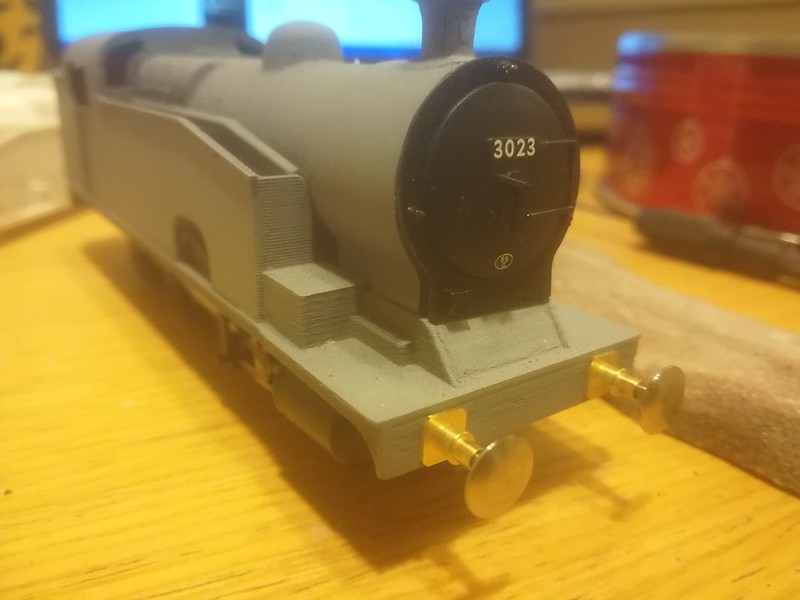
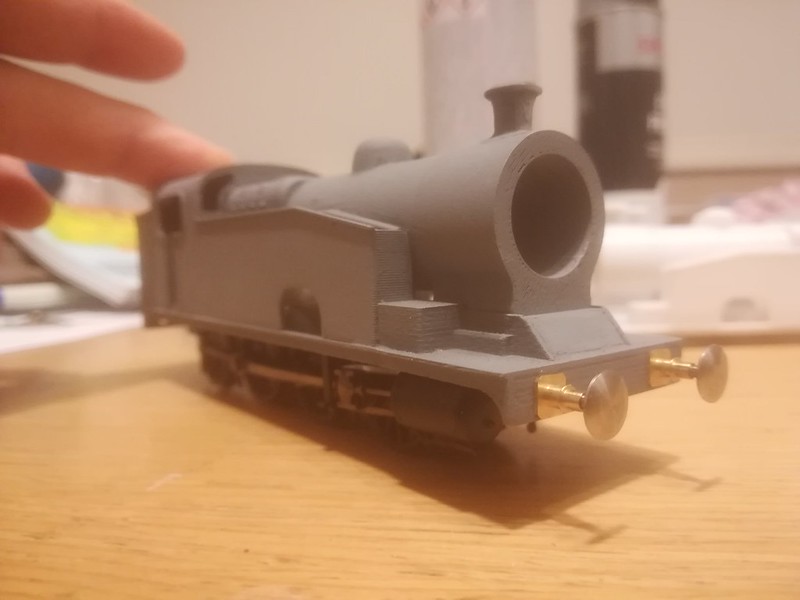
Q1 With buffers temporarily in place. these are 22" Oleo's, which is over-size compared to the originals, but deliberate in this case.
At the finish of its working life, №69932 was sent to Darlington works for scrapping. The story goes that on the way to the original destination of Gorton to be scrapped, №69932 got mixed up with №69934, each being sent to the others' intended destination. Rather than swap them over again, and knowing that each was destined for scrap, the works each stencilled the other Loco's numbers on. After №69932 (as 69934) arrived at Darlington, the works fitters took a bit of a shine to it, and used it for moving dead locos around, strictly off the records of course, as they'd marked "69934" down as scrapped in Aug 1959, even going as far as stencilling its fake number onto №69936 which did get cut up. Goodness knows how they got away with hiding it!
"Withdrawn" in late 1960, quite some time after the rest of the class, №69932 was moved out of the works and tucked away at the back end of the old Haughton Road Engine Shed, even at that point the works were hoping that someone would be able to buy the engine rather than see it scrapped. in 1967 NELPG found it, no doubt assisted in the discovery by helpful Ex-Darlington Works men (recently made redundant by the closure of the works in 1966), and despite a LOT of complaints from pen pushing accountants, wrangled the system and purchased the engine. Coupling hooks and buffers had been cut off to designate it as an "ex-locomotive", so the guys had to source some replacement buffers, the only ones they could get their hands on were industrial 22" Oleo's, offered to them by the rail workshops at British Steel Teesside, they would complete the Locomotive nicely, but few members of NELPG seriously thought that №69932 would run again, let alone be able to find a sensible use for an engine with severely limited operational range owing to its small water tank.
The Engine joined the №63395 and №65894 at Thornaby for a while, pending assessment into its condition. №63395 headed for the NYMR is summer 1970, while №65894 and №69932 both headed for ICI Billingham, and later №69932 moved to the newly opened ICI Wilton "No.5 Workshop".
By the time №63395 and №65894 were both in service at the NYMR, the popularity of the line had led to increasingly heavy trainloads, displacing the smaller industrial locomotives from regular services, and even leaving №65894 overworked at times. Combining this newfound popularity “problem” with through running from Grosmont to Pickering in 1975 had resulted in double heading to keep up with ticket demand, and provide enough power to tackle the 1in49 to Goathland with eight coaches. As such, NELPG realised that №69932 would prove to be more valuable as a working Locomotive than initially thought and the grunt of №69932 would certainly be much appreciated in shoving the services up Beck Hole Bank. №69932 was dismantled to begin restoration, which was eventually completed in 1976. Serious consideration was made towards having №69932 superheated, the boilers had been originally built as such when operating as a Q4, but conversion to tank and change of duties had rendered the superheater unnecessary, but for grunting up Beck Hole, the engine would probably benefit from it. Cost was the final determining factor, and at the time, NELPG and the NYMR didn’t have much disposable funding to pay for such work, so №69932 retained its saturated set-up.
Each summer season №69932 assisted almost every service out of Grosmont barring those hauled by the WD's. Such traction and power meant even the black fives could pull 8 and 9 coaches up Beck Hole. The small water tanks meant that №69932 was seldom used for any distance operations, and it has been said that it has only visited Pickering at most, a dozen times in the last 40 years! I'm told that the guys at Grosmont MPD are very fond of it, as it has so much power and traction, and it somehow always manages to jump the overhaul queue when its "ticket" expires, and did once famously (and quite spectacularly!) push eight coaches, and №44767 all of the way up Beck Hole on its own, after the Black Five failed partway up the bank, with a photograph taken capturing the spectacular tower of smoke, steam and sparks blasting out of its chimney as the train approached the platform. The Five was dropped off the train there, and the Q1, after being topped up with water, continued the train on to Pickering, the only time it has hauled a revenue earning service all the way though. Two services that started out of Grosmont while the Q1 was on that train were diesel assisted, while the other was hauled by the WD. On the flat the engine tends to waddle a little, as it lacks a front bogie or truck to control the yawing motion, and the other 0-8-0’s have tenders to help minimise the same thing, but its less than perfect level running is more than offset by its almost unstick-able hill-climbing.
Grosmont MPD once argued that water toughs could be fitted on the route to fill up the Q1’s water tanks, but unfortunately the line speed is just too low to make it work right, and there aren’t many parts of the NYMR flat enough!
№69932 is never coupled up to the trains. Those massive 22” Oleos come in handy, as it means the engine is less prone to buffer lock when banking others out of Grosmont, and often drops off the train just before Goathland, rolling back down to Grosmont in readiness for the next departure.
Okay so that's the fiction out of the way......
IMG_20190307_185109 by Paul Sterling, on Flickr
This is the loco laid on the chassis, it isn't screwed on yet, but I mimic'd the mounting points of the ROD/O4, so it just needs 2 M2 holes tapping into it, which I had done on an earlier prototype. There is a bit of an optical illusion going on which makes it look like it is sloping forwards, but on laying a straight edge next to it, the body is now completely level, so its just something I'll have to train my brain on...
I need to put an order in to Alan Gibson or similar for the detail parts now. I've just ordered some DCC Concepts Liquid Lead from Hattons to ballast the side tanks and bunker (and probably boiler, I want some weight in this one!), along with another ROD 2-8-0, which is probably going to become an S1, a project which in some respects is a lot easier than the Q1 (i'll be using an O4 boiler), but a lot harder to work out at the rear, as I will have to chop the chassis on that one to fit the bogie, I can't get out of it in that instance, the chassis block comes back too far.
Thanks, Paul.
Last edited by Paul_sterling on Mon Apr 08, 2019 12:27 pm, edited 2 times in total.
-
- GER D14 4-4-0 'Claud Hamilton'
- Posts: 332
- Joined: Fri May 10, 2013 12:50 pm
- Location: Durham
Re: LNER Q1/2 Build
Evening Folks,
A quick question if you don't mind,
Does anybody have any info in regards to the smokebox door fitted to the Q4 and Q1, and the O4 and GWR Based ROD engines?
I'm curious as to 1, was the Q1 door always the same as those on the Q4, and was this door dimensionally as per the O4?
.....and lastly, did the GWR change the door beyond changing the dart? I've not got my Yeadon book at home (which has the lions share of Q1 pics), but from the Harsnape book, and the Grifiths book, the only pics I can see are with the GWR engines having a two hinge type with straps across the door, and the LNER based engines, appear to have only the Robinson style single hinge, with no straps across the door at all.
I only ask because I have managed to remove the front of the smokebox from the GWR ROD loco, and have sized it up for the Q1, but as the Q1 smokebox is smaller dia than that of the ROD, it would have to be filed to size, but I was unsure if the door was also smaller on these, and that the external border was always kept the same size/ratio.
Hopefully that makes some sense....
Thanks, Paul.
-
- GNR J52 0-6-0T
- Posts: 23
- Joined: Mon Jun 18, 2012 11:18 am
Re: LNER Q1/2 Build
Drawing for Q4 (Class 8A) is attached - taken from GA
This is in two parts, the main door on the left in brass with a hole for the GC handle (or other handle) and the outer rim which is 0.19 mm NiSi. The outer rim gives a 0.7 mm ring around the smoke box door when fitted.
It fits into a 8mm hole in the front of the smoke-box.
John
This also fits the Class 8 (B5) and Class 11B (D9)This is in two parts, the main door on the left in brass with a hole for the GC handle (or other handle) and the outer rim which is 0.19 mm NiSi. The outer rim gives a 0.7 mm ring around the smoke box door when fitted.
It fits into a 8mm hole in the front of the smoke-box.
John
-
- GER D14 4-4-0 'Claud Hamilton'
- Posts: 332
- Joined: Fri May 10, 2013 12:50 pm
- Location: Durham
Re: LNER Q1/2 Build
Thank you John, that is exceptional.croesnewydd wrote: ↑Sun Mar 10, 2019 9:28 am Drawing for Q4 (Class 8A) is attached - taken from GA
293 Smoke Box Door 8,8A&11B.PNG
This also fits the Class 8 (B5) and Class 11B (D9)
This is in two parts, the main door on the left in brass with a hole for the GC handle (or other handle) and the outer rim which is 0.19 mm NiSi. The outer rim gives a 0.7 mm ring around the smoke box door when fitted.
It fits into a 8mm hole in the front of the smoke-box.
John
Do you sell these parts I take it?
Thanks,
Paul.
-
- GNR J52 0-6-0T
- Posts: 23
- Joined: Mon Jun 18, 2012 11:18 am
Re: LNER Q1/2 Build
Paul,
Normally I do not sell these parts - I have added the drawing in the expectation that you (or a modelling friend with a lathe) may be able to use the measurements.
The door itself is 15 minutes work and the rim is an etched part from some designs I have done.
John
Normally I do not sell these parts - I have added the drawing in the expectation that you (or a modelling friend with a lathe) may be able to use the measurements.
The door itself is 15 minutes work and the rim is an etched part from some designs I have done.
John
-
- GER D14 4-4-0 'Claud Hamilton'
- Posts: 332
- Joined: Fri May 10, 2013 12:50 pm
- Location: Durham
Re: LNER Q1/2 Build
Thanks John, thats absolutely fine, I can sort that.croesnewydd wrote: ↑Sun Mar 10, 2019 10:26 am Paul,
Normally I do not sell these parts - I have added the drawing in the expectation that you (or a modelling friend with a lathe) may be able to use the measurements.
The door itself is 15 minutes work and the rim is an etched part from some designs I have done.
John
Thank you for uploading the drawing, much appreciated.
Thanks, Paul.
-
- GER D14 4-4-0 'Claud Hamilton'
- Posts: 332
- Joined: Fri May 10, 2013 12:50 pm
- Location: Durham
Re: LNER Q1/2 Build
In Case anyone else was wondering the answer to my question in regards to two straps or no straps on the smokebox. I've just browsed the Yeadons Vol 20, which has pics of almost all of the class, and they all have the same smokebox door and hinge, variations are limited to the smokebox dart, being either lever and wheel, or twin lever. Some had the lamp bracket on the door, whilst others atop the smokebox, in front of the chimney.
Thanks, Paul.
Thanks, Paul.
-
- GER D14 4-4-0 'Claud Hamilton'
- Posts: 332
- Joined: Fri May 10, 2013 12:50 pm
- Location: Durham
Re: LNER Q1/2 Build
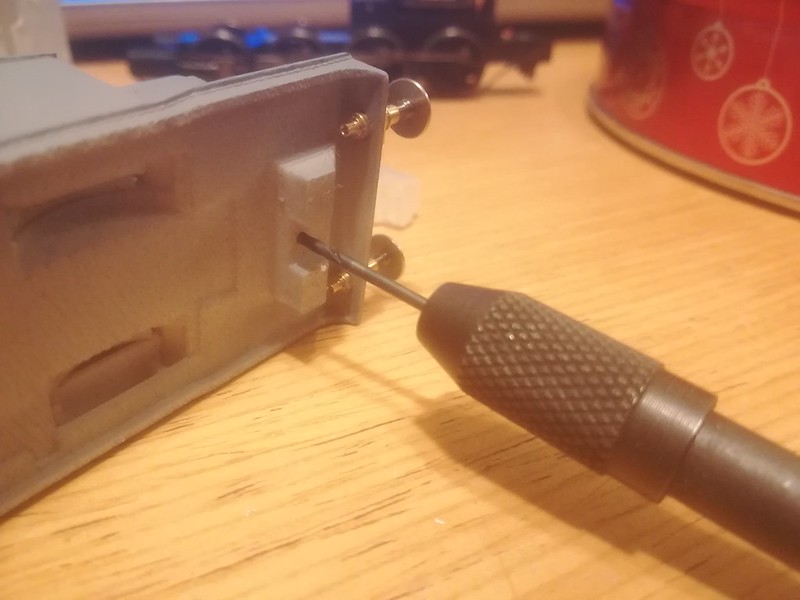
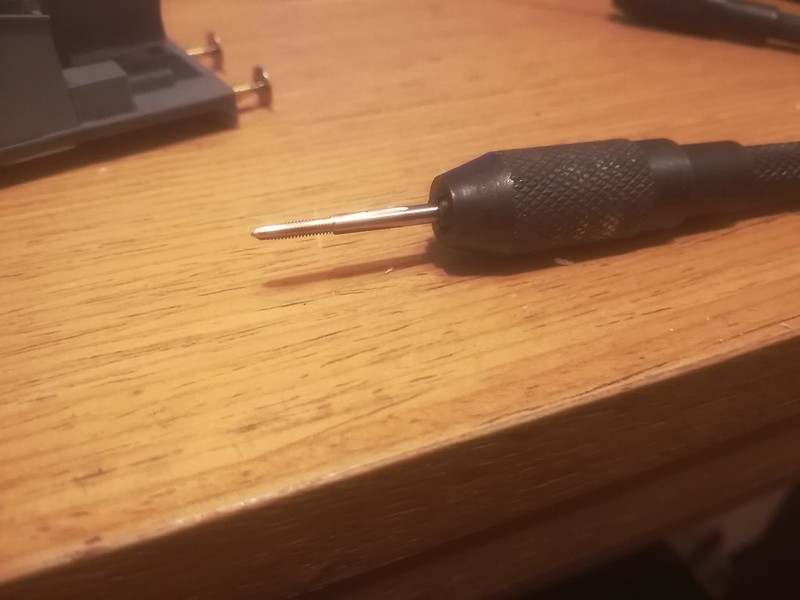
On Friday night I put the screwthreads into the Mk3 body to allow it to be fixed to the chassis
IMG_20190308_211346 by Paul Sterling, on Flickr
IMG_20190308_211439 by Paul Sterling, on Flickr
M2 threads, into a 1.5mm drilled hole. ordinarily the hole should be 1.6mm, but its a softer material than a metal, so size for size is overkill, any smaller though, and the flutes will fill up too readily and rip out the newly cut threads.
IMG_20190308_212250 by Paul Sterling, on Flickr
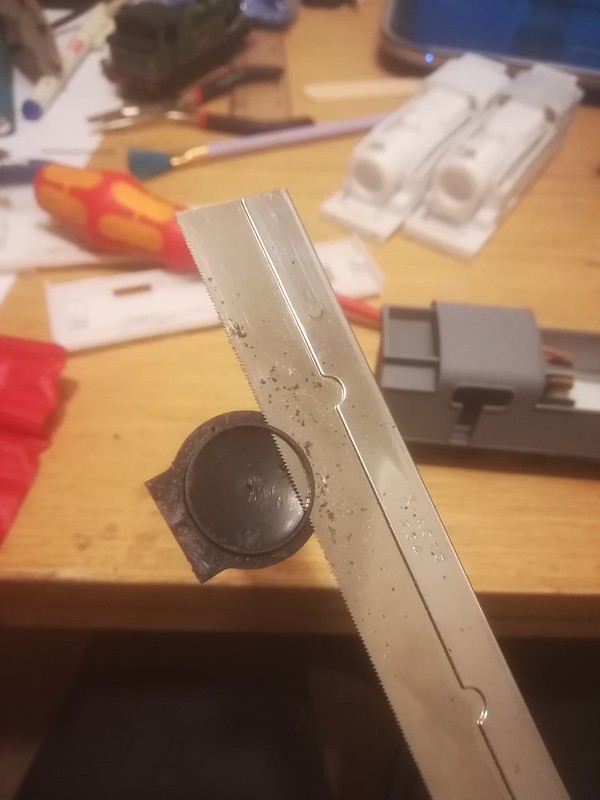
I also experimented with the smokebox from the ROD
IMG_20190308_212457 by Paul Sterling, on Flickr
It looks OK, but as subsequent research has indicated, no Q1 has the double strap hinge, and as the face of the moulding is oversize, the door wouldnt have looked right once the exterior size had been thinned down. So now with Johns excellent drawing, I can at least turn a suitable door.
Thanks, Paul.