Gladiator LNER/BR J6
Moderators: 52D, Tom F, Rlangham, Atlantic 3279, Blink Bonny, Saint Johnstoun, richard
-
john coffin
- LNER V2 2-6-2 'Green Arrow'
- Posts: 1101
- Joined: Mon Sep 19, 2011 12:24 am
Re: Gladiator LNER/BR J6
Whilst I thought you might say that Rob, I kind of wondered how you are going to ensure that the axle and everything are going to stay
square and properly quartered. I wonder if you might need to silver solder it?
Is there a jig, or do you have to guess?
Paul
square and properly quartered. I wonder if you might need to silver solder it?
Is there a jig, or do you have to guess?
Paul
- notascoobie
- GCR O4 2-8-0 'ROD'
- Posts: 554
- Joined: Sun Jul 20, 2008 9:43 pm
- Location: S Yorkshire
Re: Gladiator LNER/BR J6
I'll be interested how you get on with this one Rob. I always thought that silver solder was the only way. However I was suprised when talking to Steve Barnfield that he used Locktite. I don't think he was joking.
Cheers Vernon
Cheers Vernon
- greenglade
- GCR O4 2-8-0 'ROD'
- Posts: 525
- Joined: Thu Feb 23, 2012 1:59 pm
Re: Gladiator LNER/BR J6
Just to pick up on the 'Loctite' debate, don't be fooled into thinking that modern retainers aren't strong enough, they most certainly are if the right type is chosen and the components are meticulously clean. For a relatively small model in 'O' gauge you aren't going to have any issues with slipped components. Choose the correct product, for this job something like 638 would do but do check the gap spec and chose a product that relates to the components concerned. Loctite comes in many forms, some will deal with fairly large gaps between components, others are made for slipped or even interference fits. Be warned that Loctite will cure within seconds, say 10 to 15 before you won't be able to move it if it's not quartered correctly without heating to 250c, full curing takes place after 24 hours.
Keep up the good work Rob, btw full size trains today use loctite for among other things, fitting wheels to axles..if it's good enough for the railways it's more than good enough for a model, just chose the product most suitable.
regards
Pete
Keep up the good work Rob, btw full size trains today use loctite for among other things, fitting wheels to axles..if it's good enough for the railways it's more than good enough for a model, just chose the product most suitable.
regards
Pete
-
john coffin
- LNER V2 2-6-2 'Green Arrow'
- Posts: 1101
- Joined: Mon Sep 19, 2011 12:24 am
Re: Gladiator LNER/BR J6
My experience with Loctite was in the early days when you had to be really clean both mechanically and chemically. I am sure that it has improved greatly and as you say it is used in many situations that would not be possible with other means of fixing.
I do wonder though whether it is mechanically safe to cut and shut 4mm gauge axles to provide properly working connecting rods?
Paul
I do wonder though whether it is mechanically safe to cut and shut 4mm gauge axles to provide properly working connecting rods?
Paul
- greenglade
- GCR O4 2-8-0 'ROD'
- Posts: 525
- Joined: Thu Feb 23, 2012 1:59 pm
Re: Gladiator LNER/BR J6
Hi Pauljohn coffin wrote: ↑Sun Dec 24, 2017 1:44 pm
I do wonder though whether it is mechanically safe to cut and shut 4mm gauge axles to provide properly working connecting rods?
Paul
It will be fine with 4mm, in fact I would say that the axle itself will be much truer than what it would after applying heat to silver solder...generally if silver soldering an axle the stubs would be left oversize to be trued down between centers after the components have been silver soldered together as heat will make it run out of true. You do need to use the correct product though, on this Gresley pacific axle I have used two types, one with a longer curing time and larger gap, the other for a press fit and no curing time at all. The crank pin is pressed, the web to axles needed longer curing and slightly larger gap to be able to get the axle pushed through both webs and lined up before it had chance to cure, final job being to cut the axle as per usual. All joints are key'd/broached but this is more for getting the correct quartering of 120 ,113,127 than strength, although for a loco of this power it's best to be 'belts and braces' it will be capable of pulling a few ton and so better safe than sorry. I know some model engineers who just rely on loctite. I'm not that brave, however there is no such concern on something as small(light) as 4mm, you aren't going to break the join if following manufacturers instructions to the full...

regards
Pete
-
john coffin
- LNER V2 2-6-2 'Green Arrow'
- Posts: 1101
- Joined: Mon Sep 19, 2011 12:24 am
Re: Gladiator LNER/BR J6
That's wonderful and most illuminating Peter. As I said it is a long time since I used Loctite regularly for certain motor bike bits, so am always
keen to see the latest incarnation.
The axles look stunning and as for the rest of your work on the 5 inch loco is amazing. Really nice to know that there are still people around
prepared to have a go at something this big and Iconic.
Since in the short time anything I produce will only be for 2 cylinder locos,I can see a much clearer approach to what I had perceived as an
insurmountable problem to get the correct movement.
Paul
- greenglade
- GCR O4 2-8-0 'ROD'
- Posts: 525
- Joined: Thu Feb 23, 2012 1:59 pm
Re: Gladiator LNER/BR J6
Thanks' Paul
Nothing is insurmountable sir... just one step at a time as they say....there just happens to be an awful lot of steps in locomotive building no matter what the scale....I have a nice 7mm Martin Finney Gresley pacific awaiting it's turn once the 'big un' is done, mind you I also want to make a rake of Gresley teaks in 5" too.....something tells me there may not be enough time in me for that, but hey I'll give it a go......
Pete
-
john coffin
- LNER V2 2-6-2 'Green Arrow'
- Posts: 1101
- Joined: Mon Sep 19, 2011 12:24 am
Re: Gladiator LNER/BR J6
Well at least in 5inch gauge you can use REAL WOOD!!!!!!!!!!!
- greenglade
- GCR O4 2-8-0 'ROD'
- Posts: 525
- Joined: Thu Feb 23, 2012 1:59 pm
Re: Gladiator LNER/BR J6
Oh I don't know John, perhaps some 0.6mm iron on veneer fixed to a brass base plate would do the trick...for the cab/tender floor that is.....john coffin wrote: ↑Sun Dec 24, 2017 7:01 pm Well at least in 5inch gauge you can use REAL WOOD!!!!!!!!!!!
Pete
- Robpulham
- LNER A4 4-6-2 'Streak'
- Posts: 1721
- Joined: Thu Mar 27, 2008 9:54 pm
- Location: Lower Wensleydale
- Contact:
Re: Gladiator LNER/BR J6
Hi Paul,john coffin wrote: ↑Fri Dec 22, 2017 10:13 pm Whilst I thought you might say that Rob, I kind of wondered how you are going to ensure that the axle and everything are going to stay
square and properly quartered. I wonder if you might need to silver solder it?
Is there a jig, or do you have to guess?
Paul
Laurie Griffin takes the hard work out of lining them up - the eccentrics have a hole through them and a piece of steel rod is provided to line them up. The cranks have a corresponding hole on the inner face to line them up. the only mildly complicated bit is cutting the steel rod to length.
- Robpulham
- LNER A4 4-6-2 'Streak'
- Posts: 1721
- Joined: Thu Mar 27, 2008 9:54 pm
- Location: Lower Wensleydale
- Contact:
Re: Gladiator LNER/BR J6
Pete,
That crank axle is gorgeous, my hat goes off to you.
That crank axle is gorgeous, my hat goes off to you.
- greenglade
- GCR O4 2-8-0 'ROD'
- Posts: 525
- Joined: Thu Feb 23, 2012 1:59 pm
- Robpulham
- LNER A4 4-6-2 'Streak'
- Posts: 1721
- Joined: Thu Mar 27, 2008 9:54 pm
- Location: Lower Wensleydale
- Contact:
Re: Gladiator LNER/BR J6
Thanks Pete, this one isn't for me.
As mentioned elsewhere a lack of time and energy has allowed me to do a few small jobs on the J6 that didn't require anything that wasn't therapeutic.
Although David had advised that it wouldn't be available until March it was a pleasant surprise when an email suggested that it could be collected at Bristol show. Warren Haywood very kindly collected it for me, so the build has resumed. Perversely I have decided not to start with the tender but to get the loco frames done next - it's to have working inside motion.
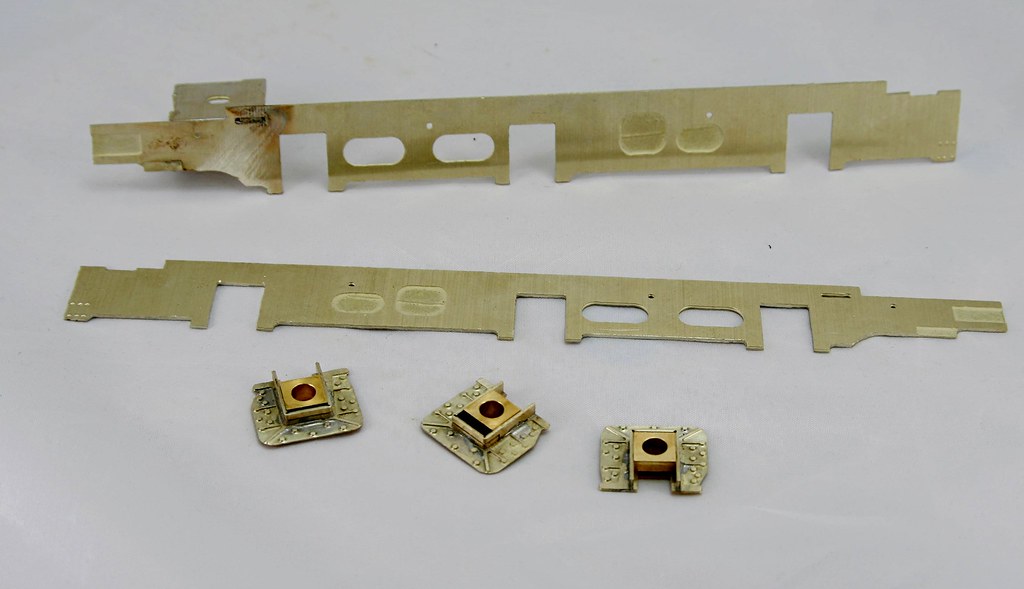
Parts of the etches do show their age and so it is with the loco springs which are a very basic etch. My client has asked me to build it as if it were for me so I have the discretion to obtain replacements for anything that I think could be improved upon.
The Hornblocks are Finney and were from stock so I will need to pick up some replacements for them from the Guys when I see them next.
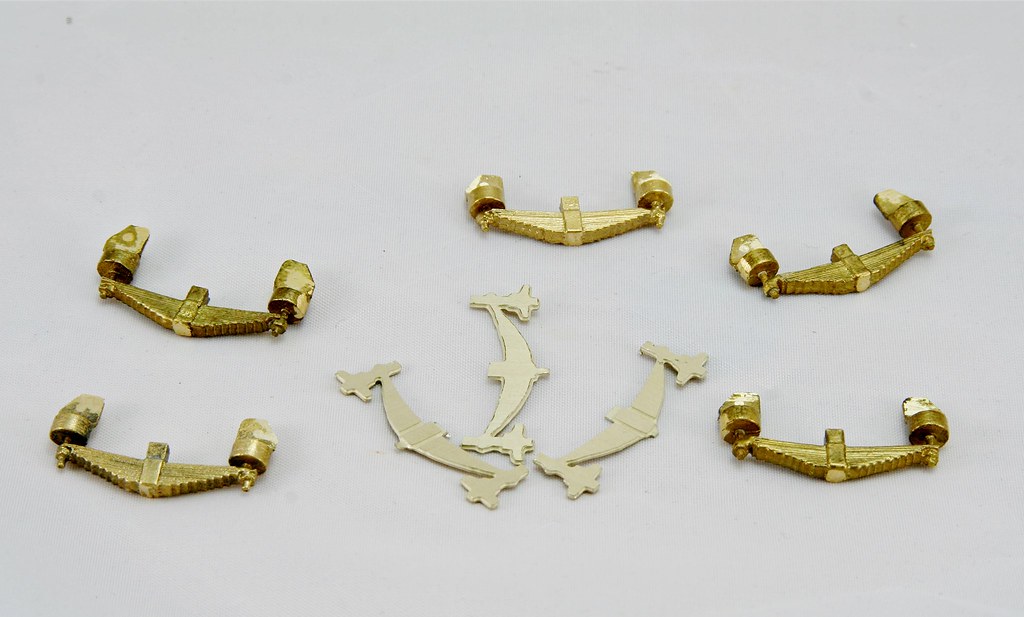
The spring castings are from Andy Beaton (@demu1037) at Ragstone Models and will be modified to make them look more like the J6 springs before fitting.
As mentioned elsewhere a lack of time and energy has allowed me to do a few small jobs on the J6 that didn't require anything that wasn't therapeutic.
Although David had advised that it wouldn't be available until March it was a pleasant surprise when an email suggested that it could be collected at Bristol show. Warren Haywood very kindly collected it for me, so the build has resumed. Perversely I have decided not to start with the tender but to get the loco frames done next - it's to have working inside motion.
Parts of the etches do show their age and so it is with the loco springs which are a very basic etch. My client has asked me to build it as if it were for me so I have the discretion to obtain replacements for anything that I think could be improved upon.
The Hornblocks are Finney and were from stock so I will need to pick up some replacements for them from the Guys when I see them next.

The spring castings are from Andy Beaton (@demu1037) at Ragstone Models and will be modified to make them look more like the J6 springs before fitting.

- Robpulham
- LNER A4 4-6-2 'Streak'
- Posts: 1721
- Joined: Thu Mar 27, 2008 9:54 pm
- Location: Lower Wensleydale
- Contact:
Re: Gladiator LNER/BR J6
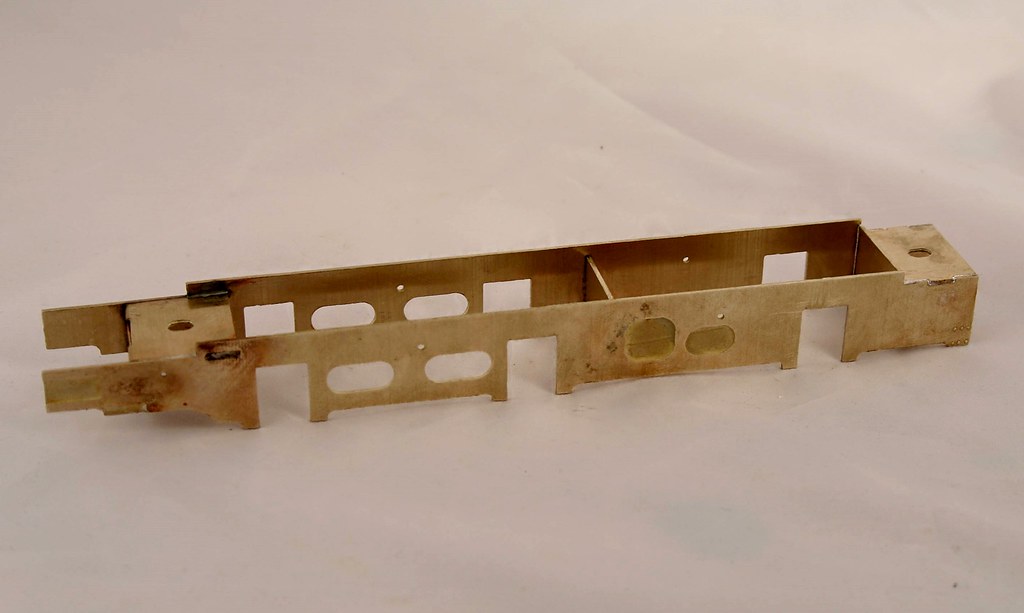
Further progress has the chassis together and ready for the fitting of the hornblocks.
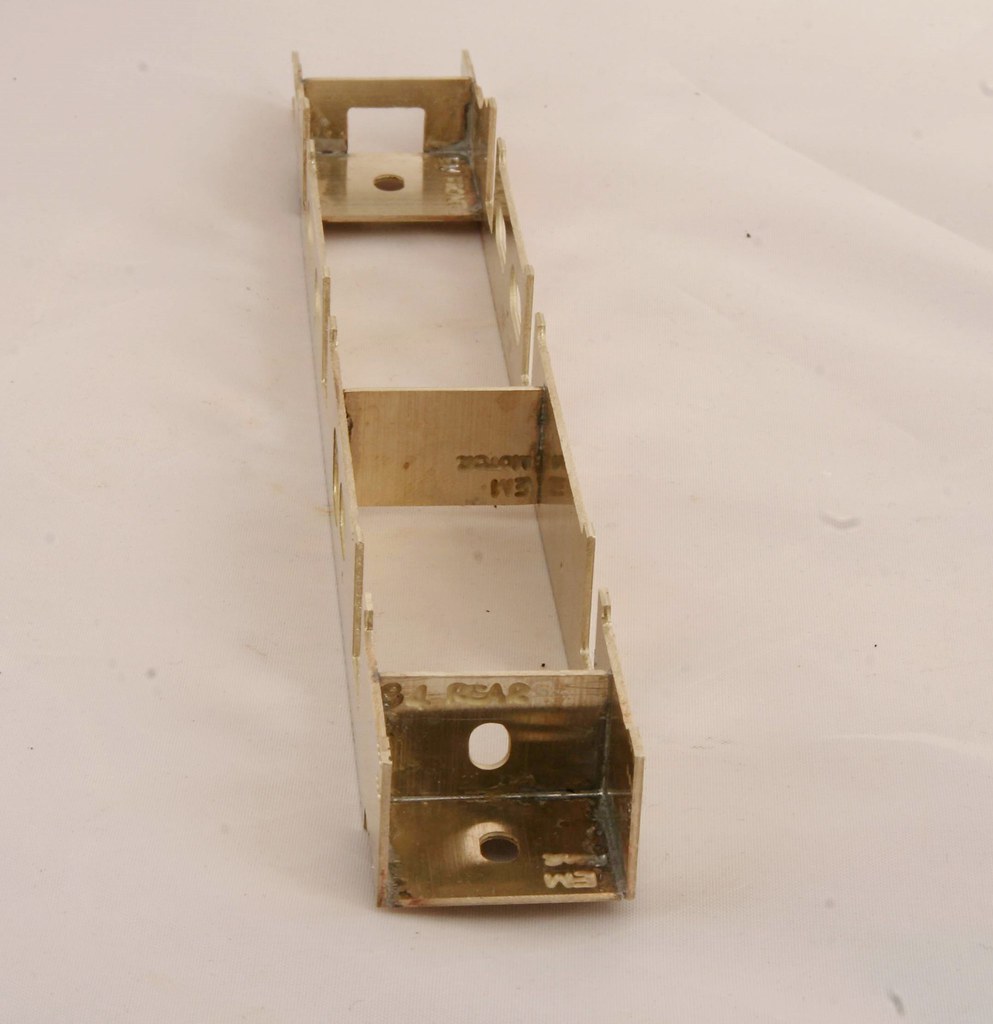
Despite the quite substantial frames there was still a bit of flex in between the two main spacers and the rear one which is just soldered to the top left the bottom of the chassis with a tendency to splay outwards. To get over this I have temporarily soldered a third frame spacer (labeled motor spacer in and I also cut one of the wider frame spacers down and soldered it upright to take out the splay at the rear.
As is comes there are three sets of spacers, marked from when it was blown up from a 4mm kit 00 gauge, EM gauge and P4 I am using the EM gauge spacers as a compromise between getting int to go around 5' curves and having sufficient room to fit the inside motion.
Before I go any further I am going to rework the springs and fit them before adding the Horn guides.
Despite the quite substantial frames there was still a bit of flex in between the two main spacers and the rear one which is just soldered to the top left the bottom of the chassis with a tendency to splay outwards. To get over this I have temporarily soldered a third frame spacer (labeled motor spacer in and I also cut one of the wider frame spacers down and soldered it upright to take out the splay at the rear.
As is comes there are three sets of spacers, marked from when it was blown up from a 4mm kit 00 gauge, EM gauge and P4 I am using the EM gauge spacers as a compromise between getting int to go around 5' curves and having sufficient room to fit the inside motion.


Before I go any further I am going to rework the springs and fit them before adding the Horn guides.
- Robpulham
- LNER A4 4-6-2 'Streak'
- Posts: 1721
- Joined: Thu Mar 27, 2008 9:54 pm
- Location: Lower Wensleydale
- Contact:
Re: Gladiator LNER/BR J6
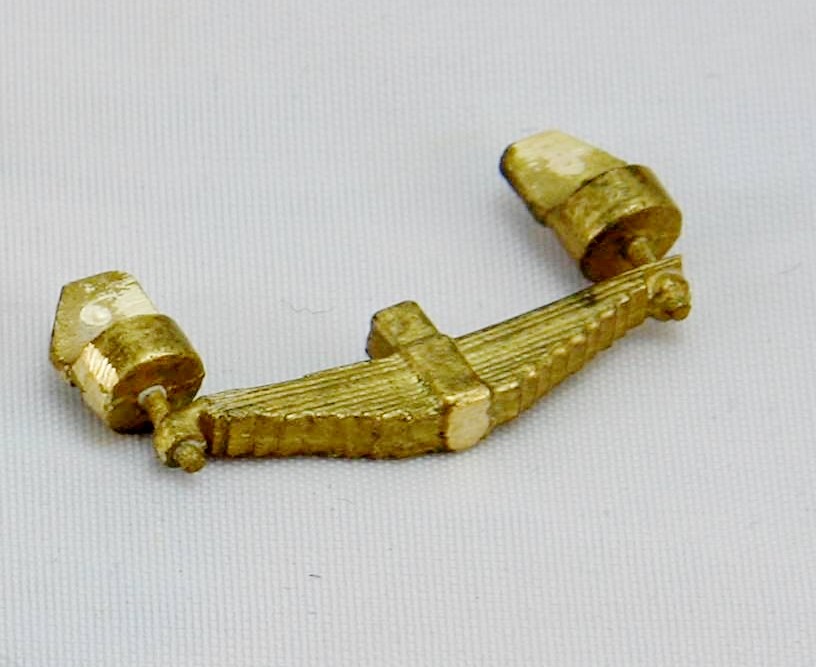
A spring in the step, or should that read, "some steps with the springs" (groan!)
We started with this.
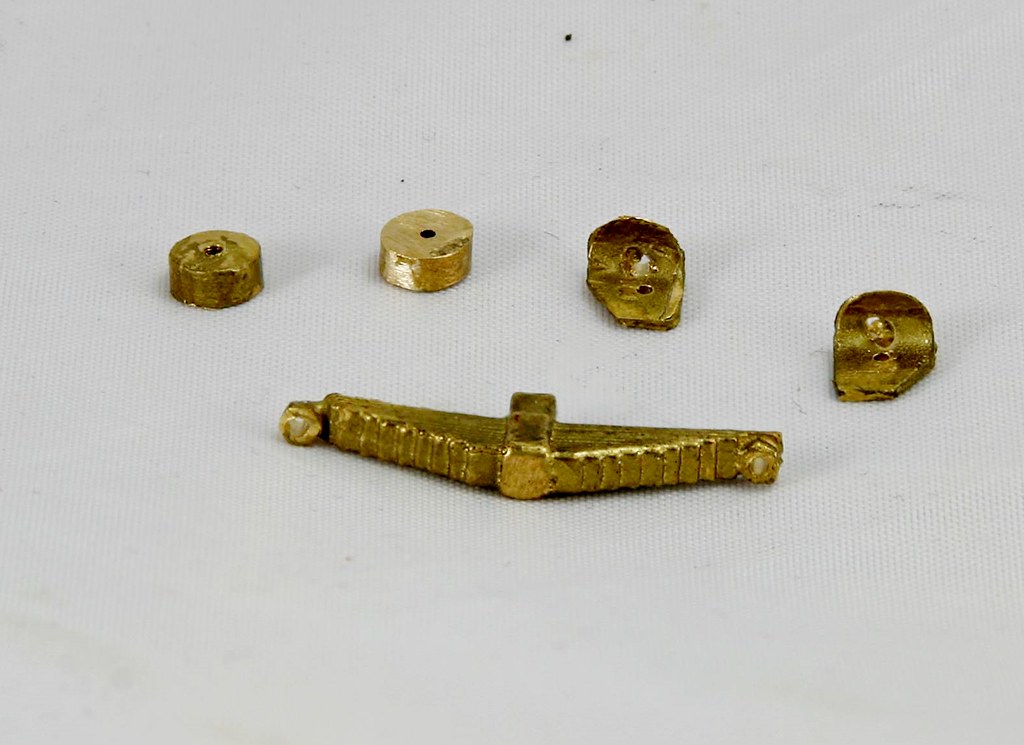
I then patiently cut that down to get these separate pieces
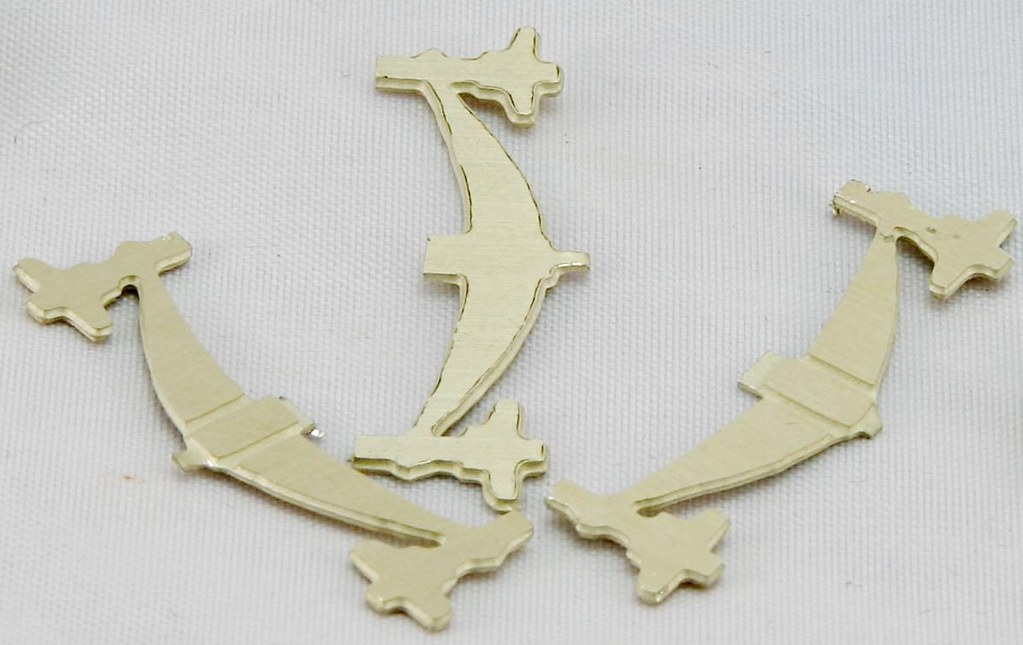
What I am aiming for is a 3D profile of these
Then I started to re-assemble them - and to misquote Eric Morecambe, all the right bits but not necessarily in the right order....
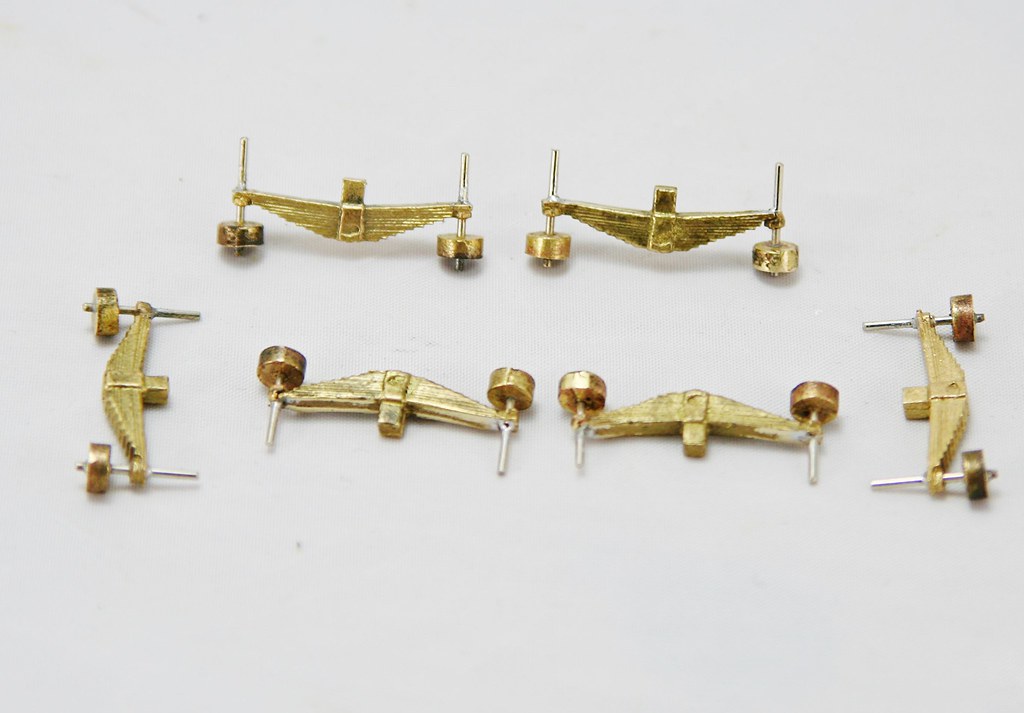
Monday evening should see them ready to fit (I hope!)
We started with this.

I then patiently cut that down to get these separate pieces

What I am aiming for is a 3D profile of these

Then I started to re-assemble them - and to misquote Eric Morecambe, all the right bits but not necessarily in the right order....

Monday evening should see them ready to fit (I hope!)