I'm wondering if it can be done in OO as well, I'll see if I can find the smallest possible magnets for when I do the Dapol brake van kit, turn it into a self contained diorama (which is my intention with any coaches or brake vans I get in future)Robpulham wrote:You must be a mind reader, I have been looking at exactly that over the last few days.Nova wrote: I would suggest in the future some type of magnetically attached roof to allow viewing of the interior, unless the roof is integral to the structure
Rob's 7mm Rolling Stock Workbench
Moderators: 52D, Tom F, Rlangham, Atlantic 3279, Blink Bonny, Saint Johnstoun, richard
-
Nova
- GER D14 4-4-0 'Claud Hamilton'
- Posts: 371
- Joined: Wed Jun 24, 2015 7:30 pm
- Location: Scunthorpe, North Lincs
Re: Rob's 7mm Rolling Stock Workbench
Coalby and Marblethorpe, my vision of an un-nationalised Great Britain in the 50s and 60s: viewtopic.php?f=3&t=11905
36C Studeos, kits in 4MM scale: viewtopic.php?f=3&t=11947
36C Studeos, kits in 4MM scale: viewtopic.php?f=3&t=11947
- Robpulham
- LNER A4 4-6-2 'Streak'
- Posts: 1721
- Joined: Thu Mar 27, 2008 9:54 pm
- Location: Lower Wensleydale
- Contact:
Re: Rob's 7mm Rolling Stock Workbench
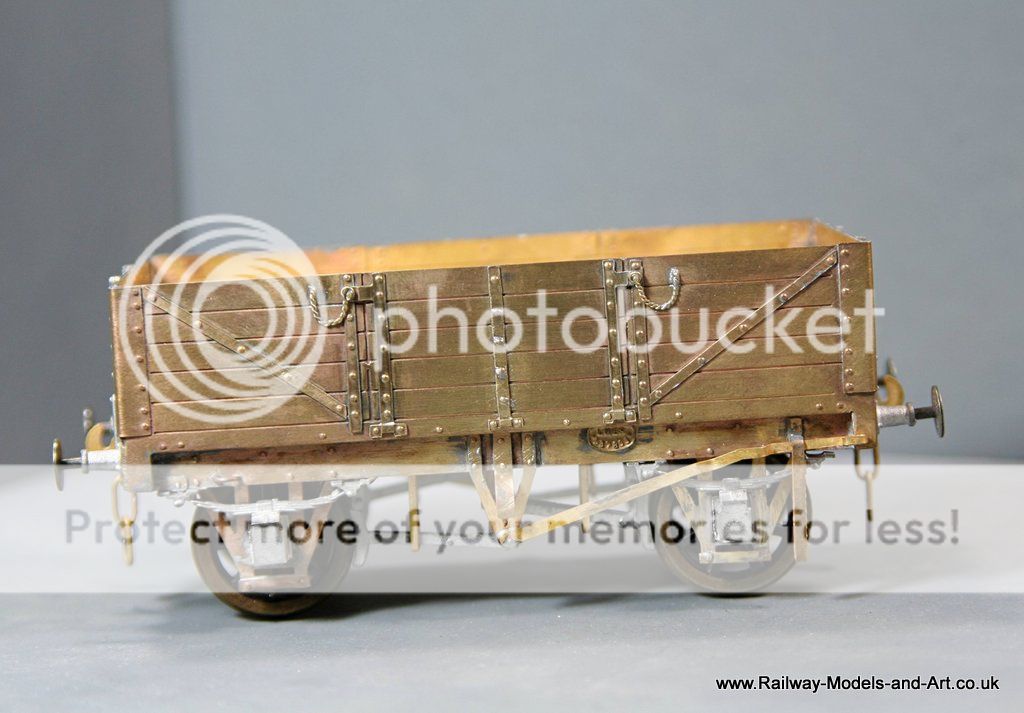
Some minor surgery combined with Sinusitis has laid me up for the best part of two weeks so the work bench has been quiet. Filling a little more in the way of head space I opted to finish a long time inhabitant of the queens shelf, a Powsides GER 5 plank Open. Before placing it aside I had built it all apart from adding the castings and I am not really sure why I hadn't completed it.
It proved a fairly straightforward build apart from the fact that the brake shoes were miles from the wheels so I had to split them and move them out towards the wheels. Then make a brass strip to represent the tumbler which I soldered to the rear of the castings after filing a slot. The only other changes were (after reviewing photos in Tatlow) to add some ex Connoisseur GER ratchet brake lever guides instead of the supplied hole/pin version.
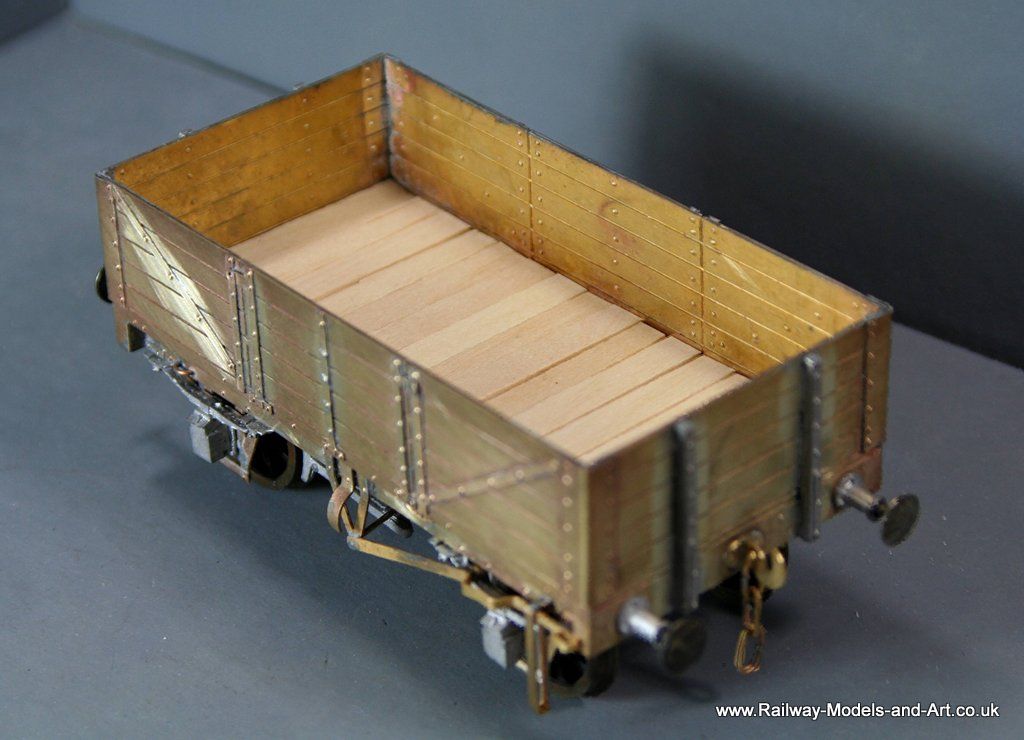
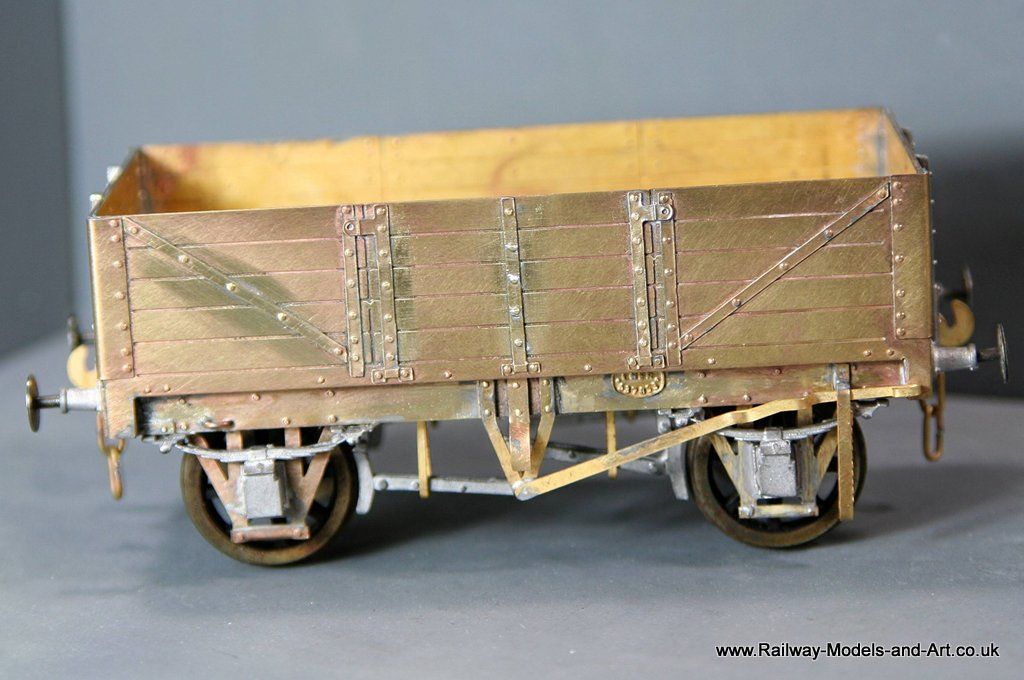
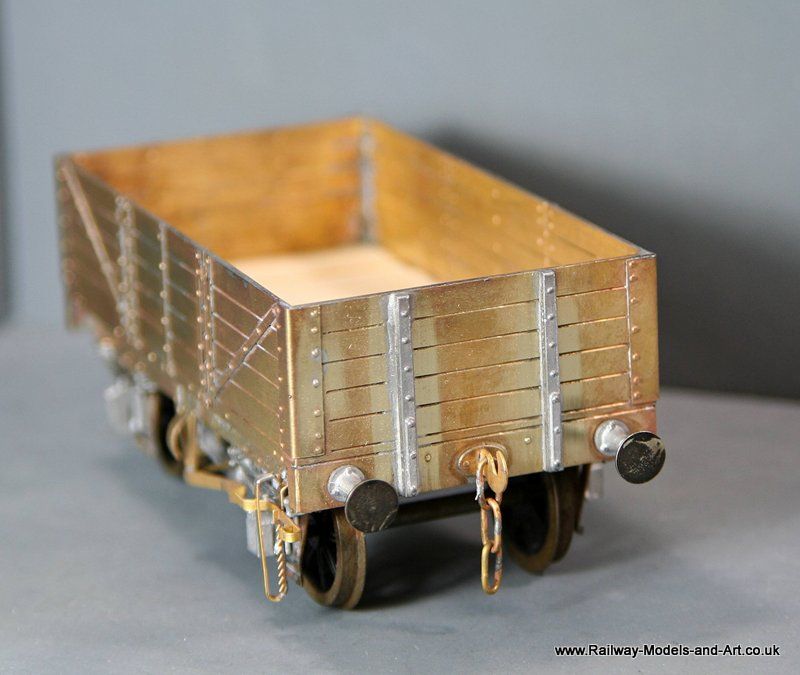
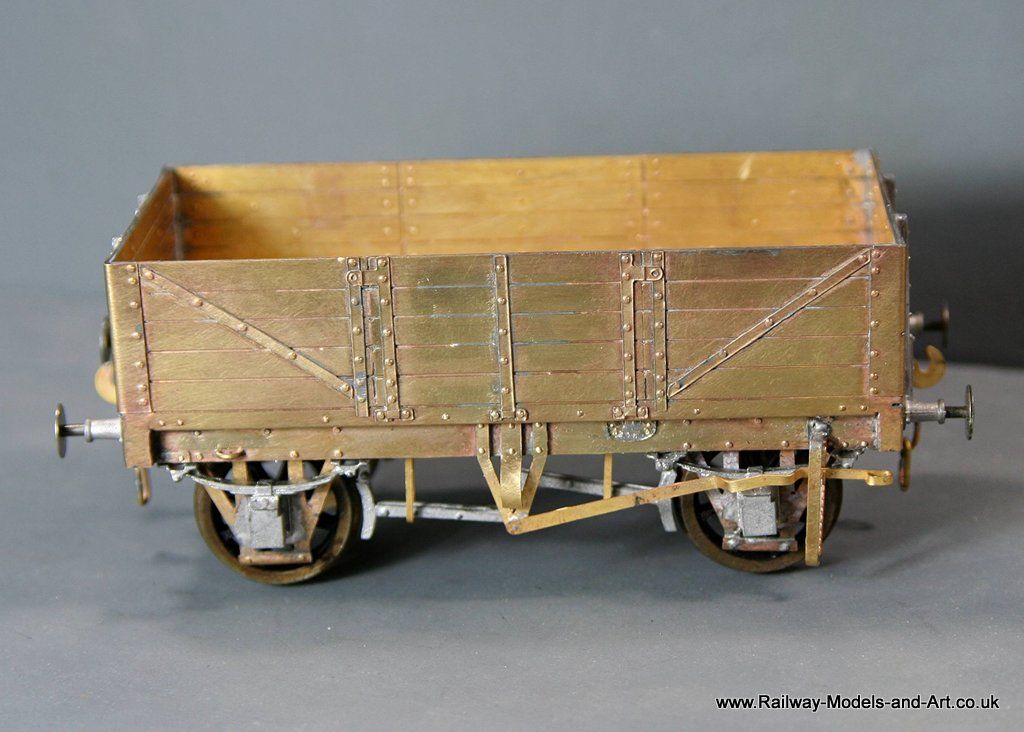
Next its back to the NER Brake vans.
It proved a fairly straightforward build apart from the fact that the brake shoes were miles from the wheels so I had to split them and move them out towards the wheels. Then make a brass strip to represent the tumbler which I soldered to the rear of the castings after filing a slot. The only other changes were (after reviewing photos in Tatlow) to add some ex Connoisseur GER ratchet brake lever guides instead of the supplied hole/pin version.


Next its back to the NER Brake vans.
Last edited by Robpulham on Thu Apr 13, 2017 5:18 pm, edited 1 time in total.
- Robpulham
- LNER A4 4-6-2 'Streak'
- Posts: 1721
- Joined: Thu Mar 27, 2008 9:54 pm
- Location: Lower Wensleydale
- Contact:
Re: Rob's 7mm Rolling Stock Workbench
A decent session at the bench yesterday saw the 2nd NER Birdcage brake well on it's way.
At the suggestion of a friend I looked at the photo to determine whether there were frames in the windows that I cut in the end.
There isn't a frame as such on the photo but I decided to try to replicate the etched frame that's etched in the other end.
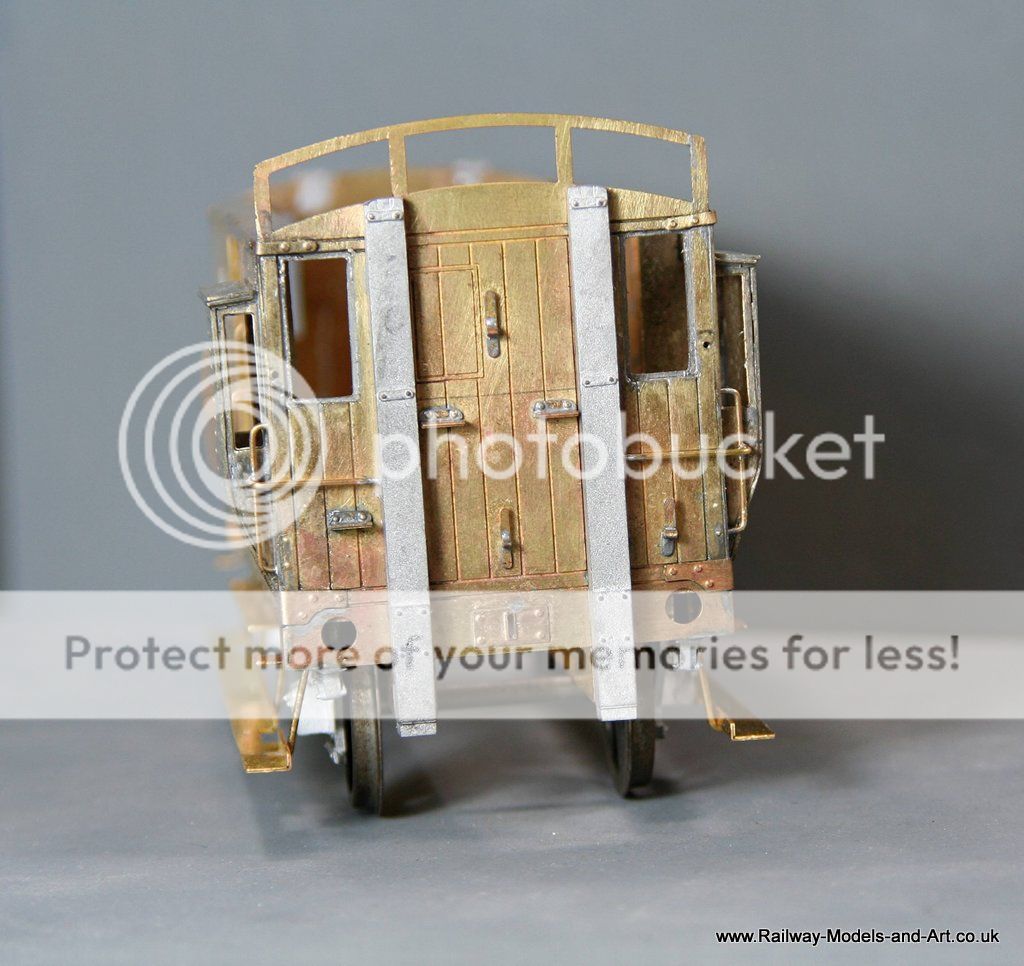
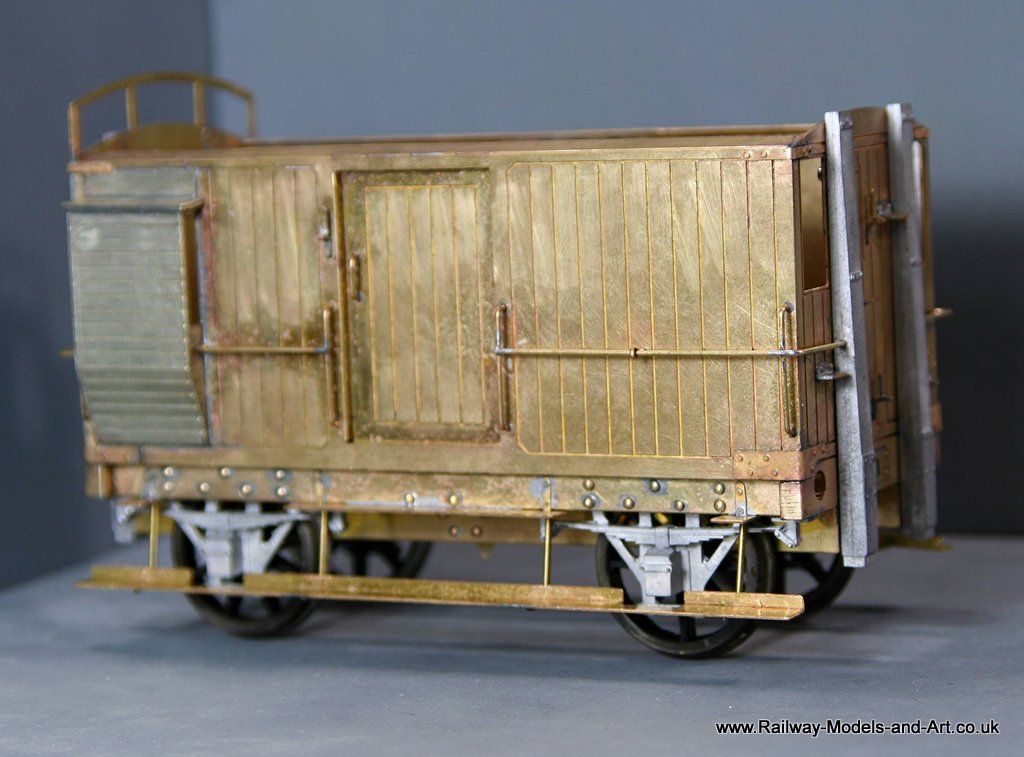
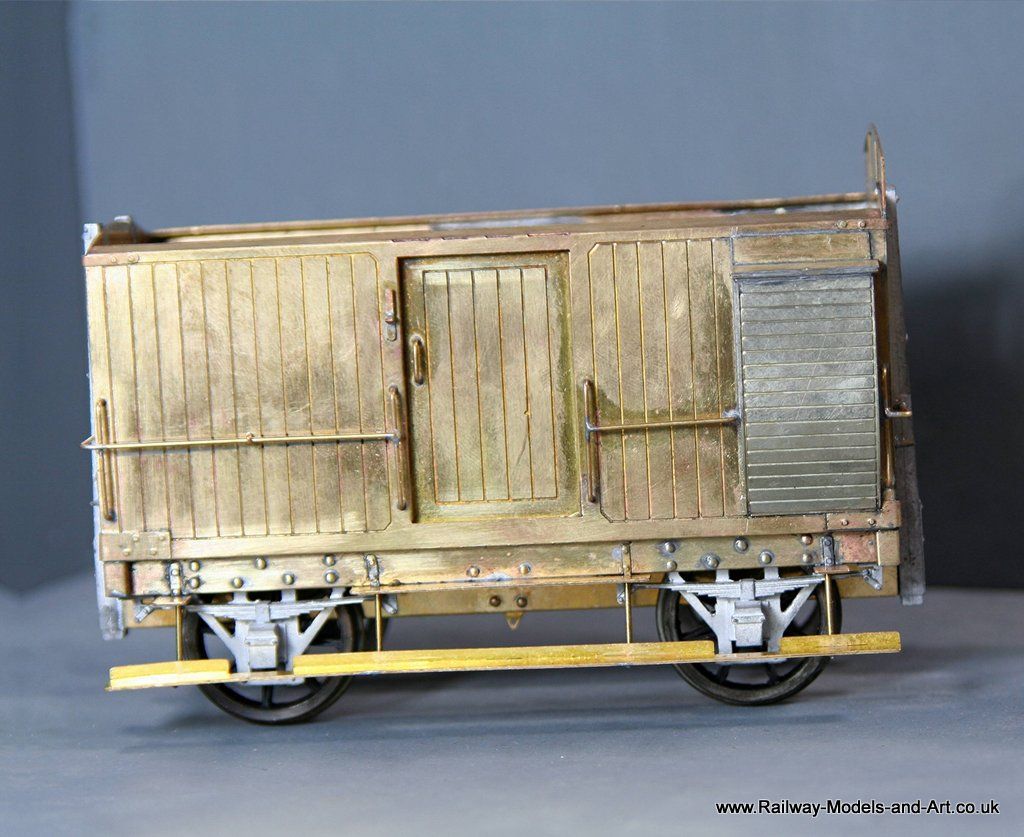
At the suggestion of a friend I looked at the photo to determine whether there were frames in the windows that I cut in the end.
There isn't a frame as such on the photo but I decided to try to replicate the etched frame that's etched in the other end.


- Robpulham
- LNER A4 4-6-2 'Streak'
- Posts: 1721
- Joined: Thu Mar 27, 2008 9:54 pm
- Location: Lower Wensleydale
- Contact:
Re: Rob's 7mm Rolling Stock Workbench
Isn't it always the way? You look at the photos and realise that you have missed something. In this case it was the pins and chains for the side doors.
I got the second NER Birdcage brake to a similar state as the first one - just needing buffers and working out how best to fit the roof post painting.
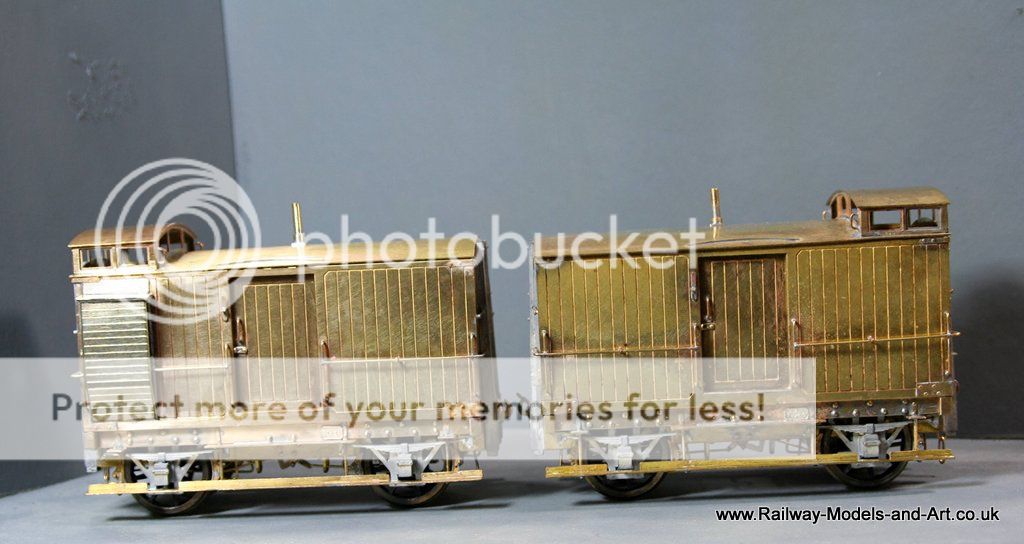
And then something that came together almost as a surprise. As I was doing the two V1 vans I started to clean up and make the various folds in a V4 van and before I knew it, quite a bit was to was ready to solder up.
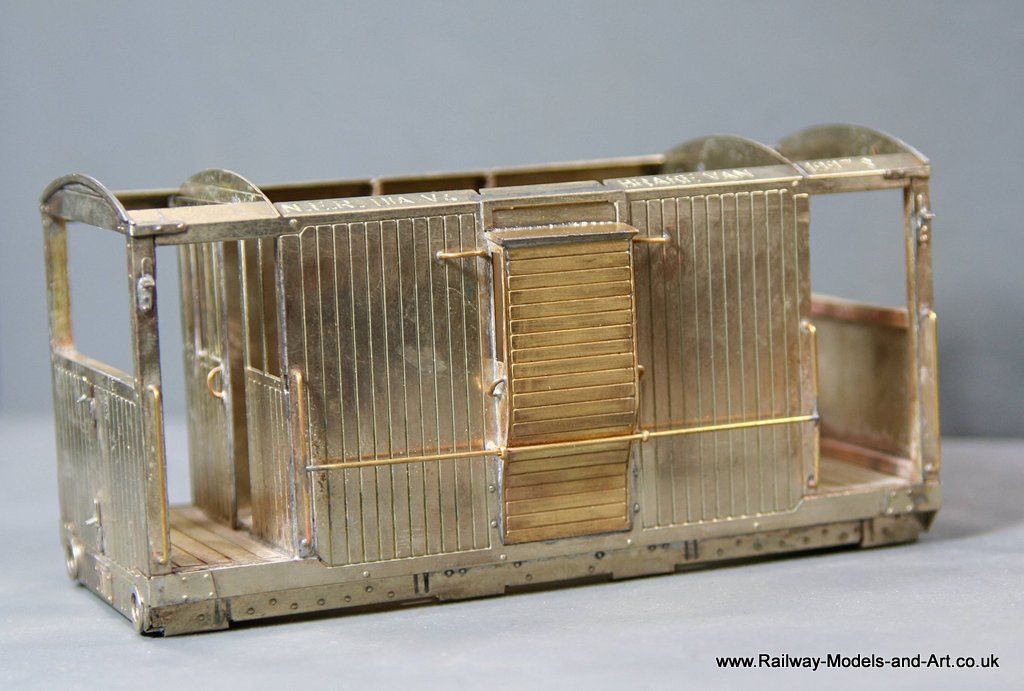
The doors are sliding doors and the way that Jim has portrayed them made leaving one of them partially open almost irresistible. It means that I will need to model an interior but that doesn't faze me.
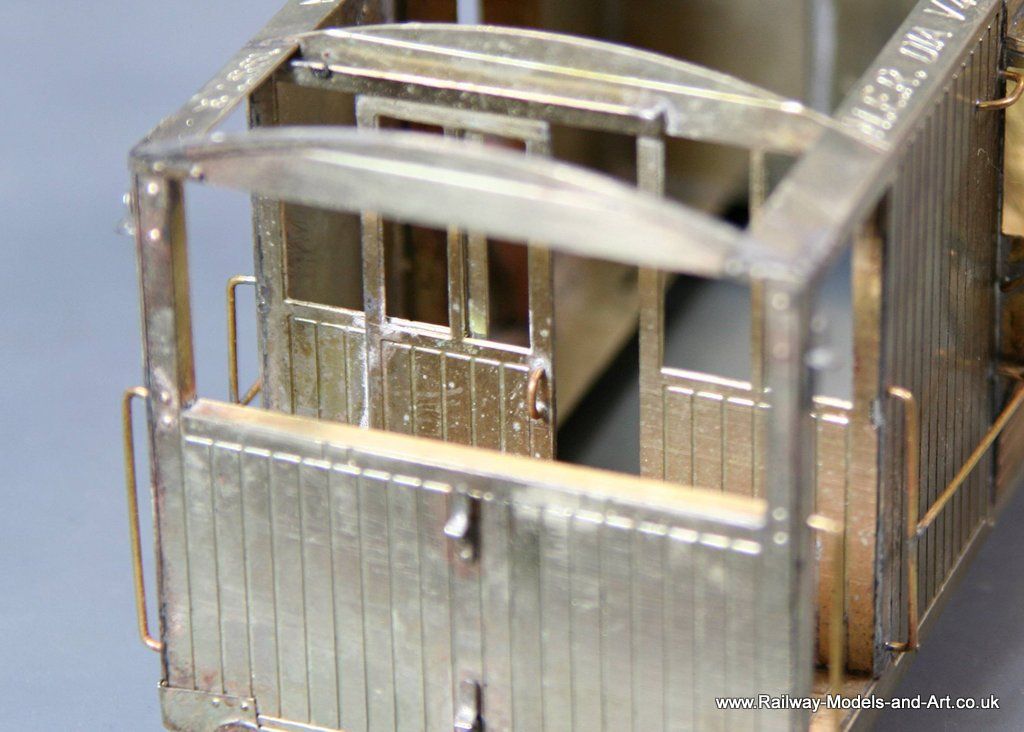
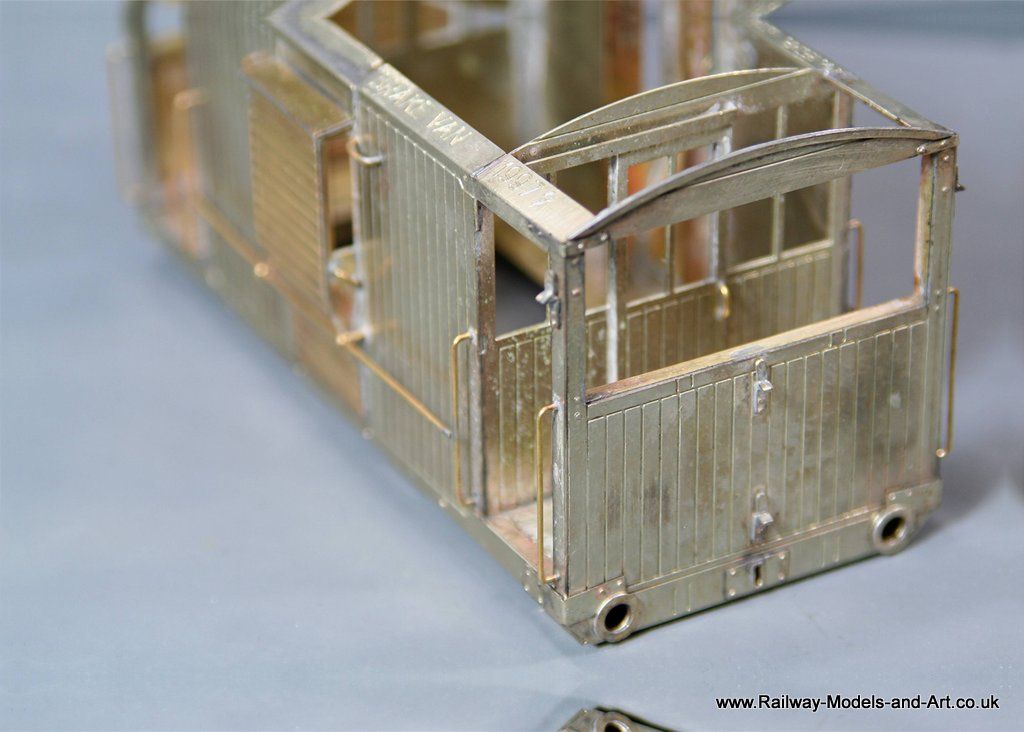
Again it's a Connoisseur kit and to that I have added square brass rod to beef up the vertical and horizontal framing and some internal planking to the veranda ends.
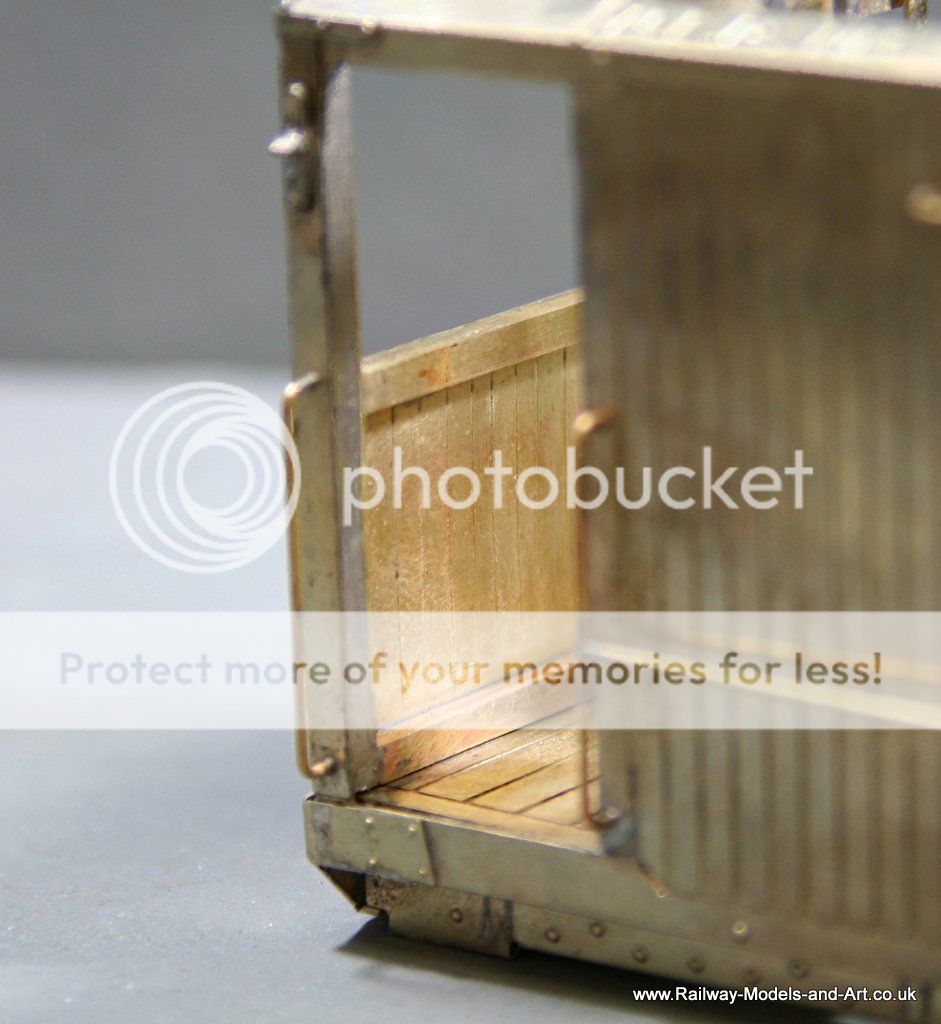
It all needs a good clean up before I go much further with it.

I got the second NER Birdcage brake to a similar state as the first one - just needing buffers and working out how best to fit the roof post painting.

And then something that came together almost as a surprise. As I was doing the two V1 vans I started to clean up and make the various folds in a V4 van and before I knew it, quite a bit was to was ready to solder up.

The doors are sliding doors and the way that Jim has portrayed them made leaving one of them partially open almost irresistible. It means that I will need to model an interior but that doesn't faze me.


Again it's a Connoisseur kit and to that I have added square brass rod to beef up the vertical and horizontal framing and some internal planking to the veranda ends.

It all needs a good clean up before I go much further with it.
- Robpulham
- LNER A4 4-6-2 'Streak'
- Posts: 1721
- Joined: Thu Mar 27, 2008 9:54 pm
- Location: Lower Wensleydale
- Contact:
Re: Rob's 7mm Rolling Stock Workbench
Due to recovering from minor surgery, I haven't felt like venturing into the workshop since early February and apart from a bit done on the Kirk coaches a couple of weekends ago I haven't done any modelling at all.
Last night I ventured forth and got stuck in with the NER V4 brake van again. I added the remaining corner patches, the guard irons across the door ways and added the foot boards. I had done the roof at the last session that I did but forgot to take any photos of it.
I think that apart from the brakes and remaining handrails that fit into the end posts all the brass work on the outside is complete so whitemetal fittings next.
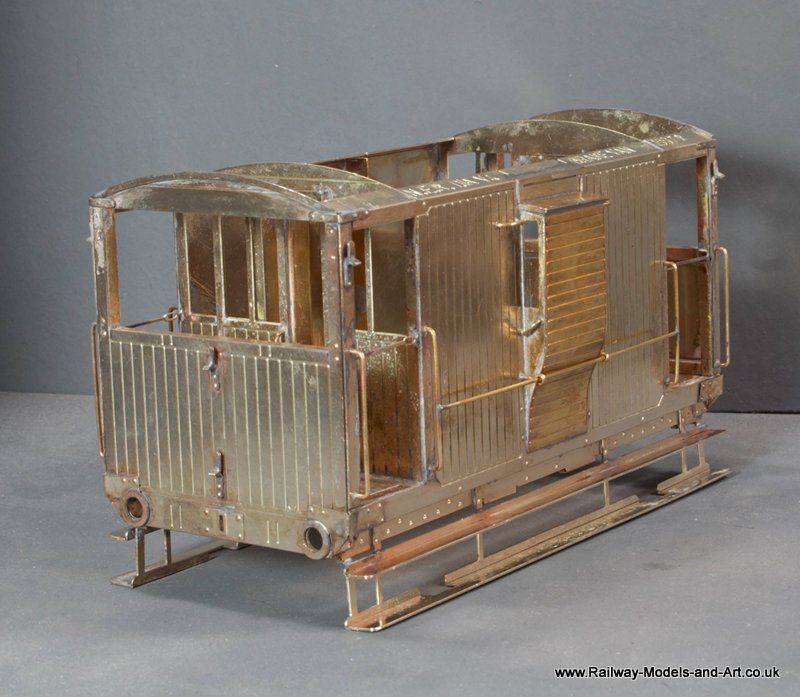
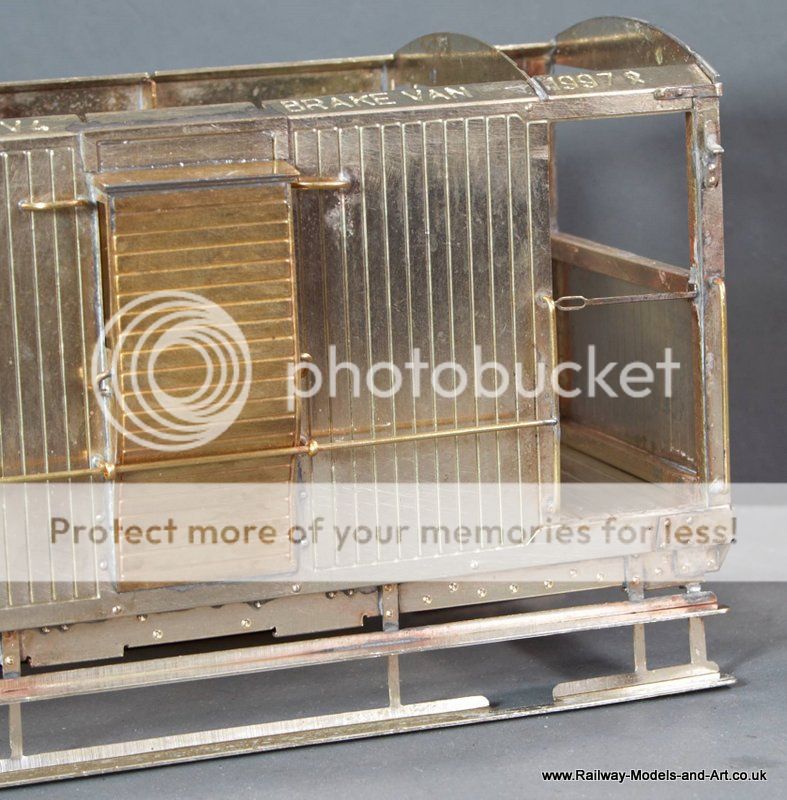
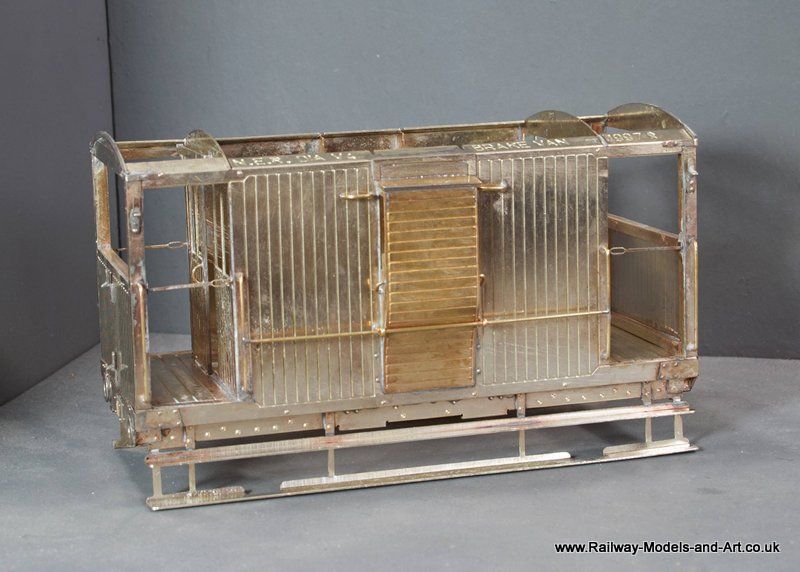
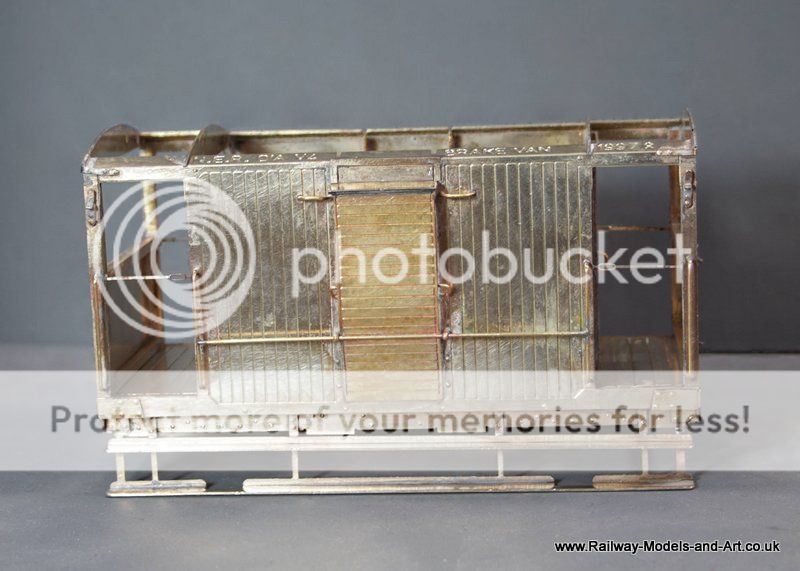
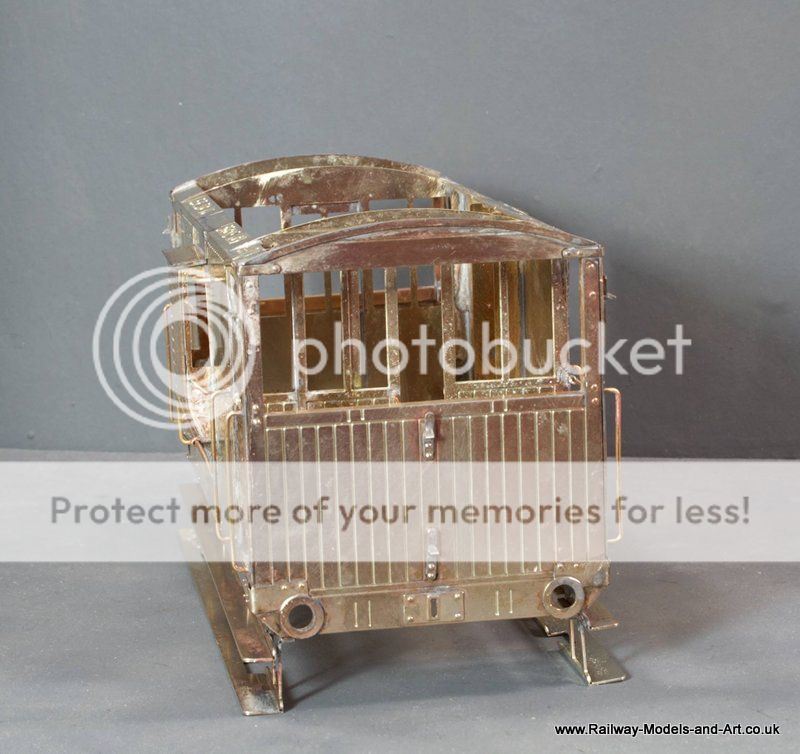
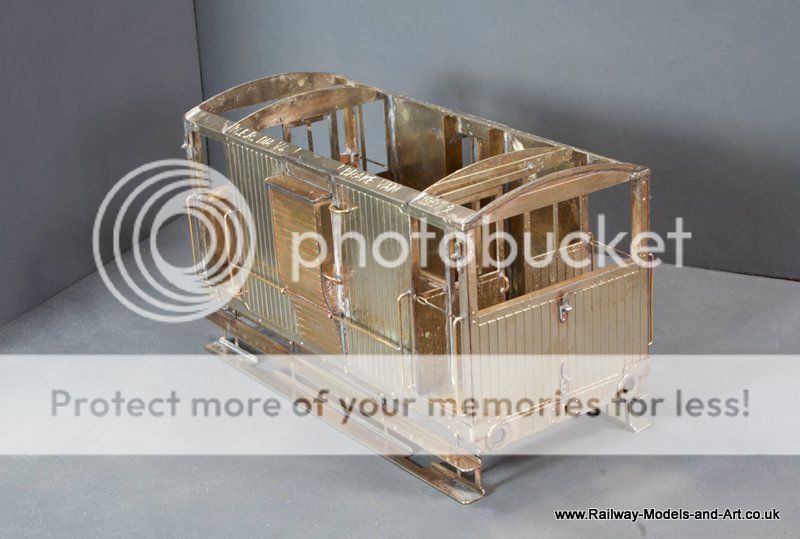
As on the other NER brake vans I made a replacement for the cast chimney from tube.
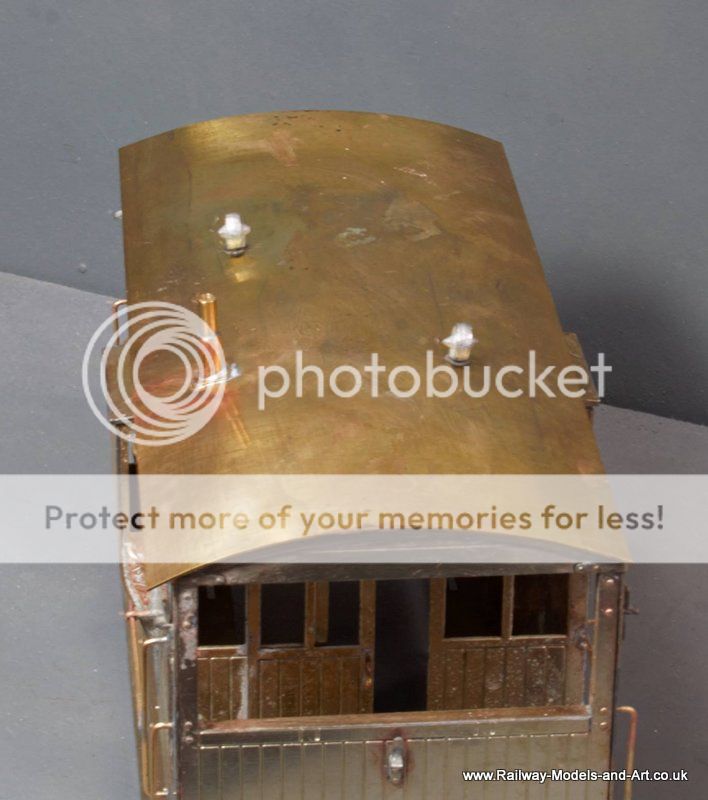
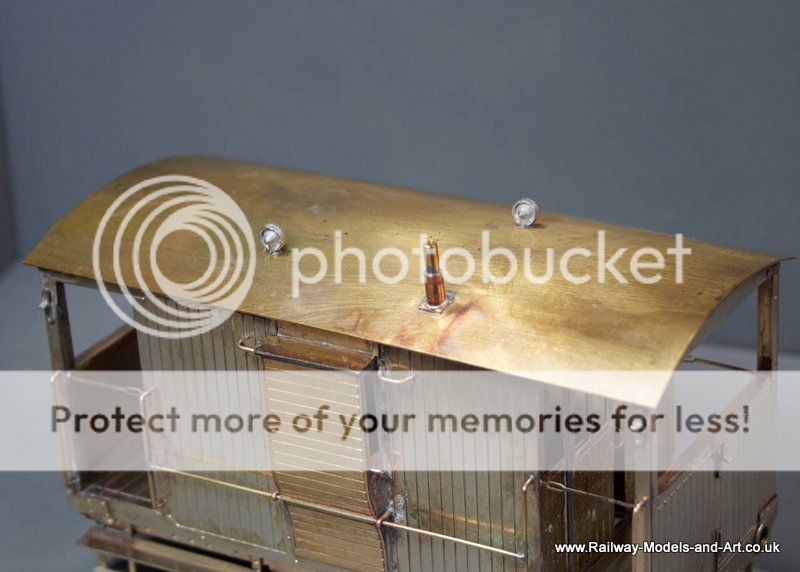
Last night I ventured forth and got stuck in with the NER V4 brake van again. I added the remaining corner patches, the guard irons across the door ways and added the foot boards. I had done the roof at the last session that I did but forgot to take any photos of it.
I think that apart from the brakes and remaining handrails that fit into the end posts all the brass work on the outside is complete so whitemetal fittings next.


As on the other NER brake vans I made a replacement for the cast chimney from tube.


- Robpulham
- LNER A4 4-6-2 'Streak'
- Posts: 1721
- Joined: Thu Mar 27, 2008 9:54 pm
- Location: Lower Wensleydale
- Contact:
Re: Rob's 7mm Rolling Stock Workbench
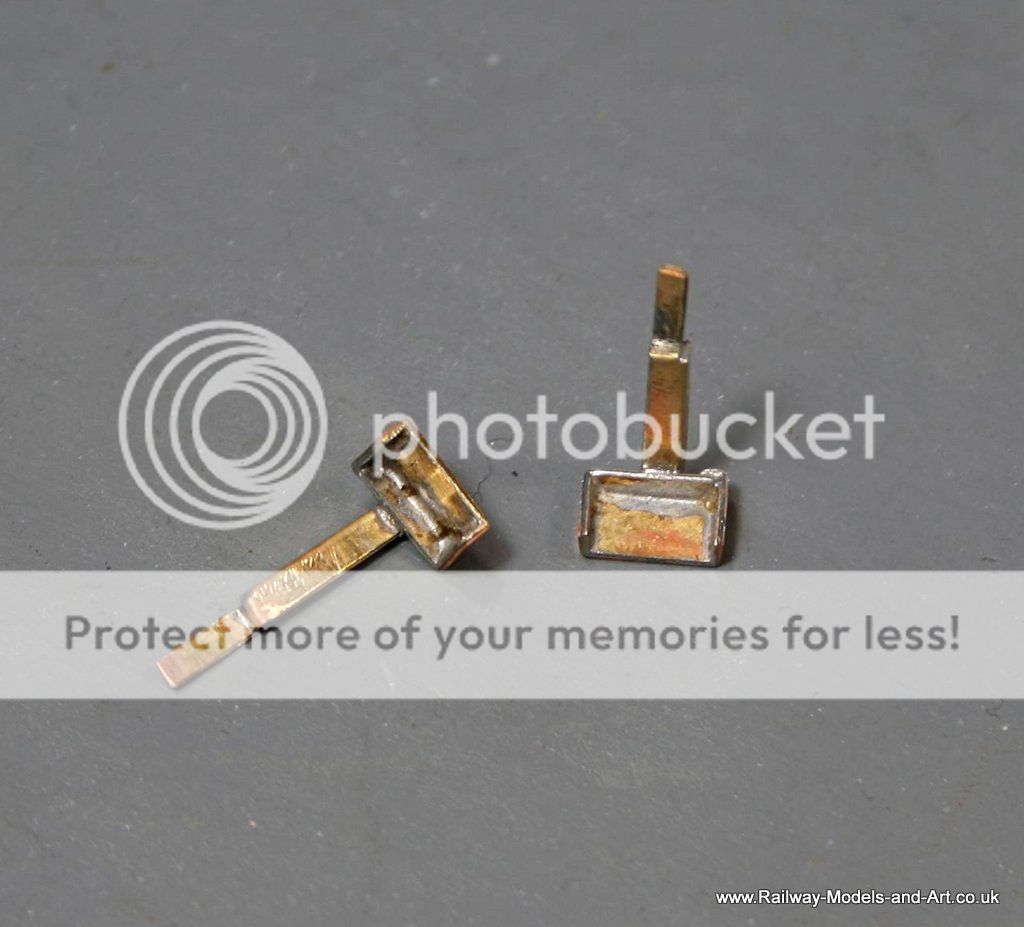
Last night saw more small steps - quite literally in that I made up the rather nifty etched steps for the Tevan
Then I did a bit more on the V4 brake van getting the floor cut and fitted ready for soldering in once I have fitted the brake gear etc. - I made the floor from a scrap etched part and I have yet to decide whether to fill the holes with rod or leave them. - There are only 5 and they are less than a mm in diameter and will they be seen with the roof on, I doubt it.
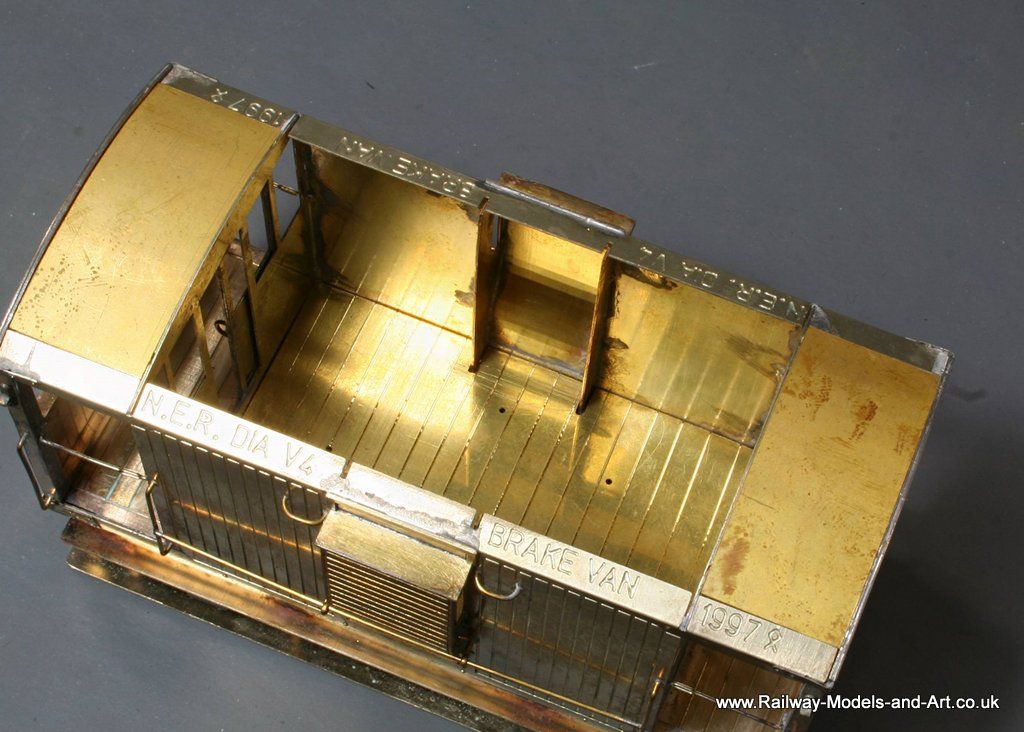
I also made a couple of inserts for above the veranda which once soldered in place will increase the gluing area for sticking the roof on once painted.
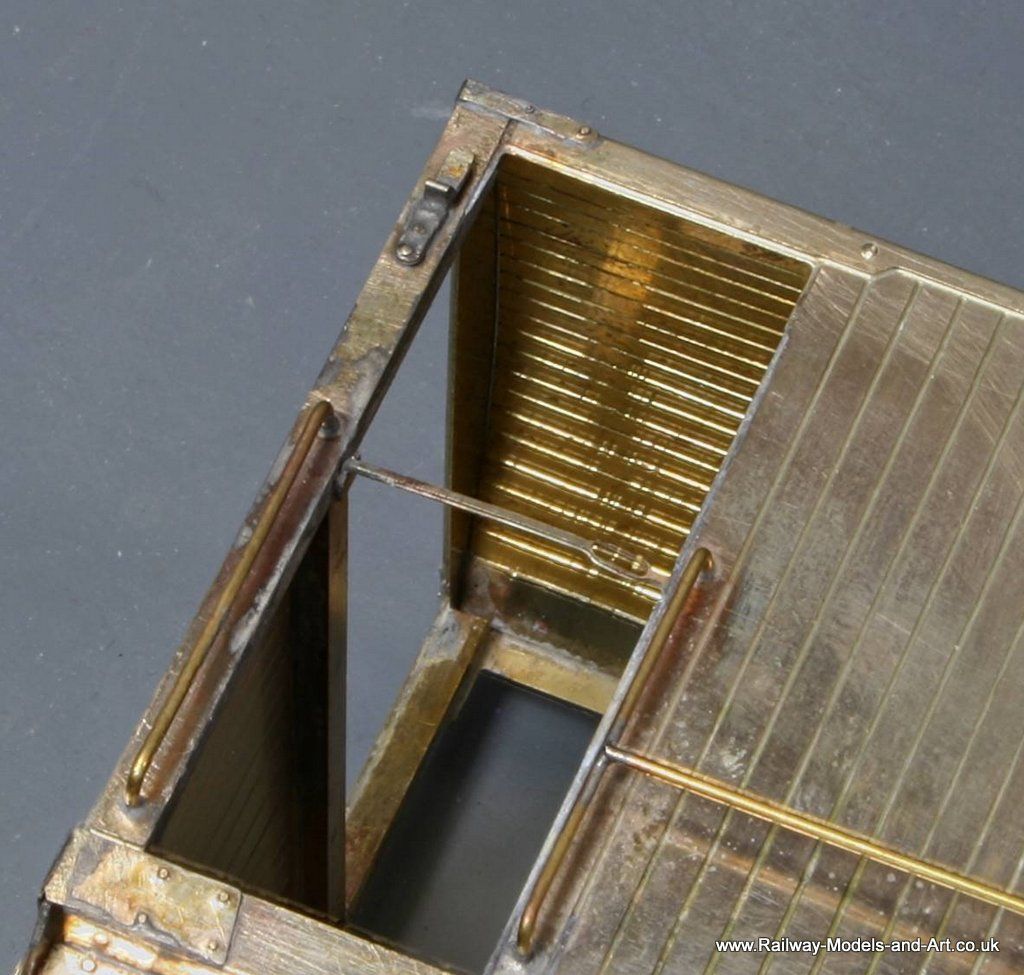

Then I did a bit more on the V4 brake van getting the floor cut and fitted ready for soldering in once I have fitted the brake gear etc. - I made the floor from a scrap etched part and I have yet to decide whether to fill the holes with rod or leave them. - There are only 5 and they are less than a mm in diameter and will they be seen with the roof on, I doubt it.

I also made a couple of inserts for above the veranda which once soldered in place will increase the gluing area for sticking the roof on once painted.

- Robpulham
- LNER A4 4-6-2 'Streak'
- Posts: 1721
- Joined: Thu Mar 27, 2008 9:54 pm
- Location: Lower Wensleydale
- Contact:
Re: Rob's 7mm Rolling Stock Workbench
I managed a little more on the internals for the V4 brake van last night.
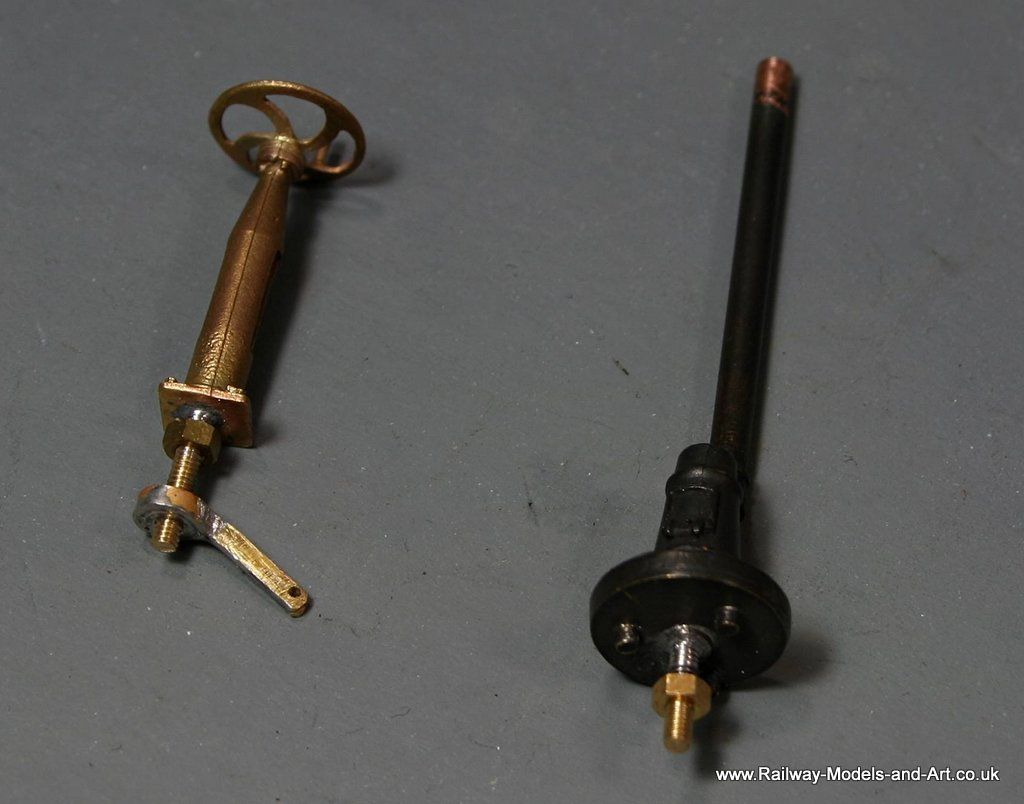
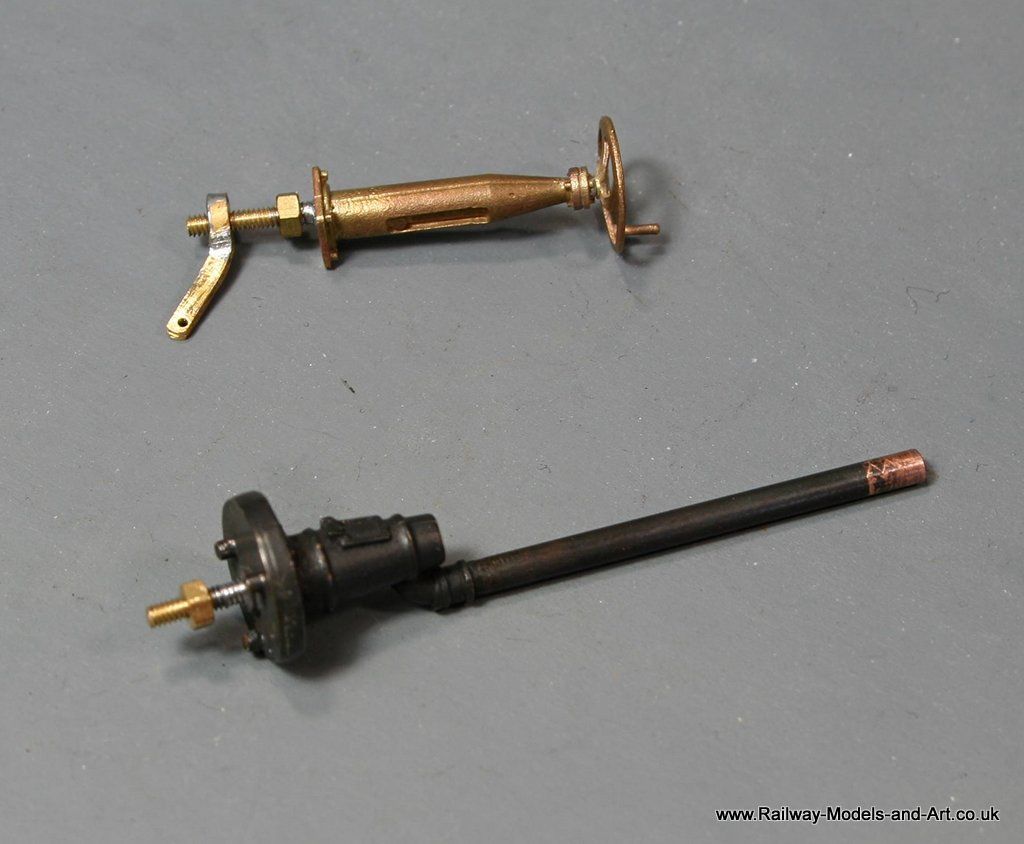
Being, by inclination and birth, a tight fisted Yorkshire man. I don't throw much away, and sometime ago I bought a thousand 10ba brass CS screws. The problem was that when I bought them they only had them in 1 1/2" lengths. This means that most of them that I have used so far, have needed cutting down. This has resulted in me having a few 1" lengths of 10ba studding.
Fast forward to my cleaning up one of Slaters' very nice cast Brake Standards for the V4 and I clumsily broke off the the spigot for attaching it to the floor. At first I was just going to solder it to the brass floor and be done with it but then I thought that having the floor removable for as long as possible would help with painting the inside.
So I drilled out the base where the spigot had been and soldered in a length of the aforementioned stud. A little of the solder wicked up the thread but a quick run down the thread with a 10ba die soon sorted that.
I then thought that with a bit of filing I could use a 10ba nut with some scrap etch to represent the lever for the brake cross shaft and although turning the handle doesn't actuate the brakes it still looks the part.
It wasn't a great leap to think that I may as well do the same with the stove to make it removable too.


- Dave
- LNER A4 4-6-2 'Streak'
- Posts: 1733
- Joined: Sat Nov 13, 2010 9:33 pm
- Location: Centre of the known universe York
Re: Rob's 7mm Rolling Stock Workbench
You could have made it a working brake 
-
jwealleans
- LNER A4 4-6-2 'Streak'
- Posts: 4303
- Joined: Wed Oct 25, 2006 8:46 am
Re: Rob's 7mm Rolling Stock Workbench
Don't put it past him.
- Robpulham
- LNER A4 4-6-2 'Streak'
- Posts: 1721
- Joined: Thu Mar 27, 2008 9:54 pm
- Location: Lower Wensleydale
- Contact:
Re: Rob's 7mm Rolling Stock Workbench
Dave wrote:You could have made it a working brake
Funny you should say that because the brakes actually do work on this onejwealleans wrote:Don't put it past him.
- Dave
- LNER A4 4-6-2 'Streak'
- Posts: 1733
- Joined: Sat Nov 13, 2010 9:33 pm
- Location: Centre of the known universe York
Re: Rob's 7mm Rolling Stock Workbench
Touche mon capitan
- Robpulham
- LNER A4 4-6-2 'Streak'
- Posts: 1721
- Joined: Thu Mar 27, 2008 9:54 pm
- Location: Lower Wensleydale
- Contact:
Re: Rob's 7mm Rolling Stock Workbench
In between doing bits and pieces on the Kirk coaches I have been making slow progress on the V4 brake van.
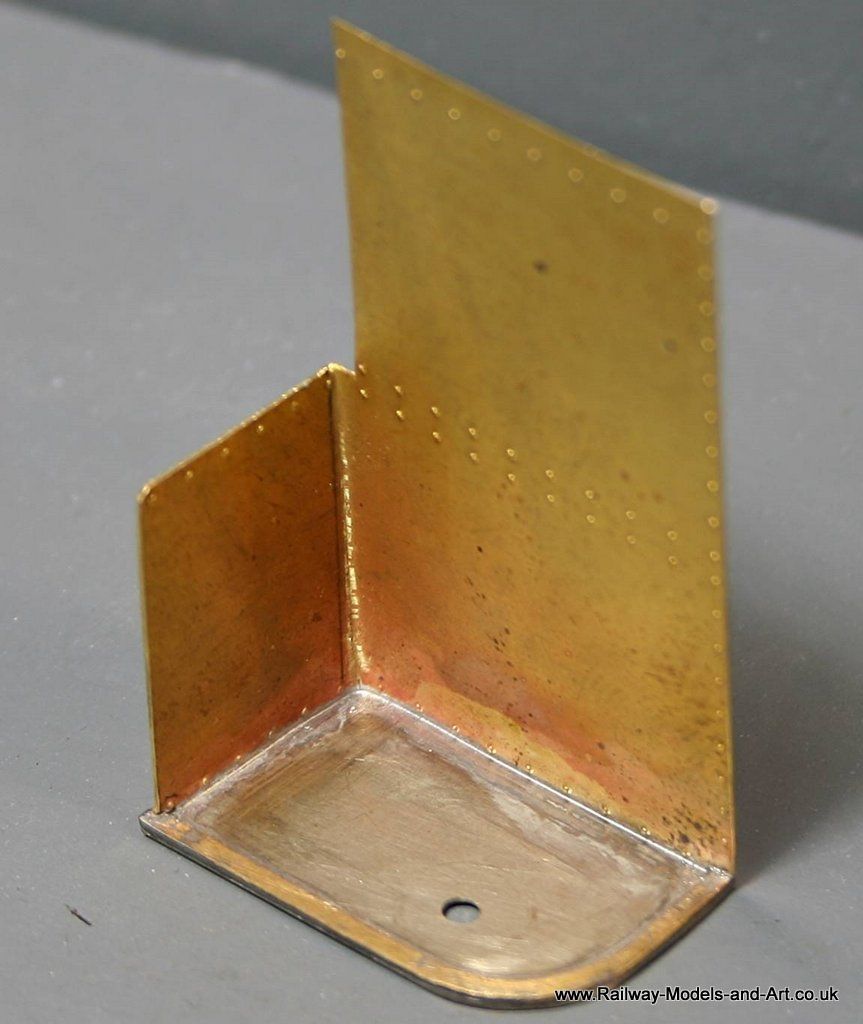
I have been fortunate to have been given access to a couple of GA's by fellow member Dave, which show a hearth and heat shielding around the area where the stove sits.
A raid of the scrap etch box yielded this - the hole in the bottom it where the stove will bolt down.
And me, being me couldn't resist making the coat hook to go with a lamp iron that hung to either side of the chimney.
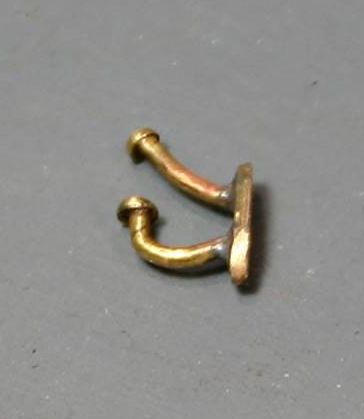
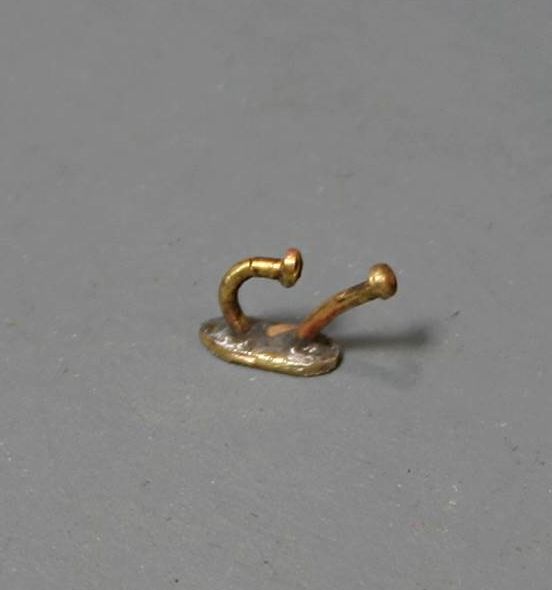
Now I mentioned that I have two GA's and this is where life gets a little odd. One of them shows 3'7" wheels which is what Jim recommends in the kit and the other shows 3'1" wheels. Even more odd is the fact that when trying to fit the 3'7" wheels they rub on the underside of the solebars. Plan B is to try some 3'1" wheels and check out the ride height.
I have been fortunate to have been given access to a couple of GA's by fellow member Dave, which show a hearth and heat shielding around the area where the stove sits.
A raid of the scrap etch box yielded this - the hole in the bottom it where the stove will bolt down.

And me, being me couldn't resist making the coat hook to go with a lamp iron that hung to either side of the chimney.


Now I mentioned that I have two GA's and this is where life gets a little odd. One of them shows 3'7" wheels which is what Jim recommends in the kit and the other shows 3'1" wheels. Even more odd is the fact that when trying to fit the 3'7" wheels they rub on the underside of the solebars. Plan B is to try some 3'1" wheels and check out the ride height.
- Robpulham
- LNER A4 4-6-2 'Streak'
- Posts: 1721
- Joined: Thu Mar 27, 2008 9:54 pm
- Location: Lower Wensleydale
- Contact:
Re: Rob's 7mm Rolling Stock Workbench
I think that I have got to the bottom of why the 3'7" wheels don't fit. Jim certainly did discover the error but what I had forgotten was that I wasn't using a production etch. Sometime ago when I planned the second Birdcage Van with side cotes I asked Jim if he had any scrap etches that contained the wooden duckets from the V4 kit. He duly let me have some and while making up the two V1/3 vans I idly cleaned and folded up the remainder of the etches that Jim has sent to which I added the missing bit's from my V4 kit not really thinking too much about why the etches had been scrap in the first place because there was nothing obvious to see. Upon checking last night, the production etches have cuts outs to clear the wheels.
- Robpulham
- LNER A4 4-6-2 'Streak'
- Posts: 1721
- Joined: Thu Mar 27, 2008 9:54 pm
- Location: Lower Wensleydale
- Contact:
Re: Rob's 7mm Rolling Stock Workbench
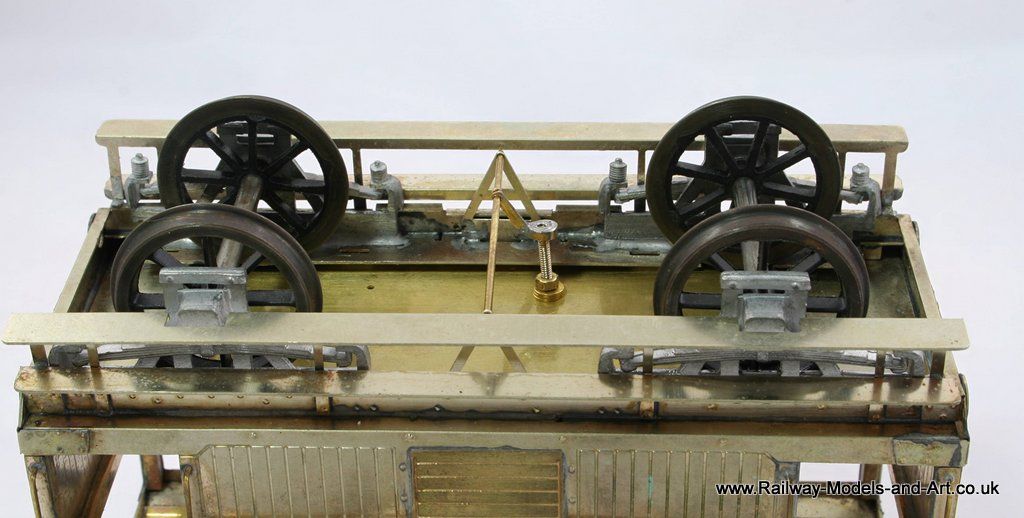
The V4 brake van came on in leaps and bounds over the weekend at home.
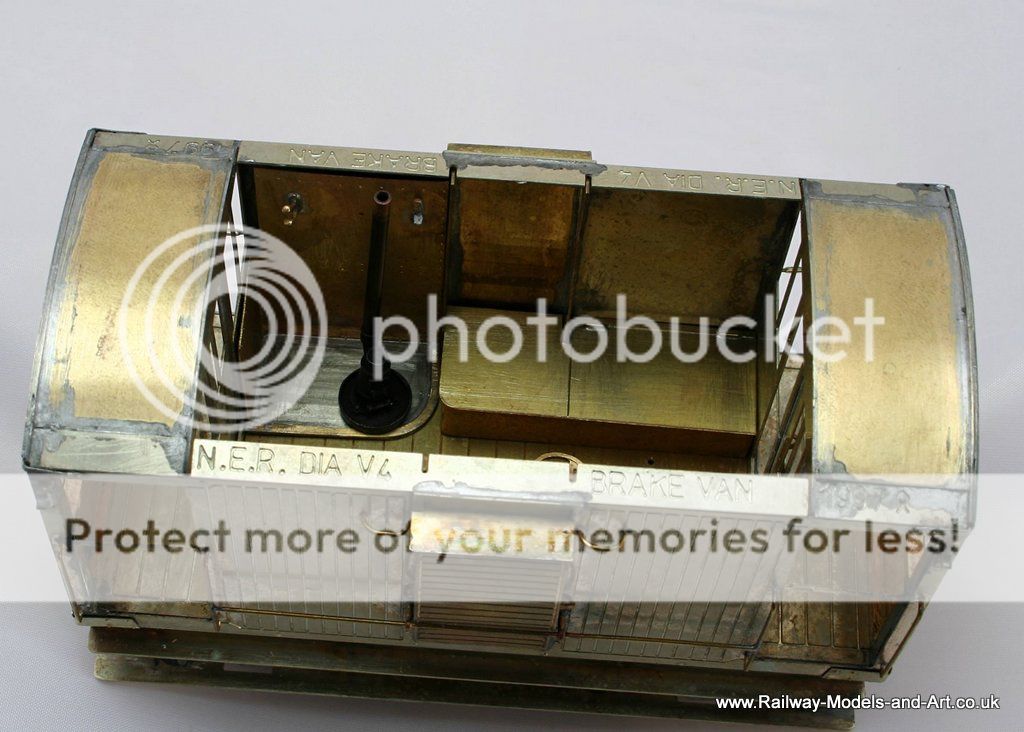
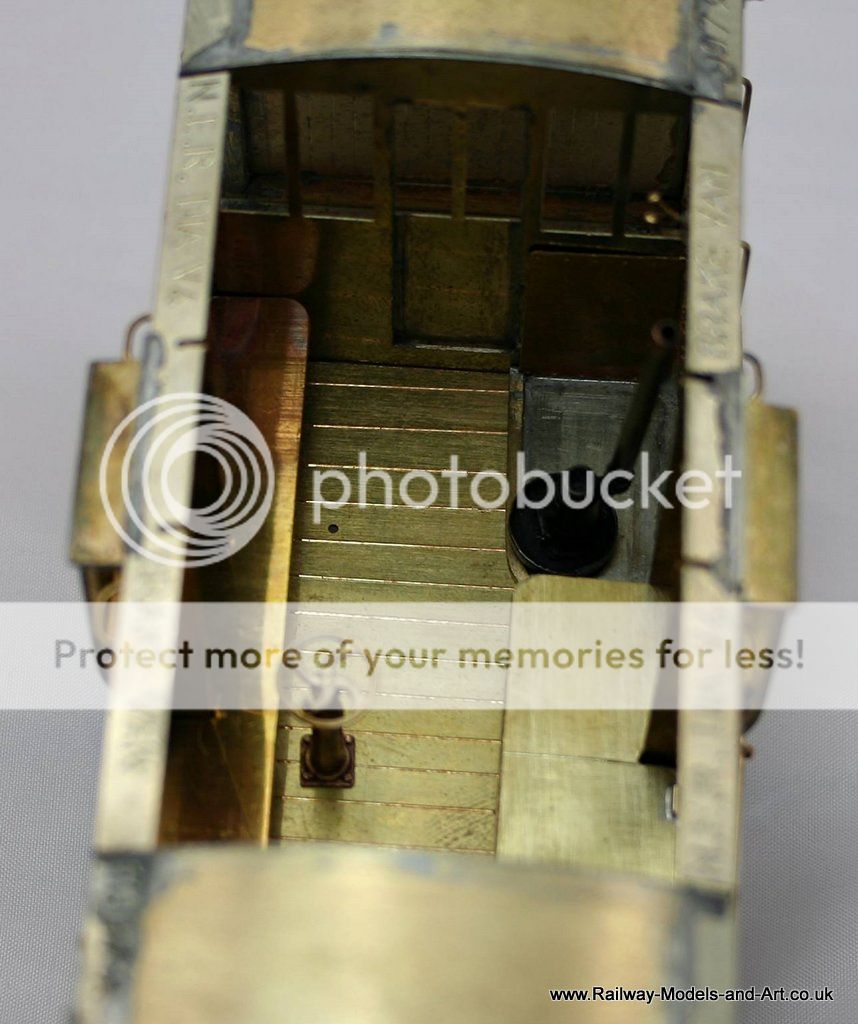
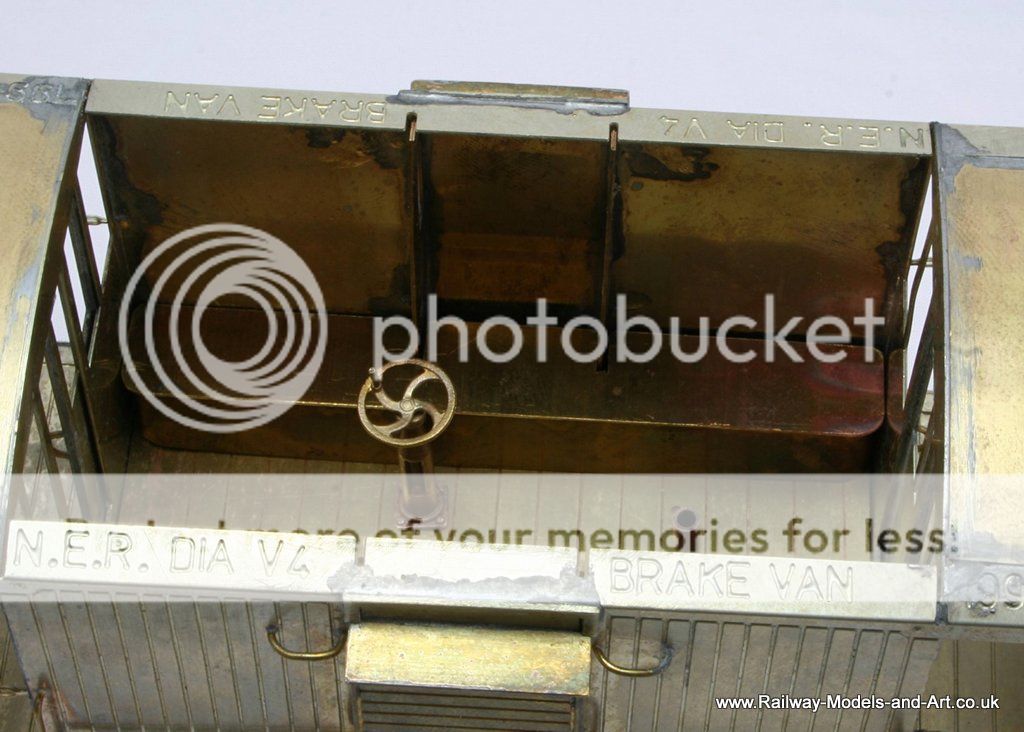
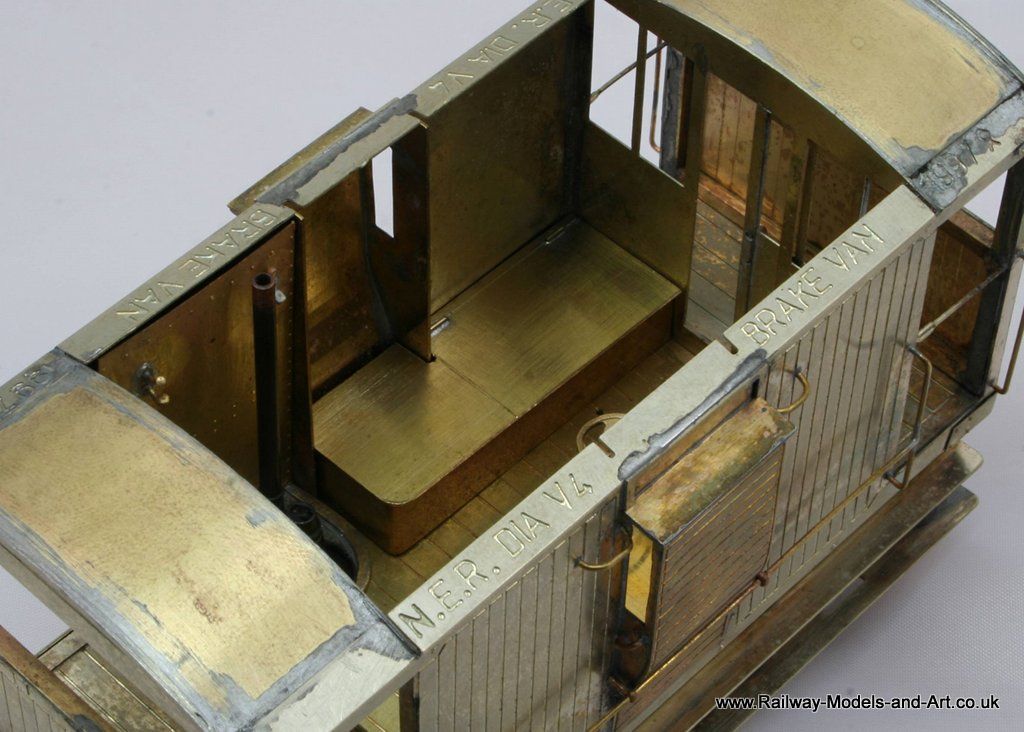
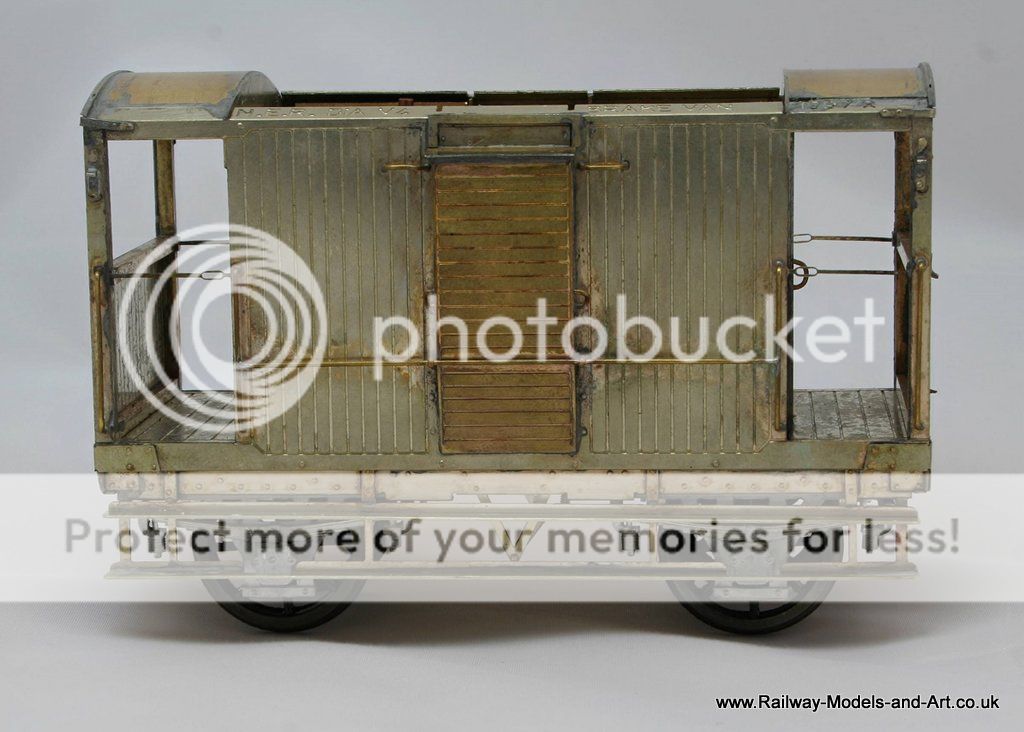
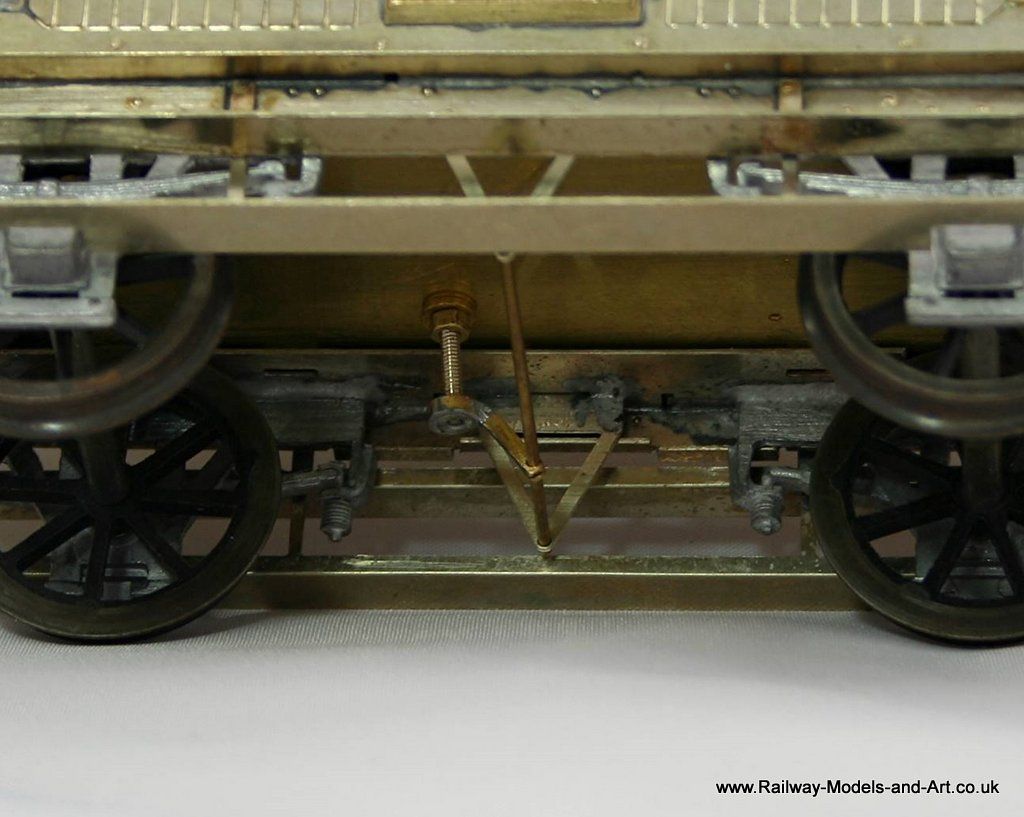
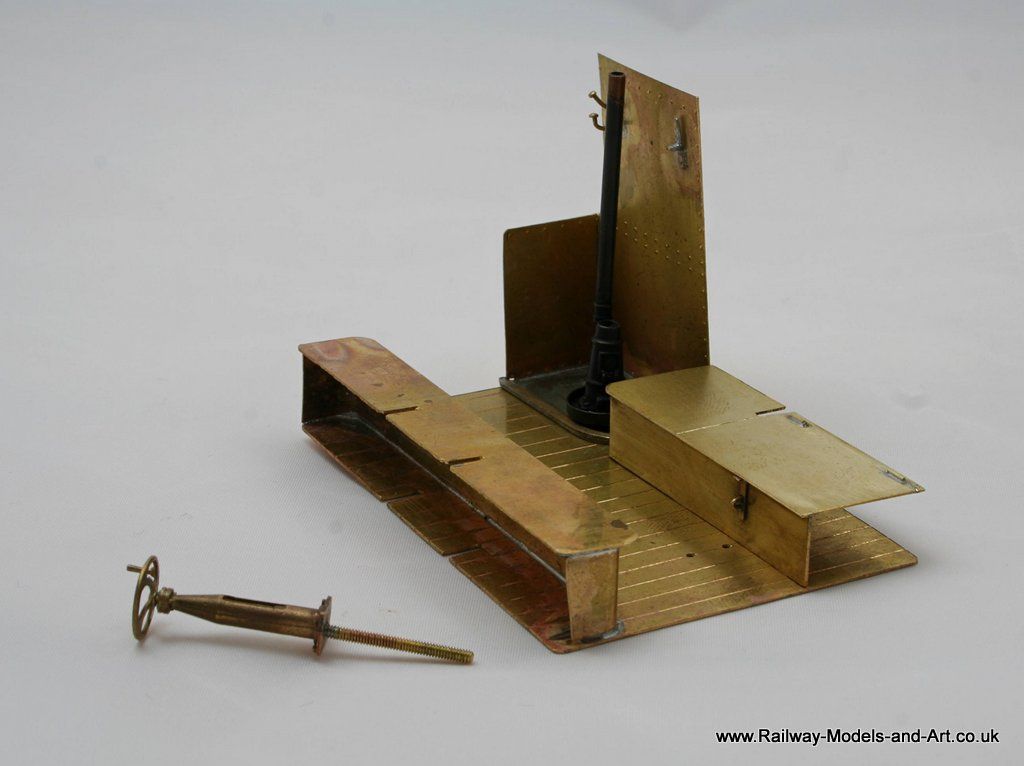
Having taken the photos above I realised that the screw for the brake column could really do with being a bit longer so I used the piece of studding left from shortening the screw to hold the seat/locker in.
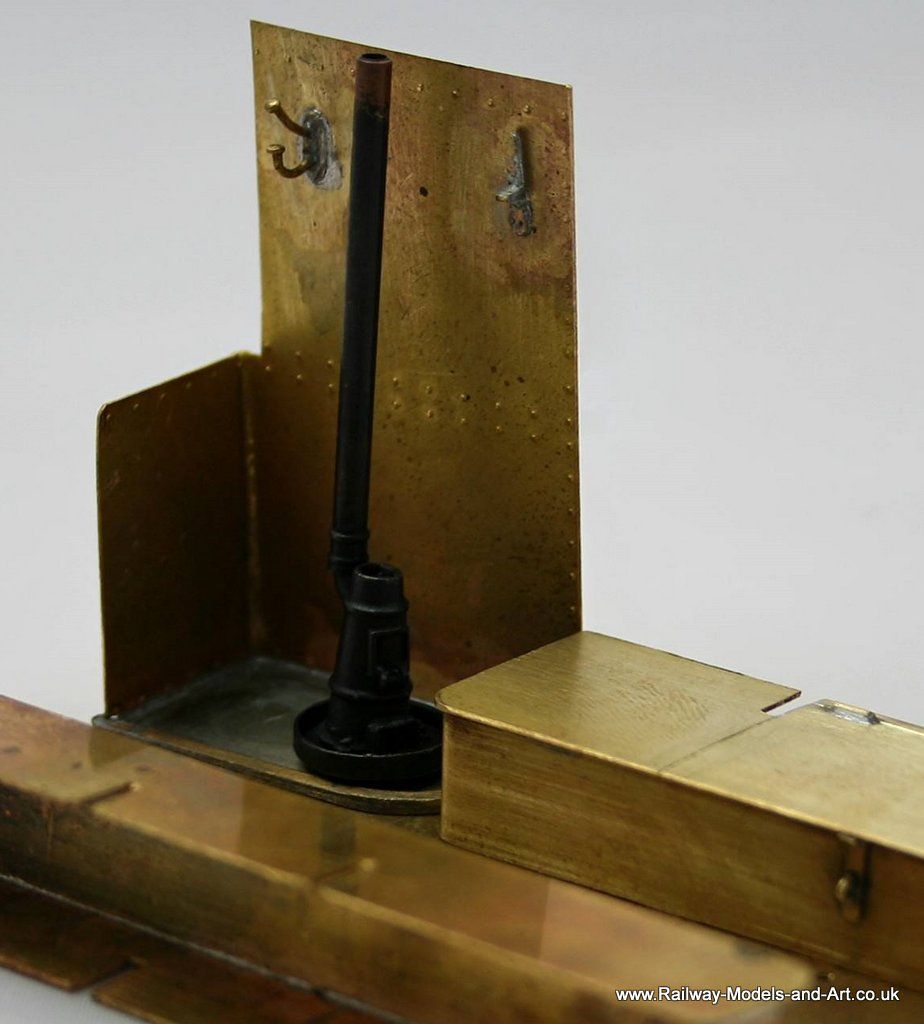
Those that are still awake will note the hasp and staple fitted since the earlier photos
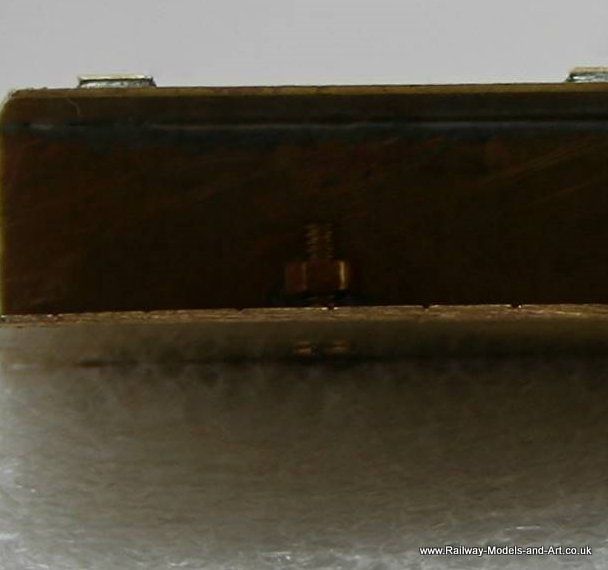
The long seat on one side is soldered in place, the one at the other side is screwed in from below allowing the floor and all the fittings to be fixed in after painting.
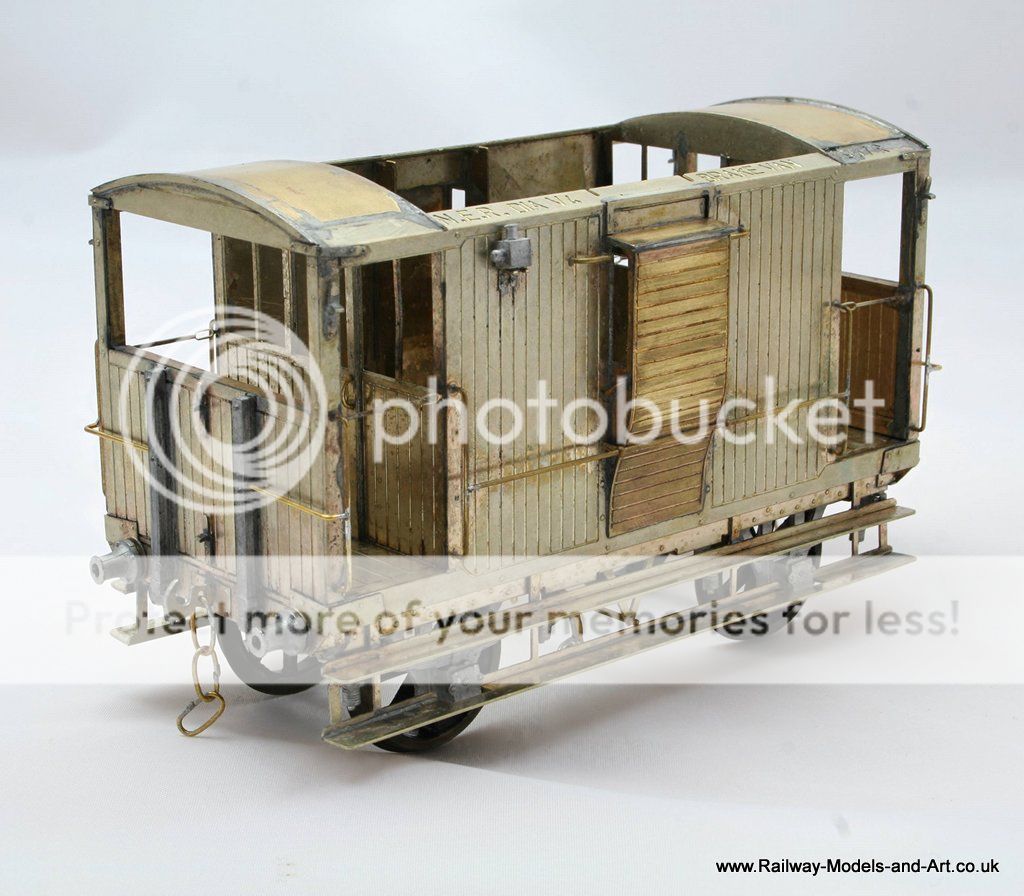
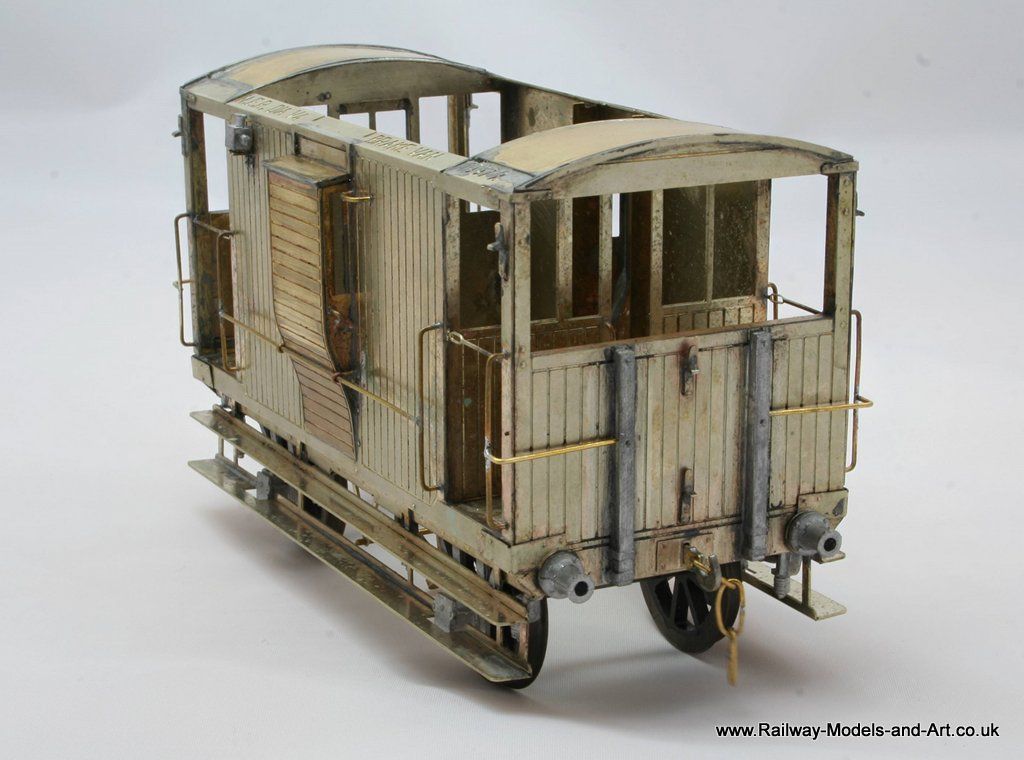
The only things left to fit are the brakes but sadly I think that I will need to temporarily remove one or both W Irons at one end because the wheel is rubbing and if I don't do it now it will only short when I try to run it.


Having taken the photos above I realised that the screw for the brake column could really do with being a bit longer so I used the piece of studding left from shortening the screw to hold the seat/locker in.

Those that are still awake will note the hasp and staple fitted since the earlier photos


The long seat on one side is soldered in place, the one at the other side is screwed in from below allowing the floor and all the fittings to be fixed in after painting.


The only things left to fit are the brakes but sadly I think that I will need to temporarily remove one or both W Irons at one end because the wheel is rubbing and if I don't do it now it will only short when I try to run it.
- Robpulham
- LNER A4 4-6-2 'Streak'
- Posts: 1721
- Joined: Thu Mar 27, 2008 9:54 pm
- Location: Lower Wensleydale
- Contact:
Re: Rob's 7mm Rolling Stock Workbench
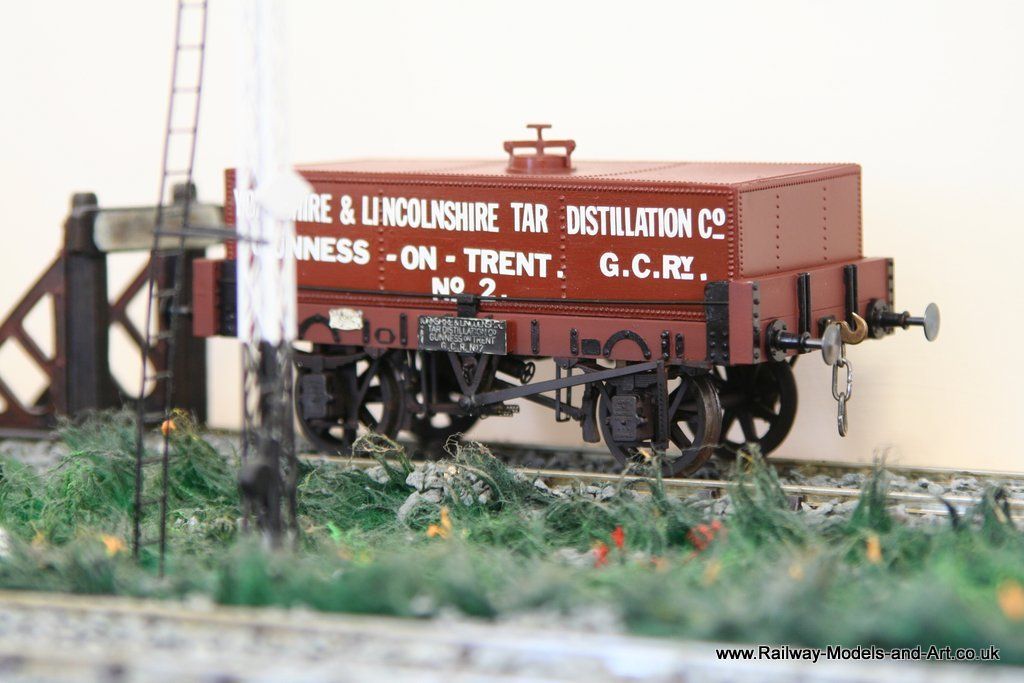
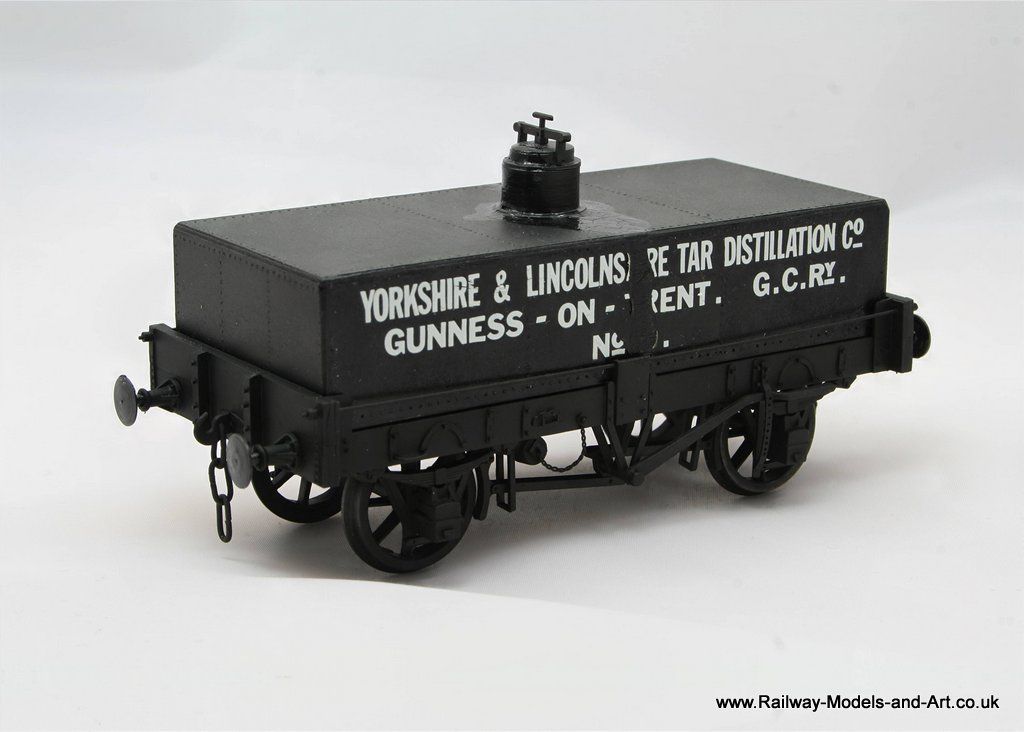
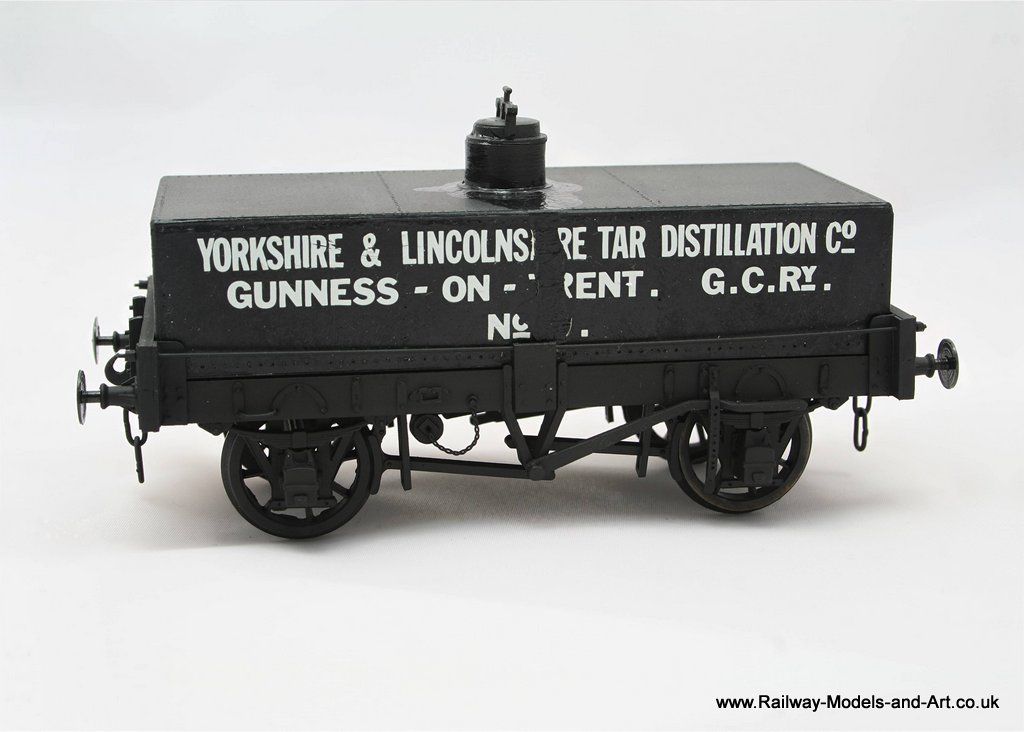
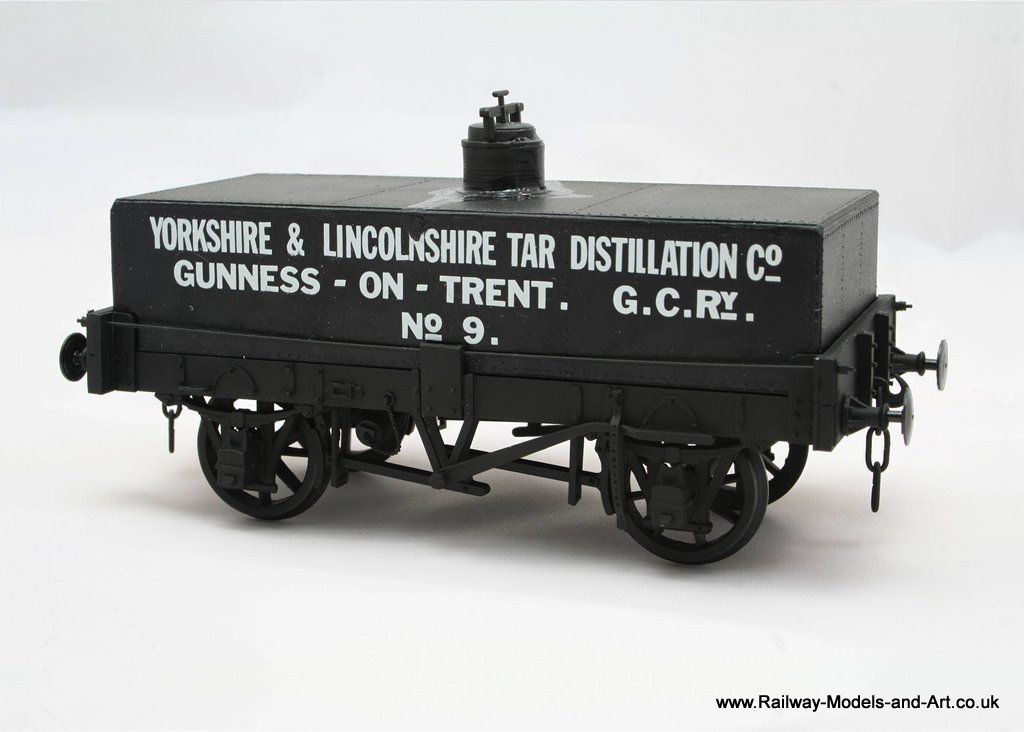
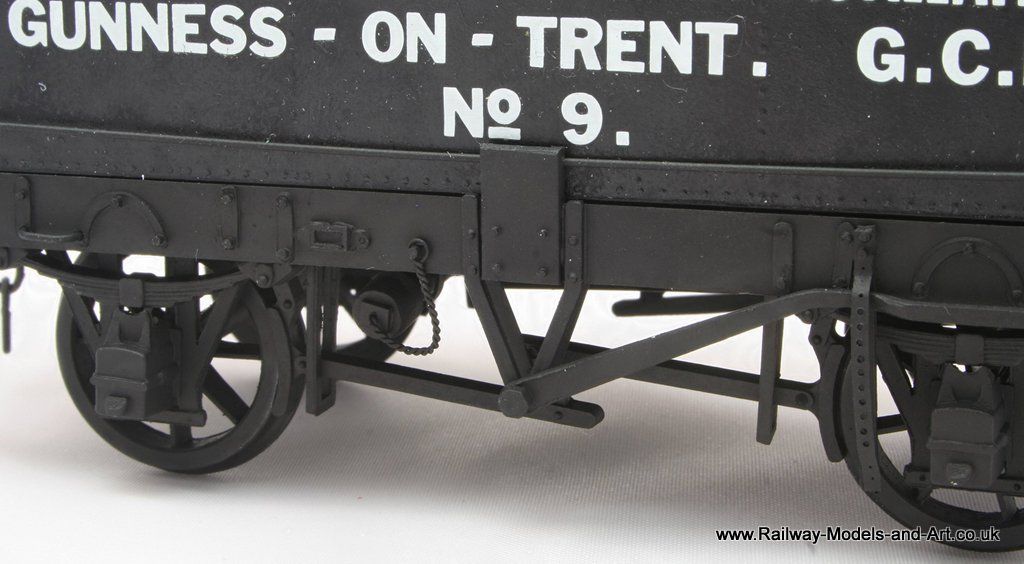
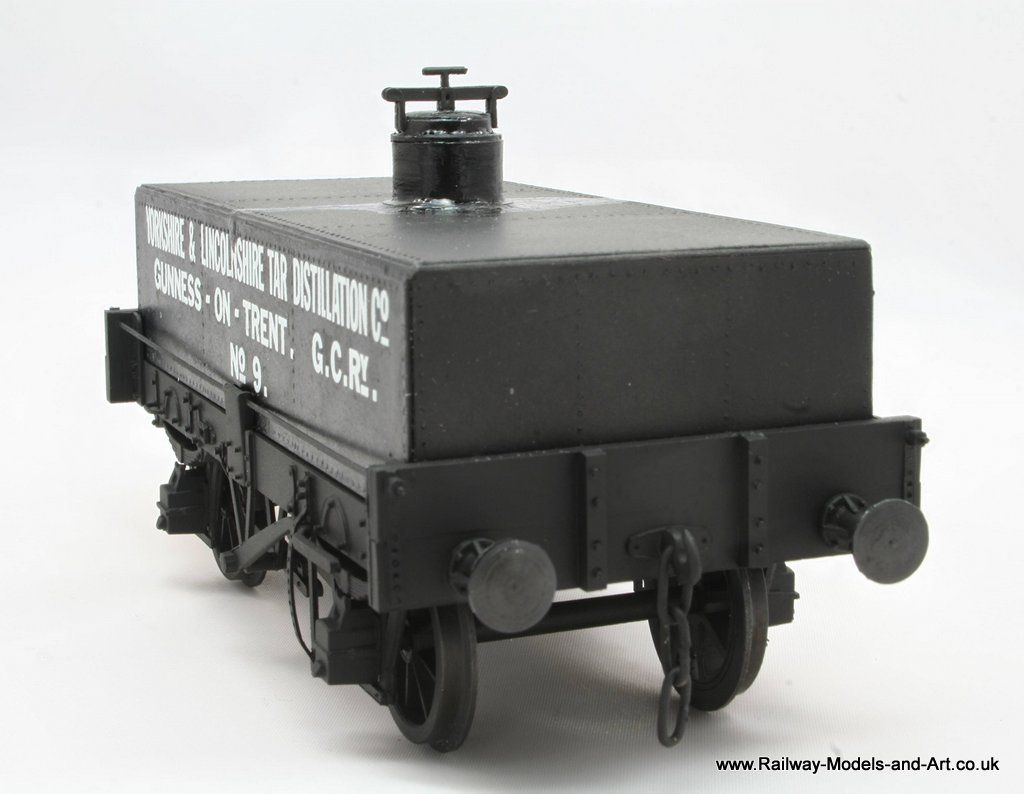
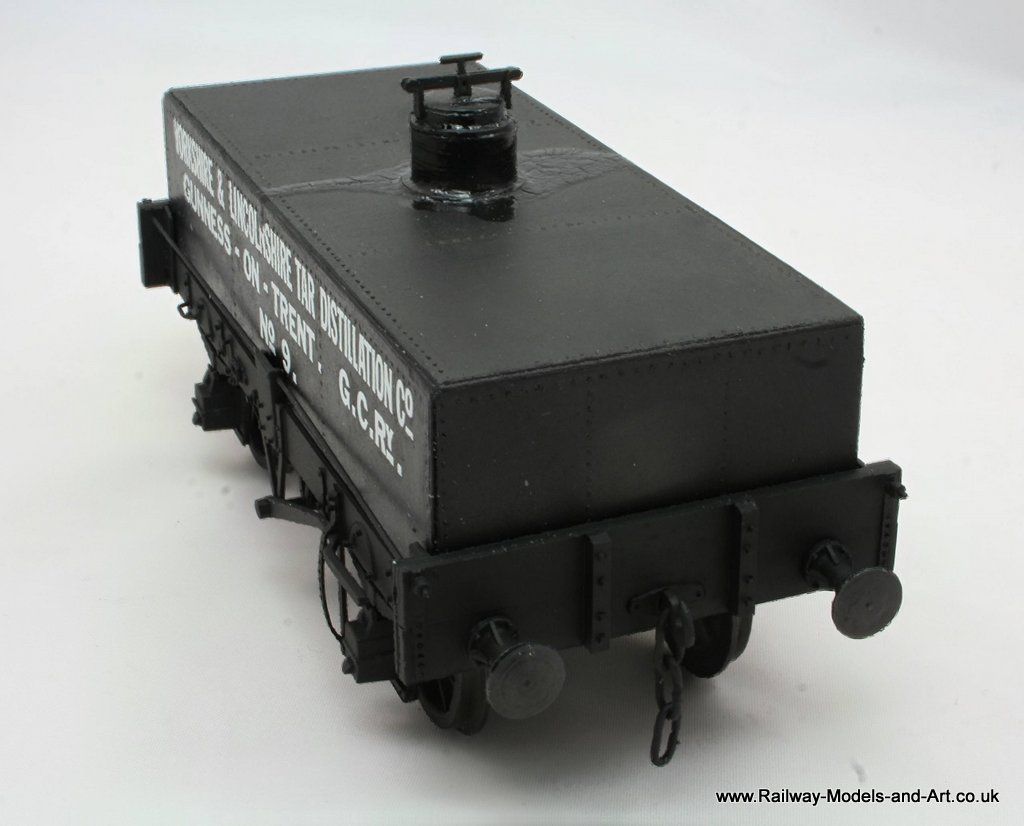
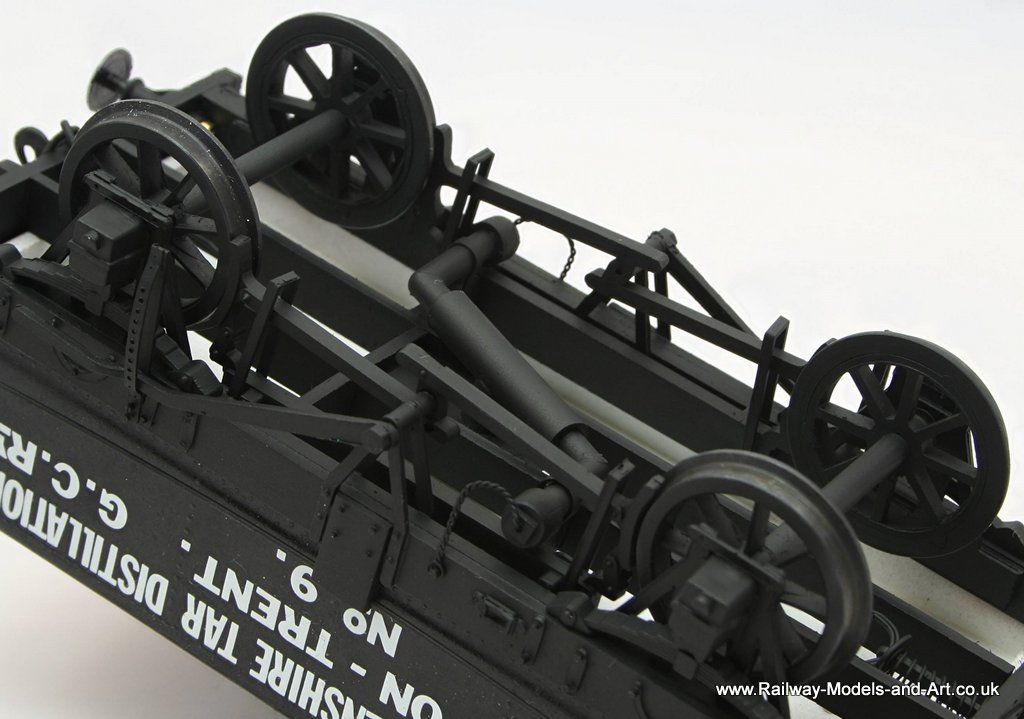
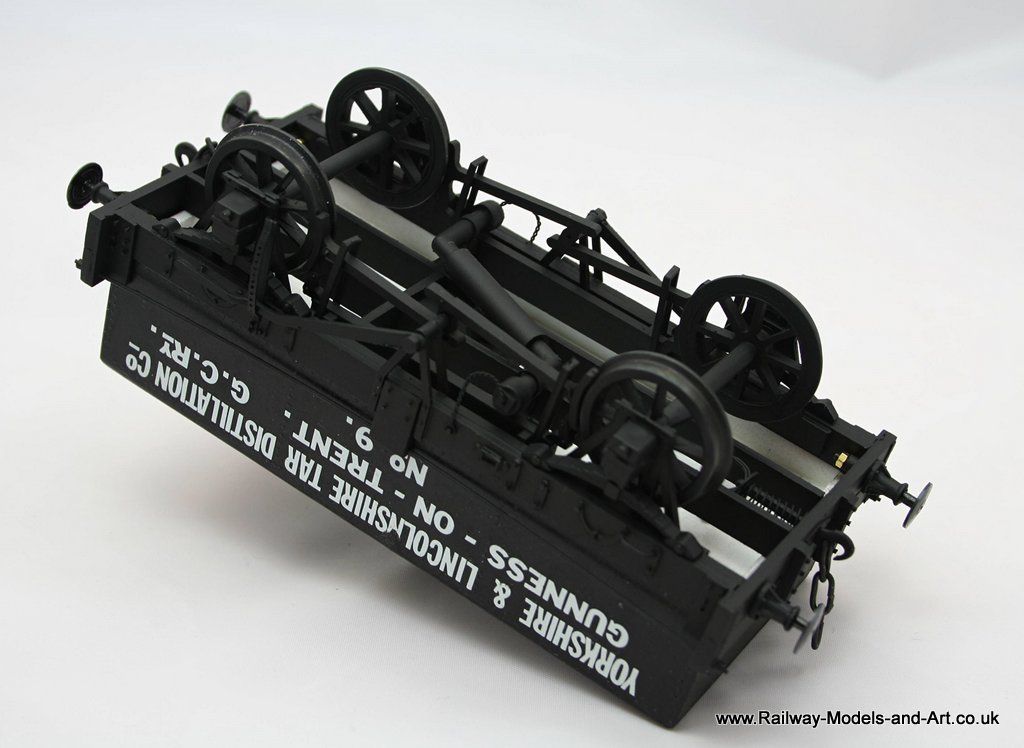
Another one rolled off the bench today, just for those who thought that I had forsaken the Cameo.
The tar tank now has all it's underpinnings and just needs weathering to complete.
I am particularly pleased with how this one turned out because it was really just an experiment that wasn't meant to go further than seeing if I could make the riveted tank. Which in turn was a trial for creating cracked tar spillage....


