Rob's 7mm Scale Coach Workbench
Moderators: 52D, Tom F, Rlangham, Atlantic 3279, Blink Bonny, Saint Johnstoun, richard
- Robpulham
- LNER A4 4-6-2 'Streak'
- Posts: 1721
- Joined: Thu Mar 27, 2008 9:54 pm
- Location: Lower Wensleydale
- Contact:
Re: Rob's 7mm Scale Coach Workbench
Hi Vernon,
I made the hinges with a tail that fits in a hole in the side so they are a bit less vulnerable than they would have been if they were just stuck on.
Regarding the battery hanger straps, the box itself is stuck on so the strap is purely cosmetic and being out of the way underneath should survive (I hope). As I said it's my first go at a Kirk kit so I am finding my feet a bit. I have a couple of JLRT kit's too but they have cast parts which attach to the resin underframe so should in theory be less vulnerable to being knocked of. That said the hinges are cast on as part of the sides and a friend's experience shows that these are easy to break off. - I have only partially assembled a D113 and so far I have been lucky not to damage any.
- notascoobie
- GCR O4 2-8-0 'ROD'
- Posts: 554
- Joined: Sun Jul 20, 2008 9:43 pm
- Location: S Yorkshire
Re: Rob's 7mm Scale Coach Workbench
Hi Rob,
Thanks or the extras. I think you're wise to use spigots to increase the fix on your hinges. But as you noted about the JLTRT kits, projecting surface detail in plastic or resin is vulnerable!
Cheers,
Vernon
Thanks or the extras. I think you're wise to use spigots to increase the fix on your hinges. But as you noted about the JLTRT kits, projecting surface detail in plastic or resin is vulnerable!
Cheers,
Vernon
- Robpulham
- LNER A4 4-6-2 'Streak'
- Posts: 1721
- Joined: Thu Mar 27, 2008 9:54 pm
- Location: Lower Wensleydale
- Contact:
Re: Rob's 7mm Scale Coach Workbench
In between laying block paving and the many extremes of weather I managed to get the first bogie brake assembled over the weekend.
The clean up job for the parts of the next one is also well under way.
Vernon will note that in bringing it home I have lost a hinge....


The clean up job for the parts of the next one is also well under way.
Vernon will note that in bringing it home I have lost a hinge....
- Robpulham
- LNER A4 4-6-2 'Streak'
- Posts: 1721
- Joined: Thu Mar 27, 2008 9:54 pm
- Location: Lower Wensleydale
- Contact:
Re: Rob's 7mm Scale Coach Workbench
Over the last week, in between working on the front garden up north and a few days out, much progress has been made on the the Kirk parcel vans.
The first is now ready for the paint shop (apart from its bogies of which I still need to finish one of them because I am upgrading it using some spare JLRT bogies on this one).
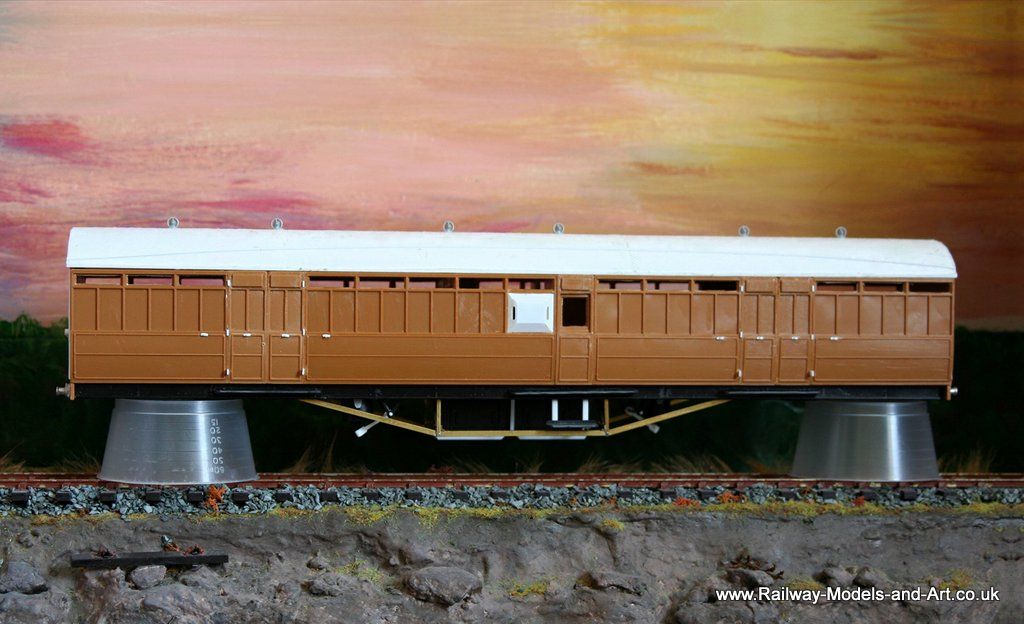
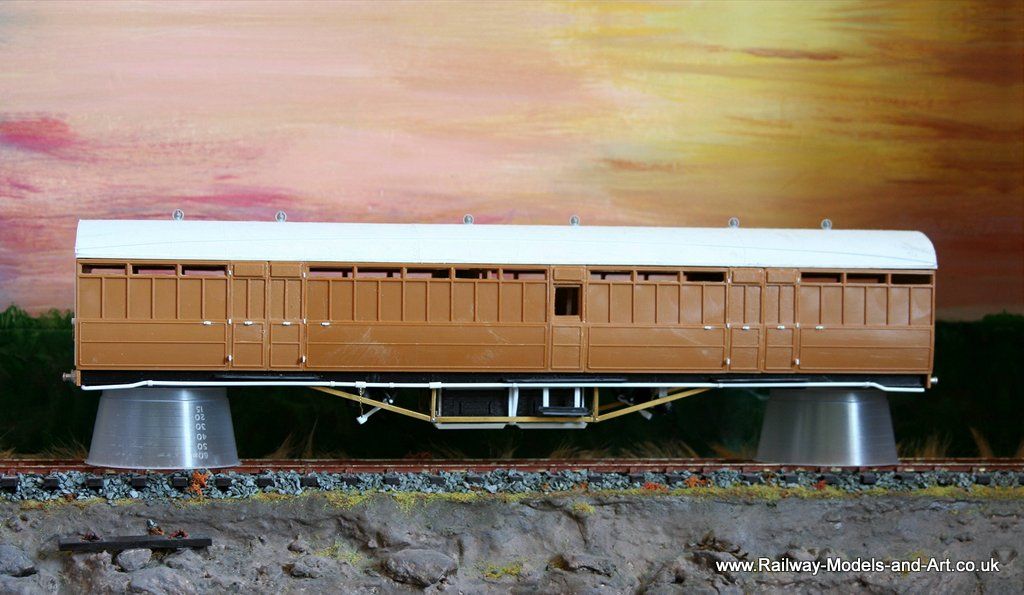
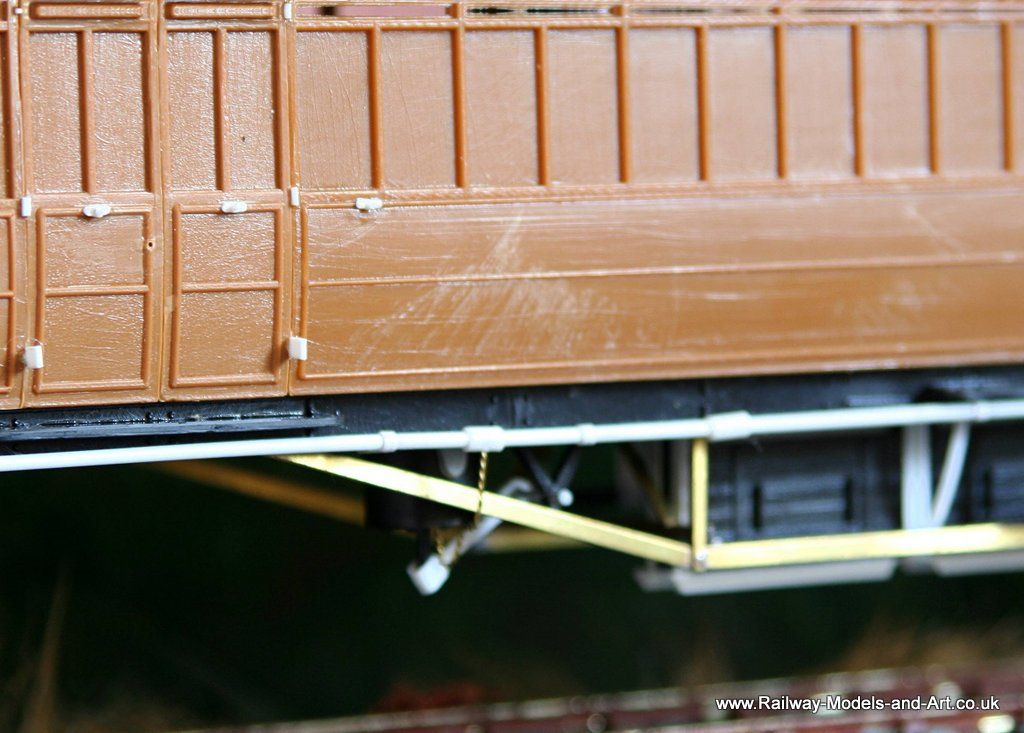
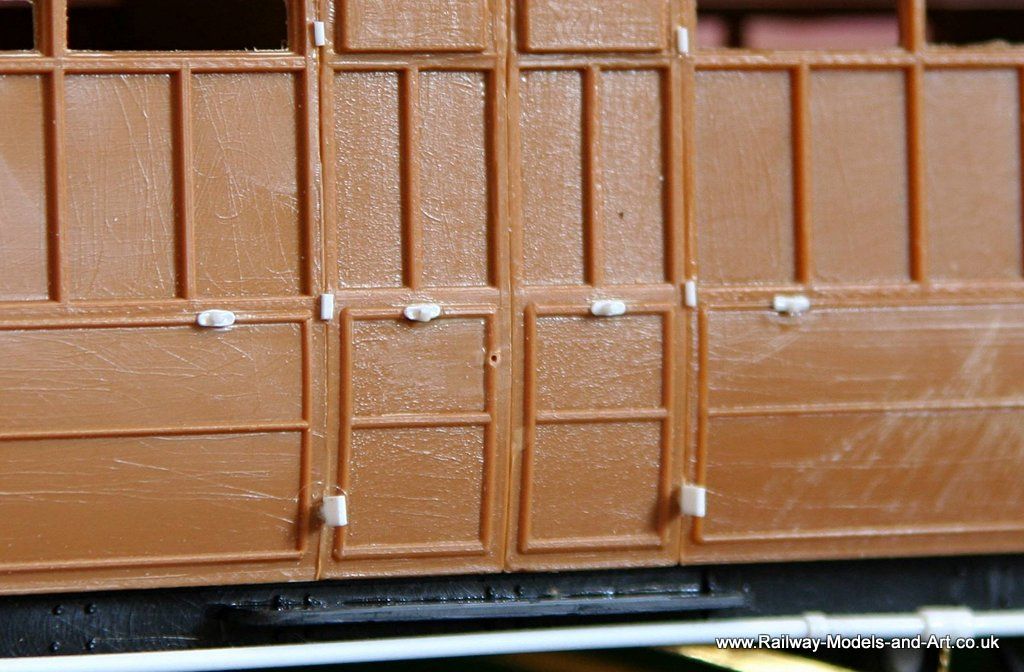
The roof has been done with my now usual covering of lense cleaner tissue laid in overlapping sections.
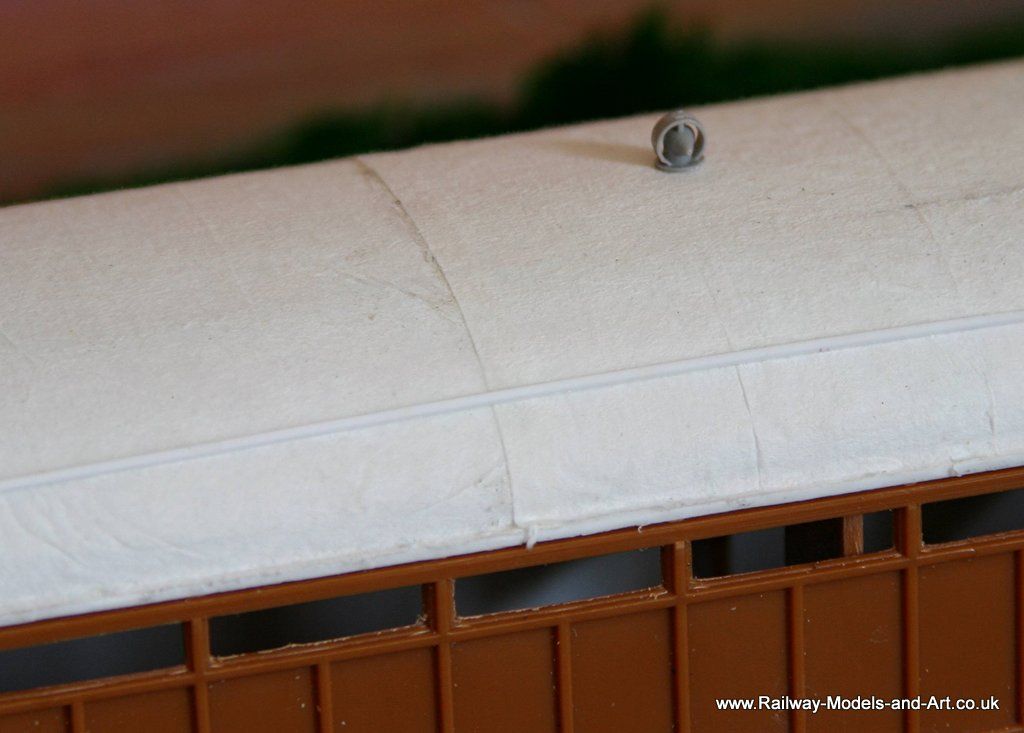
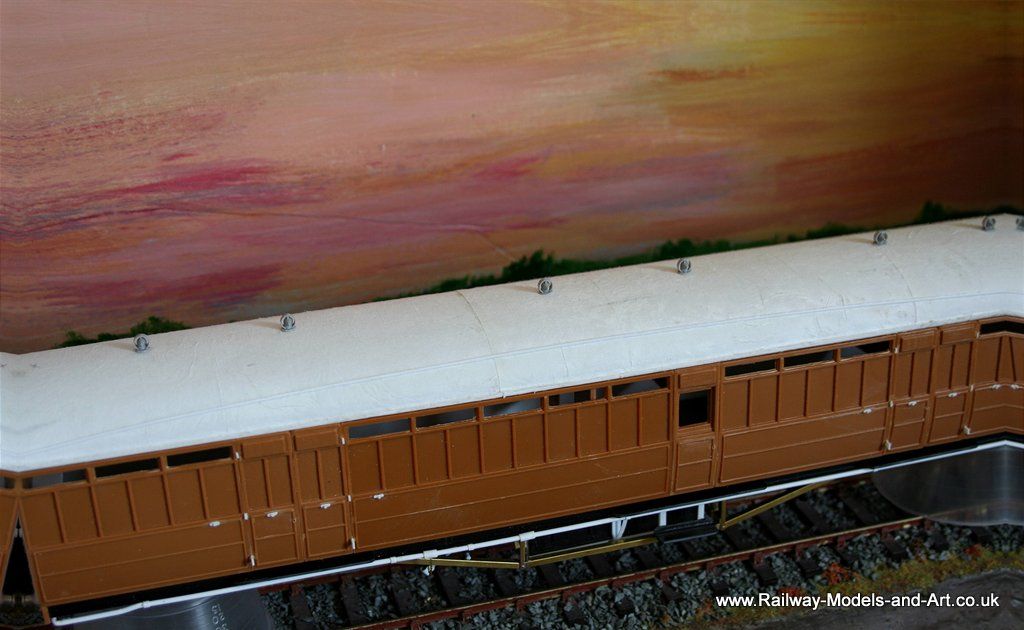
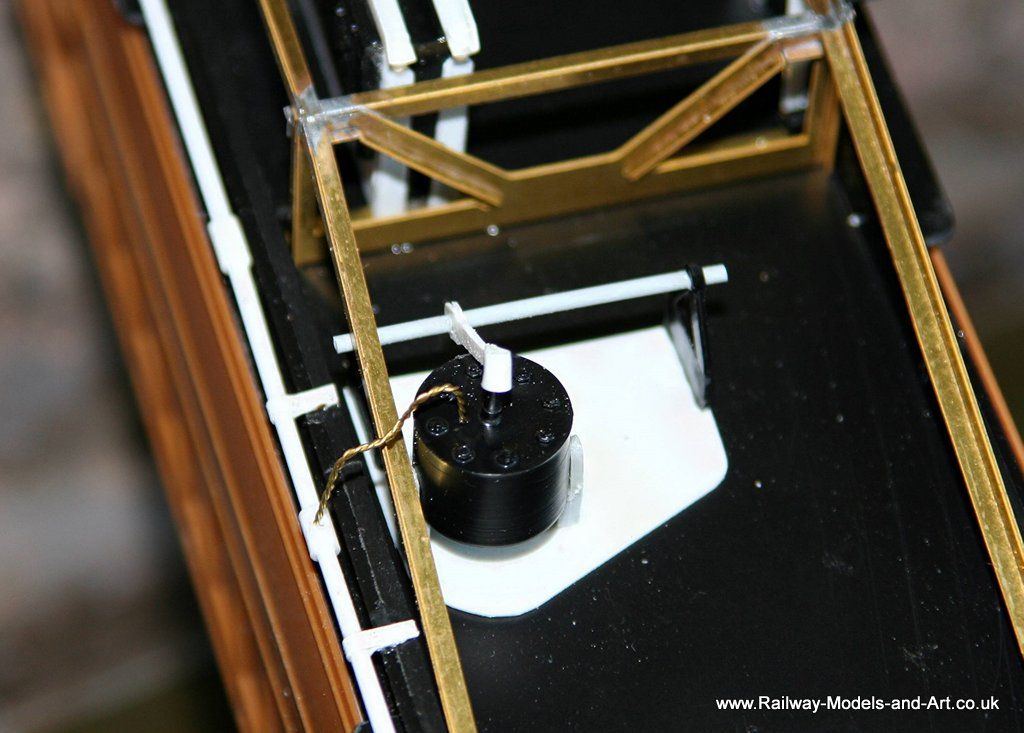
The second one has had the sides stuck together and a start made on putting the underframe together. I plan to use the Kirk fox bogies on this one because it's going to be depicted in a much earlier timeframe. I have started to add the quite prominent step boards to them and it has changed the appearance quite considerably in my view - sorry no photos of those until next week.
The first is now ready for the paint shop (apart from its bogies of which I still need to finish one of them because I am upgrading it using some spare JLRT bogies on this one).


The roof has been done with my now usual covering of lense cleaner tissue laid in overlapping sections.


The second one has had the sides stuck together and a start made on putting the underframe together. I plan to use the Kirk fox bogies on this one because it's going to be depicted in a much earlier timeframe. I have started to add the quite prominent step boards to them and it has changed the appearance quite considerably in my view - sorry no photos of those until next week.
- Robpulham
- LNER A4 4-6-2 'Streak'
- Posts: 1721
- Joined: Thu Mar 27, 2008 9:54 pm
- Location: Lower Wensleydale
- Contact:
Re: Rob's 7mm Scale Coach Workbench
More progress on the second one,
I got the basics of the underframe assembled and the queen posts added. I also finished the bogie step boards and trimmed the roof to size. Next job is to solder the rods for the turnbuckles in place.
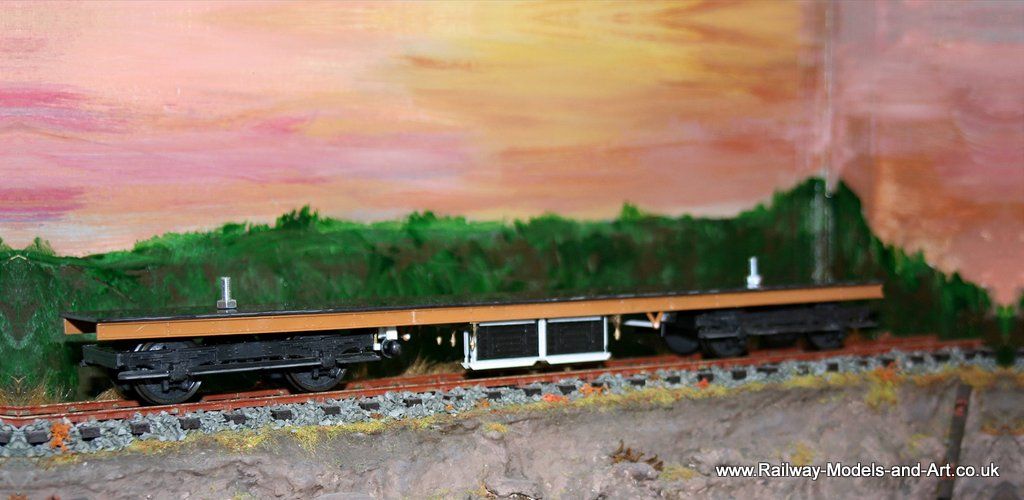
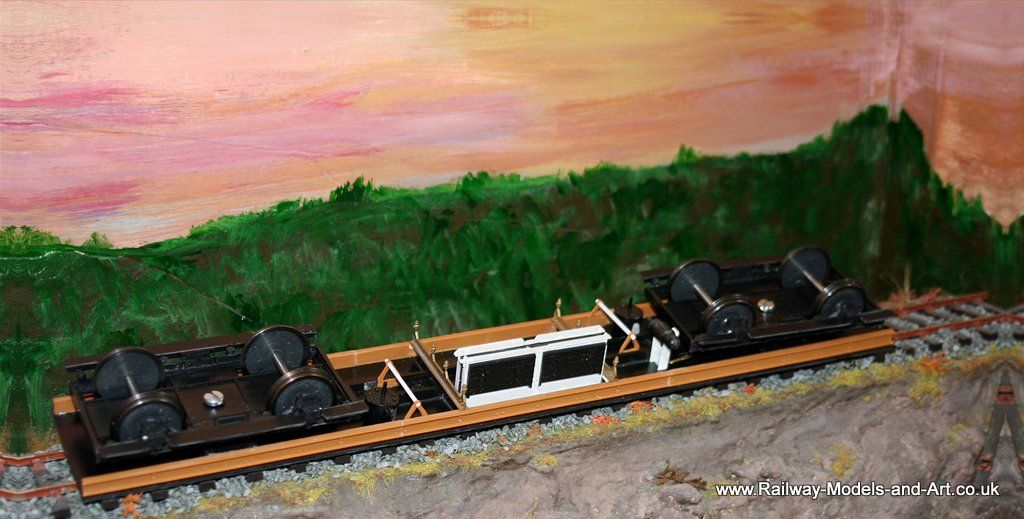
I got the basics of the underframe assembled and the queen posts added. I also finished the bogie step boards and trimmed the roof to size. Next job is to solder the rods for the turnbuckles in place.


- Robpulham
- LNER A4 4-6-2 'Streak'
- Posts: 1721
- Joined: Thu Mar 27, 2008 9:54 pm
- Location: Lower Wensleydale
- Contact:
Re: Rob's 7mm Scale Coach Workbench
A session last night saw the first van in primer and the JLRT Bogies completed.
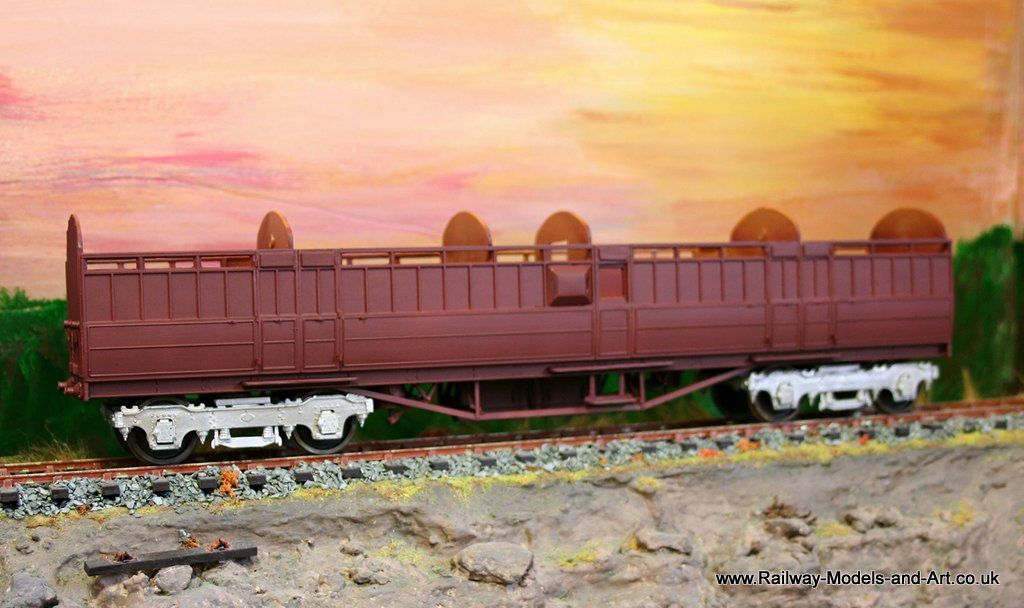
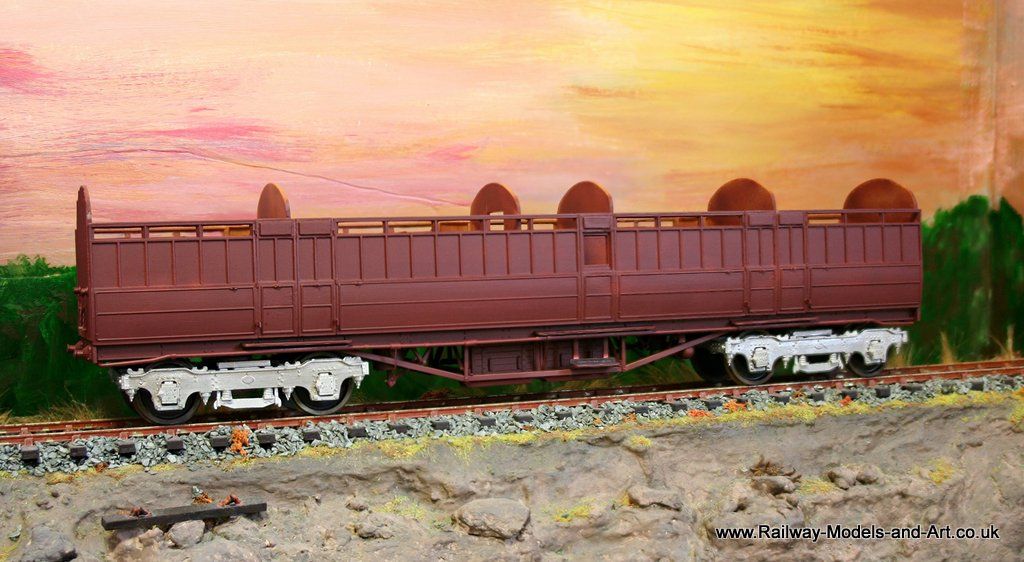
I had best start thinking about the guards grab rails.


I had best start thinking about the guards grab rails.
- Robpulham
- LNER A4 4-6-2 'Streak'
- Posts: 1721
- Joined: Thu Mar 27, 2008 9:54 pm
- Location: Lower Wensleydale
- Contact:
Re: Rob's 7mm Scale Coach Workbench
I had best put this in the right place - in a senior moment I posted it on my wagon workbench.
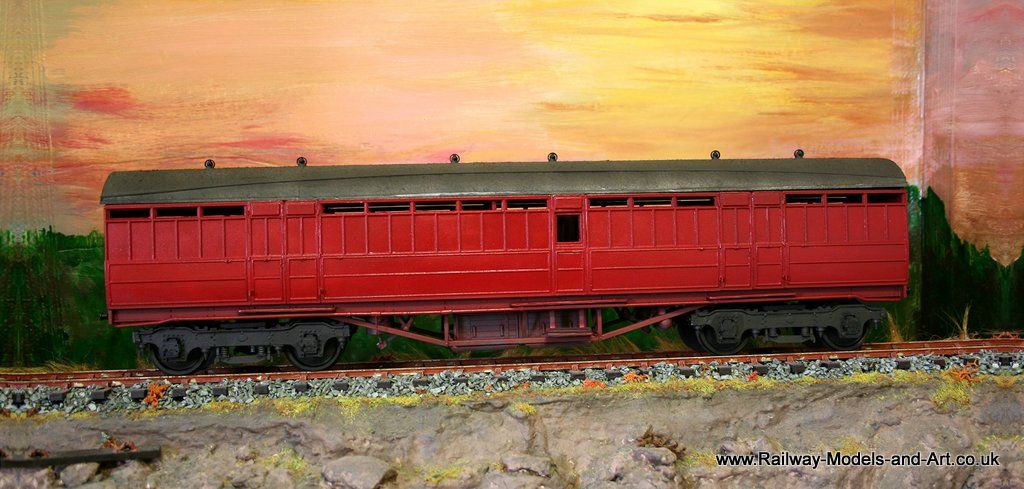
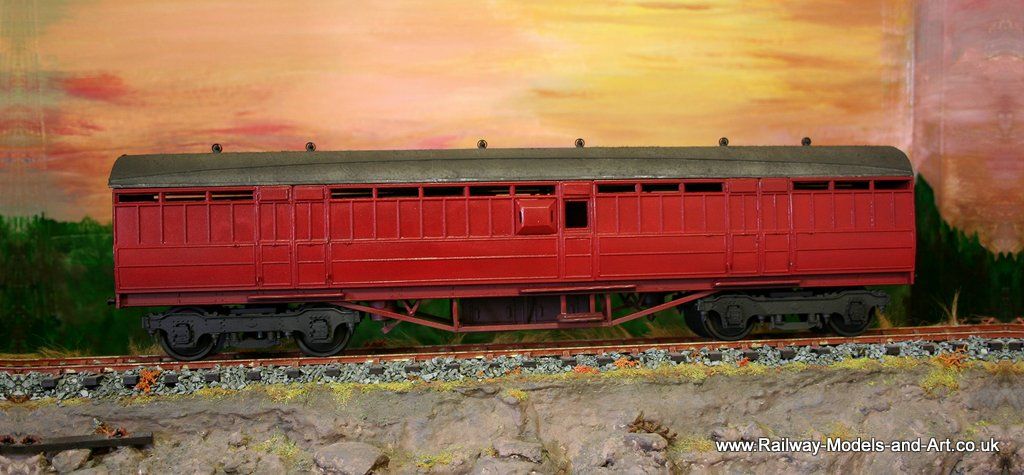
Still some way to go but at least the body is ready for transfers now and I still haven't checked the ride height.


Still some way to go but at least the body is ready for transfers now and I still haven't checked the ride height.
- Robpulham
- LNER A4 4-6-2 'Streak'
- Posts: 1721
- Joined: Thu Mar 27, 2008 9:54 pm
- Location: Lower Wensleydale
- Contact:
Re: Rob's 7mm Scale Coach Workbench
Still working on the small details for the Kirk brake and the bogie CCT.
Last night saw the fabrication of handles for the luggage doors. - sadly no invisible solder in this house.
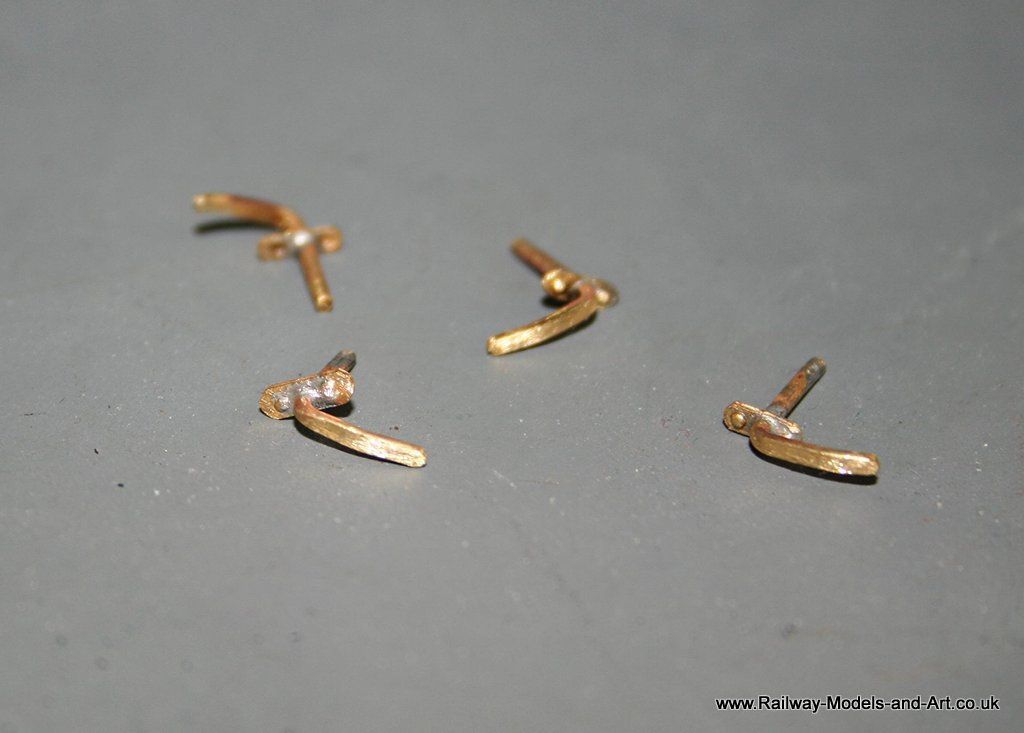
These are copies of a very nice casting that I found in my spares box - of which I only had one and no idea of where it came from originally.
Last night saw the fabrication of handles for the luggage doors. - sadly no invisible solder in this house.

These are copies of a very nice casting that I found in my spares box - of which I only had one and no idea of where it came from originally.
- Robpulham
- LNER A4 4-6-2 'Streak'
- Posts: 1721
- Joined: Thu Mar 27, 2008 9:54 pm
- Location: Lower Wensleydale
- Contact:
Re: Rob's 7mm Scale Coach Workbench
The weekend's endeavours also saw the Parcels van heading towards the finish line.
It now sport's glazing, guards grab handrails and T handles. Still to add are the luggage door handles, vacuum and steam pipes and transfers (I think) plus tidy up the paintwork and matt varnish.
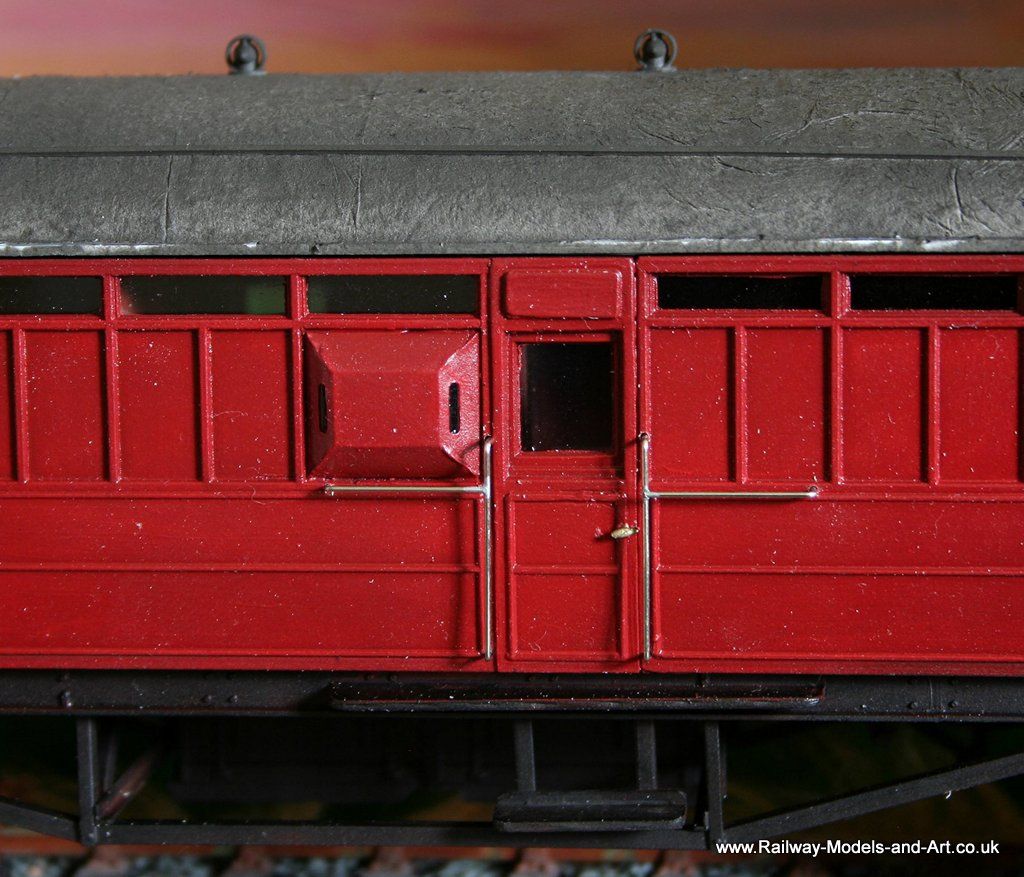
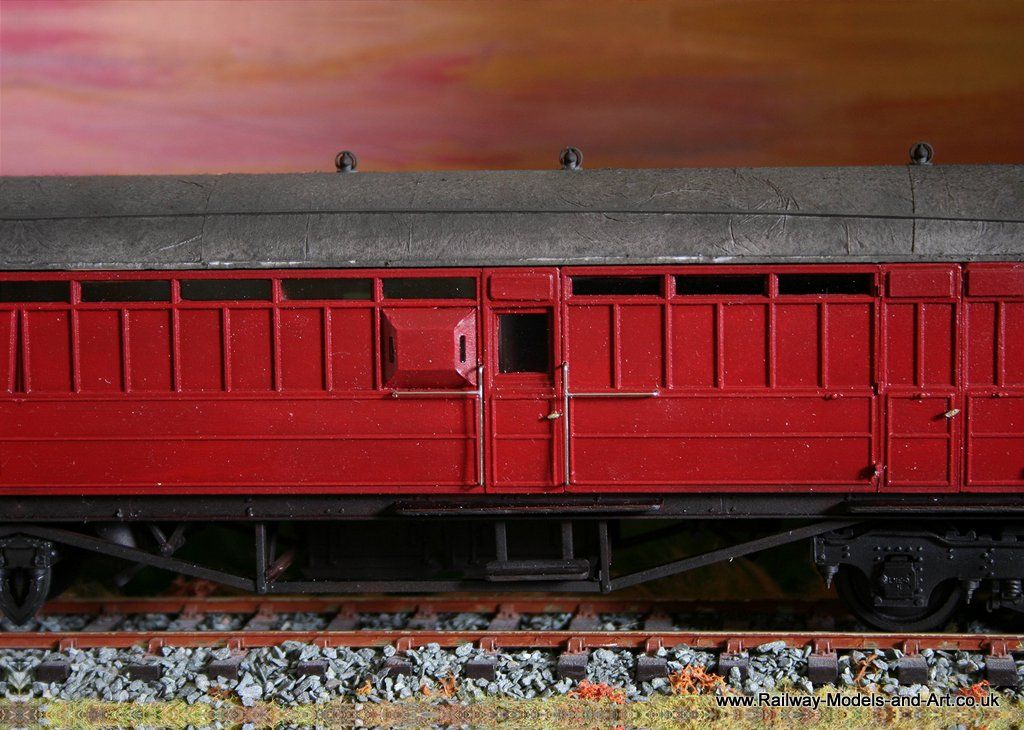

Note to self: clean of all the plastic dust from drilling out handrails etc. before taking more photos.....
It now sport's glazing, guards grab handrails and T handles. Still to add are the luggage door handles, vacuum and steam pipes and transfers (I think) plus tidy up the paintwork and matt varnish.


Note to self: clean of all the plastic dust from drilling out handrails etc. before taking more photos.....
- Robpulham
- LNER A4 4-6-2 'Streak'
- Posts: 1721
- Joined: Thu Mar 27, 2008 9:54 pm
- Location: Lower Wensleydale
- Contact:
Re: Rob's 7mm Scale Coach Workbench
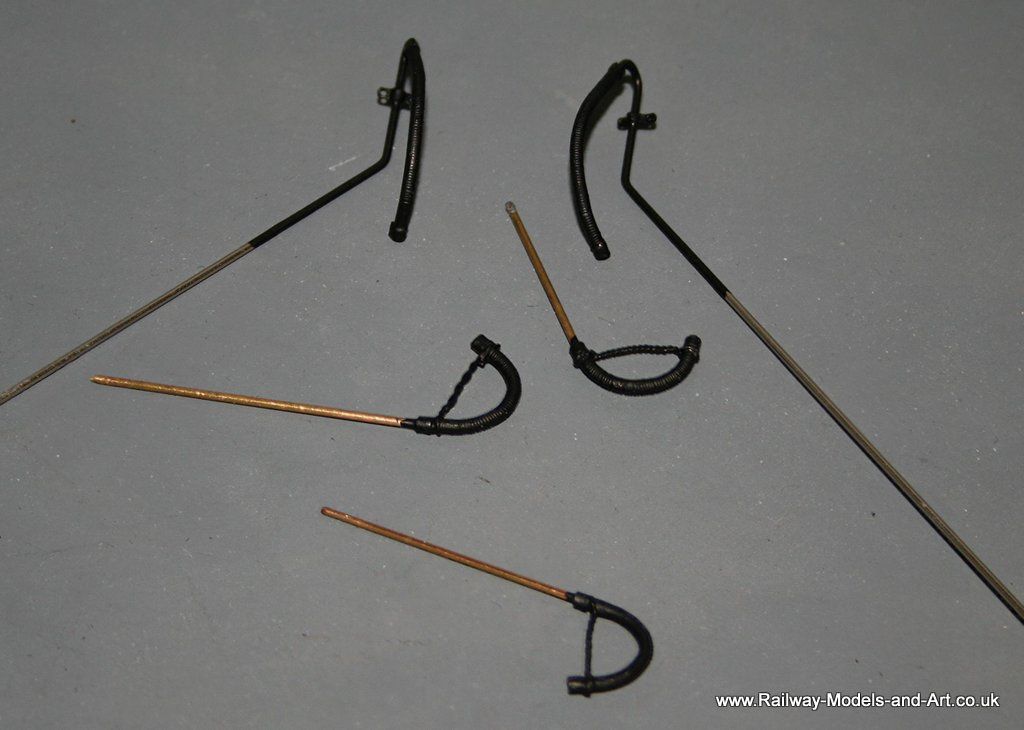
Well the last pieces of the puzzle are ready to be put in place.

- Robpulham
- LNER A4 4-6-2 'Streak'
- Posts: 1721
- Joined: Thu Mar 27, 2008 9:54 pm
- Location: Lower Wensleydale
- Contact:
Re: Rob's 7mm Scale Coach Workbench
The Kirk brake is even nearer the finish line/small adds.
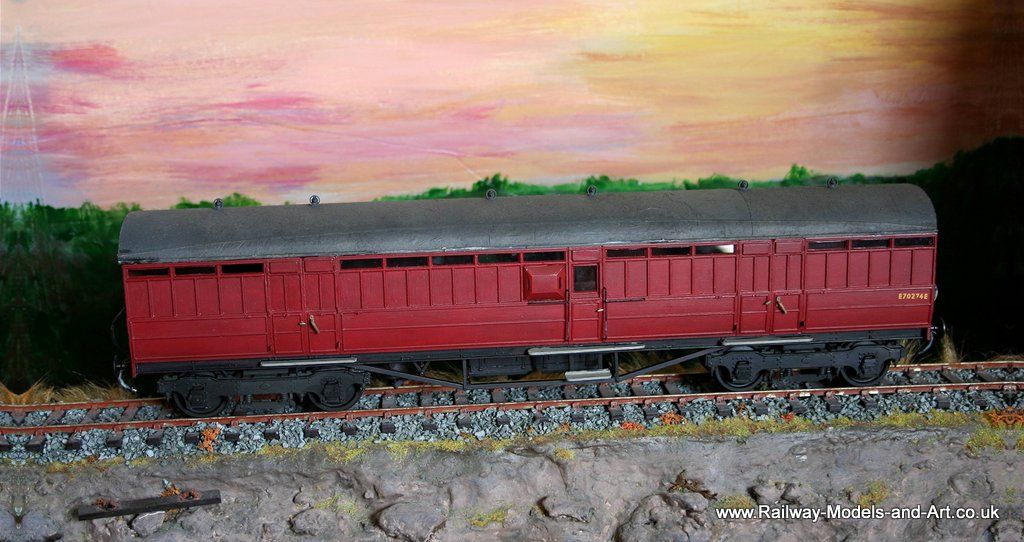
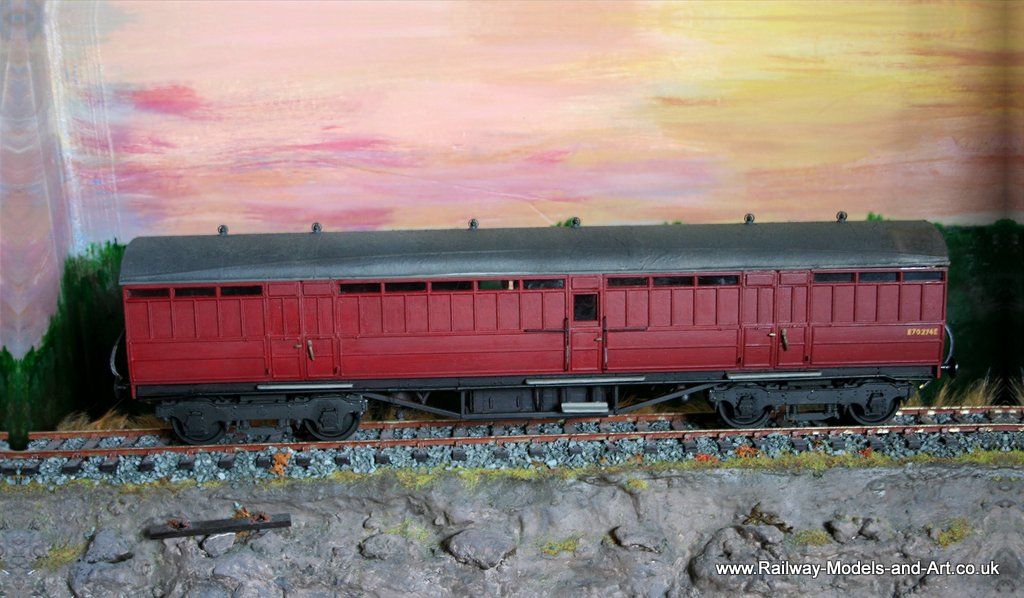
Sadly the eagle eyed amongst you will notice that the roof doesn't sit down right at one end. That's despite lots of work making them fit in the first place. I only noticed it once I had glued the roof on so it will need to be filled. Not the end of the world but a little frustrating.
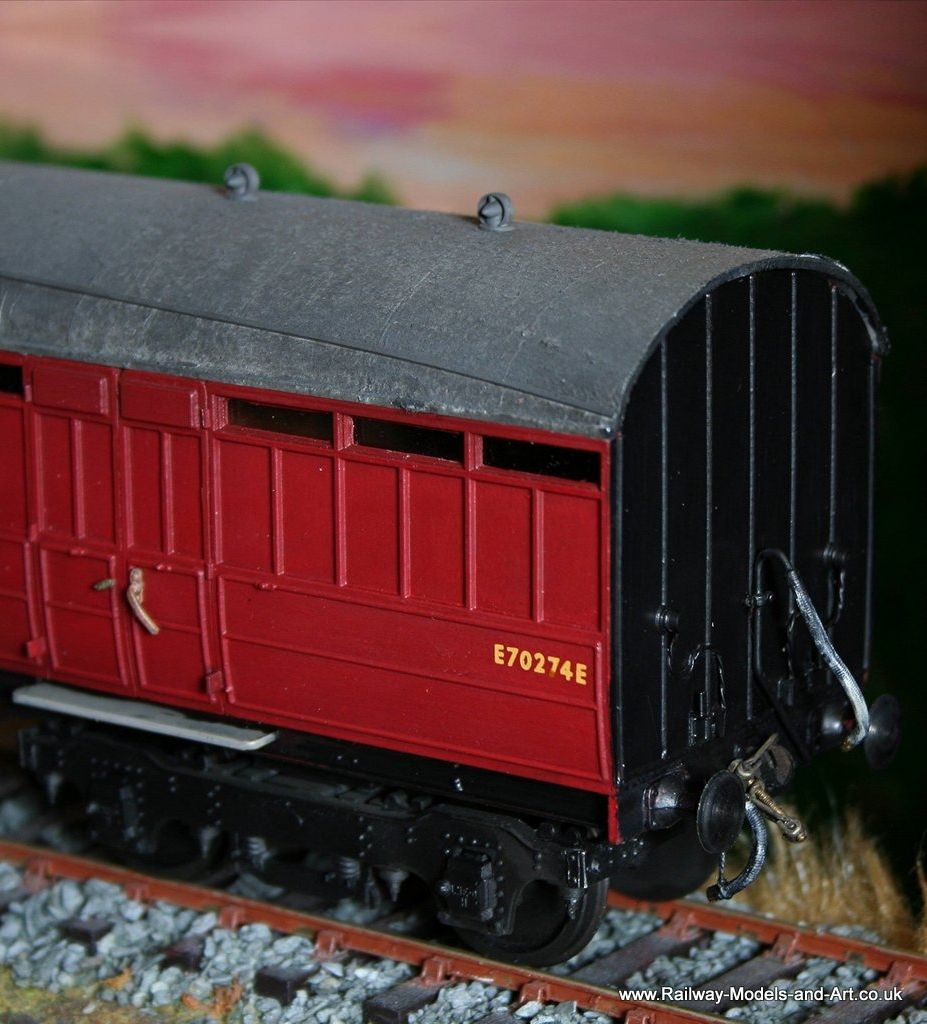
I had a bit of a Doh! moment when ordering the transfers for the CCT in that I did plan any for the Parcels van. I am very grateful to Warren for coming to my rescue with these.


Sadly the eagle eyed amongst you will notice that the roof doesn't sit down right at one end. That's despite lots of work making them fit in the first place. I only noticed it once I had glued the roof on so it will need to be filled. Not the end of the world but a little frustrating.

I had a bit of a Doh! moment when ordering the transfers for the CCT in that I did plan any for the Parcels van. I am very grateful to Warren for coming to my rescue with these.
- Robpulham
- LNER A4 4-6-2 'Streak'
- Posts: 1721
- Joined: Thu Mar 27, 2008 9:54 pm
- Location: Lower Wensleydale
- Contact:
Re: Rob's 7mm Scale Coach Workbench
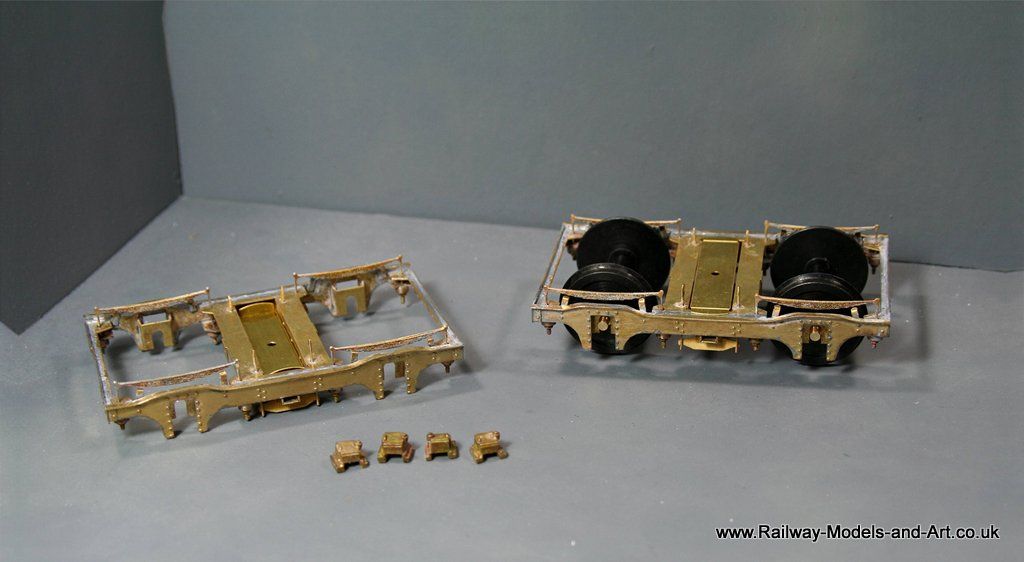
Taking advantage of a few days at home in Wakefield in between doing battle with DCC I have been building a few items in brass.
The first is a pair of Newbould Models 8' Gresley bogies. These are destined for another 51' full brake, this time a gangwayed version.
Don Gillam, the gent who bought the non gangwayed version that I had for sale back in August, asked if I would build another Kirk kit that he had bought but not started on on his behalf.
This is where I have got to.

- Robpulham
- LNER A4 4-6-2 'Streak'
- Posts: 1721
- Joined: Thu Mar 27, 2008 9:54 pm
- Location: Lower Wensleydale
- Contact:
Re: Rob's 7mm Scale Coach Workbench
Although still recovering I managed to get more done on the Kirk BG last weekend.
There was a small moulding fault on one of the sections so I elected to use it in the side that I was cutting out for the ducket. The ducket itself is one of my Silhouette cut examples Oddly I needed to cut a couple of different sizes because the ones that I had left from the last build were slightly small in the hole.
There was another issue with the solebars for the kit which were all twisted as they came. An email from Don to Ian Kirk had some replacements in the post next day. I had already stuck the sides together so it wasn't worth asking Ian to replace the section with the moulding fault. I just cut the section out squarely and let in a piece of styrene rod. Once dry I filed it to shape (much like they would have repaired damage to a coach in service). - I must take this opportunity to commend Ian for his prompt service.
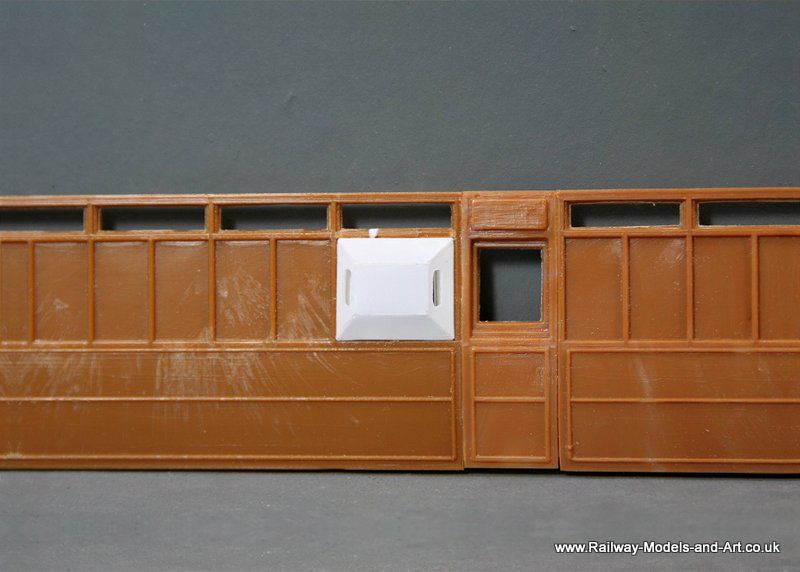
Three weeks ago I had added the base plates for the bump stops, I added the bump stops themselves on Saturday. After leaving them over night to set I filed them to uniform length using a scrap of 10 thou styrene with a hole in it. I also add the upper hinges but I will leave the lower ones until later because they are a bit vulnerable.
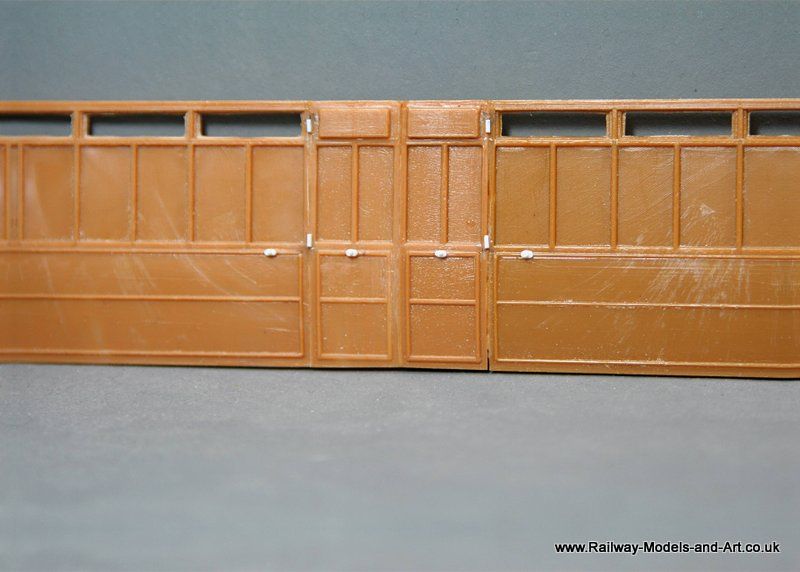
I also worked on detailing the ends - I like to build up as many sub assemblies as I can before putting it together.
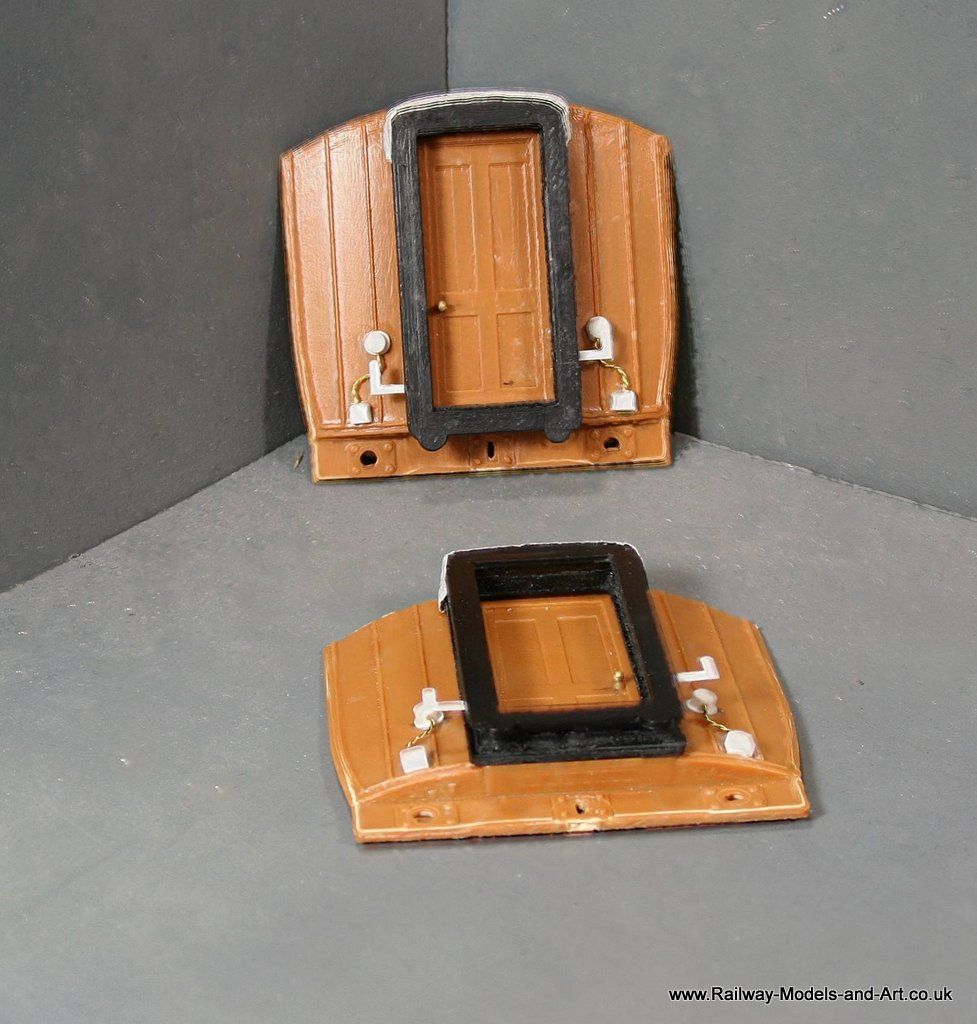
First I made a couple of door knobs from some styrene rod.
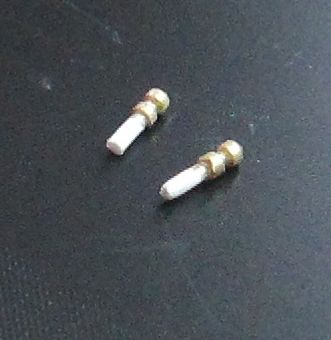
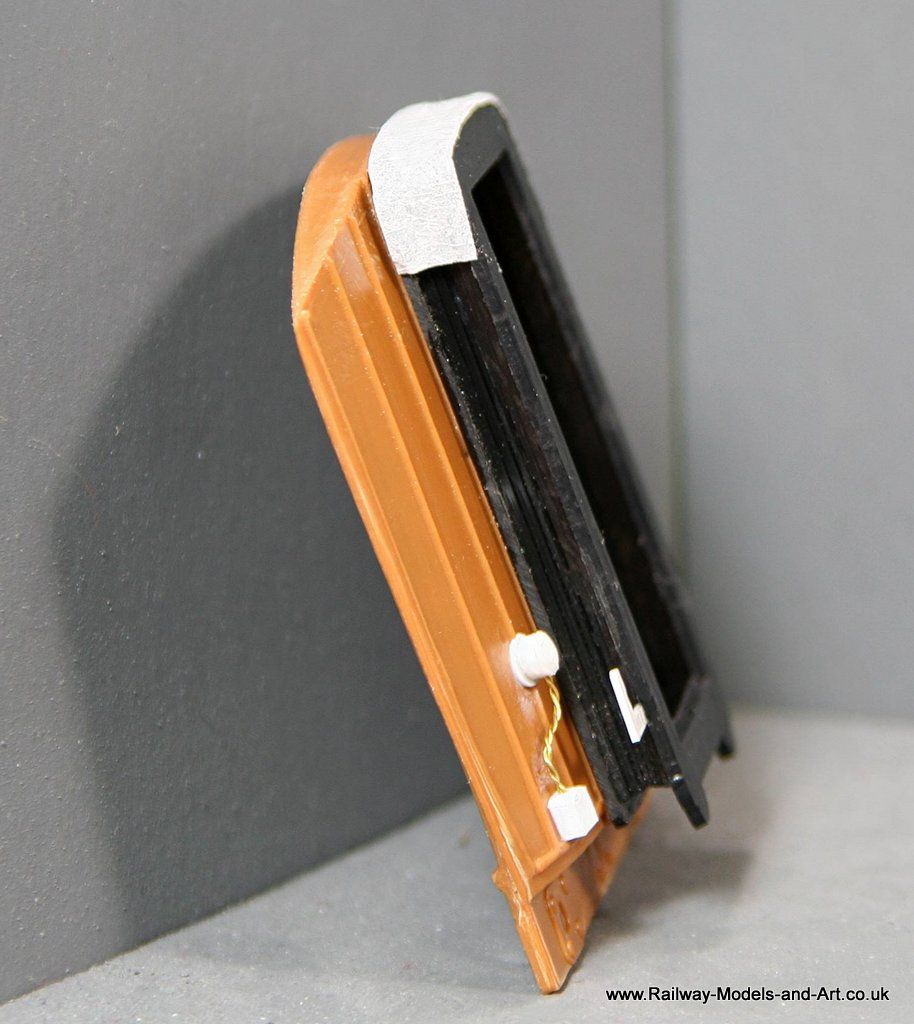
Then I added them to the doors in the ends along with lamp irons and lighting connectors. I used my ever handy lense tissue to make the canvas tops for the corridor connections.
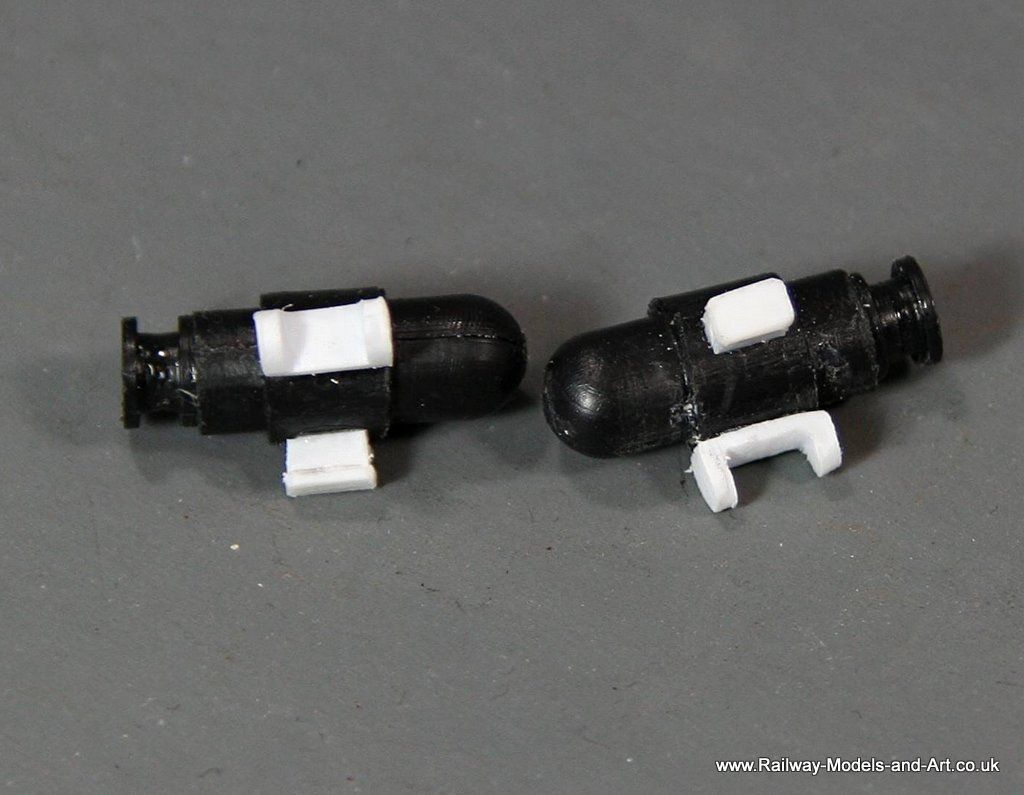
And finally I detailed up the Dynamos. These are a bit plain as they come and I had initially stuck a H section stem but seeing a 1/32 scratch build of a Pullman coach over on RMweb shamed me into doing something better. - I still need to make the mounting brackets yet. There are two because Don has asked me to build and all third to go with the other two as well.
There was a small moulding fault on one of the sections so I elected to use it in the side that I was cutting out for the ducket. The ducket itself is one of my Silhouette cut examples Oddly I needed to cut a couple of different sizes because the ones that I had left from the last build were slightly small in the hole.
There was another issue with the solebars for the kit which were all twisted as they came. An email from Don to Ian Kirk had some replacements in the post next day. I had already stuck the sides together so it wasn't worth asking Ian to replace the section with the moulding fault. I just cut the section out squarely and let in a piece of styrene rod. Once dry I filed it to shape (much like they would have repaired damage to a coach in service). - I must take this opportunity to commend Ian for his prompt service.

Three weeks ago I had added the base plates for the bump stops, I added the bump stops themselves on Saturday. After leaving them over night to set I filed them to uniform length using a scrap of 10 thou styrene with a hole in it. I also add the upper hinges but I will leave the lower ones until later because they are a bit vulnerable.

I also worked on detailing the ends - I like to build up as many sub assemblies as I can before putting it together.
First I made a couple of door knobs from some styrene rod.

Then I added them to the doors in the ends along with lamp irons and lighting connectors. I used my ever handy lense tissue to make the canvas tops for the corridor connections.

And finally I detailed up the Dynamos. These are a bit plain as they come and I had initially stuck a H section stem but seeing a 1/32 scratch build of a Pullman coach over on RMweb shamed me into doing something better. - I still need to make the mounting brackets yet. There are two because Don has asked me to build and all third to go with the other two as well.

- Robpulham
- LNER A4 4-6-2 'Streak'
- Posts: 1721
- Joined: Thu Mar 27, 2008 9:54 pm
- Location: Lower Wensleydale
- Contact:
Re: Rob's 7mm Scale Coach Workbench
I forgot to add a photo of the canvas cover

- Robpulham
- LNER A4 4-6-2 'Streak'
- Posts: 1721
- Joined: Thu Mar 27, 2008 9:54 pm
- Location: Lower Wensleydale
- Contact:
Re: Rob's 7mm Scale Coach Workbench
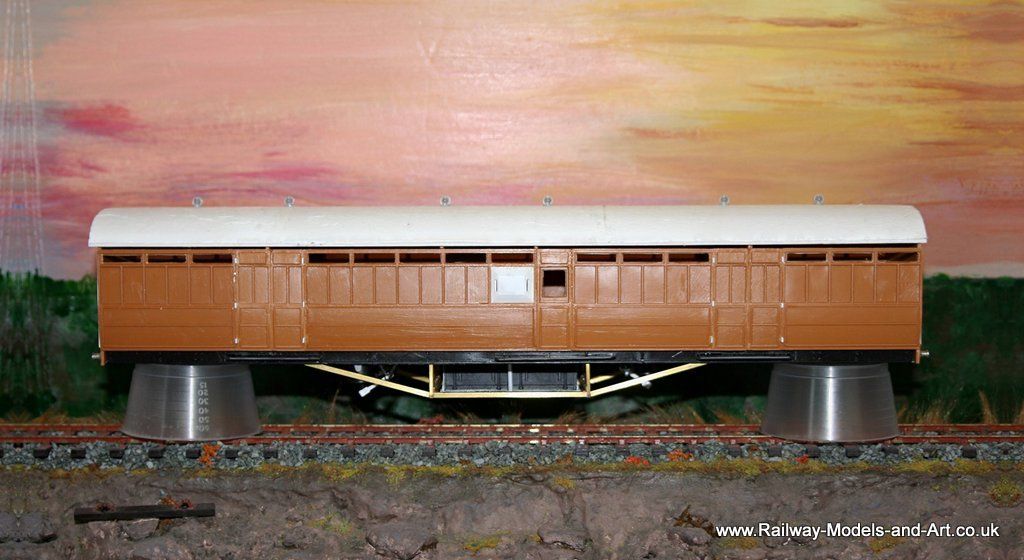
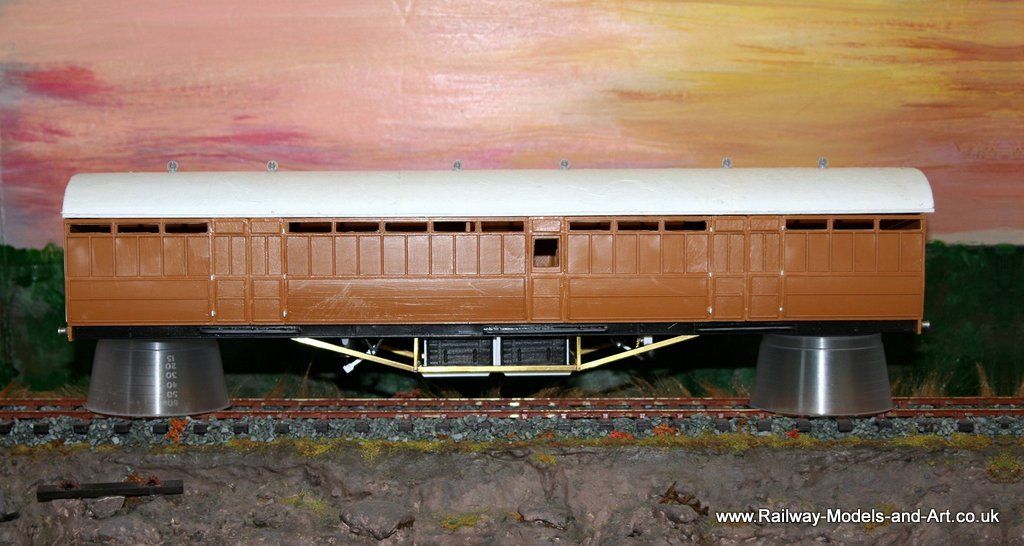
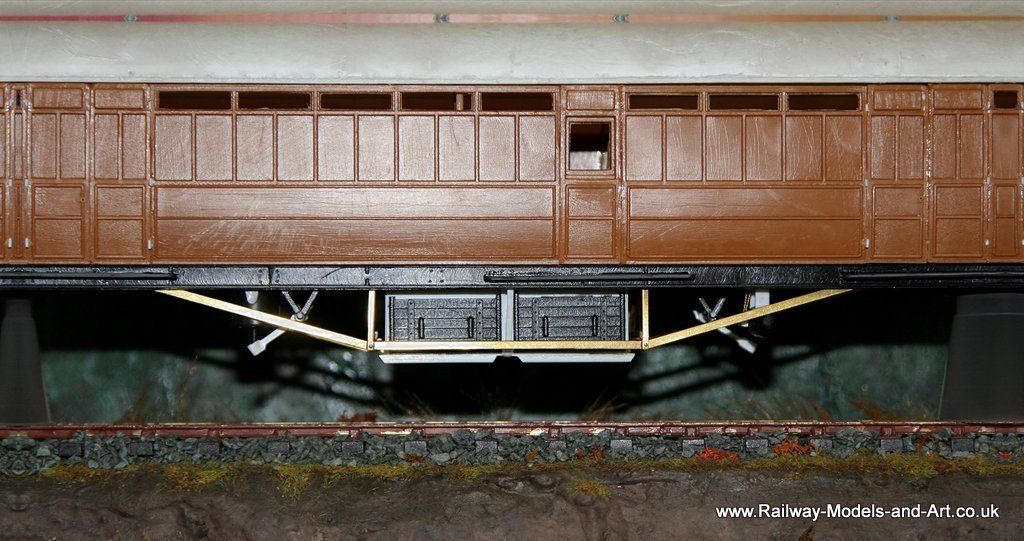
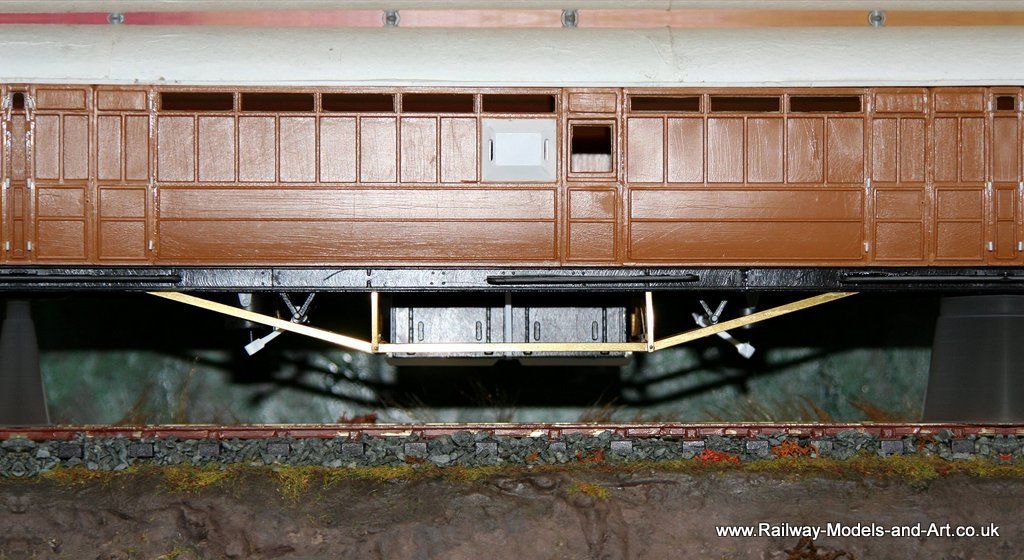
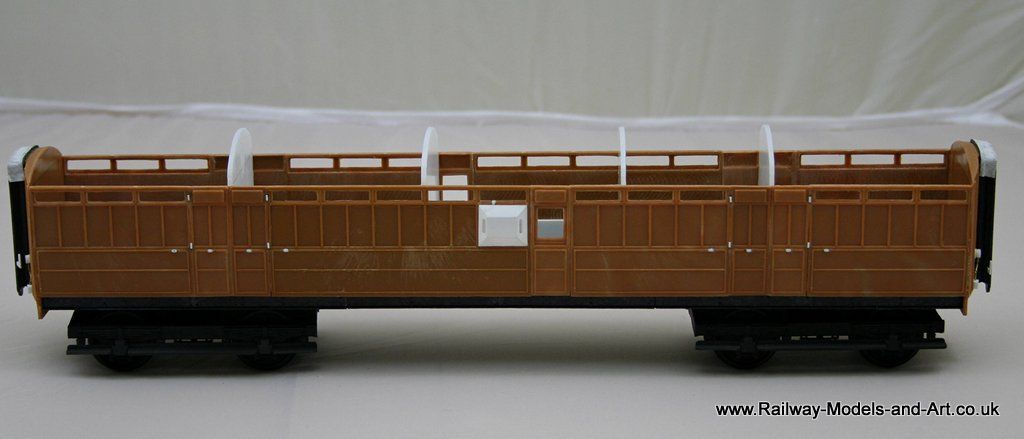
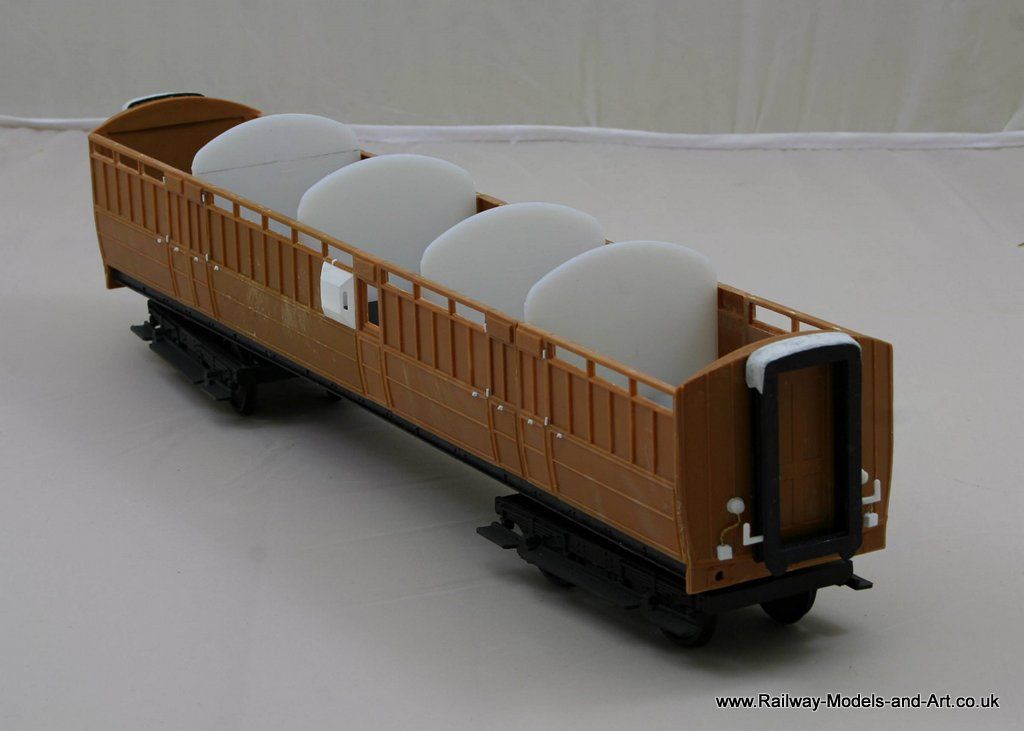
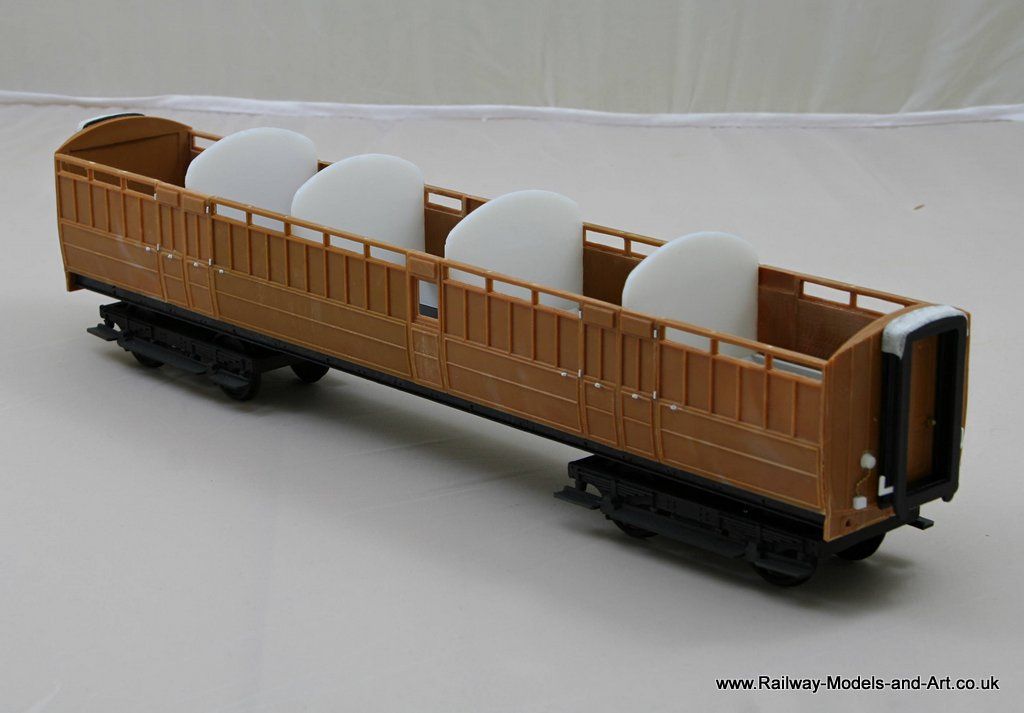
Further work ensued on the BG this weekend and it's now starting to look coach like.
Ignore the bogies, they were to hand so I used them to prop the coach on for the photos
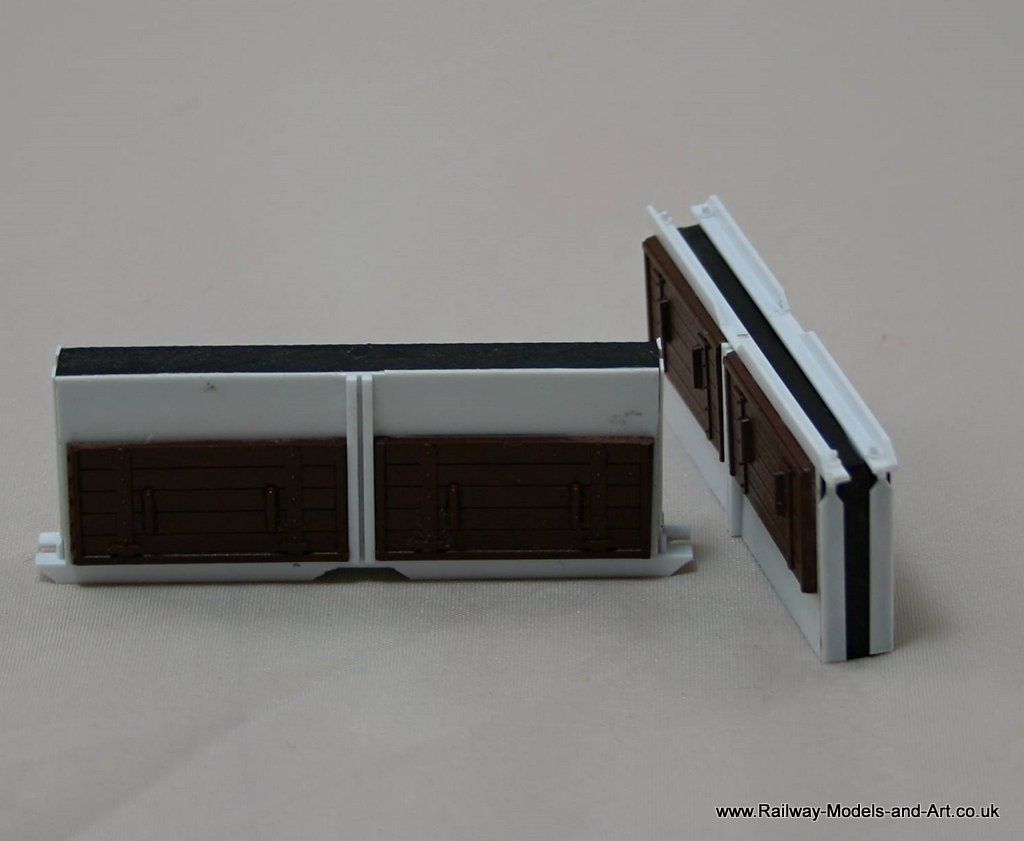
In between I made up the battery boxes for the all 3rd.
Ignore the bogies, they were to hand so I used them to prop the coach on for the photos


In between I made up the battery boxes for the all 3rd.
