Page 1 of 2
GNR/LNER D2 7mm Scale Test Build
Posted: Fri Mar 12, 2021 12:00 am
by Robpulham
Behind the scenes for a few months I have been collaborating with Paul Craig (John Coffin of this Parish) to bring to life in 7mm scale one of his kits currently in the London Road Models 4mm range.
Paul very kindly offered to scale the D2 up for me and after a few etch supplier hiccups I received the test etches last week. This is a bit of a place holder because I have a couple of builds ahead of me before I can get my hands on this.
As I said, this is a test build and an initial look at the etches revealed a couple of small glitches which wont affect the build at all but which Paul has already corrected on the drawings. These were, one of the brake cross beams hasn't etched right through on one edge and one of the cab openings on one of the cab options, again hasn't etched right through. Both are easily cut out with a piercing saw.
I am fortunate in that I already have a spare Gladiator Stirling Tender which these locos were paired with from time to time. I still need to order wheels and source castings but depending on which loco/what period I choose, most of them had been fitted with J6 chimney's and domes by the late 1920's. I can get these as spares from Gladiator if I need to.
More as it happens
Re: GNR/LNER D2 &mm Scale Test Build
Posted: Sat Mar 13, 2021 6:32 pm
by Robpulham
To further entice you, these are scans of the etches.
Chassis Front
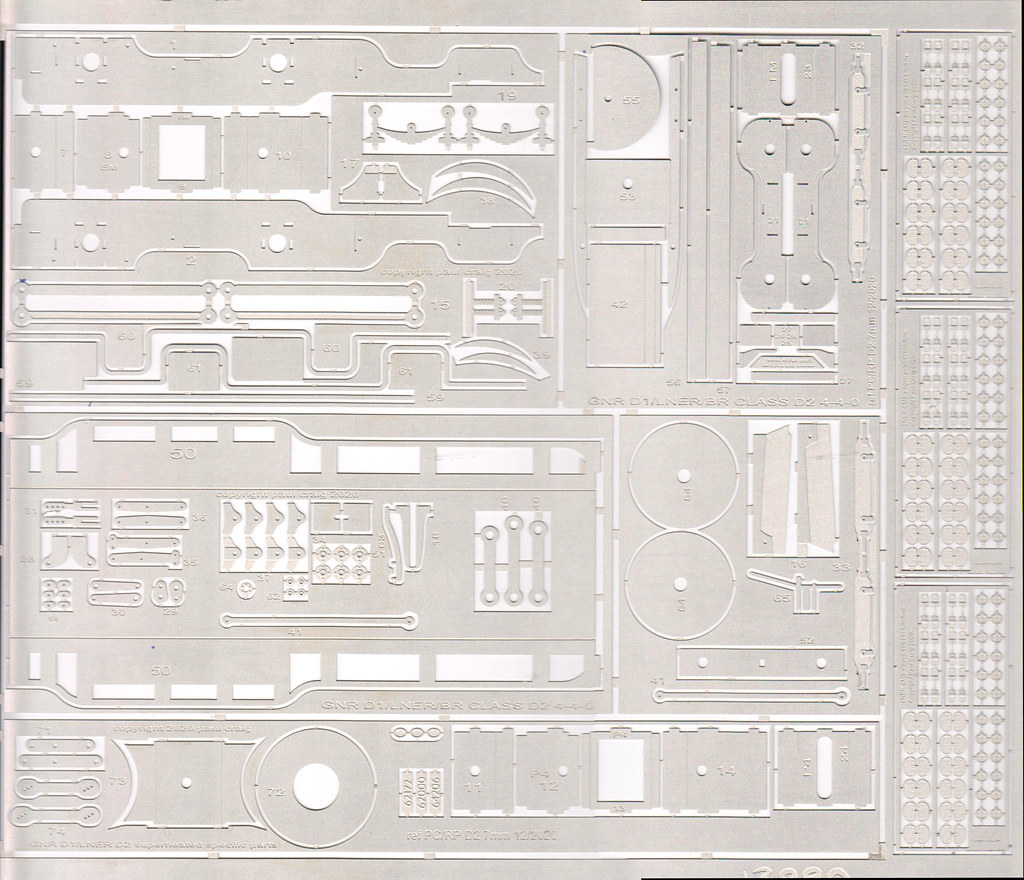
Chassis rear

Body Front
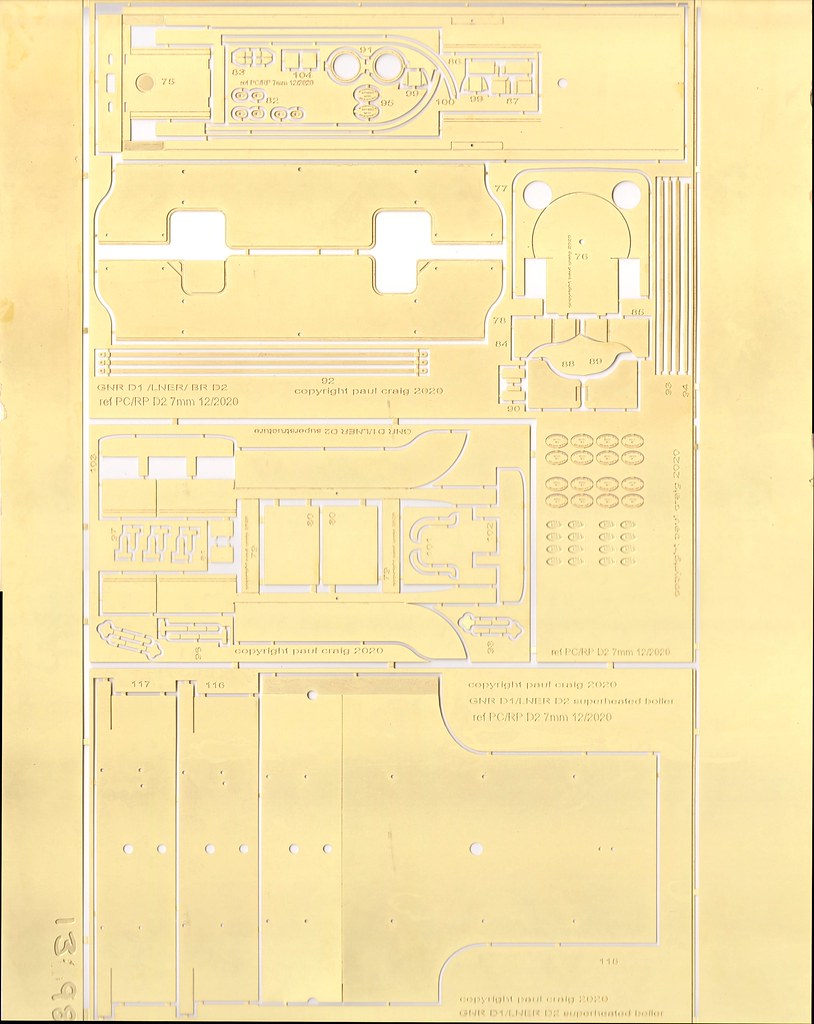
Body Rear

[/url]
Re: GNR/LNER D2 &mm Scale Test Build
Posted: Sat May 08, 2021 9:47 pm
by Robpulham
Although I am not quite at the point of officially starting this build I have been oranising the various castings and things needed for when I do get started. Many of the castings have come from David Hill at Gladiator, either from spares that came with the J6 kit or bought directly from him for this build.
One thing that I didn't buy was a whistle, I have long wanted to make such things and under the kind tutelage of Ian Middleditch a fellow Gauge O Guild member I have been playing with turning whistles.
First I made a form tool from a length of 3/16 silver steel rod (based it on a photo that Ian kindly sent me of some that he had made).
Once filed to shape the cutting end was hardened and tempered using my microflame (the last time I hardened and tempered anything was when I was at school).

Next I drilled out the centre to take a 0.8mm rod and then roughed out the larger top part of the whistle.
Then I used the form tool to create the final shape. It did create the final shape but I think that it would do even better on a slightly narrower piece of rod this one was 2.4mm and I think that a 2mm rod would create a better shape with this particular tool. In the event I touched it with the diamond file to finish it off.
I then parted it off and I took Ian's advice and put a length of 0.8mm rod in the tail chuck and through the hole in the part so that it didn't disappear into the mists when parted off.
Repeat the exercise for the bottom part and solder together on a length of rod with a 0.5mm spacer in between to create the whistle (I used a small piece of 20thou styrene with a hole and slot made in it to slip over the centre rod).
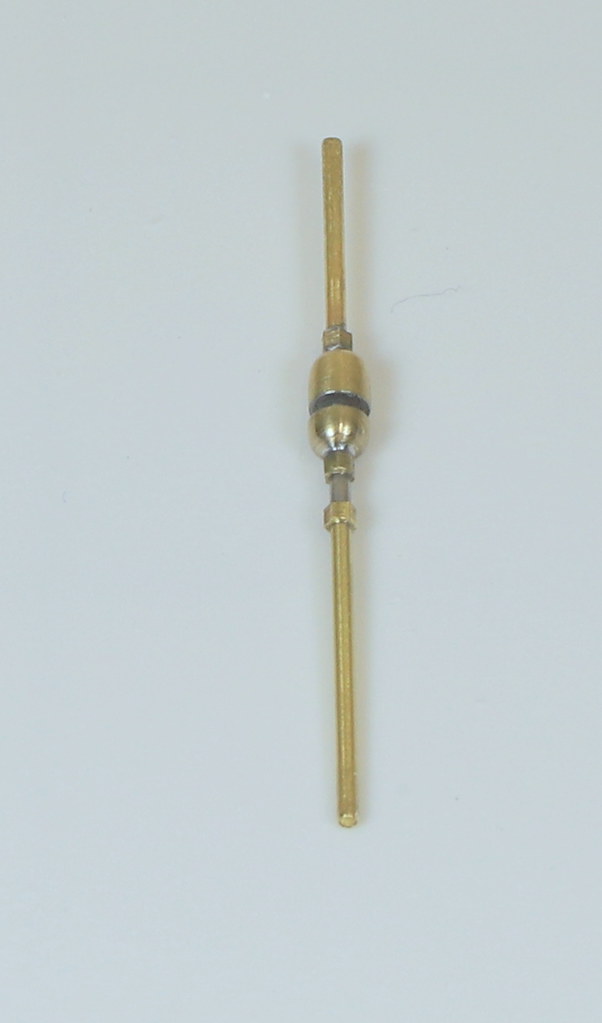
The nuts were added after the whistle was made up and are from microbore tube filed in a pin vice to a hexagon shape.


Re: GNR/LNER D2 &mm Scale Test Build
Posted: Sat May 08, 2021 10:35 pm
by Dave
I'm looking forward to seeing this Rob, as Paul has mentioned this kit many times. Looks good so far, interesting use of home made tools, must remember and try it myself.
Re: GNR/LNER D2 &mm Scale Test Build
Posted: Sun May 09, 2021 6:55 pm
by notascoobie
Hi Rob,
Di you know if Paul intends to make this generally available?
Cheers,
Vernon
Re: GNR/LNER D2 &mm Scale Test Build
Posted: Sun May 09, 2021 7:30 pm
by john coffin
Vernon, it is already available in4mm,
the reason behind this build is to see how easy it might be to convert to 7mm
then hopefully yes.
Paul
Re: GNR/LNER D2 7mm Scale Test Build
Posted: Sat May 15, 2021 9:56 pm
by Robpulham
A fellow modeller asked me how I made my form tool for the whistle. I had already planned to make one to cut (if possible) globe lubricators.
I made one and it took a few refinements but I got there in the end.


I realise that this may not necessarily fit in with many people's idea of Railway modelling per se, but I wrote up my method of making the form tool so if anyone is interested I will post up the words and accompanying photos.
Re: GNR/LNER D2 7mm Scale Test Build
Posted: Sun May 16, 2021 9:05 pm
by Robpulham
Further to my last post, when the brass bearings arrived I knocked one up into a lubricator to see how I would do it.
It was a bit interesting drilling out the bearing but following advice given I got a short length of tube the same diameter as my bearing and made a slit in it to make a split collet. This I gripped in one of the collets on the lathe and then I centre drilled it. Followed by drilling right through. They are slippery little blighters and one flew off into space as I was attempting to load into the lathe collet. Surprisingly I found it a couple of hours later.
I was fortunate to have some 1mm square bar in stock so I drilled right through one way and then half way on one side. When I fitted the rod through the bearing and into the square section I filed half of it away for the last millimetre which gave me a bit more room to solder the piece in that goes into the boiler.

With the obligatory scaling piece.

As with all such things in modelling making one is sometimes the easy part making another or several is more difficult. So it proved with the second one
I ruined one bearing when I hadn't quite tightened the collet enough and the bearing wasn't centred, then I didn't get enough solder on the cross pipe so that came adrift as I cut it short and I ended up having to re-drill it in the pillar drill before I could solder it back in.
But get a pair I did. My collection of bits for the D2 is slowly coming together.

Re: GNR/LNER D2 7mm Scale Test Build
Posted: Mon May 17, 2021 1:54 am
by john coffin
Have to say Rob,
that I hope the actual kit lives up to all the prep work you are doing

Now can you turn me some whistles and such like for 4mm please????????????
Paul
Re: GNR/LNER D2 7mm Scale Test Build
Posted: Mon May 17, 2021 11:21 am
by Robpulham
john coffin wrote: ↑Mon May 17, 2021 1:54 am
Have to say Rob,
that I hope the actual kit lives up to all the prep work you are doing

Now can you turn me some whistles and such like for 4mm please????????????
Paul
I have every faith in it Paul.
As to turning 4mm whistles, I am not sure. I am told that my lathe doesn't have a high enough top speed to turn sub 1mm items but I haven't tried it myself yet.
That said I have just scaled my working drawing for the whistle and that comes out at just over 1mm wide so it might be possible.
The most challenging bit I think will be drilling the centre 0.5mm for the stem.
I will have a go at some point this week.
Re: GNR/LNER D2 7mm Scale Test Build
Posted: Fri Jun 25, 2021 9:48 pm
by Robpulham
Although the first build of the D2 is to be a BR period build and I have a J6 chimney casting from Gladiator for it. However once the etches are proved I plan to build a second D2 for myself which I wish to finish as it was in it's early life with the LNER in lined green.
This means that it will need the original chimney so I need to turn one/have one 3D printed or something...
Those who are Gauge O Guild members my be aware that following on from the success of the virtual shows the Guild has been hosting some special interest session in various subjects one of them being 3D CAD/Printing. I missed the initial session a few weeks ago but caught up with it via the YouTube channel and then joined last nights session.
Prior to joining the Zoom session I downloaded and installed Fusion360 which is the software at the centre of the 3D CAD element of the sessions.
This morning I had a play and following a demo video done by a fellow GOG member last year I managed to draw a chimney.
Having completed it I shared the image below with Paul and he commented that the smokebox looked a bit narrow. Then it dawned on me that I had used the figure for the radius taken from the drawing and hadn't doubled it to enter the diameter. Apparently you can enter a radius figure instead of the default diameter but I haven't worked out how yet.
So this afternoon I attempted to redraw it using the correct smokebox size.
You will note in the image above that there are orange coloured squares. These are offset planes that I used to apply the dimensions from my chimney drawing. I managed to miss out one of the planes (for the bottom of the chimney rim) and try as I might I couldn't manage to draw any lines between the planes like I had this morning. in frustration I deleted all but the base, saved it and went and had my dinner.
This evening I worked out how to import a drawing, resize it and then draw over it as I would in Inkscape or QCAD.
Below are a couple of views of the revised drawing.
I am now a happy bunny.
Re: GNR/LNER D2 7mm Scale Test Build
Posted: Thu Jul 01, 2021 2:49 pm
by Robpulham
At the risk of boring you, I have continued to play with fusion and next up I drew a dome for the D2.
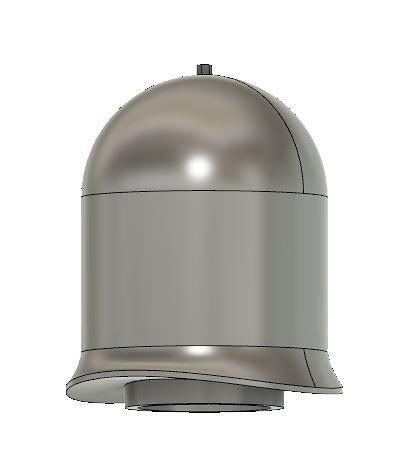

Complete with hex nut on the top. Domes are so much easier to draw than chimneys, I did this one in a couple of hours.

Then I had a go at the GNR version of the Ramsbottom safety valves
I started out with this
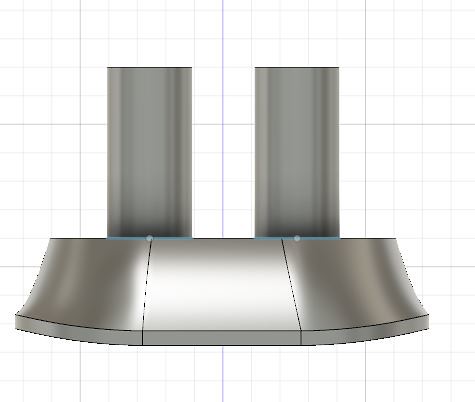
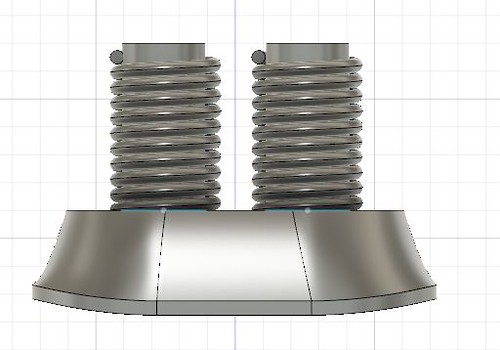
and then this
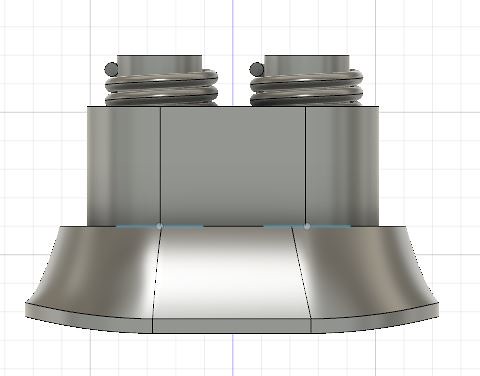
It was at this point that Chris looked over my should and said it looks good but doesn't look right. Of course she was correct in that the spring should be on the lever which I hadn't drawn yet not on the valve columns.
To be continued...
Re: GNR/LNER D2 7mm Scale Test Build
Posted: Fri May 06, 2022 10:50 am
by Robpulham
john coffin wrote: ↑Mon May 17, 2021 1:54 am
Have to say Rob,
that I hope the actual kit lives up to all the prep work you are doing

Paul
A long time later....
I started with the boiler, for no other reason than, I repackaged the etches from the hardboard sheets into an A5 plastic box to make storage easier. The boiler etch wouldn’t fit in the box flat so I decided to roll it to make it fit.
It’s worth mentioning at this point that as I remove each part from the etch I spend time removing the etching cusp. If you don’t, parts may not fit together as anticipated.
The boiler is part no 115 for a superheated loco. The brass is reasonably soft and I didn’t have any physical trouble rolling it with my GW Models rollers. However, they did tend to flex in the middle which mean that the centre of the boiler wasn’t quite as circular as the ends when I had finished. I have a couple of quite thick walled, chrome tubes which are filled with lead and they are really good for forming cylinders/bends.
Using a white rubber mallet, I easily tightened up the centre of the boiler making it uniformly round along its length.
Then I soldered in two of the etched formers, Parts 54 and 55. The latter being a half circle for the firebox end. There are two part 54’s and so far, I have only added the one until I get a handle on how the rest goes together. This I soldered in at the rear of the smokebox.
Re: GNR/LNER D2 7mm Scale Test Build
Posted: Sat May 07, 2022 12:50 pm
by Robpulham
The cat was firmly out of the bag so I did a little more.
The next bit that I did was prepare the valence jog for assembly – Part 50. The 4mm scale instructions, suggest that you remove all the items contained within the jig but having looked at them I felt sure that I shouldn’t need them until later in the build so left them in place to help strengthen the jig.
I made the folds with a set of ‘Metalsmith’ bending bars which got it almost to 90 degrees but I needed to tweak it with a pair of steel rules on my sheet of glass. I suspect that I could have done the entire fold with the steel rules but I have the bending bars so I use them. Rinse and repeat for the other side.
Re: GNR/LNER D2 7mm Scale Test Build
Posted: Sun May 08, 2022 10:44 pm
by Robpulham
Next up is one of the trickiest bits of the build. Bending the footplate (Part 75) to fit the valence. The instructions suggest fitting part 53 to the front section of the footplate to stiffen it up but I elected not to as I thought it might make it easier to form the curves if I were able to lay it flat on the edge of my sheet of glass when forming some of the curves. I started by folding down the drag beam to give me a datum for the first curve. Marking on the etch where the first curve begins, I used a short length of 10mm diameter bar to start to form the first bend.
As I mentioned in the first post the brass is quite soft so forming it isn’t difficult it just requires a gentle hand and steady working of one side and then the other with frequent checking against the top of the valence. Work your way along until all the curves are complete and the footplate sits flush on the valence without having to use any force to get it to sit down at any point.
Don’t worry if you don’t get it quite right first go using gentle pressure its not difficult to ease the curve along a bit to shorten or lengthen between that and the next one. Just manipulate it, slowly and methodically.
When you are happy solder it to the valence cradle made up previously.


 [/url]


