Thanks Richard, I wish that I could take the credit for the weathering - it's still a black art to merichard wrote:Some good weathering on the Implement Wagon. I think mine must be ex-Works, and for the Queen at that!
Rob's 7mm Rolling Stock Workbench
Moderators: 52D, Tom F, Rlangham, Atlantic 3279, Blink Bonny, Saint Johnstoun, richard
- Robpulham
- LNER A4 4-6-2 'Streak'
- Posts: 1721
- Joined: Thu Mar 27, 2008 9:54 pm
- Location: Lower Wensleydale
- Contact:
Re: 7mm Rolling Stock Builds
- Robpulham
- LNER A4 4-6-2 'Streak'
- Posts: 1721
- Joined: Thu Mar 27, 2008 9:54 pm
- Location: Lower Wensleydale
- Contact:
Re: 7mm Rolling Stock Builds
Got you -sorry I hadn't heard of Jarrow Slakes before.52D wrote:No dont print a back scene the NER delibarately chose Jarrow Slakes to photograph their locos in works grey as the viewpoint was uncluttered and neutral to make what ever they were photographing stand out.
-
James Brodie
- GER D14 4-4-0 'Claud Hamilton'
- Posts: 333
- Joined: Fri Dec 21, 2007 9:13 pm
- Location: North Yorkshire Moors.
Re: 7mm Rolling Stock Builds
Beautiful TOAD model I wish I could build to that standard......BUT......one had to come from somewhere,sorry.
The Slaters side lamp? A lovely brass side lamp (here comes the but) The lamp has a tail lamp carrying handle.
The tail lamp carrying handle was designed to fit over the vehicle coupling if there was no tail lamp bracket fitted.
During daylight hours the guard used a strip torn off a red flag slotted and secured on the rear wagon of the train. Hours of darkness a lit tail lamp was used. In the Teesside area from Thornaby to Grangetown the local freights ran without a van at the rear unless going out past these designated areas then the van (Toad) had a tail lamp and two side lamps.
fully fitted trains the van or rear vehicle just had a tail lamp but this wasn't the case for the Teesside locals as the J26/7 or Q6s were steam brake only engines. The guard rode on the engine.
Another firm do a beauty of a headlamp which is a converted tail lamp designed after BR steam was withdrawn.This lamp could shew a white light or red light but really should only be used on preserved engines not steamers up to the end of steam. I have one of these lamps and have painted the bull red as my era is 1920 t0 1947.incidentely Toad applies to all guard vans irrespective of which company, it is not a GWR preserve.
Jim Brodie
- Robpulham
- LNER A4 4-6-2 'Streak'
- Posts: 1721
- Joined: Thu Mar 27, 2008 9:54 pm
- Location: Lower Wensleydale
- Contact:
Re: 7mm Rolling Stock Builds
While I have been catching up on painting my back log of rolling stock, Chris my good lady has been weathering some of the ones that I have put the transfers on.
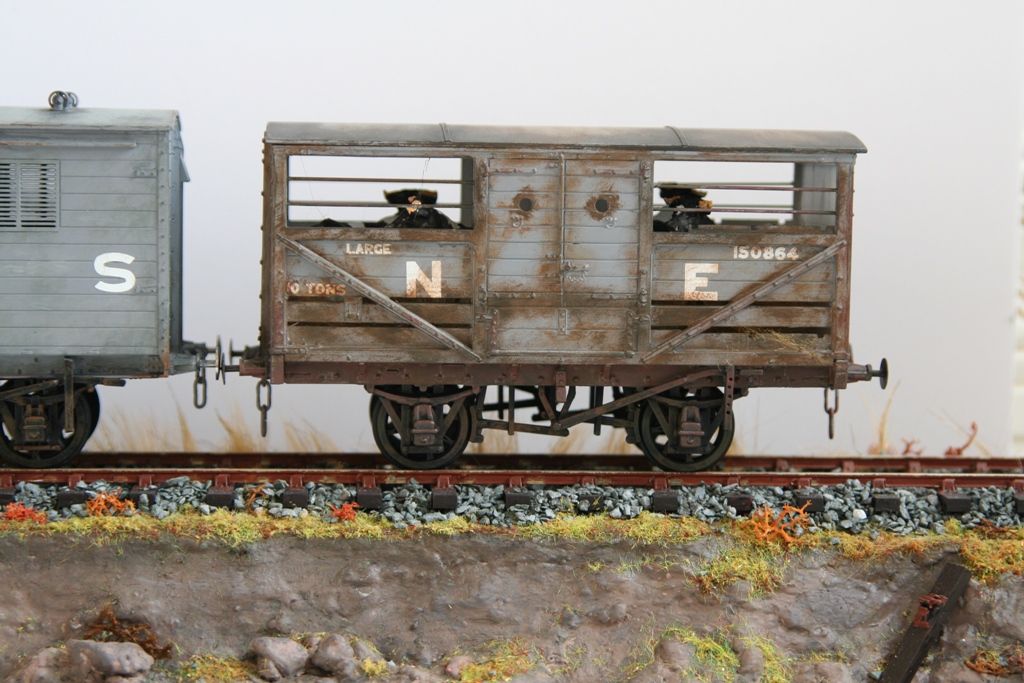
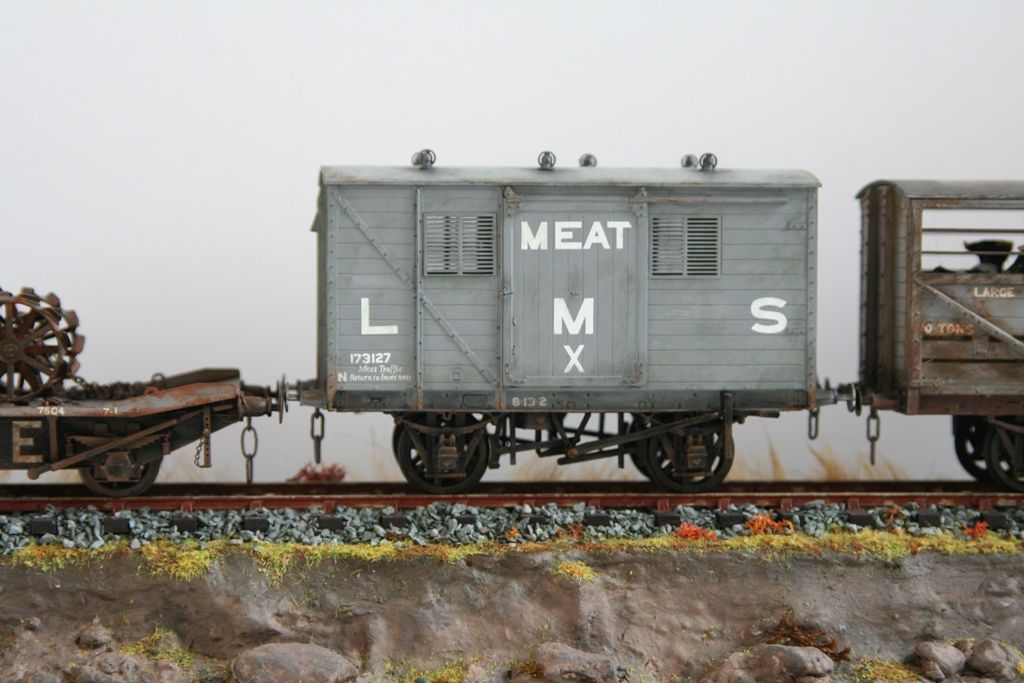
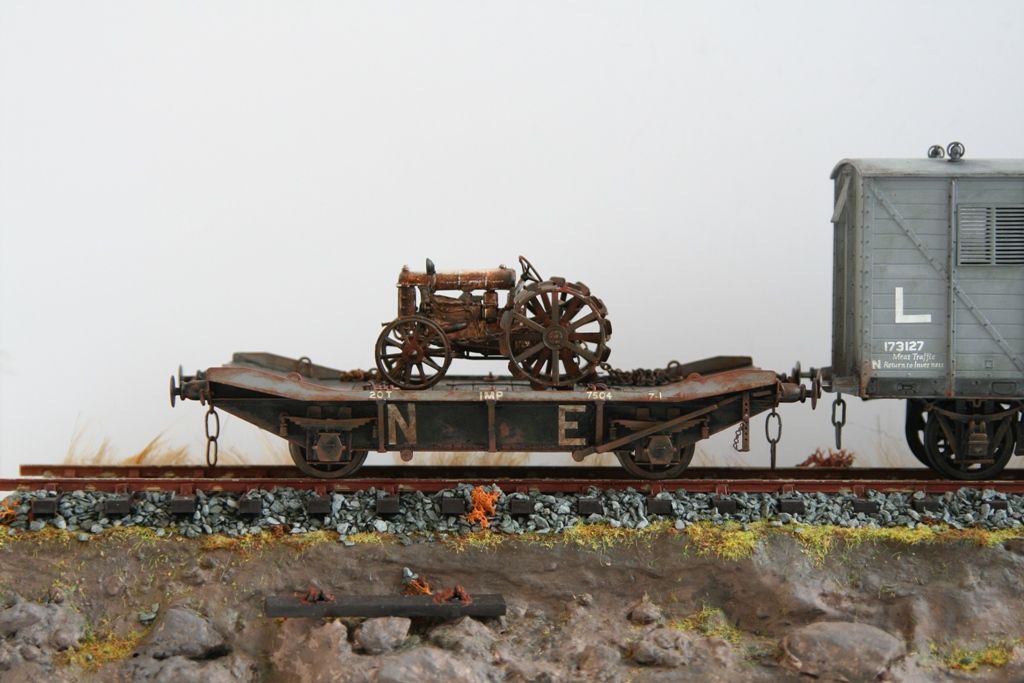
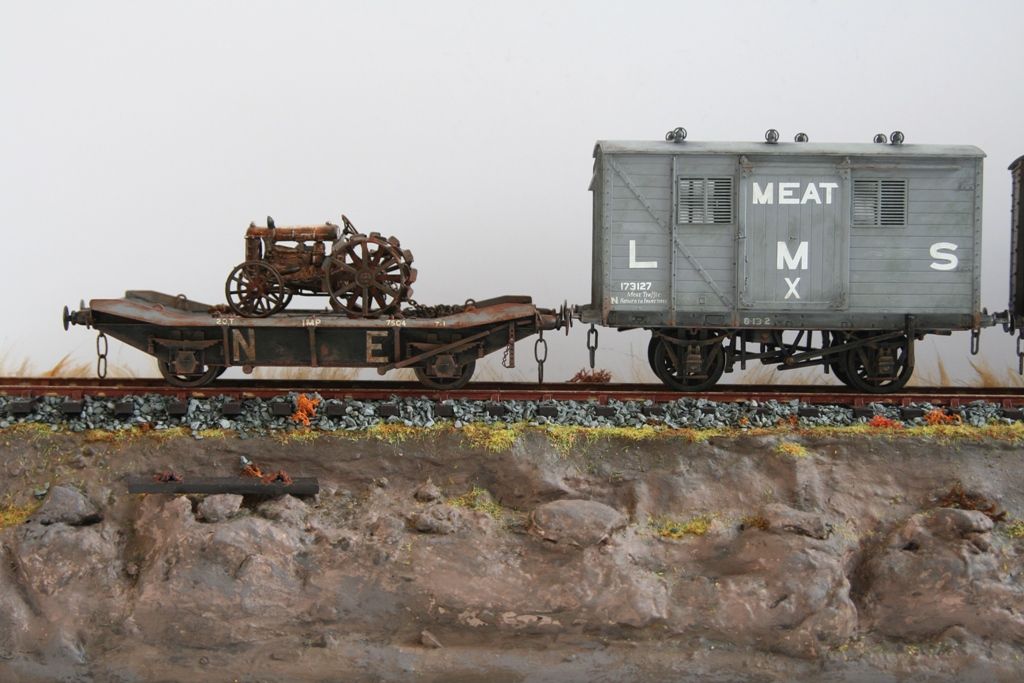
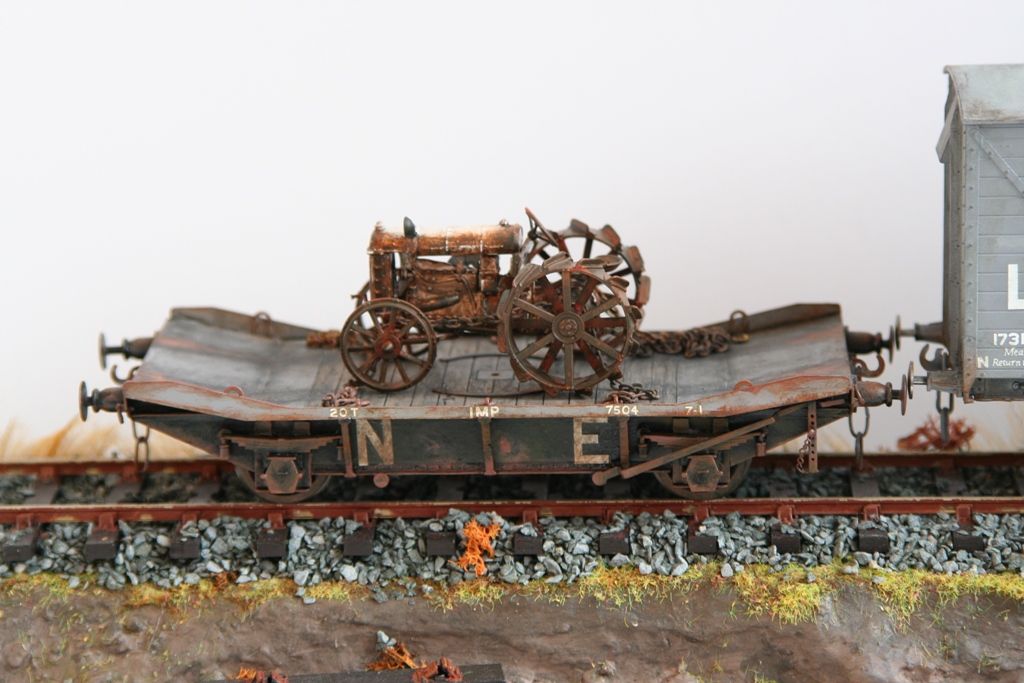
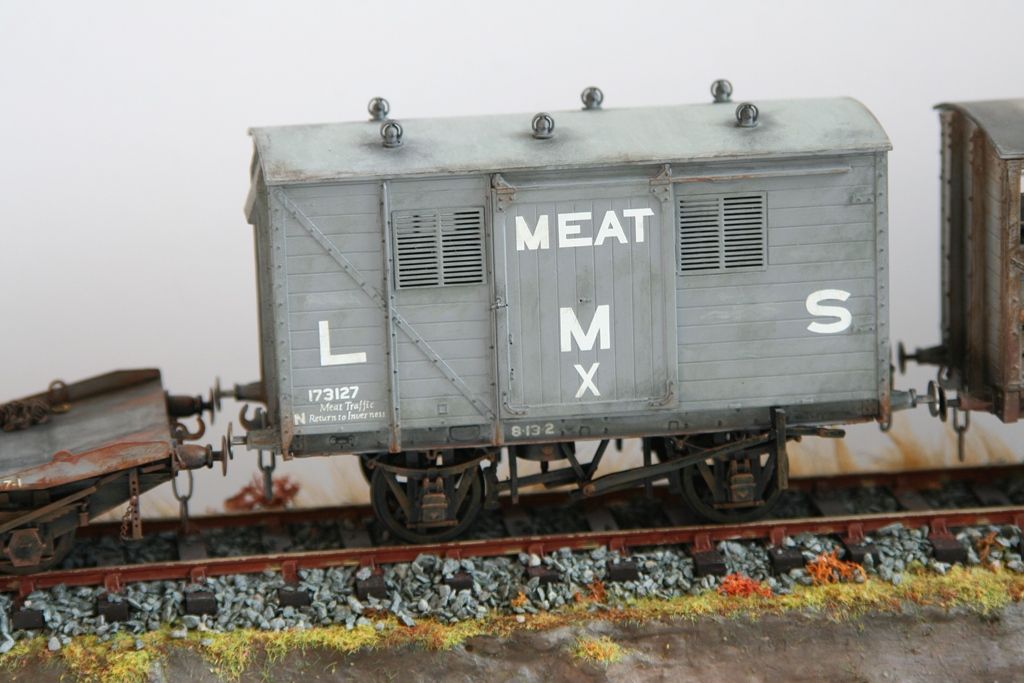
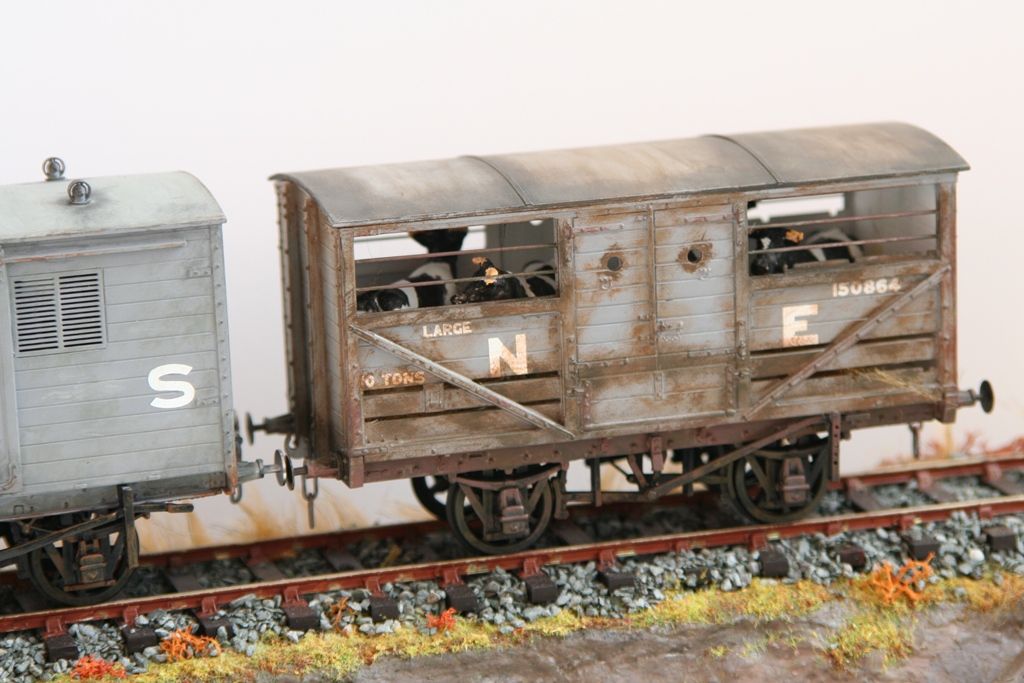
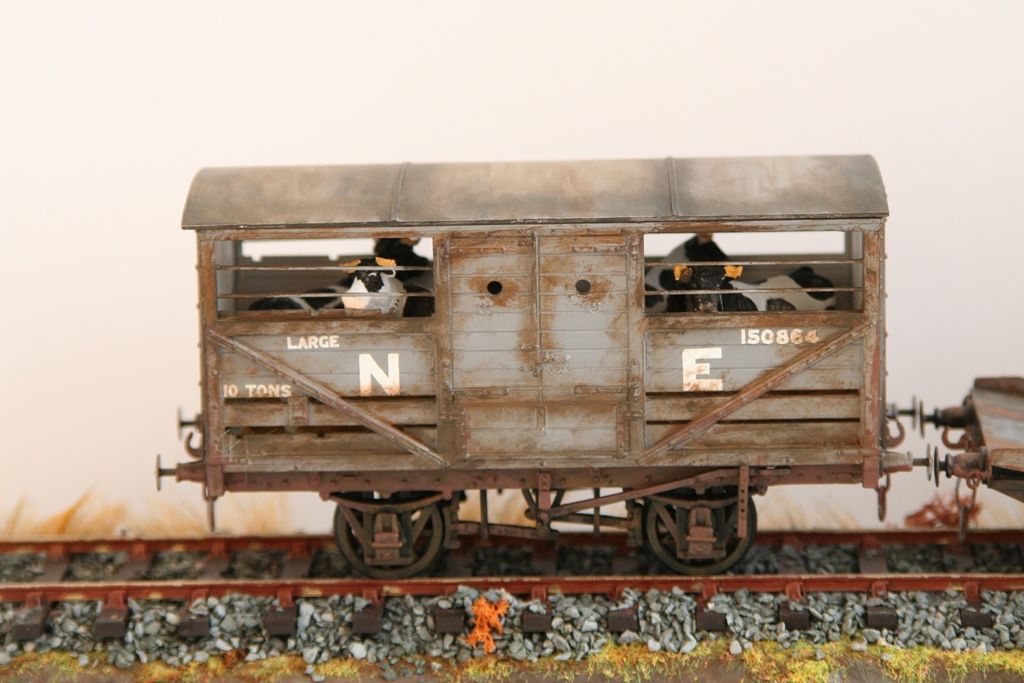
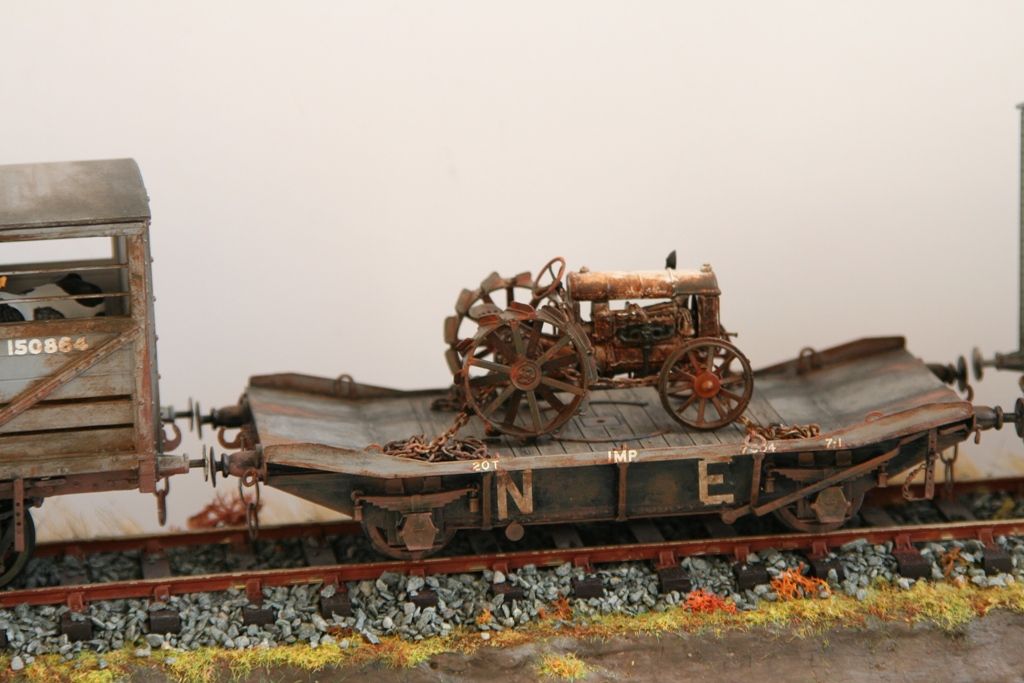
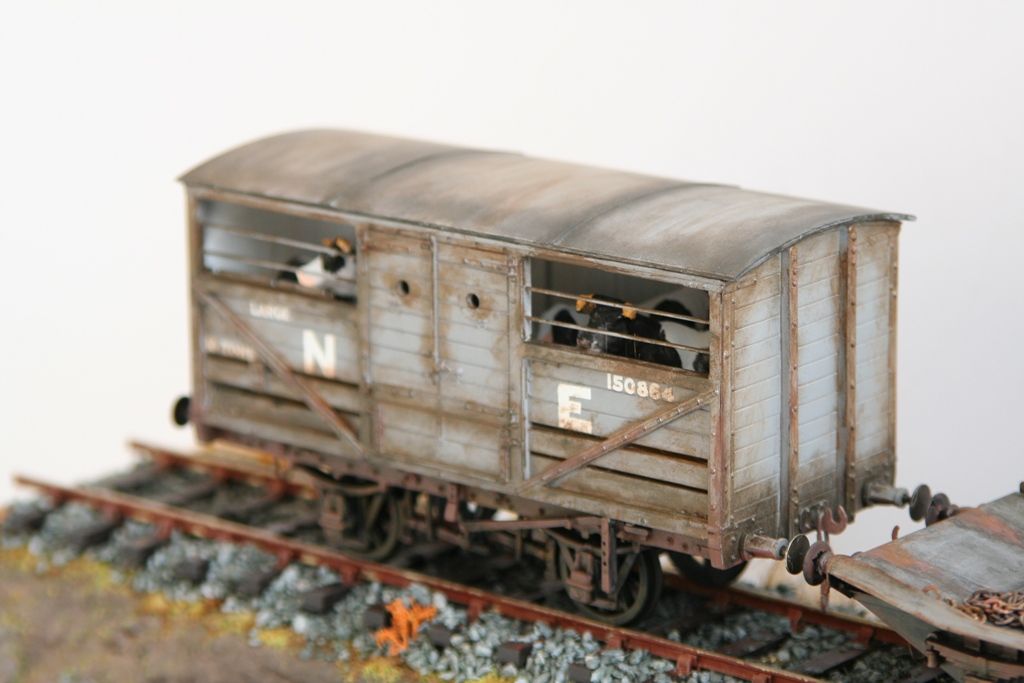
And last but not least, this is my favourite from this batch of photos
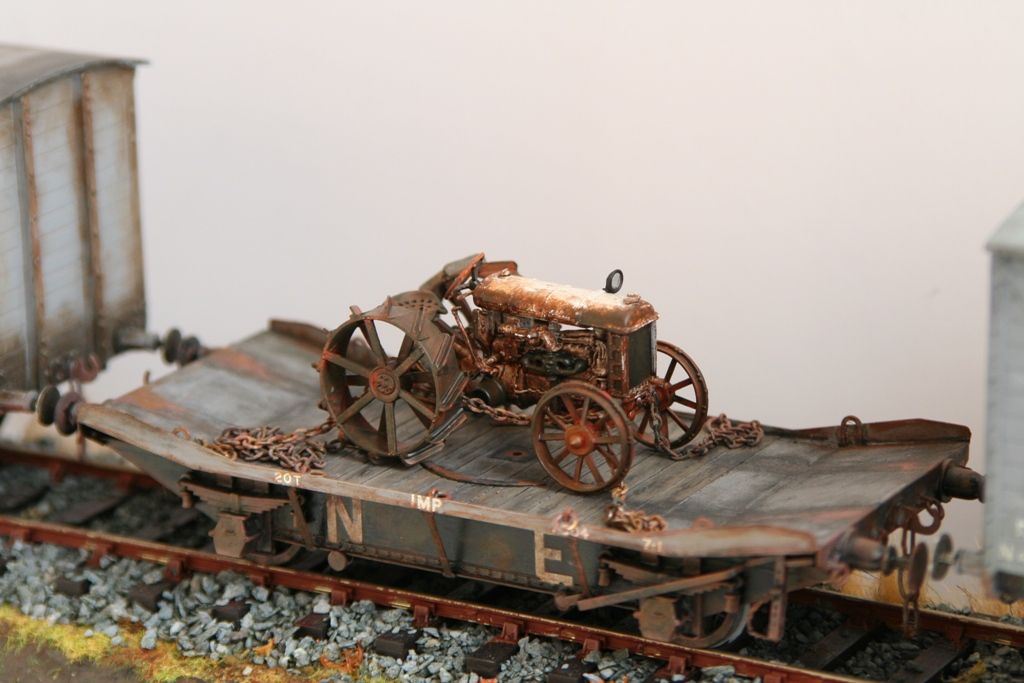


And last but not least, this is my favourite from this batch of photos

- manna
- LNER A4 4-6-2 'Streak'
- Posts: 3861
- Joined: Sun May 24, 2009 12:56 am
- Location: All over Australia
Re: 7mm Rolling Stock Builds
G'Day Gents
Nice wagons, the way you've got your passengers crammed in you think they were cattle
manna
Nice wagons, the way you've got your passengers crammed in you think they were cattle
manna
EDGWARE GN, Steam in the Suburbs.
-
jwealleans
- LNER A4 4-6-2 'Streak'
- Posts: 4303
- Joined: Wed Oct 25, 2006 8:46 am
Re: 7mm Rolling Stock Builds
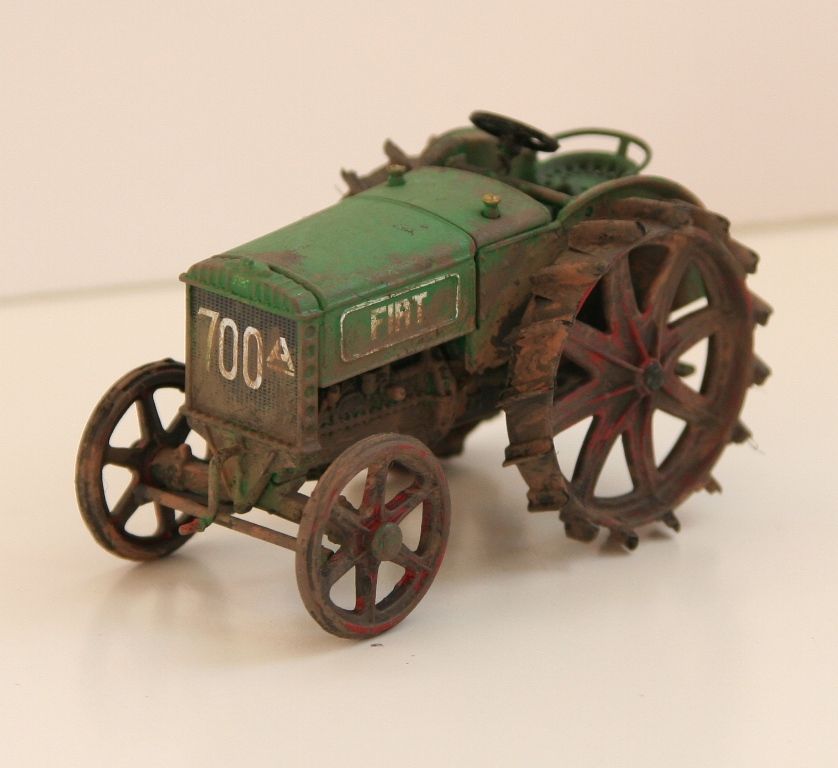
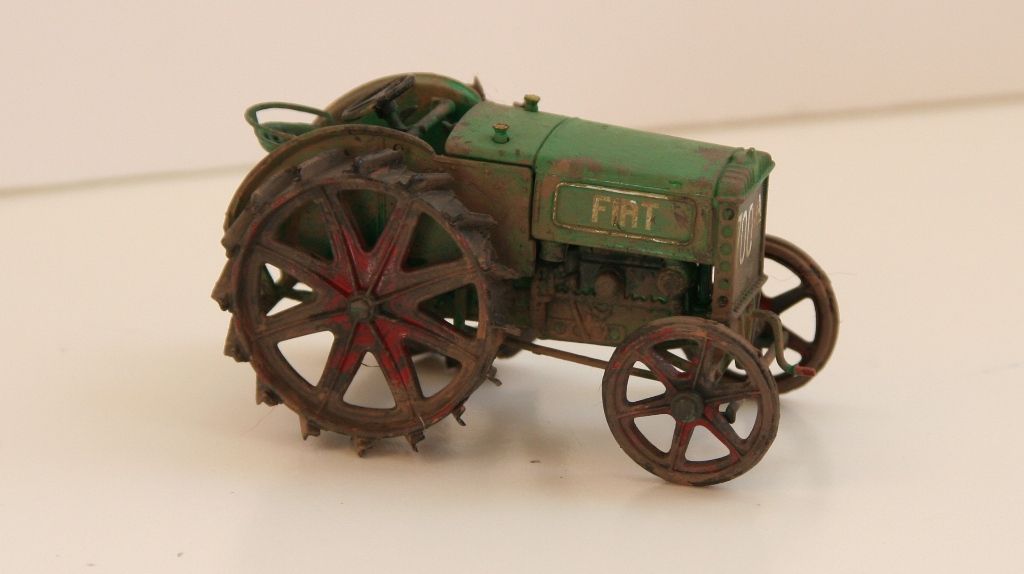
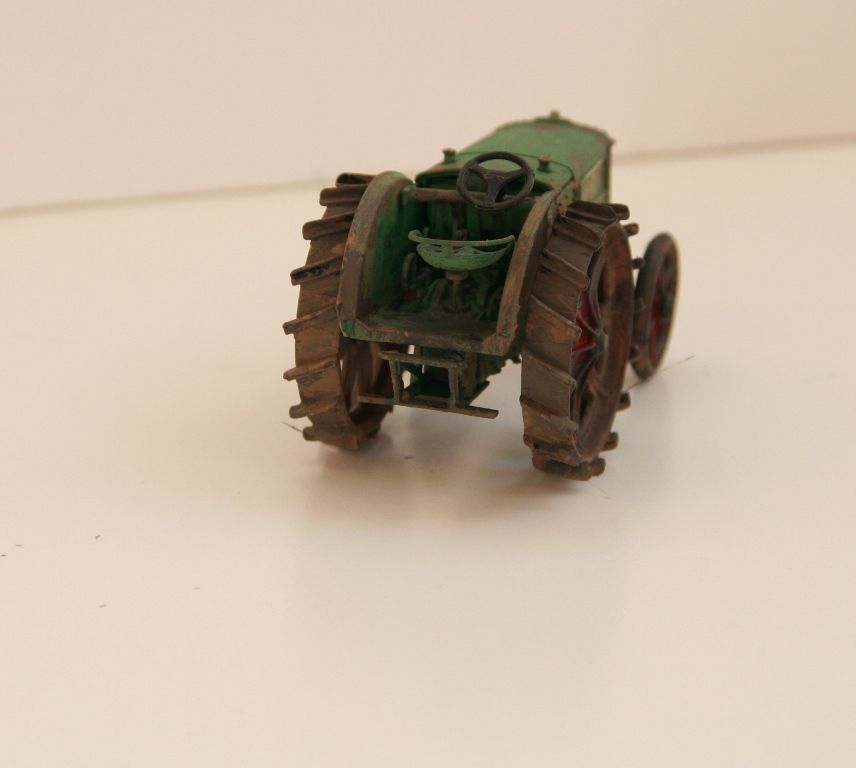
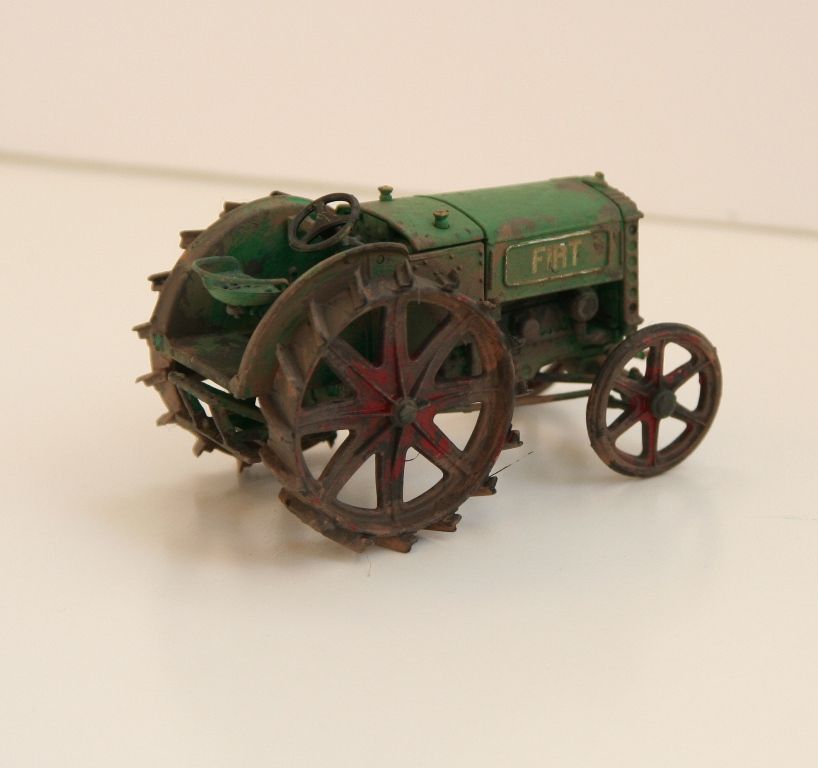
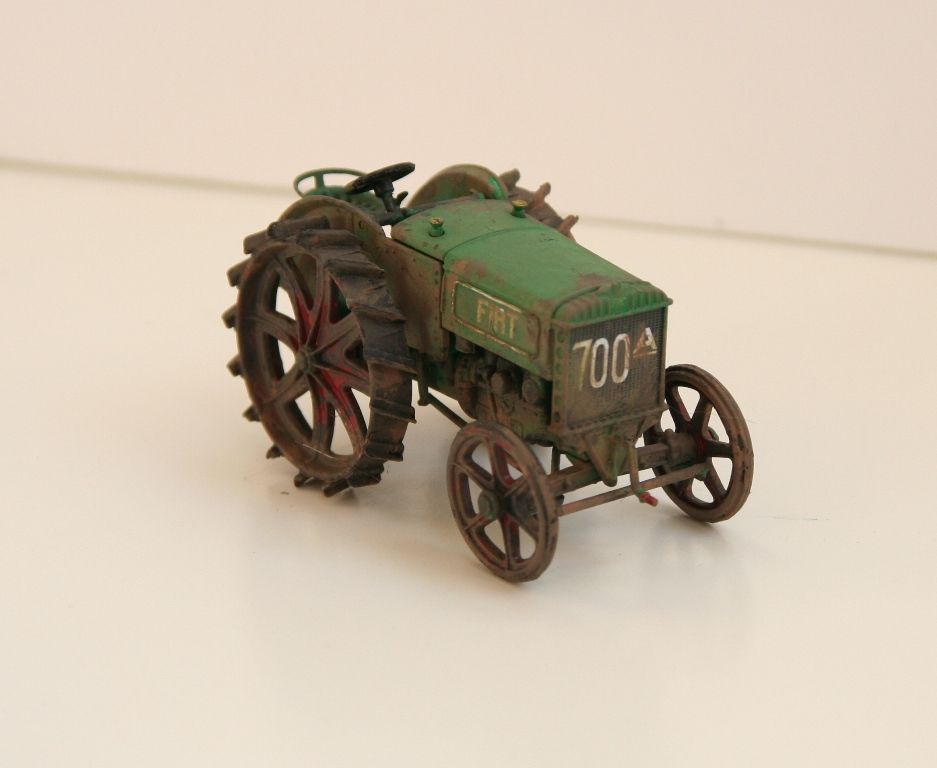
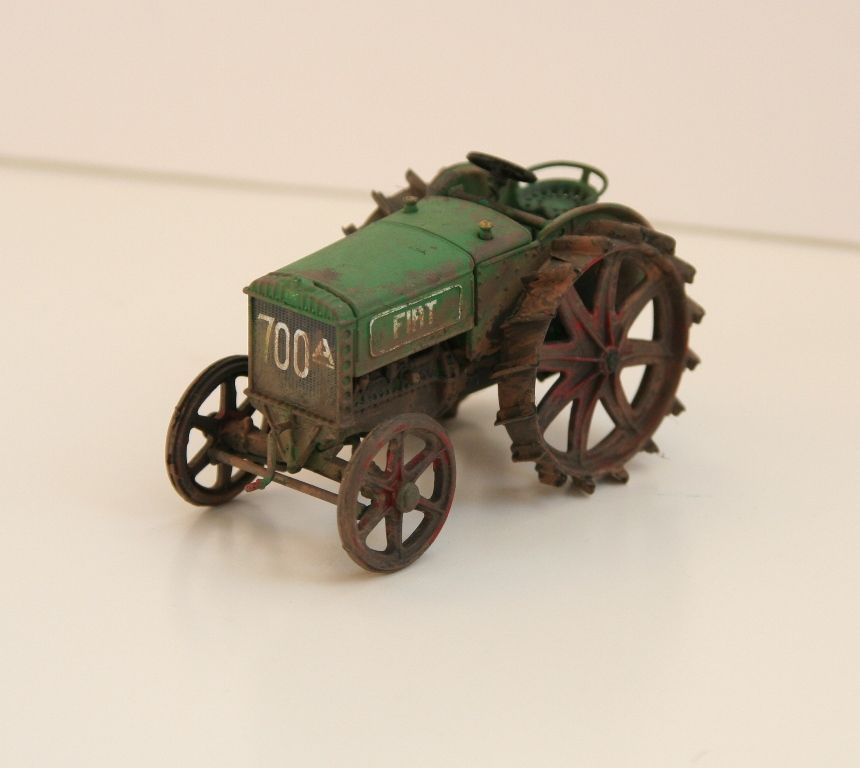
I think the phrase for that tractor is 'hedgerow condition'?
- Robpulham
- LNER A4 4-6-2 'Streak'
- Posts: 1721
- Joined: Thu Mar 27, 2008 9:54 pm
- Location: Lower Wensleydale
- Contact:
Re: 7mm Rolling Stock Builds
Touchemanna wrote:G'Day Gents
Nice wagons, the way you've got your passengers crammed in you think they were cattle
manna
- Robpulham
- LNER A4 4-6-2 'Streak'
- Posts: 1721
- Joined: Thu Mar 27, 2008 9:54 pm
- Location: Lower Wensleydale
- Contact:
Re: 7mm Rolling Stock Builds
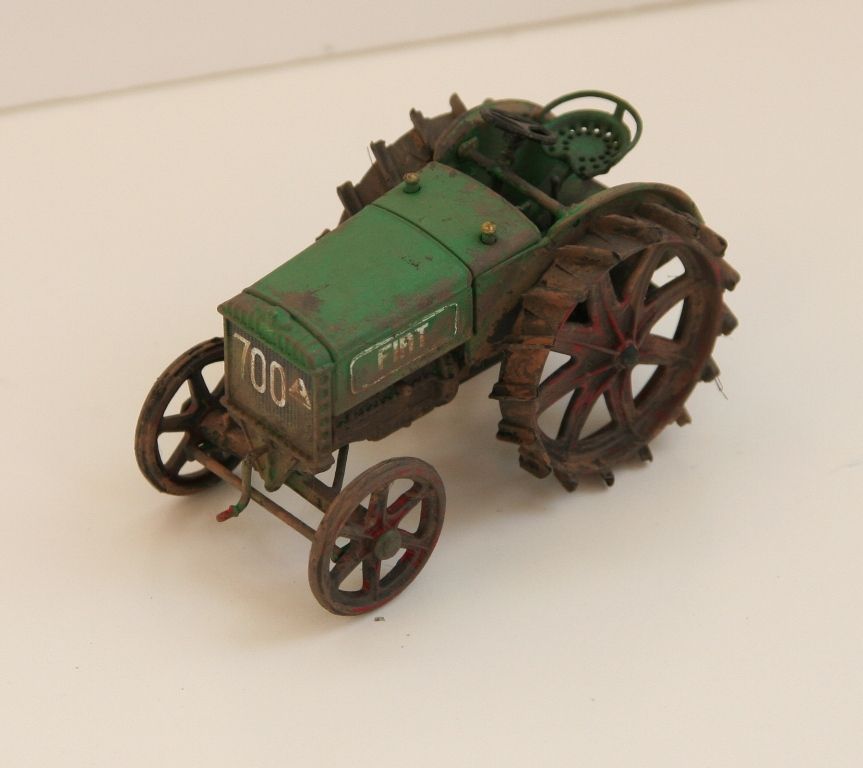
The promised tractor photos - this one is mucky rather than rusty.....


- Blink Bonny
- LNER A4 4-6-2 'Streak'
- Posts: 3946
- Joined: Mon Dec 03, 2007 9:21 pm
- Location: The Midlands
- Contact:
Re: 7mm Rolling Stock Builds
Ay up!
I love the tractors! Very nicely weathered indeed.
I love the tractors! Very nicely weathered indeed.
If I ain't here, I'm in Bilston, scoffing decent chips at last!!!!
- Robpulham
- LNER A4 4-6-2 'Streak'
- Posts: 1721
- Joined: Thu Mar 27, 2008 9:54 pm
- Location: Lower Wensleydale
- Contact:
Re: 7mm Rolling Stock Builds
Work on the turntable has come to a temporary halt. It's almost ready for painting but I need to change the filters on my spray booth extractor.
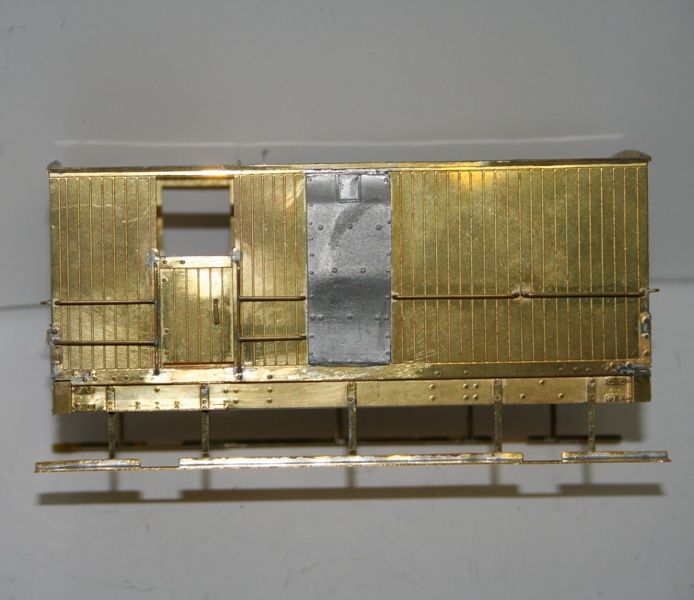
So to keep my hand in, I started this kit on Saturday. It's one that my good lady bought me for Christmas last year - a Connoisseur North British 20 ton brake van.
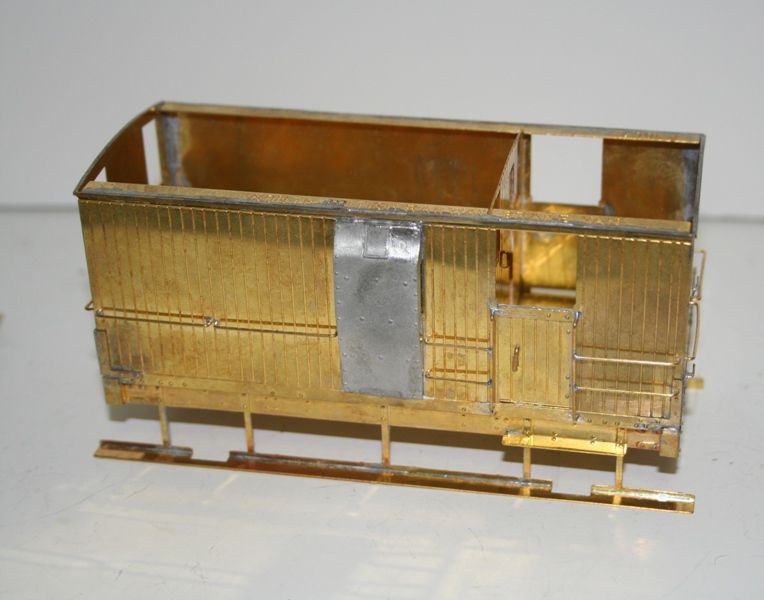
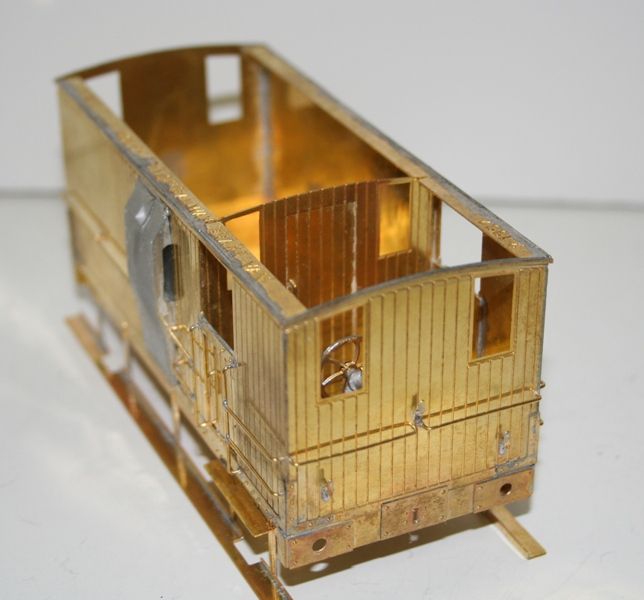
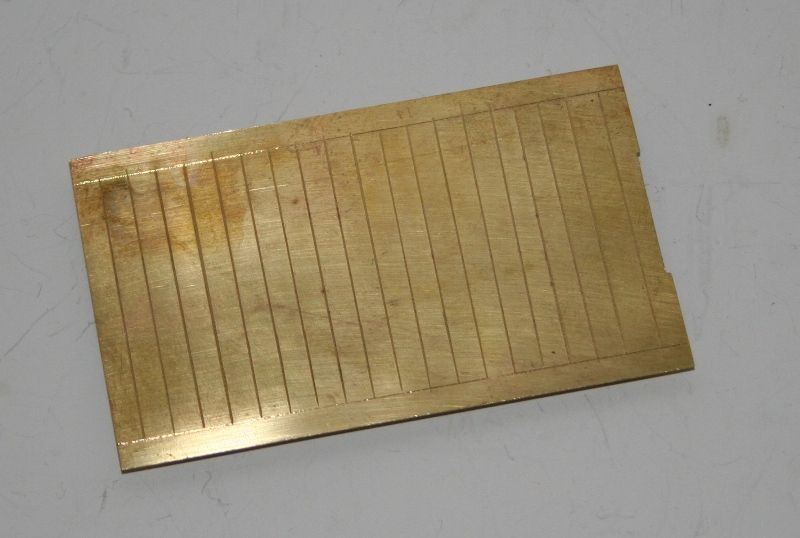
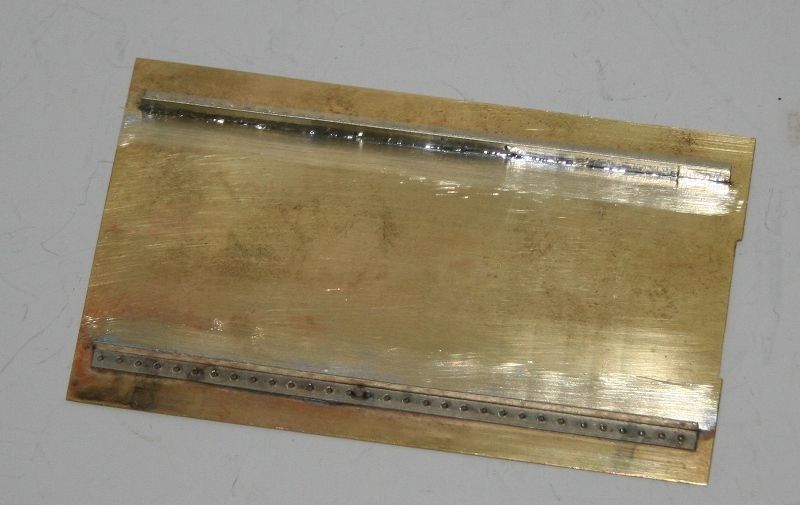
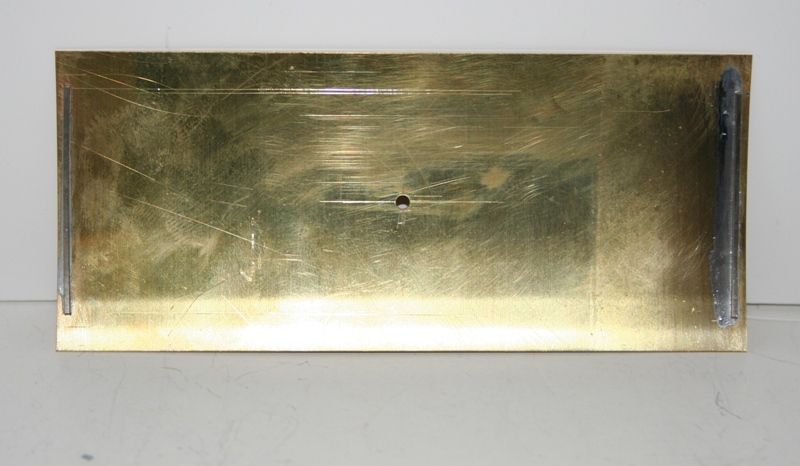
Jim only provides a floor for the veranda section (not really a veranda on this one but you get the idea). So I made one up from some brass sheet. To bring it to the same level as the other floor I used some spare angle bracket from the turntable. Waste nowt!
And inside the van
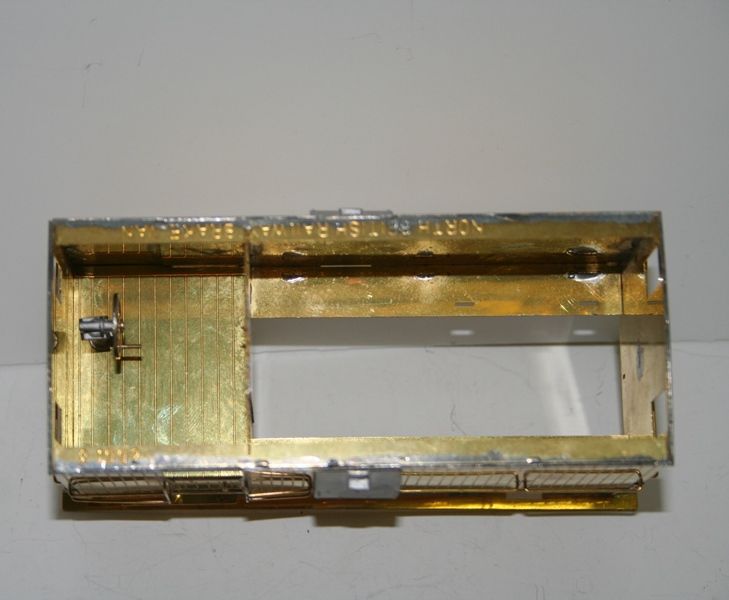
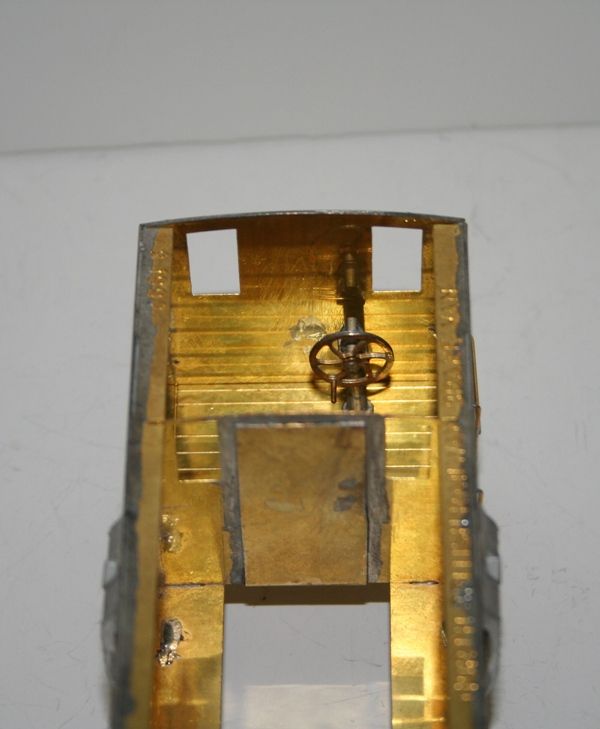
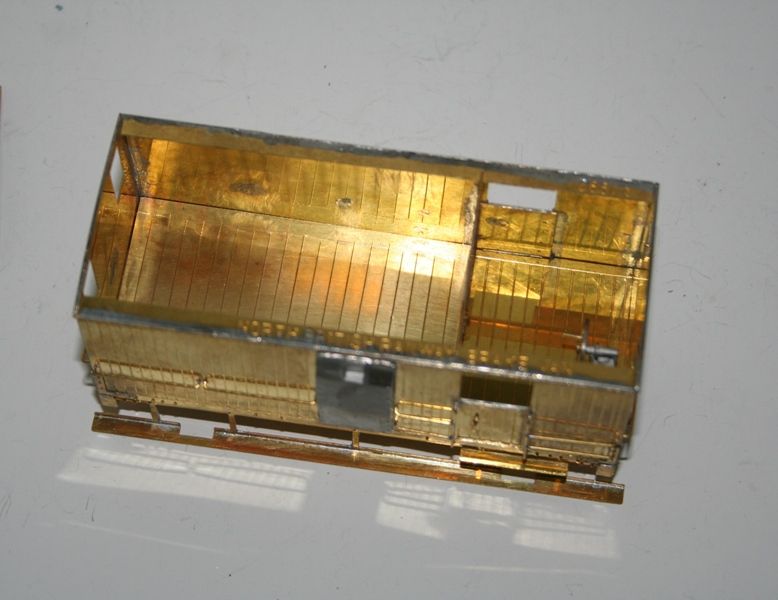
I reinforced the roof with some square section nickel bar to make it clip into the roof. I will also add some longer springy bits down the sides to help the middle sit down properly.
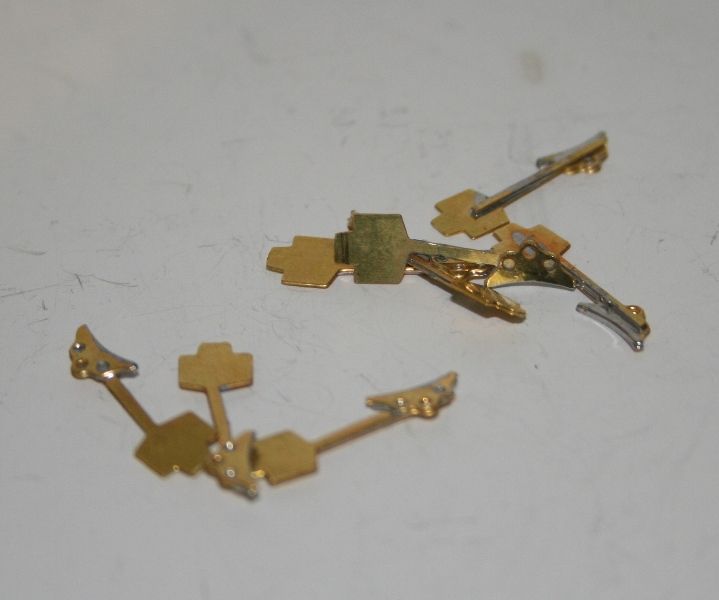
I also added some scrap etch strip to the back of the step supports and the brake brackets.
 .
.
This is where I got to last night.
Today while sitting in the smallest room in the house, I had the thought. "I wonder if I have any photo's in my Tatlow LNER Wagons volumes that might give me any missing details." Have you ever wished that you'd had that thought earlier......?
Tatlow revealed a second set of handrails below those on the non veranda end. Not too difficult to add thought I. Then I noticed the very distinctive curved ends to the vertical handrails and the fact that they don't sit at 90% to the side of the van.
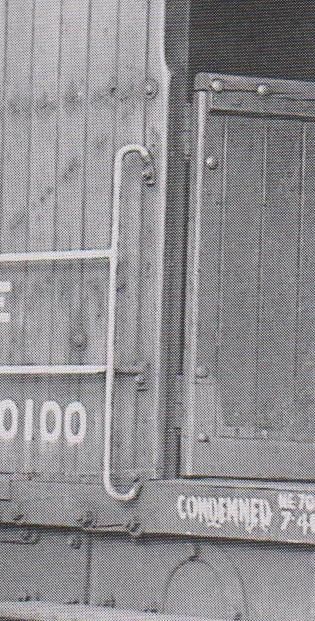
Oh Bovver!!! Says I.
So the next job tonight is to see if I can make a jig to bend 4 of those - before I take the ones I made earlier off.
So to keep my hand in, I started this kit on Saturday. It's one that my good lady bought me for Christmas last year - a Connoisseur North British 20 ton brake van.


Jim only provides a floor for the veranda section (not really a veranda on this one but you get the idea). So I made one up from some brass sheet. To bring it to the same level as the other floor I used some spare angle bracket from the turntable. Waste nowt!


And inside the van


I reinforced the roof with some square section nickel bar to make it clip into the roof. I will also add some longer springy bits down the sides to help the middle sit down properly.

I also added some scrap etch strip to the back of the step supports and the brake brackets.
 .
.This is where I got to last night.
Today while sitting in the smallest room in the house, I had the thought. "I wonder if I have any photo's in my Tatlow LNER Wagons volumes that might give me any missing details." Have you ever wished that you'd had that thought earlier......?
Tatlow revealed a second set of handrails below those on the non veranda end. Not too difficult to add thought I. Then I noticed the very distinctive curved ends to the vertical handrails and the fact that they don't sit at 90% to the side of the van.

Oh Bovver!!! Says I.
So the next job tonight is to see if I can make a jig to bend 4 of those - before I take the ones I made earlier off.
- Robpulham
- LNER A4 4-6-2 'Streak'
- Posts: 1721
- Joined: Thu Mar 27, 2008 9:54 pm
- Location: Lower Wensleydale
- Contact:
Re: 7mm Rolling Stock Builds
After discovering the different handrails, a pleasant couple of hours was spent over the last couple of nights creating these - I finished them too late to post last night.
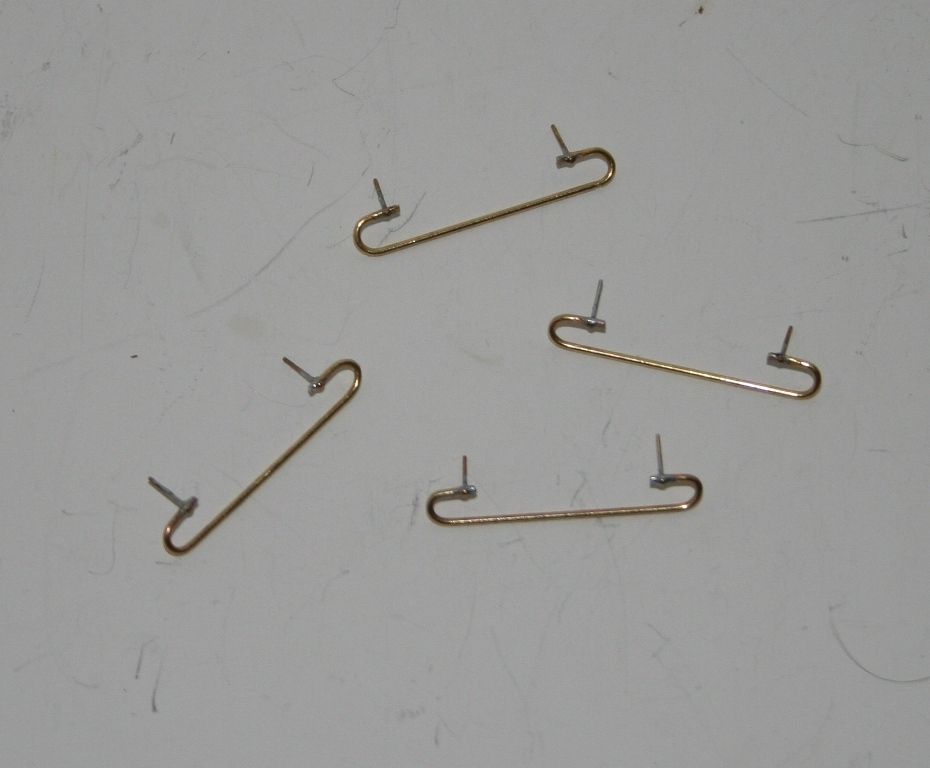
Tonights task is to put them on the van I hope.....

Tonights task is to put them on the van I hope.....
-
mistahjim
- LNER J39 0-6-0
- Posts: 167
- Joined: Thu Apr 20, 2006 12:06 pm
- Location: South Wales, see?
- Contact:
Re: 7mm Rolling Stock Builds
They certainly look a good match for the photographs Rob! I wonder how many other modellers have spotted and included this little detail?
I'd also like to compliment the weathering on the wagons elsewhere on this thread, very convincing and inspiring.
I'd also like to compliment the weathering on the wagons elsewhere on this thread, very convincing and inspiring.
What do you get when you cut an avocado into 6.022 x10^23 pieces?
Guacamole.
Guacamole.
- Robpulham
- LNER A4 4-6-2 'Streak'
- Posts: 1721
- Joined: Thu Mar 27, 2008 9:54 pm
- Location: Lower Wensleydale
- Contact:
Re: 7mm Rolling Stock Builds
Thanks Mistahjim, I just wish I had taken the time to look sooner 
- Robpulham
- LNER A4 4-6-2 'Streak'
- Posts: 1721
- Joined: Thu Mar 27, 2008 9:54 pm
- Location: Lower Wensleydale
- Contact:
Re: 7mm Rolling Stock Builds
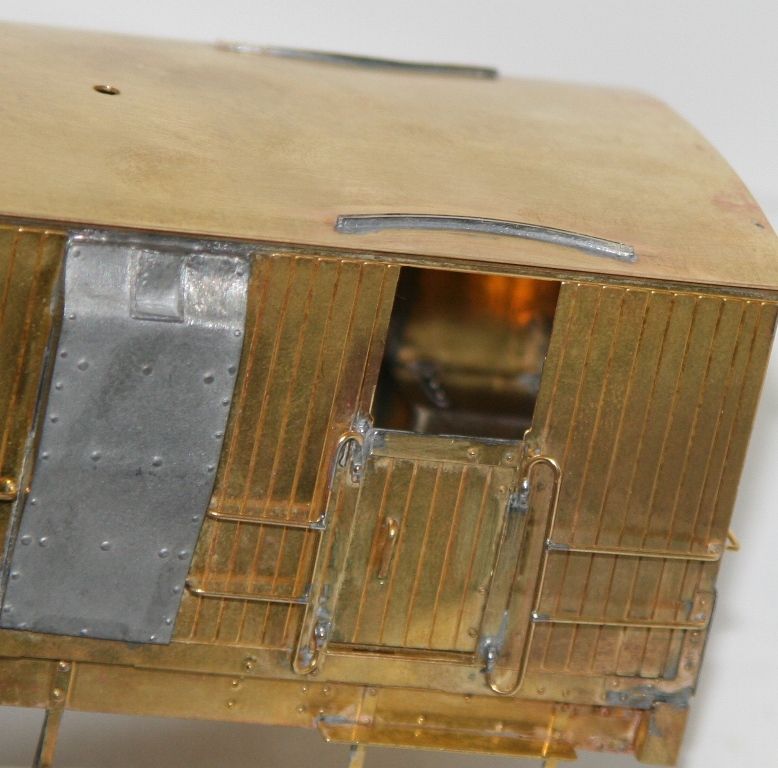
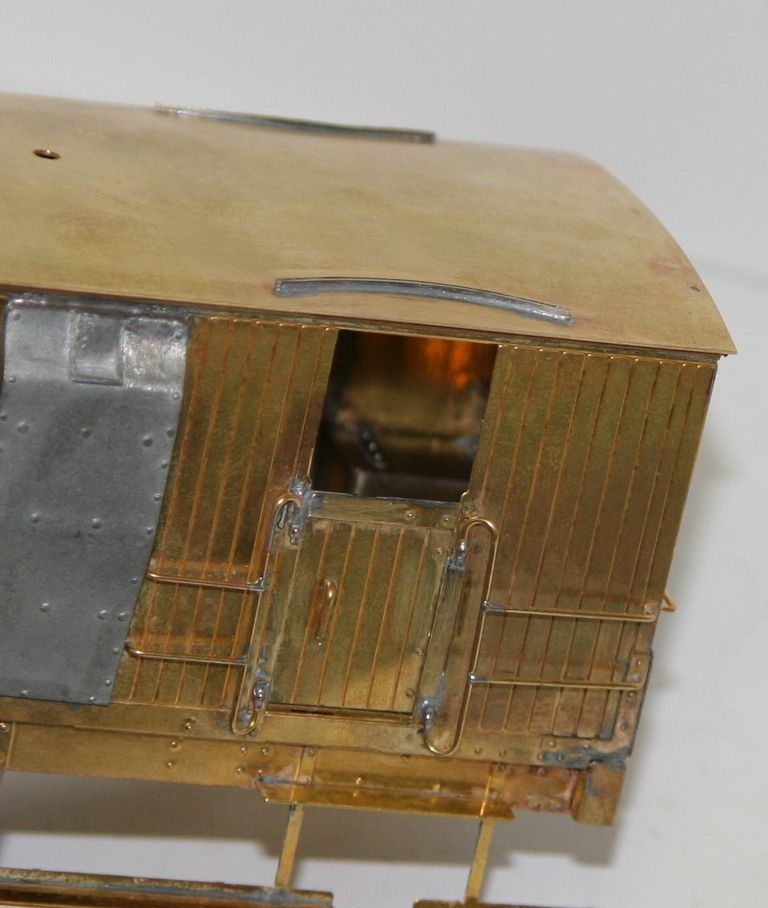
A busy couple of days ultimately meant that I didn't get the handrails fitted on Thursday night, despite my best intentions.
Today has seen them and the additional lower handrails added.
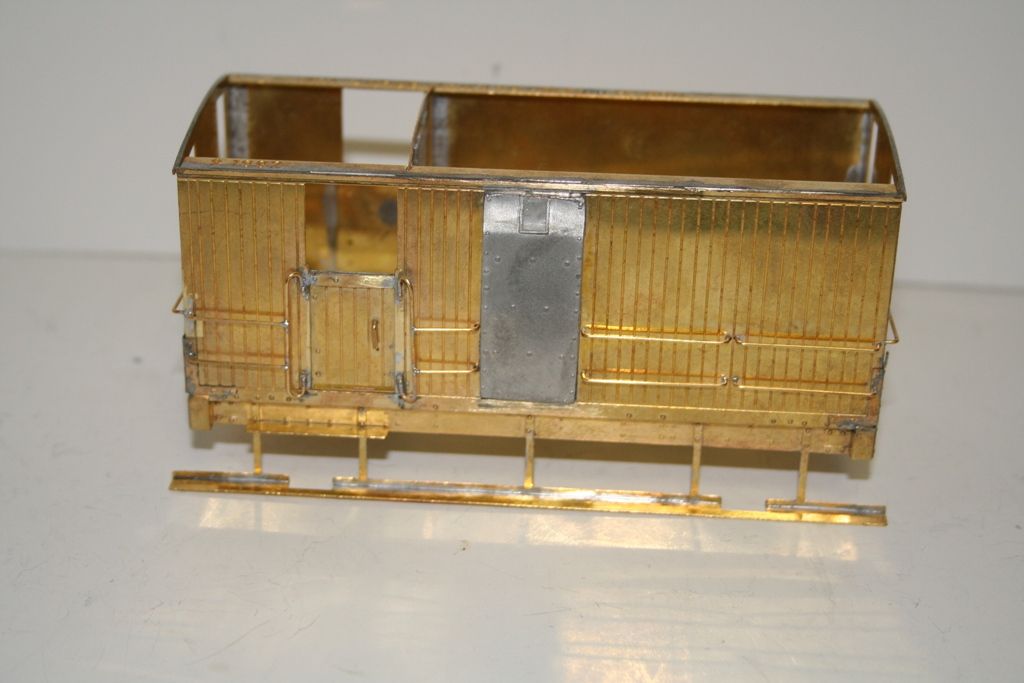
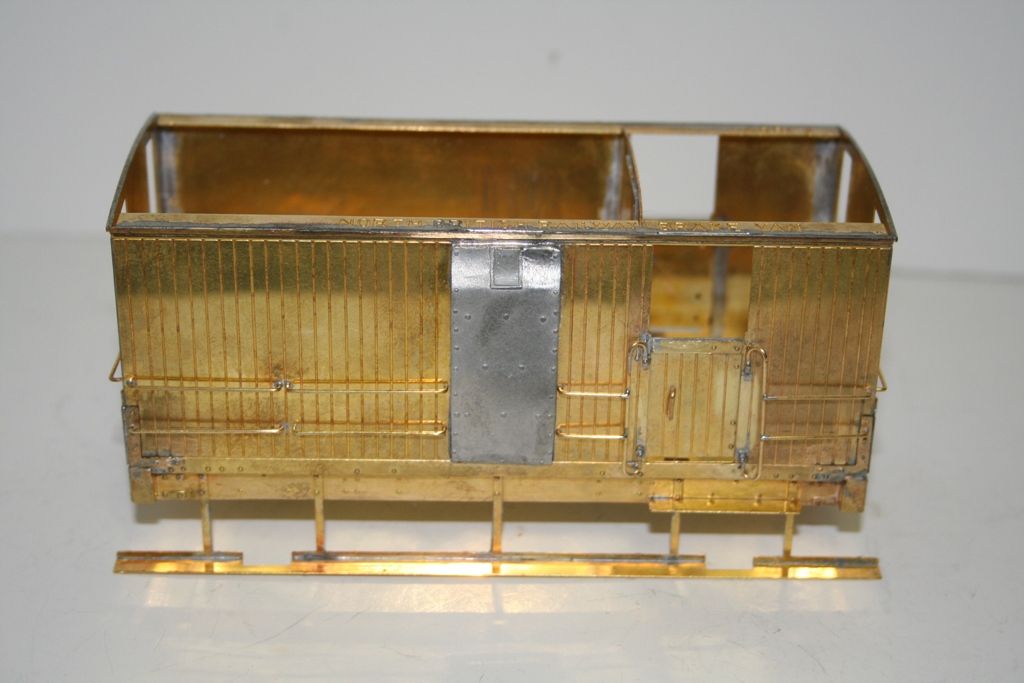
Although I haven't taken a photo yet, Thursday did see the rain strips fitted to the roof.
Jim's instructions have you using 0.7mm round brass rod. However I found a short length of 0.8mm square nickel rod in my stash which was just long enough to do the two rainstrips.
I ran them through my rolling bars to get the curves even while matching the dimensions quoted by Jim.
Regards Rob
Today has seen them and the additional lower handrails added.


Although I haven't taken a photo yet, Thursday did see the rain strips fitted to the roof.
Jim's instructions have you using 0.7mm round brass rod. However I found a short length of 0.8mm square nickel rod in my stash which was just long enough to do the two rainstrips.
I ran them through my rolling bars to get the curves even while matching the dimensions quoted by Jim.
Regards Rob
- Robpulham
- LNER A4 4-6-2 'Streak'
- Posts: 1721
- Joined: Thu Mar 27, 2008 9:54 pm
- Location: Lower Wensleydale
- Contact:
Re: 7mm Rolling Stock Builds
What an interesting and enjoyable build this is turning out to be.
While researching in Tatlow and reviewing a drawing supplied by a friend, I picked up that up to 1931 these vans had quite prominent sanding gear. Having resized the drawing to 7mm scale and taken dimensions for the sand boxes from it I deduced that the ones in the veranda compartment would be visible when viewed from normal model railway viewing angles - above and to either side.
So I gathered some bit's of scrap etch from the turntable and made a couple. I made the hinges and soldered them onto the lid using the microflame. I had just nicely got to soldering the lid onto the box using sprung tweezers as clamps, when it all sprung apart and one of the hinges disappeared into thin air....
An hour later when I had made up a new one and the boxes were fitted to the floor, my good lady found the one lost in space.
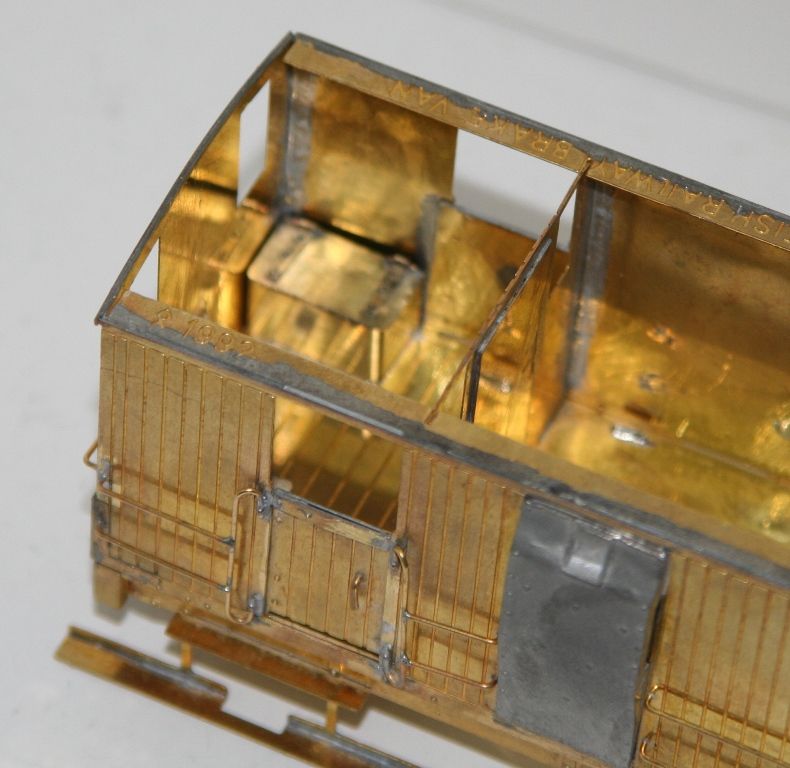
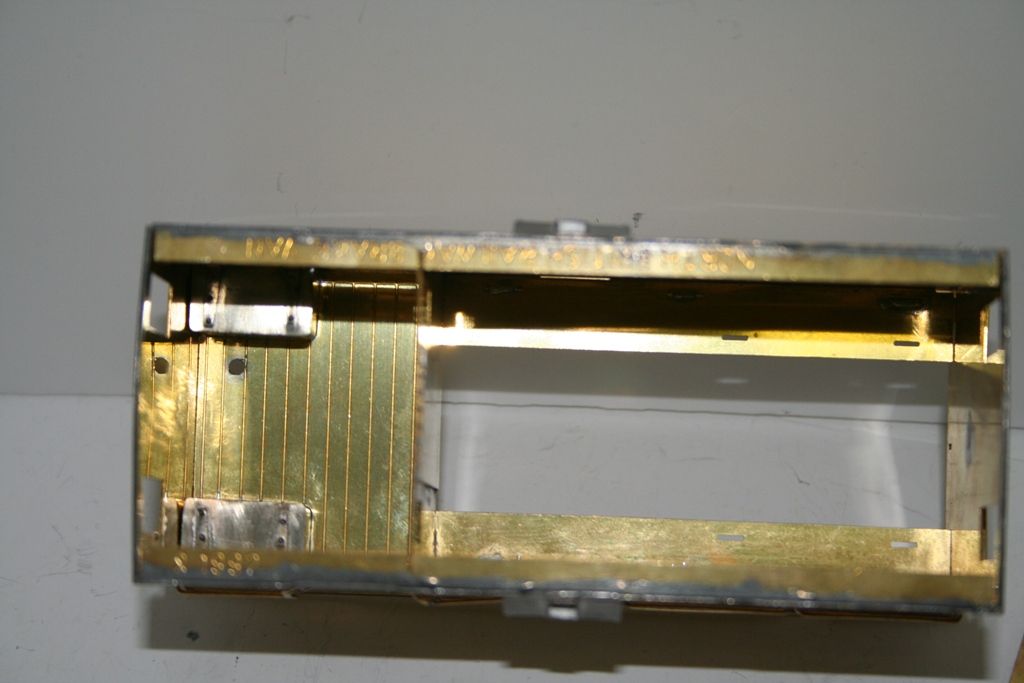
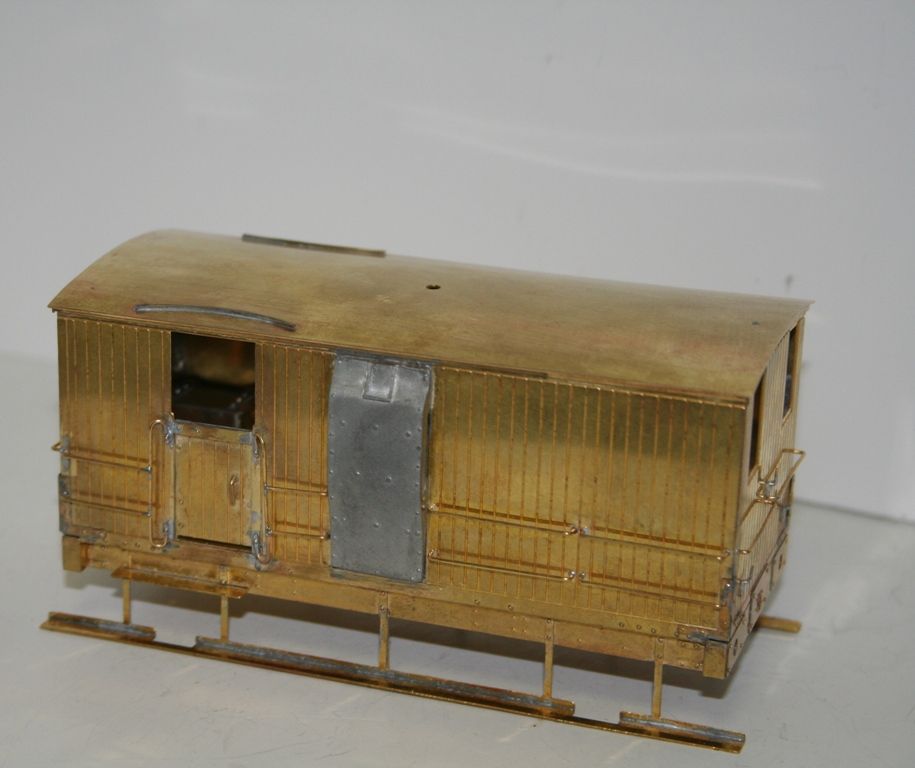
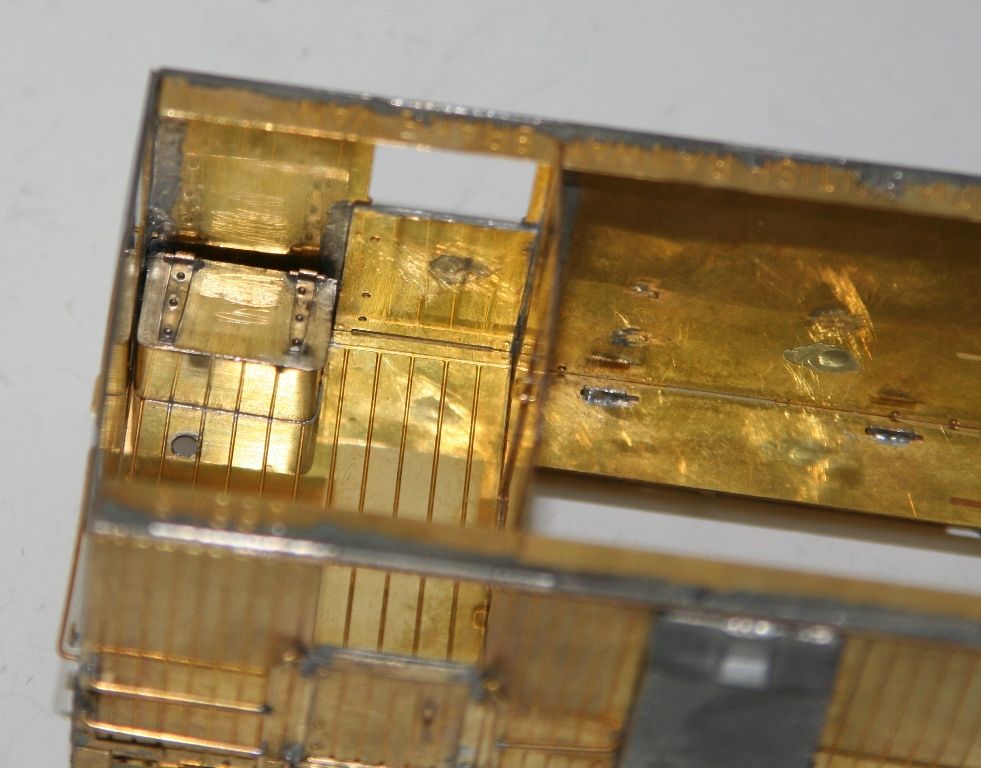
I also beefed up the brake yokes. The photo's that I am working from show the main cross bar of the yoke to be quite substantial so once again scrap etch to the rescue. That was done after this set of photos was taken so they will probably be on when I show pictures of them.
While researching in Tatlow and reviewing a drawing supplied by a friend, I picked up that up to 1931 these vans had quite prominent sanding gear. Having resized the drawing to 7mm scale and taken dimensions for the sand boxes from it I deduced that the ones in the veranda compartment would be visible when viewed from normal model railway viewing angles - above and to either side.
So I gathered some bit's of scrap etch from the turntable and made a couple. I made the hinges and soldered them onto the lid using the microflame. I had just nicely got to soldering the lid onto the box using sprung tweezers as clamps, when it all sprung apart and one of the hinges disappeared into thin air....
An hour later when I had made up a new one and the boxes were fitted to the floor, my good lady found the one lost in space.


I also beefed up the brake yokes. The photo's that I am working from show the main cross bar of the yoke to be quite substantial so once again scrap etch to the rescue. That was done after this set of photos was taken so they will probably be on when I show pictures of them.