West End Workbench

This forum is for the discussion of railway modelling of the LNER and its constituent companies.

Moderators: 52D, Tom F, Rlangham, Atlantic 3279, Blink Bonny, Saint Johnstoun, richard

Mercator II
GCR O4 2-8-0 'ROD'
Posts: 533
Joined: Mon Nov 03, 2008 12:14 pm
Location: Lincolnshire

Re: West End Workbench

Post by Mercator II »

Atlantic 3279 wrote: Tue Nov 15, 2022 10:55 am At current prices I won't be going so far as to shower everything in resin at the NEC, but I can supply as much hot air as necessary providing that there's somebody with a sense of humour to provide hot air in equal measure.

Those re-dipped Fozard coaches are immensely improved compared to the original (not so) "economical" paint finish.
Showers? Usually a strange concept to far too many that attend the show🤢

I'll be in attendance on Saturday so will be sure to stop by and say hi
oOo

Brian

Garage Hobbit!!
Modelling in 00 on my heritage line, very GCR inspired
jwealleans
LNER A4 4-6-2 'Streak'
Posts: 4303
Joined: Wed Oct 25, 2006 8:46 am

Re: West End Workbench

Post by jwealleans »

I like to think we attract a better class of anorak.
User avatar
Atlantic 3279
LNER A4 4-6-2 'Streak'
Posts: 6658
Joined: Fri Jun 26, 2009 9:51 am
Location: 2850, 245

Re: West End Workbench

Post by Atlantic 3279 »

If we were allowed kettles we could have the kettle on ready for select visitors.
Most subjects, models and techniques covered in this thread are now listed in various categories on page1

Dec. 2018: Almost all images that disappeared from my own thread following loss of free remote hosting are now restored.
jwealleans
LNER A4 4-6-2 'Streak'
Posts: 4303
Joined: Wed Oct 25, 2006 8:46 am

Re: West End Workbench

Post by jwealleans »

That would be much more civilised.
jwealleans
LNER A4 4-6-2 'Streak'
Posts: 4303
Joined: Wed Oct 25, 2006 8:46 am

Re: West End Workbench

Post by jwealleans »

.... and we're back. Not a lot to show for two full days modelling:
thumbnail_IMG_4050.jpg
One largely finished Airfix brake van, backdated to LNER D61 and one Cambrian LMS van (Mrs. W's first ever kit).

Enjoyable weekend in good company nonetheless and thanks to everyone who took the time to come and visit. Really good to see Dave S and Joshua again and catch up with Steve's news. I had my horizons broadened too; previously I'd have had no idea that 'can you demonstrate wagon building' would expand to include:

Failing to repair an Eastern European lady's watchstrap
Opening the child- (and parent-) proof pack on a Thomas the tank Engine toy
A lengthy discussion about the psychology of demonstrating to an audience with a Japanese gentleman who spoke no English
Advice on adding detail to the Hornby 6 wheel carriages.

Thanks to Mr. King for allowing me to host an equally lengthy discussion on petrol stations and their suppliers (in the context of what tank wagons had been made for them). I'll have to revise that one for next year, my knowledge was found sadly lacking.

Hopefully we can settle down to some productive modelling time before shows resume next year, most likely at Doncaster.
User avatar
Atlantic 3279
LNER A4 4-6-2 'Streak'
Posts: 6658
Joined: Fri Jun 26, 2009 9:51 am
Location: 2850, 245

Re: West End Workbench

Post by Atlantic 3279 »

I can only plead that tank wagons alone were mentioned to me when the gentleman in question was seeking information. Nothing was said about a required knowledge of petrol stations. As the man who can never have too many wagons, your expertise naturally sprang to mind.

Conversation with my German guest (and most others) also went well outside the realms of pure resin casting. I found that he had silenced an N gauge modelling friend who told him that his "giant" HO scale modelling was easy, by making and presenting to the friend an N-scale model of a saw mill with working saw bench, cutting match sticks in half as they were fed to the saw from a cassette.

A N Other also informed me that Romeo and Juliette were conversions of BR Mark 1 coaches for some sort of technical / departmental purposes. I slept all the more easily for knowing that...
Most subjects, models and techniques covered in this thread are now listed in various categories on page1

Dec. 2018: Almost all images that disappeared from my own thread following loss of free remote hosting are now restored.
jwealleans
LNER A4 4-6-2 'Streak'
Posts: 4303
Joined: Wed Oct 25, 2006 8:46 am

Re: West End Workbench

Post by jwealleans »

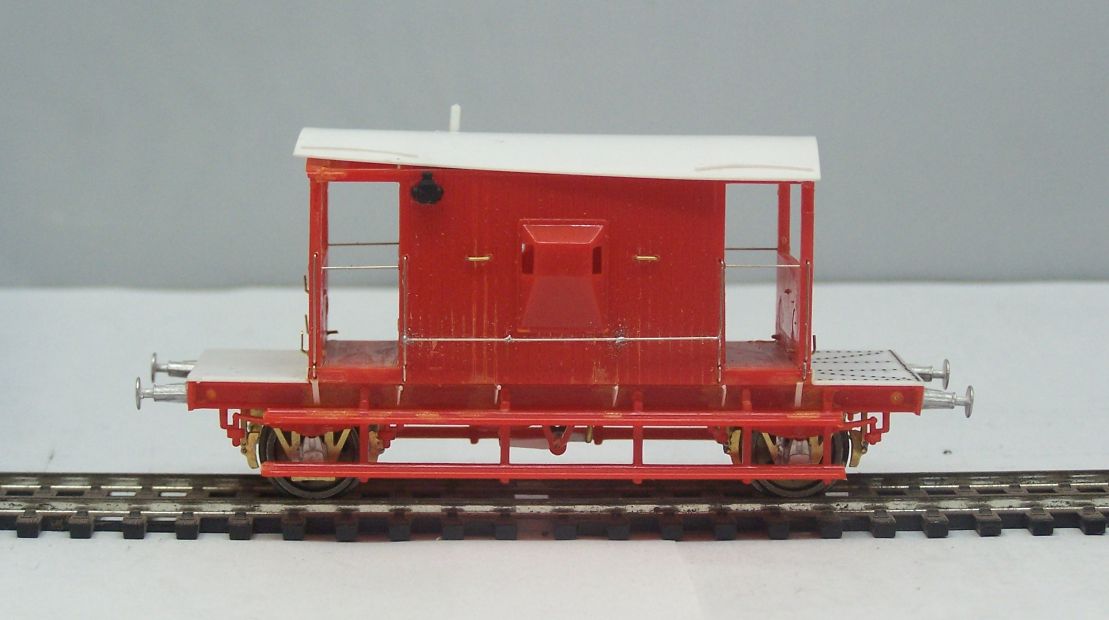
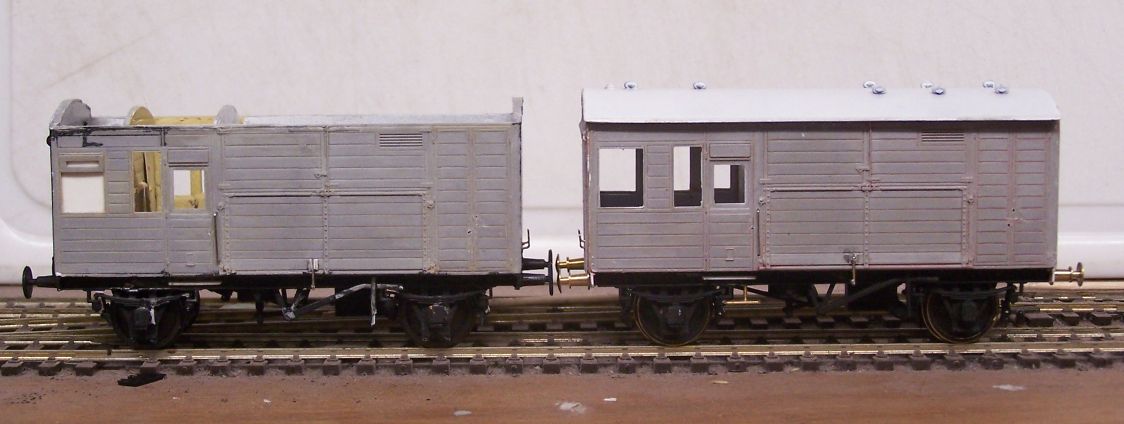
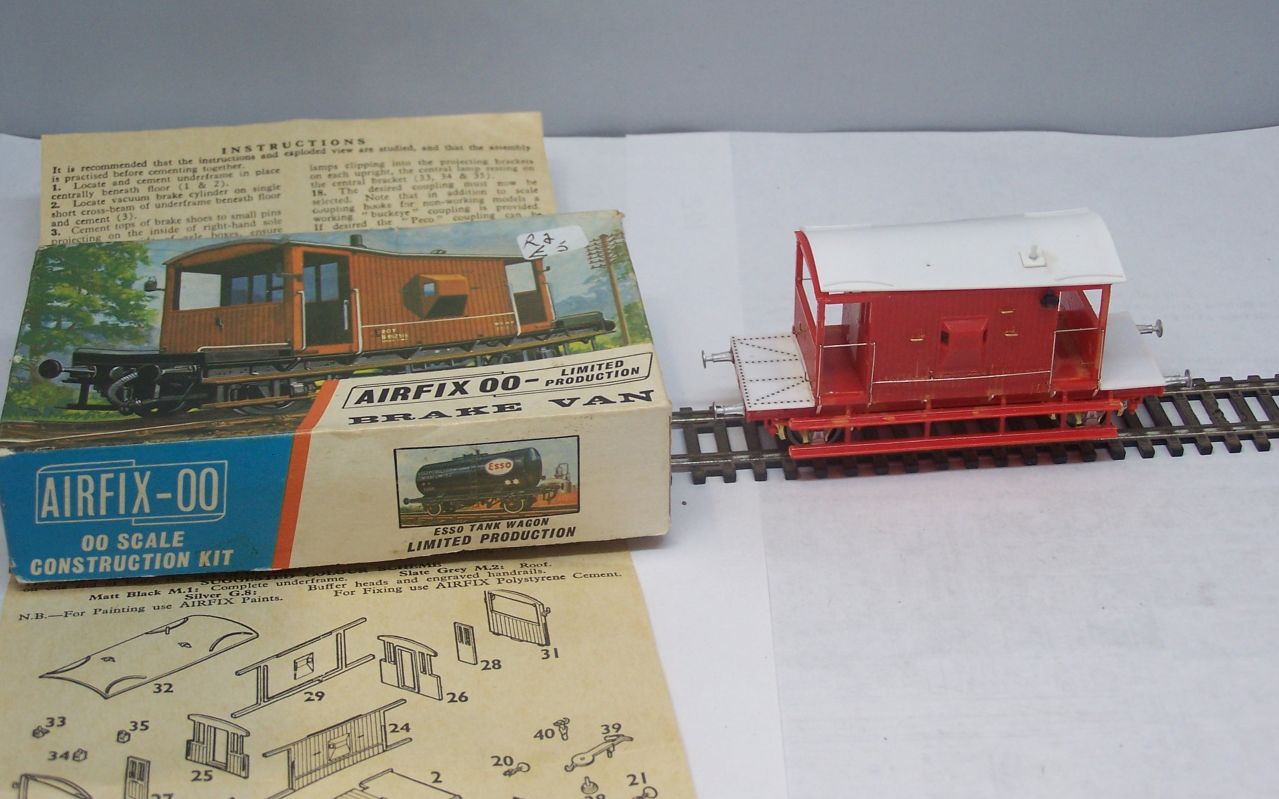
Brake van largely done now, just needs tidying up and the roof fitting properly. It must have slipped on the bottle (haven't we all?) and hasn't bent straight.

I'm thinking I'll keep this one for demonstrations as the garish colour makes seeing the alterations very easy. I have a couple more to do so we shan't be short of the one we need for Grantham.

Image

Image
jwealleans
LNER A4 4-6-2 'Streak'
Posts: 4303
Joined: Wed Oct 25, 2006 8:46 am

Re: West End Workbench

Post by jwealleans »

I've been pressing on with the wagons I had at Warley this week as i had all the bits and reference material to hand when we came back.

2 more brake vans well on the way - just need the rivet transfers applying, roofs and brake pipe upstands and the usual tidying up. If I do any more of these, I think I'll try the later diagram which had the concrete weights on the ends.

Image

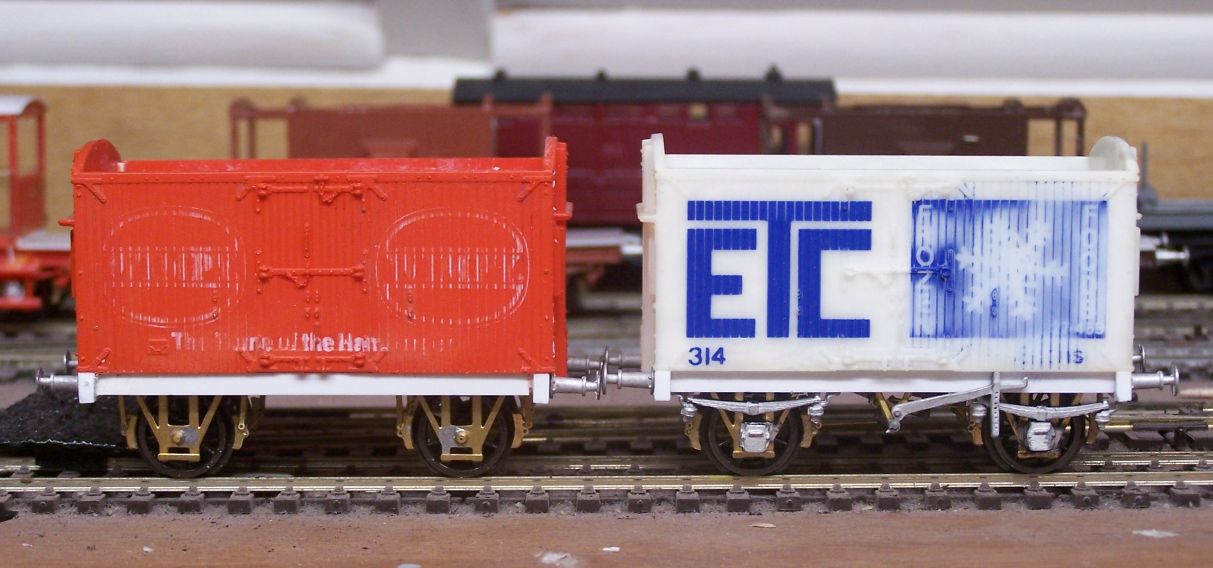
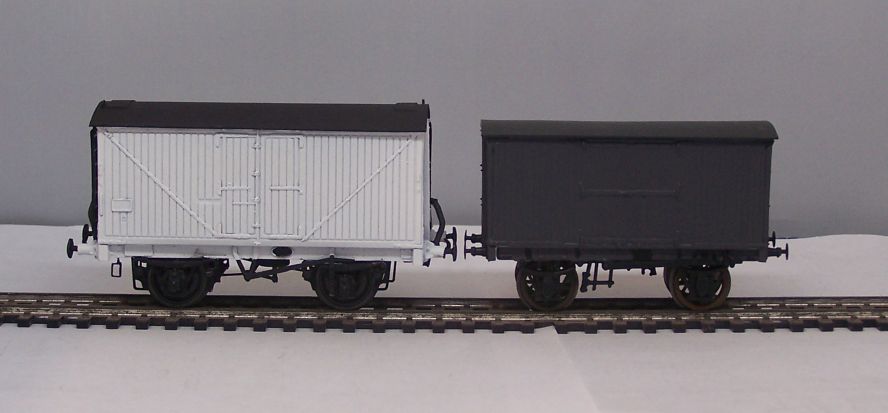
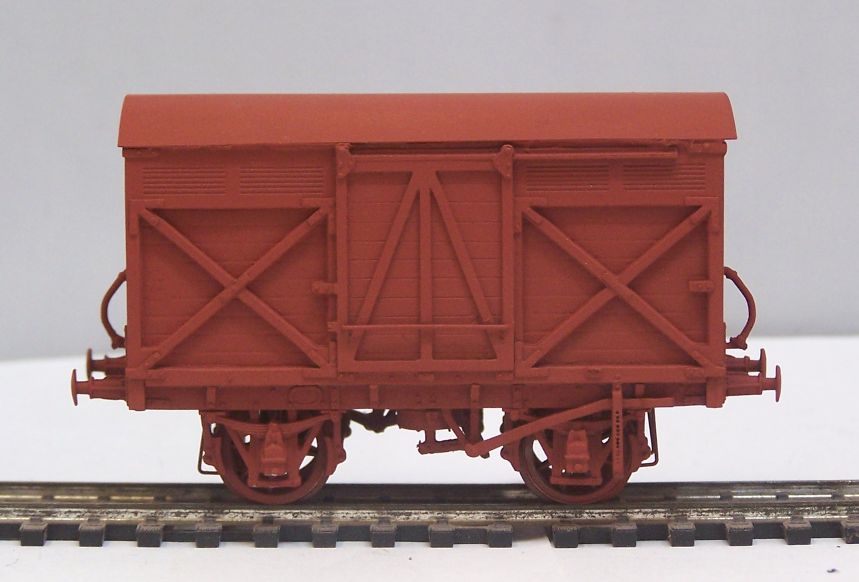
Two of the Hornby F10 van mouldings also well on the way. One still needs brake gear and the other looks as though either a spring hanger has bent upwards or an axlebox has slipped down. The left one will be finished in oxide as if in meat traffic, the right one will be white. These other liveries are much cheaper than the Thomas ones and also don't have the holes in the side where the circus panel is attached.

Image

H & B van also now with undercrackers. I might yet reinstate some strapping on this one - I cut it off to make panelling in the recesses easier. All the bits and bobs for this and the F10s come from 51L/Wizard.

Image

To show that I do take my own advice about buying and renovating show wrecks, a pair of Parkside LNER horseboxes I picked up at Cleveland Club open day in September. They were both fairly battered and had awful paint jobs - one was light green, the other a maroony colour with apparently random lettering. One is now well on the way, the other needs the power steps making and one or two brake shoes reinstating. I found a use for those brass buffers K's kits used to come with here, even though the heads are slightly small. The door springs are made from the square wire Wizard sell for point rodding.

Image
User avatar
kimballthurlow
GCR D11 4-4-0 'Improved Director'
Posts: 437
Joined: Wed Apr 29, 2009 10:58 am
Location: Brisbane, Australia
Contact:

Re: West End Workbench

Post by kimballthurlow »

Hello Jonathon,
Very nice work, it is good to see off-the-shelf models re-worked.
Regarding the F10 refrigerator wagons, do you use the floor of the Hornby and rebuild the W irons and braking gear?
I noticed the additional white plasticard which appears to be an overlay or maybe part of a new underframe/floor.

Kimball
User avatar
Atlantic 3279
LNER A4 4-6-2 'Streak'
Posts: 6658
Joined: Fri Jun 26, 2009 9:51 am
Location: 2850, 245

Re: West End Workbench

Post by Atlantic 3279 »

For anyone who hasn't yet encountered one, it is worth pointing out that some (minority?) versions of the Hornby F10 van came factory-equipped with a moulded plastic version of the correct NE underframe, with horribly chunky tension-lock coupling bars moulded on. Those eyesores can be cut off of course. The moulded version isn't as fine and accurate as one built up from scale metal parts, but it looks about right and offers a handy short-cut to a result.
I think the very first F10s issued in LNER ventilated refrigerator liveries had the NE underframe. Later versions seem to have mainly had the Hornby "anything will do" underframe. As far as I could tell, the factory "R" number gave no indication of which underframe the vans would have.
Most subjects, models and techniques covered in this thread are now listed in various categories on page1

Dec. 2018: Almost all images that disappeared from my own thread following loss of free remote hosting are now restored.
jwealleans
LNER A4 4-6-2 'Streak'
Posts: 4303
Joined: Wed Oct 25, 2006 8:46 am

Re: West End Workbench

Post by jwealleans »

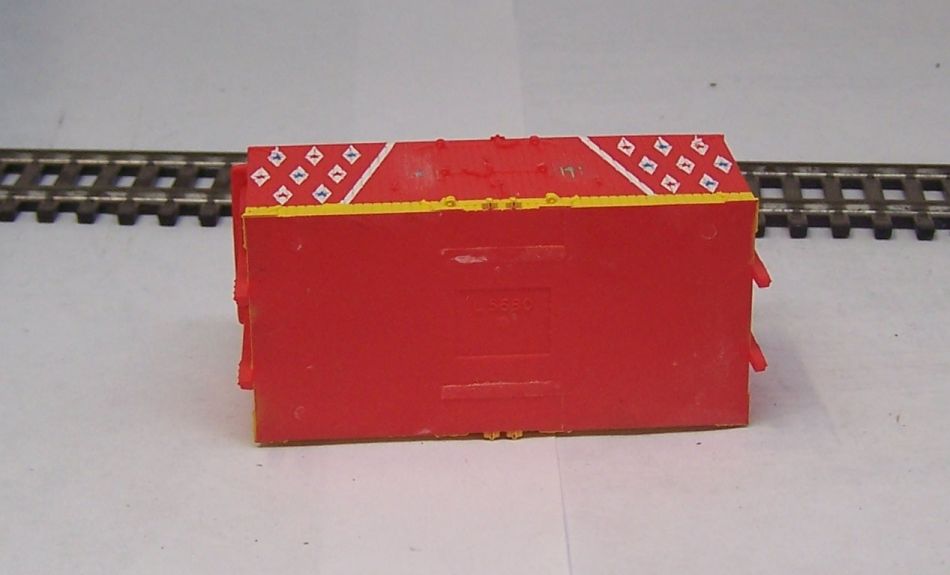
Kimball, I've been meaning to reply to this for a few days and then kept getting caught up doing other things. The Hornby van body (this applies also to the H & B van) is moulded as an open box, so you can unclip the underframe, cut and file away the moulded clips and you have a flat, square base on which to attach your own underframe. This is one from my display which I've left at that stage:
Image

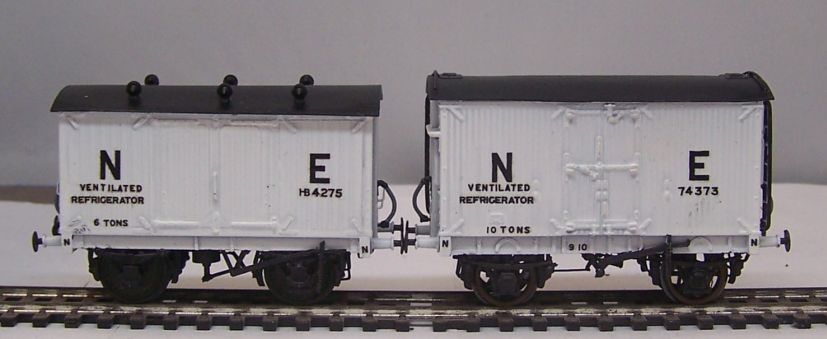
You can see where the clips were on the underside and also the green putty in the holes on the side where the Thomas Circus sign was removed. I make the buffer beams from Evergreen .156 x .080 strip and the sodlebars from the channel (Evergreen 156) I usually use for solebars, but reversed so it's flat side out. You also have to pack it up 20 thou so it's level with the bottom of the buffer beam. I use that as it's narrower and allows plenty of room for a rocking W iron to work. I generally use MJT W irons and the Mainly Trains brake gear etch, but you can take your pick from your preferred supplier.

Here are the two wagons now only needing couplings and weathering.
Image

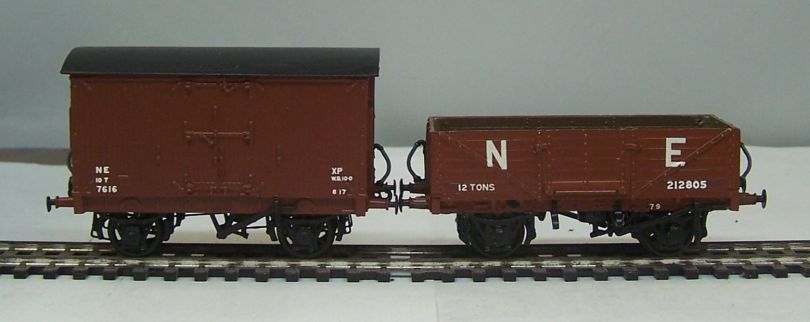
I've been trying to clear the bench a bit as we run into Christmas and have managed to finish off a few wagons, mainly from what I'd prepared for Warley. This is the other F10, to be finished with the insul-Meat branding as shown in Tatlow.
Image

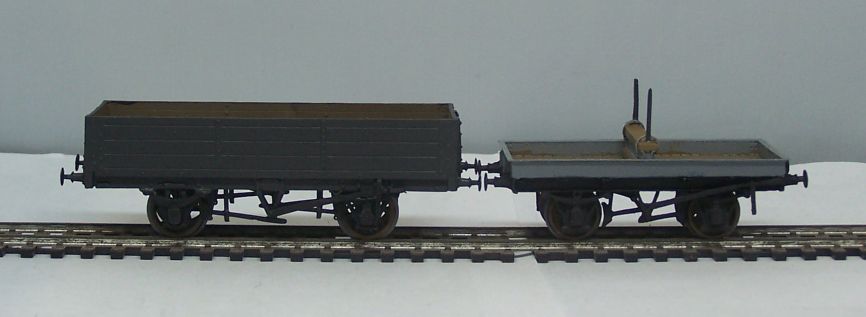
There's no suitable HMRS lettering so I'll have to make some up and have it printed. The ABS open was a second hand buy at Newcastle. I assume it had been part of a larger collection, but by the time we got there on Sunday it had been well picked over. The chap who sold me it was very sniffy about the building, but it seems well enough put together to me. I've patch painted it, replaced some of the lettering which had fallen off and varnished it. I suspect by the time that running number was built it would have had the post-1936 lettering, but I'll take my chances on anyone noticing. There are a couple more wagons from the same lot making their way through the works at the moment.
Image

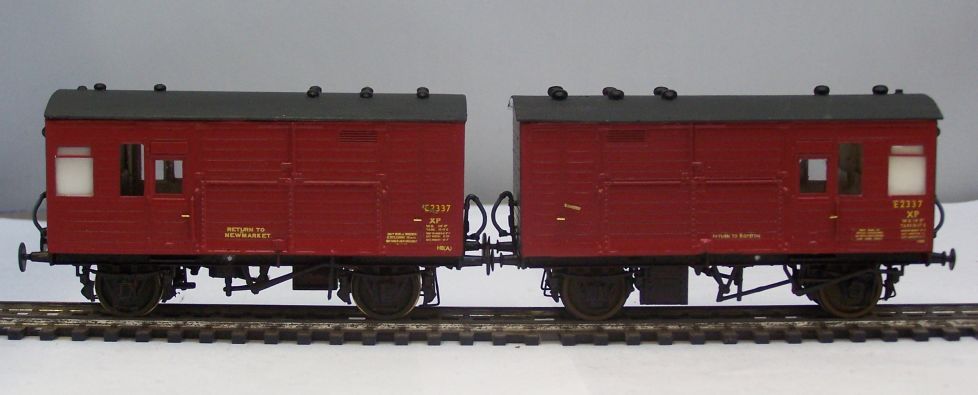
Also now revived from second hand stand wrecks, the two Parkside horseboxes. Pleased with these at a fiver each as you can simply never have too many. I had to cheat slightly and use the D4 transfers on these (CCT only include one D5 on their sheet), but at speed no-one can read them. One improvement I made to these was to ditch the chunky droplight in the lav and replace with .020x.020 Evergreen strip. Once it has the glazing behind it it's quite robust and it improves the look no end, IMHO.
Image

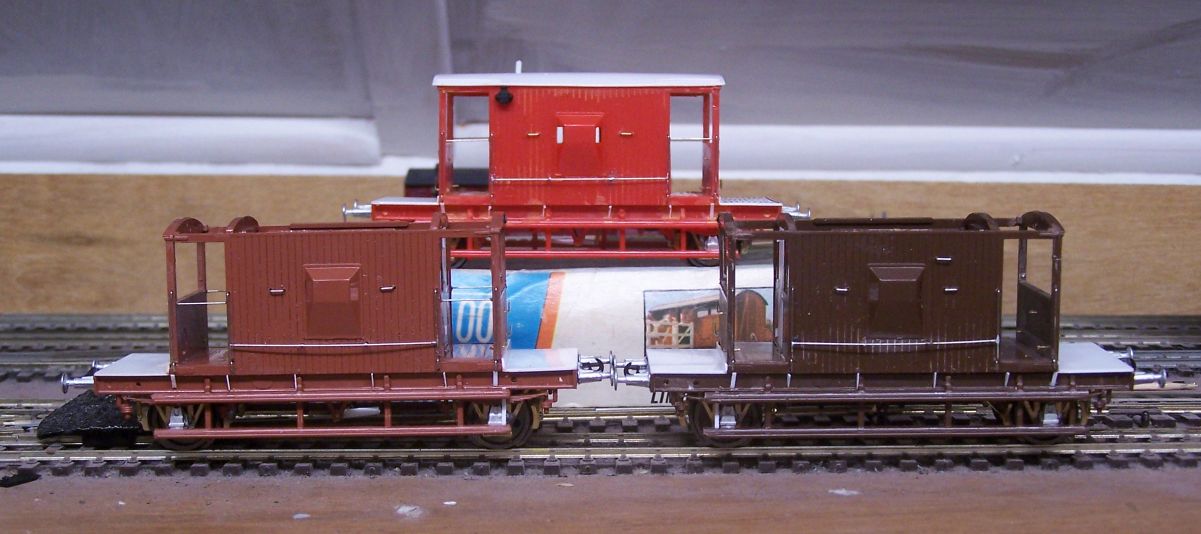
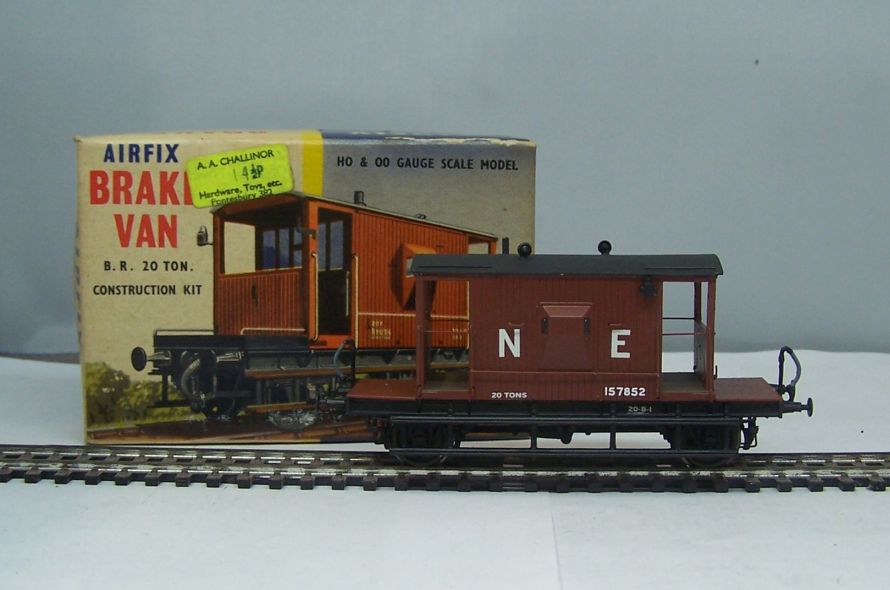
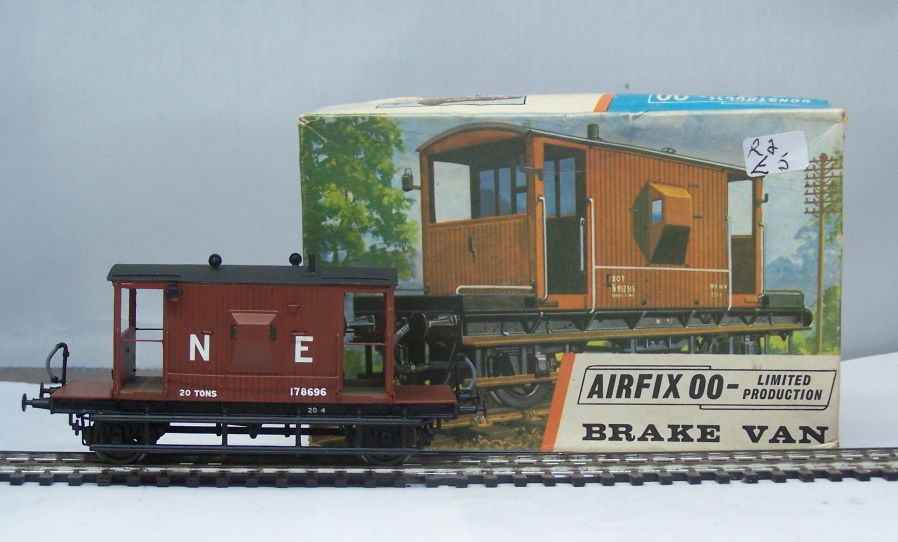
Brake vans are also done. One or other of these will go on the perishables train on Grantham. I'm pleased with these, they scrub up nicely for a kit that was old when I was in nappies.
Image

If I do another it'll be from the later batch with the end weights, that'll be a bit less work.

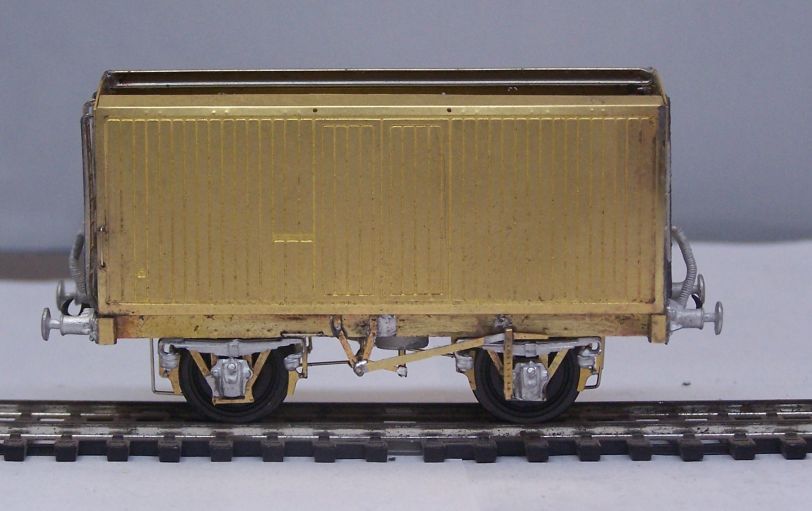
Finding myself home from work early and with most of the above at the 'leave it alone while it dries' stage, I looked for something to treat myself to and found this. I bought this at Warley and it hadn't been put into the crate with the others, so it has massively jumped the queue.
Image

Brassmasters GC Refrigerated van (the old R & E kit). It's quite challenging in places and has taken me all afternoon to get here, where the soldering is complete. It's now drying after a wash down and tomorrow - or later in the week - I'll glue all the overlays on. It also needs 14mm Mansell wheels, so an order will need to go into Wizard when I have need of enough bits and bobs. It's largely built as supplied, though I used my own ladders rather than the kit ones and added some brake bits from the Mainly Trains etch. There's no roof supplied either so one will have to be cut and curved sometime.

I should also take the opportunity to wish all my readers a happy and healthy Christmas and a very productive New Year.
jwealleans
LNER A4 4-6-2 'Streak'
Posts: 4303
Joined: Wed Oct 25, 2006 8:46 am

Re: West End Workbench

Post by jwealleans »

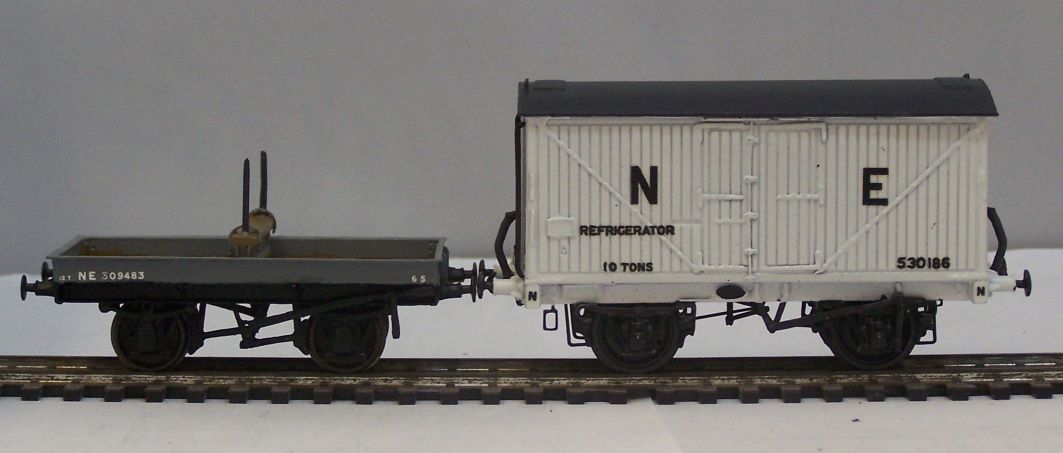
With a break in festivities until this evening I've been back at the bench. Picking up where we left off, the refrigerated van is now painted and awaiting lettering.

Image

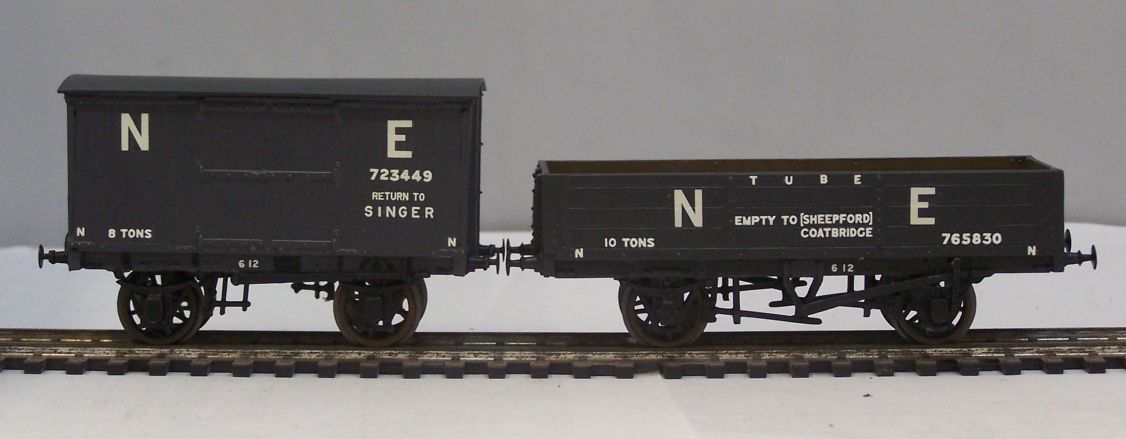
The other van was another acquisition at Newcastle show. It's either Ian Kirk or Westykits, a short wheelbase NBR van. There's one in Tatlow 3 branded 'Return to Singer' which I think may be on the HMRS sheet. I'll have a look, maybe later this week. This was built and painted to a decent standard, all I've had to do is fit buffer heads, replace the P4 wheels and put a couple of coats of varnch on to take the transfers.

Image

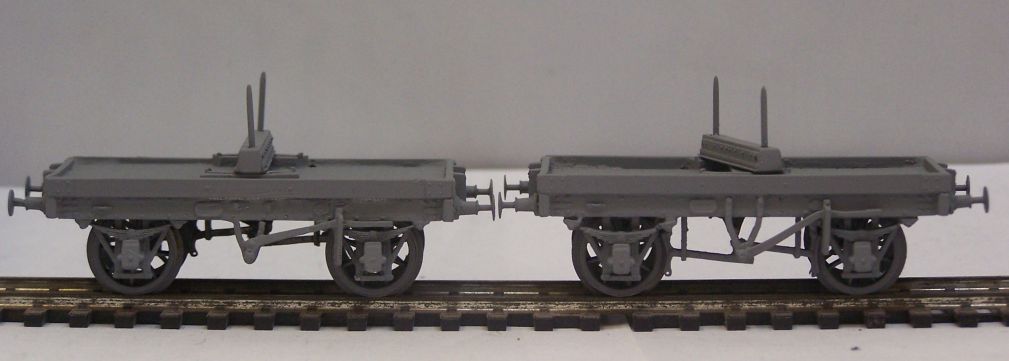
Another Newcastle show buy, probably ignored as it was incomplete, a 51L NBR Tube wagon (NBRD043E). It was missing axleguards at one end, so i fitted an MJT unit and spring/axlebox castings. Everything else was present. The single bolster must have come in a job lot as I have no recollection of where I acquired it. I think it's a kit, but there's no branding or marks on it. If it is a kit, it's not badly built - if it's a scratchbuild it's very good.

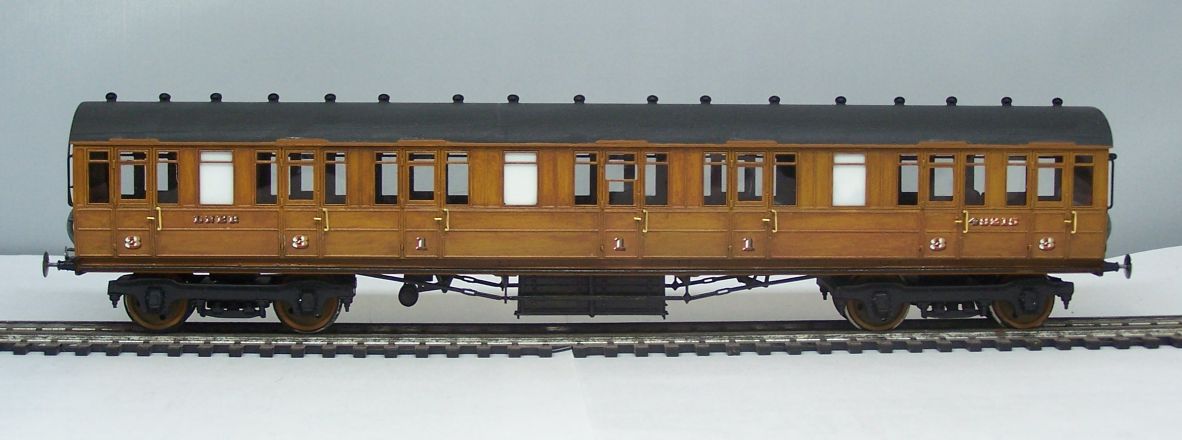
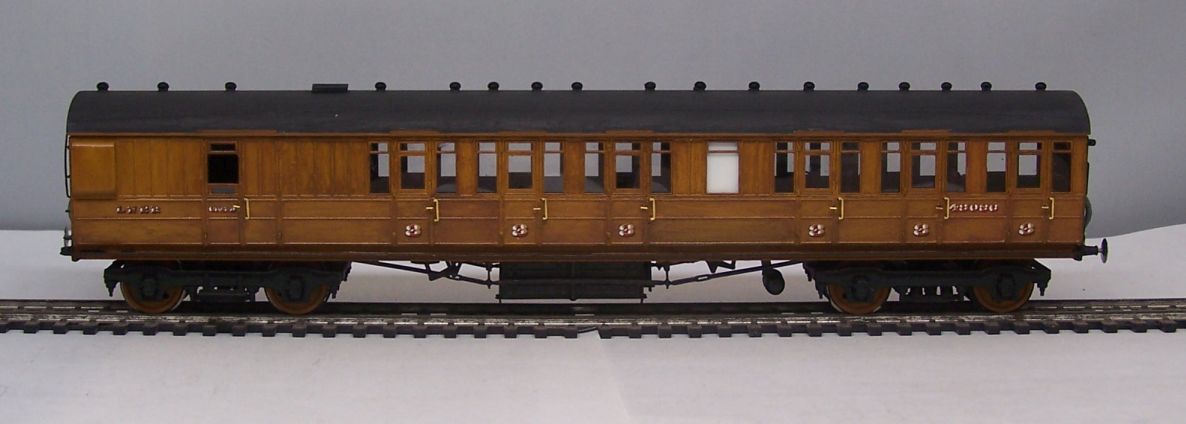
Continuing the effort to finish off a few 'nearly done..' projects, the North Eastern Design carriages I showed a few posts ago. They just needed grab handles and the roofs fitting, which i did this morning. First up, the D121 Lavatory Composite:

Image

D130 Lavatory Brake Third:

Image

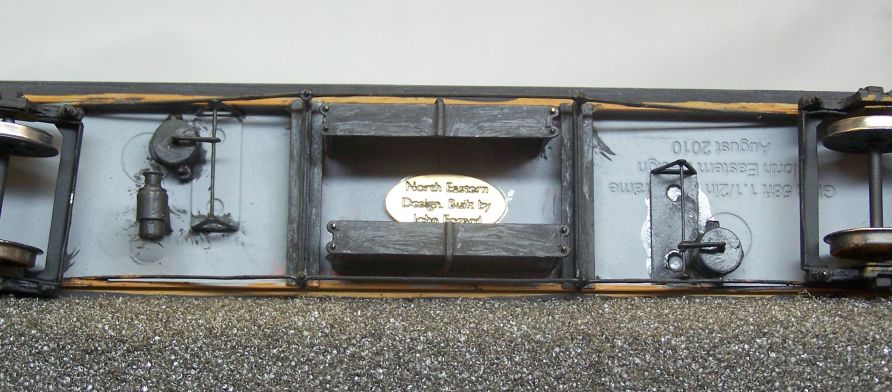
The D183 which completes the set is in primer and awaiting teak. I have also made sure I've retained the makers plates - I have repainted these, but I shan't try to take credit for the building of them.

Image
User avatar
kimballthurlow
GCR D11 4-4-0 'Improved Director'
Posts: 437
Joined: Wed Apr 29, 2009 10:58 am
Location: Brisbane, Australia
Contact:

Re: West End Workbench

Post by kimballthurlow »

Thanks Jonathon for your lucid explanations of the H&B and F10 refrigerator cars.
I have noted it systematically. I will use it sometime.
Kimball in Brisbane
jwealleans
LNER A4 4-6-2 'Streak'
Posts: 4303
Joined: Wed Oct 25, 2006 8:46 am

West End Workbench

Post by jwealleans »

Don't you get plenty done when you don't have to bother working? I did have to work yesterday, so today was my Bank Holiday. Prevented from doing domestic maintenance by persistent rain, it was back to the wagons. The last batch are now lettered, varnished and curing before being weathered.

Image

Image

The NB wagons were a bit of a nuisance to do - someone at Cowlairs must have liked the sight of their own voice. I had to make up some of the lettering from other text, letter by letter, which does take a while. i also discovered that 'Singer' referred to the company, not a place. Every day's a schoolday.

On to the last batch of fairly quick jobs now - an ABS fish which was the last one in the box at Newcastle, so I felt it was worth a fiver. Nicely built again, but it shows what some of us think is important and others don't even notice: he'd made a nice brass roof for the wagon, but hadn't filed off the really prominent mould lines on the buffers.

Image

Image

Some more single bolsters - these are Midland, by ABS and sold as a pair. They came in the bag the kit was sold in, with the instruction sheet. I had to add bolster pins and make good a broken W iron (and supply wheels) but otherwise they were ready to paint.

Another job today, to pick up again on the theme of things we notice which others don't - adding rain deflectors to the roof of the D 183 carriage. The LNER varnished or painted the cantrail teak brown on carriages and this extended to the rain deflectors above the doors. It means you don't get a smooth flat line along the base of the roof and it's very noticeable once you know to look for it. It's not universal - steel stock doesn't always have it - but wooden stock, especially GNR stock, has to. Missing it off is a sin and painting the cantrail the roof colour compounds it. Mind you, the LNER didn't always get it right either and there are photos to prove it. It's an easy job with .020x.020 Evergreen strip. Just remember that the ends are sloped down, not square. Cyano to attach and then file the face gently to be flush with the cantrail.

Image
jwealleans
LNER A4 4-6-2 'Streak'
Posts: 4303
Joined: Wed Oct 25, 2006 8:46 am

Re: West End Workbench

Post by jwealleans »

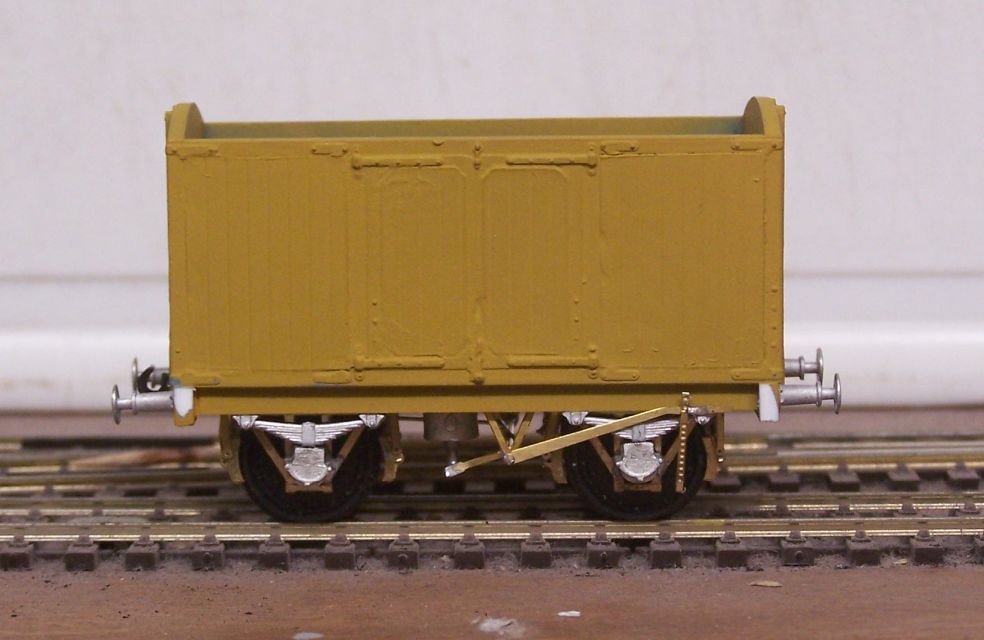
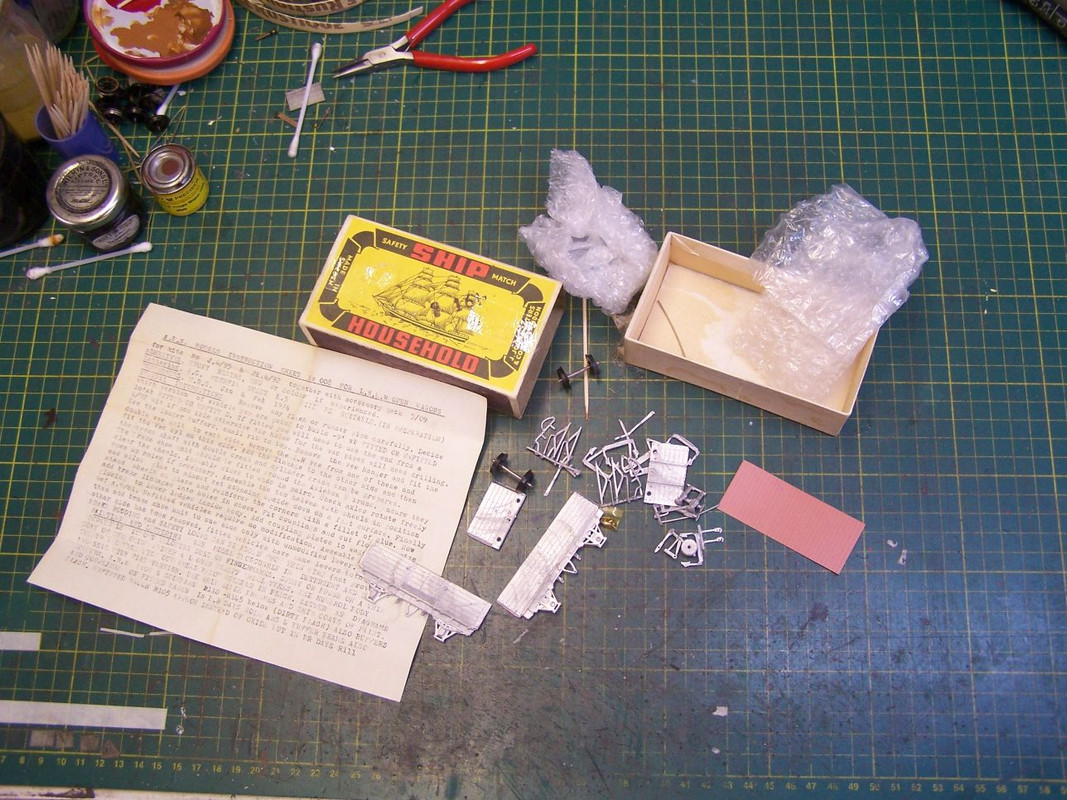
I had a lucky dip this afternoon. I was sorting through the box of wagon kits - checking to see whether I had forgotten having a kit for a D & S Macaw (I hadn't and don't) and I found a matchbox. It was a bit of a squeeze getting the crate to close with this in there, so I thought 'sod it, I'll build that, whatever it is'. I could see some whitemetal bits in there, so it went onto the bench and was tipped out.

Image

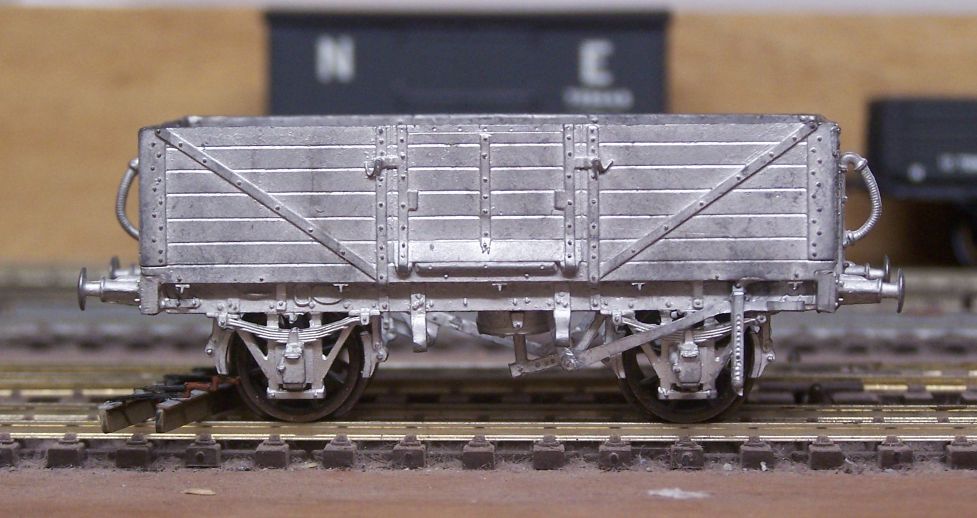
I'd have recognised it, but there was an instruction sheet with it - it was an ABS LNER open. The sheet covers several variants, but the parts only allowed the 10' WB fitted version. I have no recollection of where this kit came from, but I suspect I was given it by someone having a clearout at some time. It was complete, or as complete as I needed it to be, so the iron went on and I piled in.

Adrian's patterns and castings were generally excellent and this was no exception. It took less than 40 minutes to clean up and assemble the body. By the time I was called for dinner I had a rolling shell.

Image

Back to the bench after eating and without pressing on too hard, it just all fell together. By the time of the mandatory pause for Only Connect, the soldering was all but complete.

Image

Finished off by 9 pm, having added some extra brake gear (just about visible underneath) and glued in the floor as the last job. I manfully resisted the urge to prime it at once and it's now drying having had a thorough rinse. I'm sure I'll find the time to apply some paint tomorrow.

Image

Pleased with that and it does show how quickly you can put something like this together if you solder rather than glue.
Post Reply